Install Google Chrome on Debian using either Debian’s built-in extrepo tool or manual repository configuration. Both methods connect your system to Google’s official APT repository, providing automatic security updates alongside your regular system packages. Whether you need Chrome for web development, accessing Google Workspace, or browsing sites optimized for Chromium-based browsers, you’ll have Chrome running on Debian 13, 12, or 11 within a few minutes.
This guide covers the complete installation process, channel selection (stable, beta, or developer builds), keeping Chrome updated, and cleanly removing it when needed. The troubleshooting section addresses the duplicate repository warnings that commonly appear when managing multiple Chrome channels.
Choose Your Installation Method
Debian provides two approaches for installing Google Chrome. The extrepo method handles GPG key management automatically, while manual configuration gives you full control over the repository setup. Both methods install Chrome from the same Google repository and receive identical updates.
| Method | Source | Updates | Best For |
|---|---|---|---|
| extrepo | Google APT Repository | Automatic via APT | Most users; handles GPG keys automatically |
| Manual Repository | Google APT Repository | Automatic via APT | Scripted deployments or learning APT internals |
For most users, the extrepo method is recommended because it simplifies GPG key management and repository maintenance. The manual method requires downloading the signing key yourself but provides visibility into exactly how the repository is configured.
These instructions work on Debian 13 (Trixie), Debian 12 (Bookworm), and Debian 11 (Bullseye). Google Chrome is only available for 64-bit (amd64) systems. Chrome is not available via Flatpak or Snap; if you need a sandboxed Chromium-based browser, install Chromium on Debian from Flathub instead.
Install Google Chrome on Debian Using extrepo
Debian’s extrepo tool manages external repositories and their GPG keys automatically. This method requires enabling extrepo’s non-free policy first, since Google Chrome is proprietary software.
Install and Configure extrepo
Update your package list and install the extrepo package:
sudo apt update
sudo apt install extrepo -y
Debian’s repository database classifies Google Chrome as non-free software. Enable the non-free policy in extrepo’s configuration to allow adding the Chrome repository:
sudo sed -i 's/# - non-free/- non-free/' /etc/extrepo/config.yamlThis command uncomments the non-free line in extrepo’s configuration file, enabling repositories that host proprietary software.
Enable the Google Chrome Repository
Add the Google Chrome repository to your system:
sudo extrepo enable google_chrome
sudo apt update
Install Google Chrome:
sudo apt install google-chrome-stable -yGoogle’s installer creates legacy .list repository files that conflict with extrepo’s .sources configuration. Remove these duplicate files to prevent “Conflicting values set for option Signed-By” errors during future updates:
sudo rm -f /etc/apt/sources.list.d/google-chrome*.list
sudo apt update
The .list files only appear during fresh installations. Regular Chrome updates through APT do not recreate them, so this cleanup is a one-time step.
Verify Chrome Installation
Confirm Chrome installed correctly by checking the version:
google-chrome-stable --versionGoogle Chrome 144.0.7559.59
Your version number will reflect the current Chrome stable release. Chrome is now ready to launch from your application menu. If you want beta or developer builds, see the “Install Beta or Developer Channels” section below.
Install Google Chrome on Debian Manually
Manual repository configuration gives you complete control over the GPG key location and repository file format. This approach works well for scripted deployments or when you want to understand exactly how APT repositories are configured.
Google publishes Chrome for 64-bit (amd64) Debian systems only. If you’re running a 32-bit installation, use Firefox on Debian or Chromium on Debian instead.
Install Required Packages
Install the packages needed for secure repository configuration:
sudo apt update
sudo apt install ca-certificates curl gpg -y
These packages provide HTTPS certificate verification, the curl utility for downloading files, and GPG for handling the repository signing key.
Import Google’s Signing Key
Download Google’s public key and convert it to the binary format APT requires:
curl -fsSL https://dl.google.com/linux/linux_signing_key.pub | sudo gpg --dearmor -o /usr/share/keyrings/google-chrome.gpgThe --dearmor option converts the ASCII-armored key to binary format. Storing the key in /usr/share/keyrings/ follows Debian’s recommended practice for third-party repository keys.
Create the Repository Configuration
Add the Google Chrome repository using the DEB822 format, which all current Debian versions support:
cat <<EOF | sudo tee /etc/apt/sources.list.d/google-chrome.sources
Types: deb
URIs: https://dl.google.com/linux/chrome/deb/
Suites: stable
Components: main
Architectures: amd64
Signed-By: /usr/share/keyrings/google-chrome.gpg
EOF
This creates a .sources file that explicitly links the repository to its signing key, preventing the security warnings that occur with unsigned repositories.
Debian 13 uses the DEB822
.sourcesformat by default, while Debian 12 and 11 commonly used legacy.listfiles in older documentation. The.sourcesformat works on all three versions and provides clearer syntax.
Verify Repository Configuration
Update your package list and confirm the repository is working:
sudo apt update
apt-cache policy google-chrome-stable
google-chrome-stable:
Installed: (none)
Candidate: 144.0.7559.59-1
Version table:
144.0.7559.59-1 500
500 https://dl.google.com/linux/chrome/deb stable/main amd64 Packages
The output confirms APT can find Chrome packages from Google’s repository. The version number reflects the current stable release.
Install Google Chrome
Install Chrome with the standard APT command:
sudo apt install google-chrome-stable -yVerify the installation:
google-chrome-stable --versionGoogle Chrome 144.0.7559.59
Install Beta or Developer Channels
Google provides three additional channels for users who want early access to new features. You can install these alongside the stable version; each channel appears as a separate application in your menu.
Beta channel receives updates before stable and undergoes significant testing. Suitable for users who want new features a few weeks early with reasonable stability:
sudo apt install google-chrome-beta -yUnstable (Dev) channel receives updates first with minimal testing. Expect occasional bugs and breaking changes:
sudo apt install google-chrome-unstable -yCanary channel updates daily with the latest development code. This build is for developers testing bleeding-edge features and may crash or break regularly:
sudo apt install google-chrome-canary -yCheck the version of any installed channel:
google-chrome-beta --version
google-chrome-unstable --version
google-chrome-canary --versionAfter installation, Chrome appears in your desktop environment’s application menu. The exact location depends on your desktop environment.
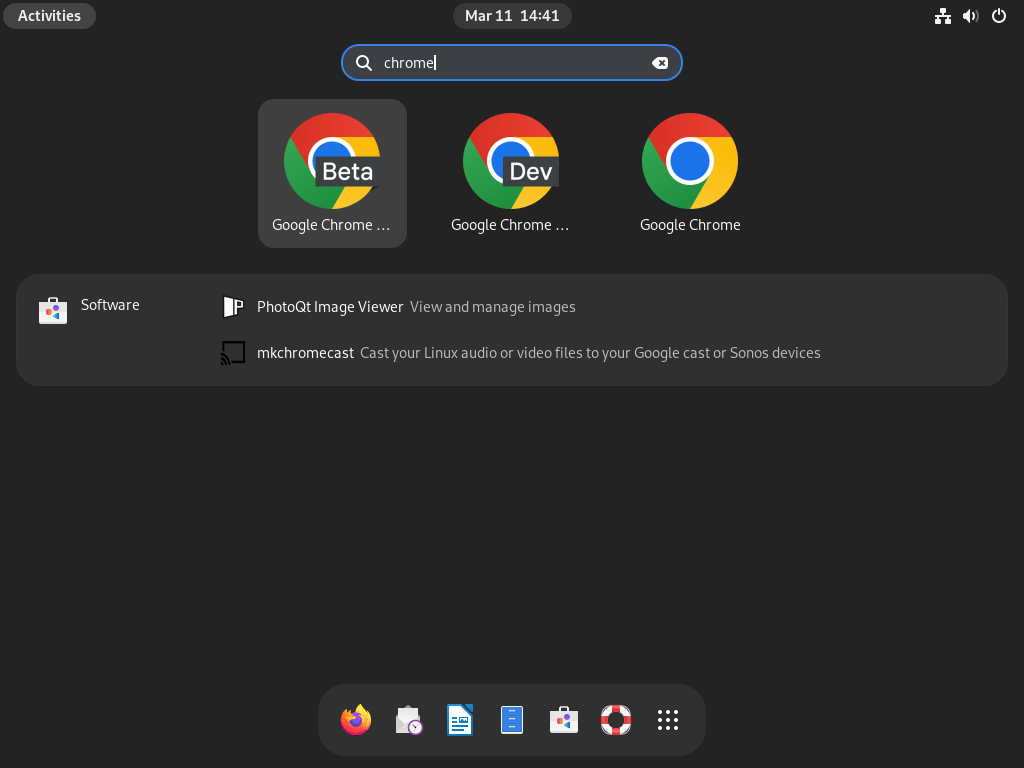
GNOME (Debian default):
- Click Activities in the top-left corner
- Type “Chrome” in the search field
- Click the Google Chrome icon to launch
If you installed multiple channels, each appears with its channel name (Google Chrome, Google Chrome Beta, Google Chrome Unstable).
First Launch Setup
Chrome presents several optional configuration prompts on first launch. None of these are required to use the browser.
Keychain Password Prompt
On desktop systems with GNOME Keyring or a similar secret service, Chrome may ask you to set or enter a keychain password. This secures saved passwords and authentication tokens.
- Enter a password to enable secure credential storage
- Click “Cancel” to skip keychain integration (passwords will still work but won’t be encrypted at rest)
This prompt only appears on systems with a graphical desktop environment and secret service. Minimal installations and servers won’t see it.
Default Browser Selection
Chrome asks whether to become your default browser. Click “Set as Default” to have system links open in Chrome, or dismiss the prompt to keep your current default (typically Firefox on fresh Debian installations).
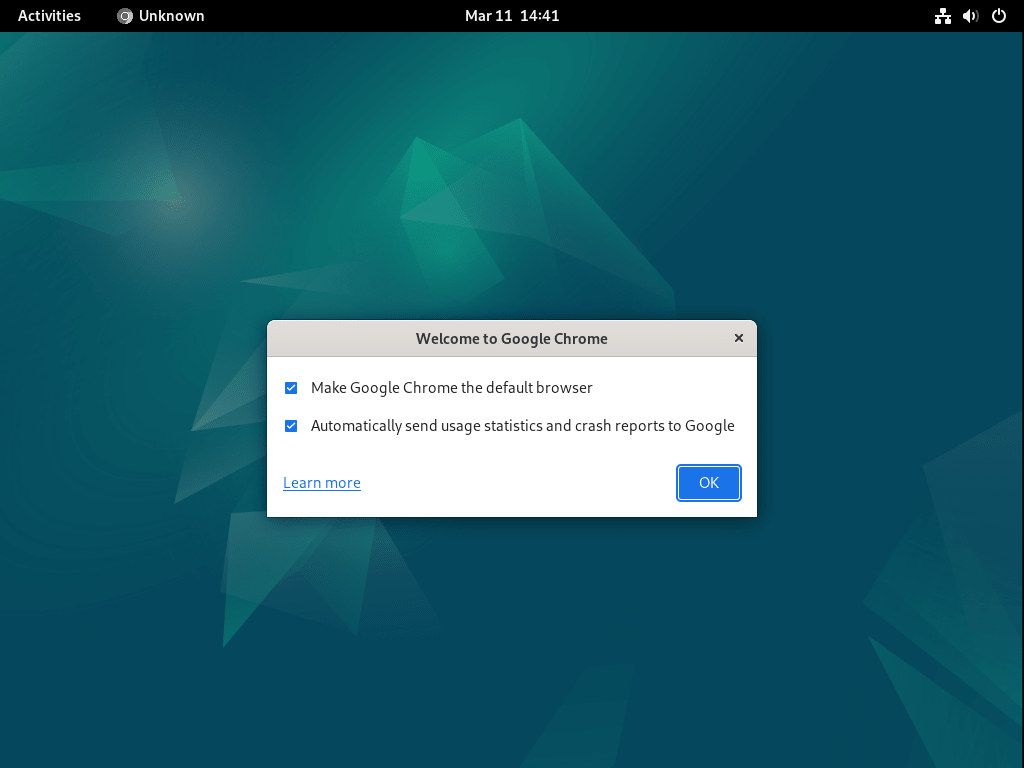
Usage Statistics
Chrome offers to send anonymous usage statistics and crash reports to Google. This data helps improve the browser but is entirely optional. Select or deselect the checkbox based on your preference.
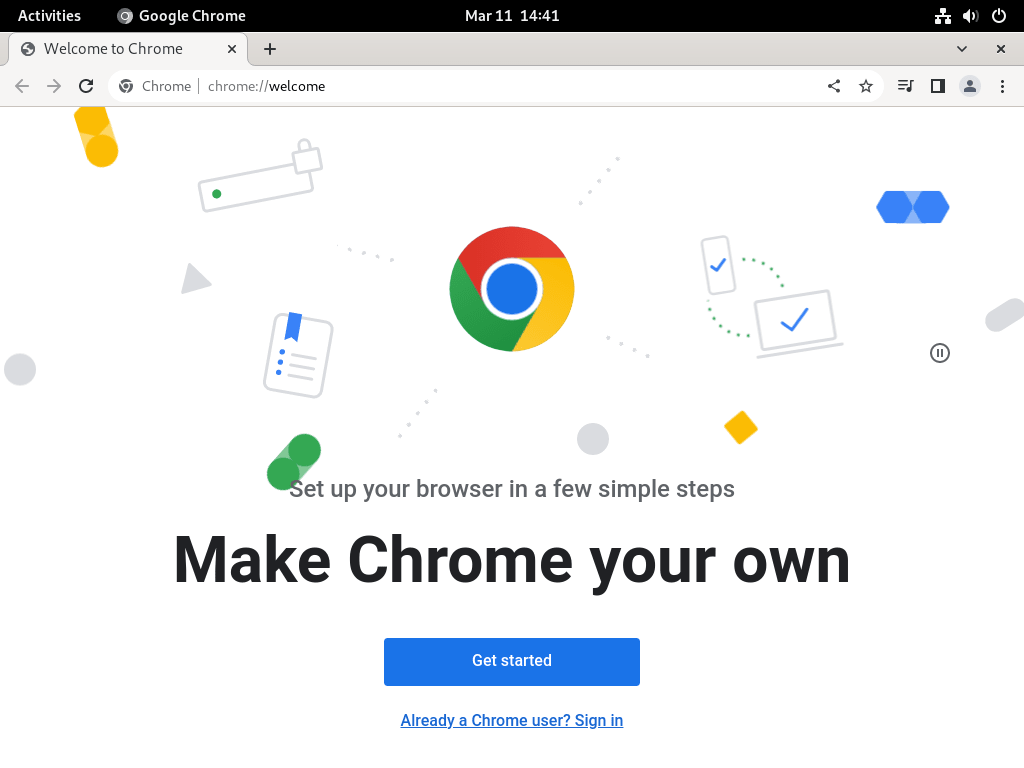
Sign In with Google Account
Signing in syncs bookmarks, history, passwords, and settings across your devices. This is optional; click the “X” on the sign-in tab to skip and use Chrome without an account.
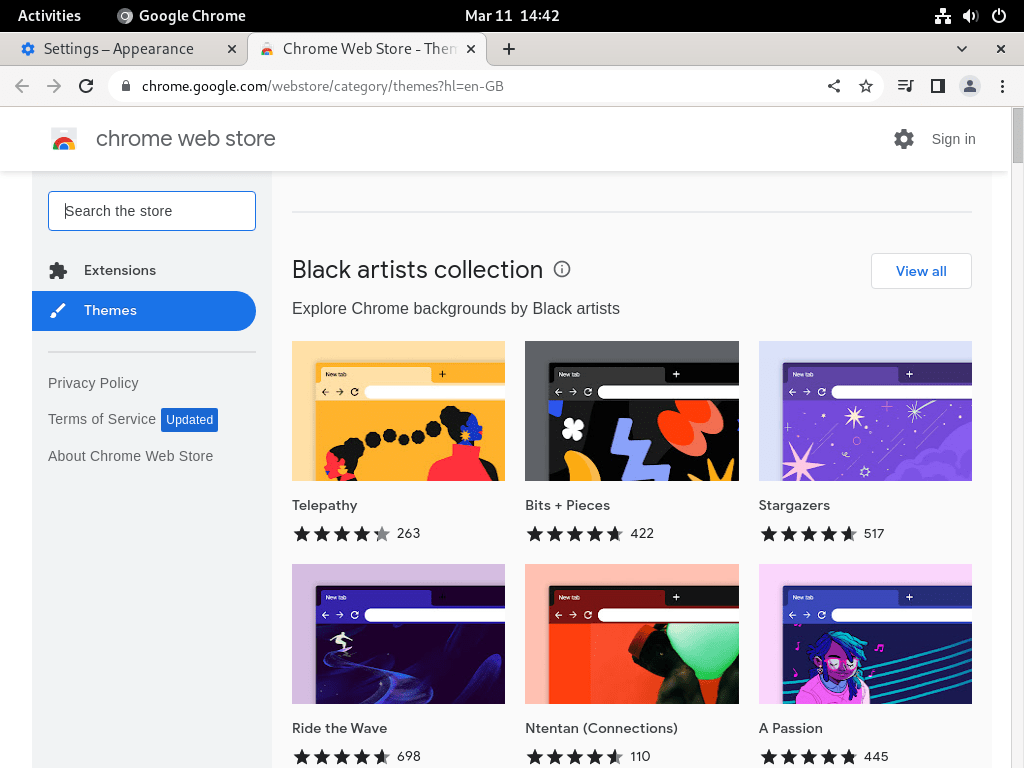
Update Google Chrome
Chrome updates automatically through APT when you update your system. The repository you configured earlier ensures Chrome receives updates alongside your other packages.
Update all packages including Chrome:
sudo apt update
sudo apt upgrade
Update only Chrome without touching other packages:
sudo apt update
sudo apt install --only-upgrade google-chrome-stable
Replace google-chrome-stable with google-chrome-beta, google-chrome-unstable, or google-chrome-canary to update other installed channels.
Uninstall Google Chrome
Remove Chrome completely from your system when you no longer need it. The process differs slightly depending on which installation method you used.
Remove Chrome Packages
Uninstall the Chrome packages for any channels you installed:
sudo apt purge google-chrome-stable google-chrome-beta google-chrome-unstable google-chrome-canary
sudo apt autoremove --purge
APT ignores packages that aren’t installed, so running this command with all channel names is safe even if you only installed stable.
Remove Repository Configuration
If you used the manual method:
sudo rm -f /etc/apt/sources.list.d/google-chrome.sources /etc/apt/sources.list.d/google-chrome.list
sudo rm -f /usr/share/keyrings/google-chrome.gpg
If you used extrepo:
sudo extrepo disable google_chromeOr remove the extrepo-managed repository file directly:
sudo rm -f /etc/apt/sources.list.d/extrepo_google_chrome.sourcesRefresh APT and verify the repository is gone:
sudo apt update
apt-cache policy google-chrome-stable
N: Unable to locate package google-chrome-stable
Remove User Data
The following commands permanently delete your Chrome profile, including bookmarks, saved passwords, extensions, and browsing history. Back up
~/.config/google-chromefirst if you want to preserve this data.
rm -rf ~/.config/google-chrome*
rm -rf ~/.cache/google-chrome*
rm -rf ~/.local/share/applications/google-chrome*.desktop
After these commands, Chrome is completely removed with no residual configuration or cache files.
Fix Duplicate Repository Warnings
Installing multiple Chrome channels or switching between installation methods can create duplicate repository entries. When apt update encounters these duplicates, it displays warnings about conflicting configurations.
Identify Duplicate Files
List all Chrome-related repository files:
ls -la /etc/apt/sources.list.d/*google*chrome* /etc/apt/sources.list.d/extrepo_google* 2>/dev/null || echo "No Chrome repository files found"A properly configured system has exactly one Chrome repository file (either .sources or .list format, not both). Multiple files indicate duplicate entries.
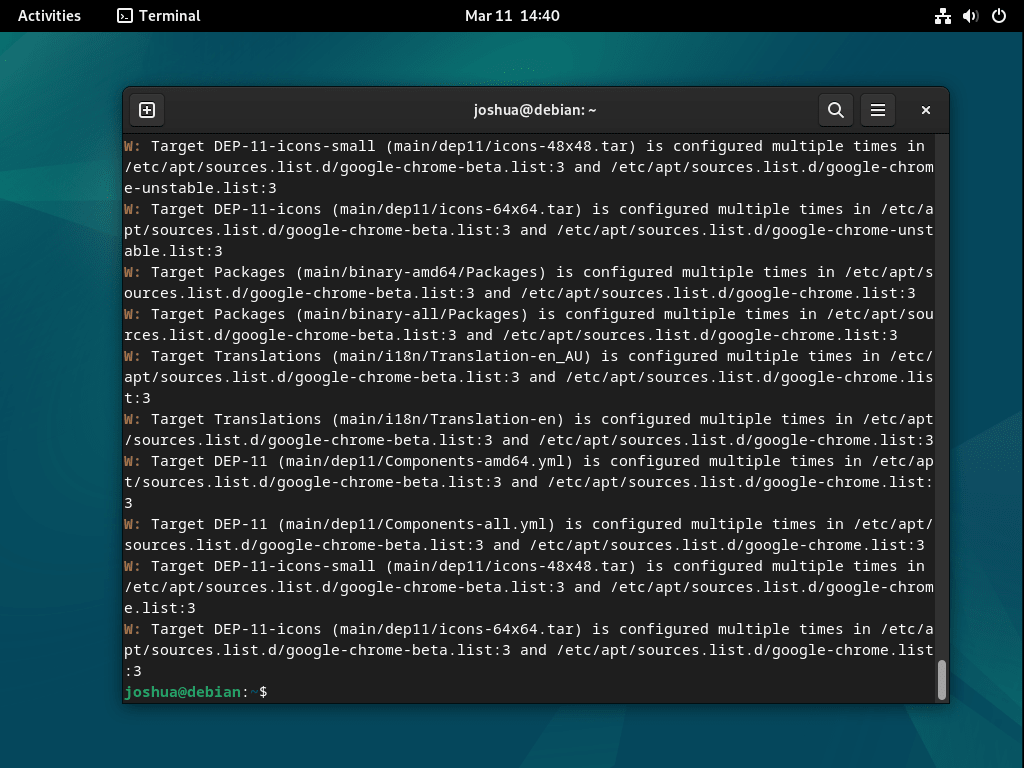
With duplicates present, apt update shows warnings like:
W: Target Packages (main/binary-amd64/Packages) is configured multiple times in /etc/apt/sources.list.d/google-chrome.list:1 and /etc/apt/sources.list.d/google-chrome.sources:1
Remove Duplicate Repository Files
The safest approach is removing all Chrome repository files and recreating a single clean entry:
sudo rm -f /etc/apt/sources.list.d/google-chrome* /etc/apt/sources.list.d/extrepo_google_chrome*Chrome remains installed; only the repository configuration is removed. Recreate the repository using the DEB822 format:
cat <<EOF | sudo tee /etc/apt/sources.list.d/google-chrome.sources
Types: deb
URIs: https://dl.google.com/linux/chrome/deb/
Suites: stable
Components: main
Architectures: amd64
Signed-By: /usr/share/keyrings/google-chrome.gpg
EOF
Verify the fix:
sudo apt updateThe update should complete without duplicate repository warnings.
Prevent Future Duplicates
Google’s installer creates a google-chrome.list file during fresh installations. If you already have a .sources file configured, remove the redundant .list after each fresh install:
sudo rm -f /etc/apt/sources.list.d/google-chrome.listRegular package updates do not recreate the
.listfile. This cleanup is only needed after a fresh Chrome installation or reinstallation.
Troubleshoot Common Issues
GPG Key Errors
If apt update reports signature verification failures:
Err:1 https://dl.google.com/linux/chrome/deb stable InRelease
  The following signatures couldn't be verified because the public key is not available: NO_PUBKEY EB4C1BFD4F042F6D
Re-download and install the signing key:
curl -fsSL https://dl.google.com/linux/linux_signing_key.pub | sudo gpg --dearmor -o /usr/share/keyrings/google-chrome.gpg
sudo apt update
Missing Libraries on Minimal Systems
Chrome requires graphical libraries that may be missing on minimal or server installations. If Chrome fails with errors about missing .so files:
error while loading shared libraries: libatk-1.0.so.0: cannot open shared object file
Install missing dependencies:
sudo apt install --fix-brokenIf issues persist, reinstall Chrome to trigger full dependency resolution:
sudo apt install --reinstall google-chrome-stableRunning Chrome on Headless Servers
Chrome requires a display server to run normally. On servers without a graphical environment, you’ll see:
[ERROR:ozone_platform_x11.cc(240)] Missing X server or $DISPLAY
For automation tasks like generating PDFs, taking screenshots, or web scraping, use Chrome’s headless mode. This runs Chrome without a visible window, performing browser operations entirely in the background:
google-chrome-stable --headless --disable-gpu --print-to-pdf=output.pdf https://example.comThis command renders the webpage and saves it as a PDF without needing any graphical display.
Common Questions
No. Google Chrome is proprietary software and is not included in Debian’s main, contrib, or non-free repositories. To install Chrome, you must add Google’s official APT repository using either the extrepo method or manual command line configuration. Once added, Chrome receives updates through your regular system updates.
Chromium is the open-source project that Chrome is built on. Google Chrome adds proprietary components including automatic updates, certain media codecs (AAC, H.264), PDF viewer integration, and Google account sync features. Chromium is available directly from Debian’s repositories or as a Flatpak, while Chrome requires Google’s external repository.
Google’s installer automatically creates a .list repository file during installation. If you already configured the repository manually using the .sources format (or via extrepo), both files point to the same repository, causing duplicate warnings during apt update. Remove the redundant .list file with sudo rm -f /etc/apt/sources.list.d/google-chrome.list to resolve this.
Additional Resources
- Google Chrome Release Blog – Official announcements for stable, beta, and dev channel updates
- Chrome Developer Release Notes – Technical details on changes in each release
- Google Chrome Help Center – Official troubleshooting and usage guides
- Chrome Web Store – Extensions, themes, and apps for Chrome
Conclusion
You now have Google Chrome installed on Debian with automatic updates through Google’s official APT repository. Whether you chose the extrepo method for simplicity or manual configuration for full control, Chrome receives security patches and feature updates alongside your regular system packages. For alternative browsers on Debian, consider Chromium on Debian for an open-source option, Brave on Debian for privacy-focused browsing, Vivaldi on Debian for extensive customization, or Firefox on Debian for a completely independent rendering engine.


Thanks a lot.
Your explanations work perfectly for debian 13 trixie.
Thanks again
Can this instruction be use for Debian 13?
Hi JQ,
Yes it can be used to install Google Chrome with Debian 13 Trixie release.
Can I have an instruction for debian 13? I tried to download from google chrome and after install it freeze after a while of use. Thanks
Great, I have Google on my debian 12.