

phpMyAdmin 是一個以 PHP 編寫的廣泛使用的開源工具,旨在透過 Web 處理 MySQL 和 MariaDB 的管理。它提供了直覺的圖形介面,用於執行各種資料庫操作,例如建立、修改和刪除資料庫、表格、欄位或行、執行 SQL 語句以及管理使用者權限。在 Debian 12、11 或 10 上安裝 phpMyAdmin 需要手動設定 LEMP 堆疊(Linux、NGINX、MySQL/MariaDB、PHP),然後下載並設定最新版本的 phpMyAdmin。
使用 phpMyAdmin 簡化了資料庫管理,甚至對於那些不習慣使用命令列進行資料庫操作的使用者來說也可以使用它。本指南將引導您完成手動安裝 LEMP 堆疊、設定 phpMyAdmin 和保護您的設定的步驟。
在 Debian 上為 phpMyAdmin 安裝 LEMP Stack
步驟1:刷新Debian系統
開始使用最新的軟體包更新您的 Debian 系統,以實現安全且無錯誤的設定。這項主動步驟旨在減少安裝過程中發生衝突的可能性。
sudo apt update && sudo apt upgrade如果您更新核心或許多軟體包,則需要重新啟動。
第2步:安裝Nginx
首先,安裝Nginx來建立LEMP堆疊。執行以下命令:
sudo apt install nginx通常情況下,系統安裝後預設啟用Nginx服務。但是,請始終謹慎檢查其狀態並確保其按預期運行:
systemctl status nginx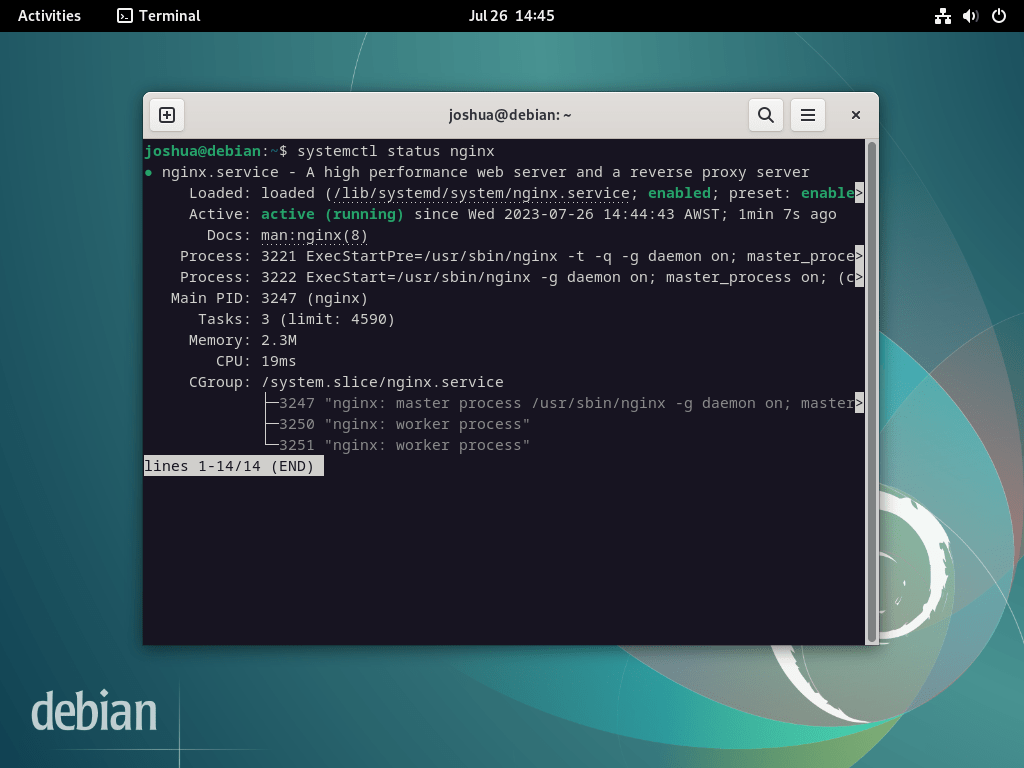
如果伺服器未處於活動狀態,請使用下列命令啟用 Nginx 並確保其在每次重新啟動時自動啟動:
sudo systemctl enable nginx --now此命令安裝 Nginx 的預設版本。
注意:如果您有興趣部署 Nginx 的最新穩定版本或主線版本,請考慮遵循我們的指南 如何在 Debian 12、11 或 10 Linux 上升級 Nginx。
第三步:安裝MariaDB
接下來,在 LEMP 堆疊設定中安裝資料庫元件。許多人選擇 MariaDB 而不是 MySQL,因為它具有卓越的效能和附加功能。
若要安裝 MariaDB,請執行以下命令:
sudo apt install mariadb-server mariadb-client注意:如果您想從官方 MariaDB.org 儲存庫安裝不同版本的 MariaDB,我們的指南 在 Debian 12、11 或 10 Linux 上安裝 MariaDB 11.x 或 10.x。
完成後,確認MariaDB服務的啟用和功能正確,類似Nginx的驗證:
systemctl status mariadb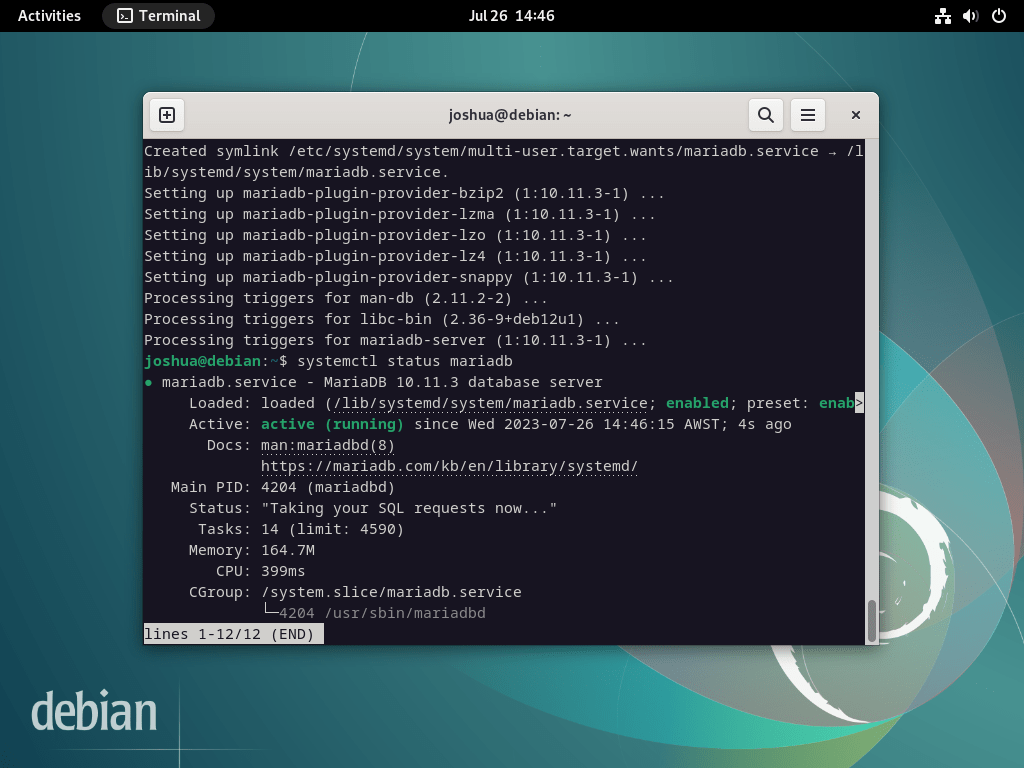
如果 MariaDB 未激活,請使用以下命令激活它並確保它在重新啟動時啟動。
sudo systemctl enable mariadb --now若要增強 MariaDB 的安全性,請執行提供的安全腳本, mysql_secure_installation,在安裝過程中。全新 MariaDB 安裝的預設設定通常會留下惡意行為者可以利用的漏洞。
sudo mysql_secure_installation執行安全腳本將引導您完成幾個步驟來增強 MariaDB 的安全性。這些步驟包括設定 root 密碼、限制遠端存取、刪除匿名使用者帳戶以及刪除測試資料庫。
NOTE: RUNNING ALL PARTS OF THIS SCRIPT IS RECOMMENDED FOR ALL MariaDB
      SERVERS IN PRODUCTION USE!  PLEASE READ EACH STEP CAREFULLY!

In order to log into MariaDB to secure it, we'll need the current
password for the root user. If you've just installed MariaDB, and
haven't set the root password yet, you should just press enter here.

Enter current password for root (enter for none):
OK, successfully used password, moving on...

Setting the root password or using the unix_socket ensures that nobody
can log into the MariaDB root user without the proper authorisation.

You already have your root account protected, so you can safely answer 'n'.

Switch to unix_socket authentication [Y/n] Y <---- Type Y then press the ENTER KEY.
Enabled successfully!
Reloading privilege tables..
 ... Success!


You already have your root account protected, so you can safely answer 'n'.

Change the root password? [Y/n] Y <---- Type Y then press the ENTER KEY.
New password:
Re-enter new password:
Password updated successfully!
Reloading privilege tables..
 ... Success!


By default, a MariaDB installation has an anonymous user, allowing anyone
to log into MariaDB without having to have a user account created for
them.  This is intended only for testing, and to make the installation
go a bit smoother.  You should remove them before moving into a
production environment.

Remove anonymous users? [Y/n] Y <---- Type Y then press the ENTER KEY.
 ... Success!

Normally, root should only be allowed to connect from 'localhost'.  This
ensures that someone cannot guess at the root password from the network.

Disallow root login remotely? [Y/n] Y <---- Type Y then press the ENTER KEY.
 ... Success!

By default, MariaDB comes with a database named 'test' that anyone can
access.  This is also intended only for testing, and should be removed
before moving into a production environment.

Remove test database and access to it? [Y/n] Y <---- Type Y then press the ENTER KEY.
 - Dropping test database...
 ... Success!
 - Removing privileges on test database...
 ... Success!

Reloading the privilege tables will ensure that all changes made so far
will take effect immediately.

Reload privilege tables now? [Y/n] Y <---- Type Y then press the ENTER KEY.
 ... Success!

Cleaning up...

All done!  If you've completed all of the above steps, your MariaDB
installation should now be secure.

Thanks for using MariaDB!
第四步:安裝PHP
安裝 PHP 服務以完成 LEMP 堆疊設定。 PHP透過PHP-FPM服務和phpMyAdmin所需的附加模組,作為Nginx和MariaDB之間的橋樑。
注意:如果您想安裝特定版本的 PHP,請參閱我們的指南 安裝 Debian 12、11 或 10 Linux 上可用的任何 PHP 8.x 版本。
若要在 Debian 系統上部署 PHP 和 PHP-FPM 以及必要的模組,請執行下列命令:
sudo apt install php-fpm php-mbstring php-bcmath php-xml php-mysql php-common php-gd php-cli php-curl php-zip php-gd安裝 PHP 後,確認 PHP 服務的狀態,就像對 MariaDB 和 Nginx 所做的那樣。
例如,對於 PHP 8.2(Debian Bookworm 上的預設版本),具體命令為:
systemctl status php8.2-fpm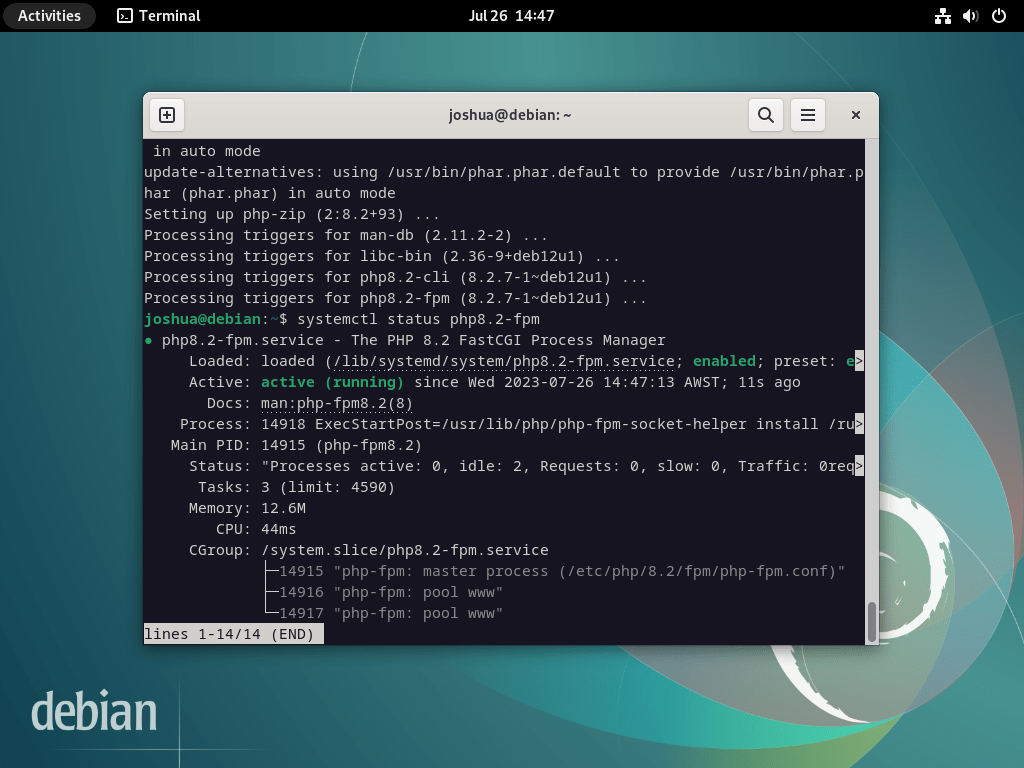
如果 PHP 服務保持不活動狀態,請使用以下命令啟用它並確保它在每次重新啟動時自動啟動。
sudo systemctl enable php-fpm --now使用 Nginx 和 Debian 完成 phpMyAdmin
本節介紹取得 phpMyAdmin 存檔並設定必需的目錄、權限和資料庫條目的過程。
步驟1:為phpMyAdmin建立超級用戶
按照慣例,您可以使用 root 使用者存取 phpMyAdmin。但是,為了遵守強大的安全實踐,請建立一個不同的超級使用者而不是使用 root 使用者。這個概念與利用 sudo 使用者而不是直接以 root 身分登入的 Linux 實踐是一致的。
首先,在終端介面中進行身份驗證:
sudo mariadb -u root身份驗證成功後,後續步驟涉及在 MariaDB 終端機中建立資料庫。
CREATE USER PMAUSER IDENTIFIED BY 'password here change';接下來,建立一個使用者並賦予其所需的權限,如下圖所示:
GRANT ALL PRIVILEGES ON *.* TO 'PMAUSER'@'localhost' IDENTIFIED BY 'password here change' WITH GRANT OPTION;替換佔位符密碼 “密碼在這裡更改” 在執行命令之前,使用安全密碼至關重要。
建立使用者並設定權限後,請記得刷新變更的權限。
FLUSH PRIVILEGES;若要退出 MariaDB 終端,請使用下列命令。
QUIT;步驟2:下載phpMyAdmin原始碼
本節介紹如何取得 phpMyAdmin 的來源存檔。利用命令列終端提供了一種下載所有語言最新版本的有效方法。
若要下載 phpMyAdmin 存檔,請在終端機中執行以下命令。
DATA="$(wget https://www.phpmyadmin.net/home_page/version.txt -q -O-)"
URL="$(echo $DATA | cut -d ' ' -f 3)"
VERSION="$(echo $DATA | cut -d ' ' -f 1)"
wget https://files.phpmyadmin.net/phpMyAdmin/${VERSION}/phpMyAdmin-${VERSION}-all-languages.tar.gz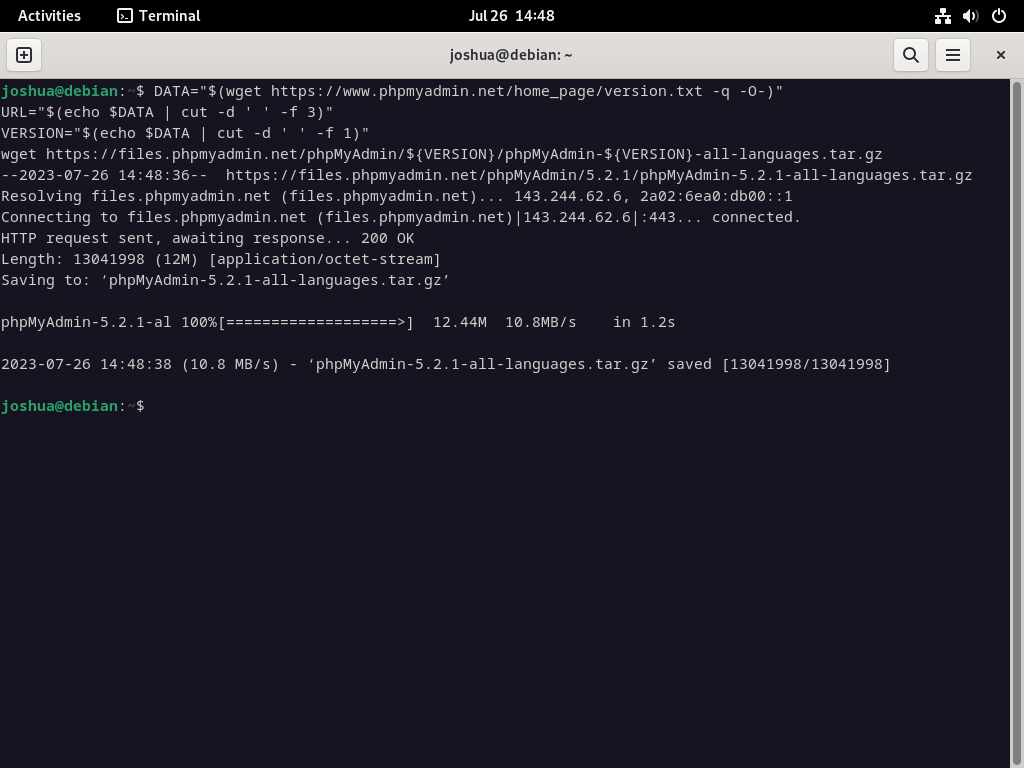
如果您需要 phpMyAdmin 的純英文版本,請將上一個指令的最後一行替換為以下內容:
wget https://files.phpmyadmin.net/phpMyAdmin/${VERSION}/phpMyAdmin-${VERSION}-english.tar.gz下載後,接下來的步驟是透過執行以下命令來提取 phpMyAdmin 檔案:
tar xvf phpMyAdmin-${VERSION}-all-languages.tar.gz第三步:配置phpMyAdmin
下一階段涉及使用 mv 命令將所有提取的檔案遷移到 /var/www/ 目錄中的最終目的地。
sudo mv phpMyAdmin-*/ /var/www/phpmyadmin當您從原始程式碼安裝 phpMyAdmin 時,您會發現預設不存在 TMP 目錄。因此,最好手動建立此目錄。
sudo mkdir /var/www/phpmyadmin/tmpphpMyAdmin 目錄包含一個預設設定範例文件,您需要重新命名該文件以便 phpMyAdmin 識別它。使用 CP 指令在 /var/www/phpmyadmin/ 目錄中建立預設檔的副本,確保備份。
若要將 config.sample.inc.php 複製到 config.inc.php,請執行下列命令:
sudo cp /var/www/phpmyadmin/config.sample.inc.php /var/www/phpmyadmin/config.inc.php複製文件後,使用首選文字編輯器將其開啟。在此範例中,我們使用 Nano 文字編輯器:
sudo nano /var/www/phpmyadmin/config.inc.phpphpMyAdmin 採用 Blowfish 密碼。若要修改此設置,請導航至以 $cfg['blowfish_secret'] 開頭的行。
$cfg['blowfish_secret'] = ''; /* YOU MUST FILL IN THIS FOR COOKIE AUTH! */在單引號內分配 32 個隨機字元的字串。使用 pwgen 程式作為產生此字串的便捷方法。執行以下終端命令安裝pwgen:
這使得所有操作都清晰並直接歸因於使用者(或執行該操作的人)。
sudo apt install pwgen 安裝後,執行以下命令:
pwgen -s 32 1該命令將產生一個由 32 個隨機字元組成的字串作為河豚秘密。
將密碼插入設定檔的範例 (不要抄襲):
UvqAlsvTxRdYIyO8TnlkJsVQaWs2LfgL設定檔中的範例:
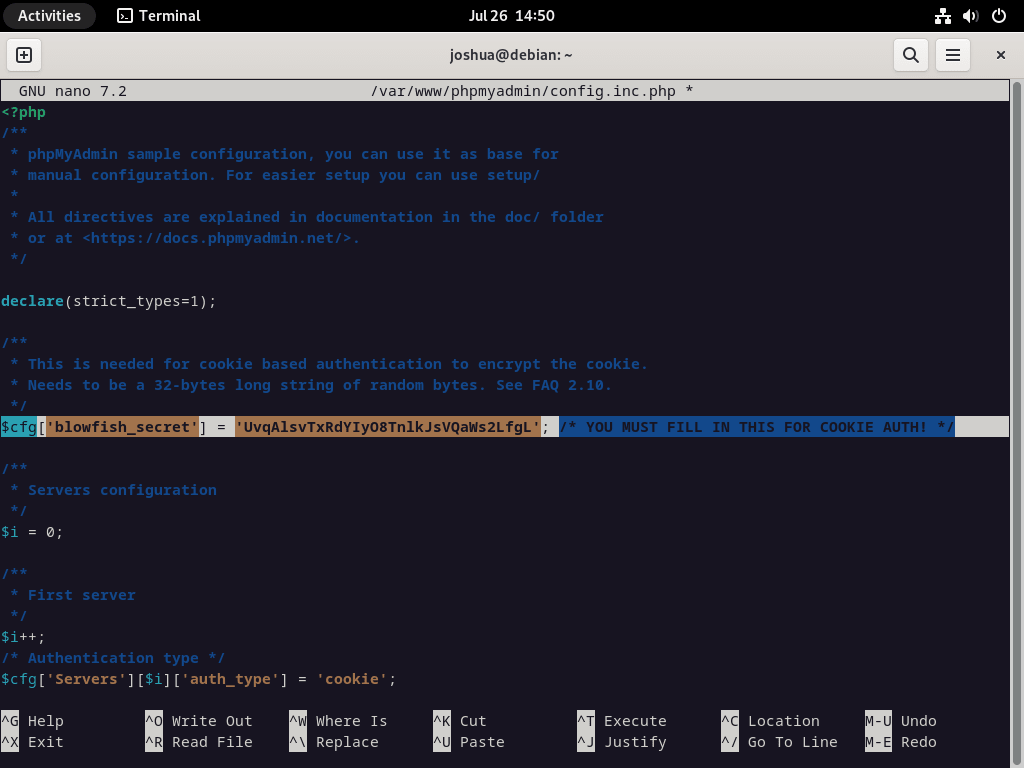
對於大多數用戶來說,其餘的預設設定應該就足夠了。但是,如果您的伺服器位於網路內的另一台伺服器上,則需要找到並修改行 $cfg['Servers'][$i]['host'] 以反映專用 IP 位址。此修改的範例如下所示:
$cfg['Servers'][$i]['host'] = '192.168.55.101';步驟4:設定phpMyAdmin檔案權限
將目錄擁有者的權限分配給 www-user 對於確保相容性和安全性至關重要。
設定 chown 權限:
sudo chown -R www-data:www-data /var/www/phpmyadmin/設定 chmod 權限:
sudo find /var/www/phpmyadmin/ -type d -exec chmod 755 {} \;
sudo find /var/www/phpmyadmin/ -type f -exec chmod 644 {} \;
在接下來的部分中,我們將討論為 phpMyAdmin 服務建立和設定 Nginx 服務區塊。
為 phpMyAdmin 設定 NGINX 伺服器塊
若要存取 phpMyAdmin Web 介面,請建立 NGINX 伺服器區塊作為重要步驟。強烈建議建立一個獨特的子域來加強安全措施並抵禦暴力攻擊。請隨意為該子網域命名任何您認為合適的名稱。
步驟 1:在 Debian 上為 phpMyAdmin 建立 Nginx 伺服器區塊
讓我們先使用 Nano 文字編輯器建立並開啟伺服器區塊。執行以下命令:
sudo nano /etc/nginx/sites-available/phpmyadmin.conf步驟 2:設定 Nginx 伺服器區塊
成功開啟伺服器區塊檔案後,將以下文字複製並貼上到檔案中。請務必將網域 URL 替換為您自己的網域 URL:
server {
  listen 80;
  listen [::]:80;
  server_name pma.example.com;
  root /var/www/phpmyadmin/;
  index index.php index.html index.htm index.nginx-debian.html;

  access_log /var/log/nginx/phpmyadmin_access.log;
  error_log /var/log/nginx/phpmyadmin_error.log;

  location / {
    try_files $uri $uri/ /index.php;
  }

  location ~ ^/(doc|sql|setup)/ {
    deny all;
  }

  location ~ \.php$ {
    fastcgi_pass unix:/run/php/php8.2-fpm.sock;
    fastcgi_param SCRIPT_FILENAME $document_root$fastcgi_script_name;
    include fastcgi_params;
    include snippets/fastcgi-php.conf;
  }

  location ~ /\.ht {
    deny all;
  }
}
對於上面的範例,以下是一些需要注意的關鍵點:
- /run/php/php8.2-fpm.sock; – 此路徑需要反映正在使用的 PHP-FPM 版本。例如,可能是 8.3、8.1、8.0、7.4 等。
- 根/var/www/phpmyadmin/; – 這是指本指南中定義的路徑。如果您的 phpMyAdmin 位於其他地方,請確保相應地更新此行。
如果您是唯一從靜態 IP 位址存取伺服器的人,請考慮在第一個位置項目上方新增以下程式碼:
  allow <your ip address>;
  deny all;

  location / {
    try_files $uri $uri/ /index.php;
  }
上述程式碼有效地阻止未經授權的訪客存取具有 403 錯誤的頁面,僅授予對您的 IP 位址的存取權限。儘管它可能不適合所有設置,但它可以有效防禦暴力攻擊。
第 3 步:儲存並退出文字編輯器
若要儲存更改,請按 (CTRL+O),要退出編輯器,請按 (CTRL+X)。
步驟 4:建立設定檔的符號鏈接
接下來,建立從sites-available目錄到設定檔所在的sites-enabled目錄的符號連結:
sudo ln -s /etc/nginx/sites-available/phpmyadmin.conf /etc/nginx/sites-enabled/第 5 步:執行試運行測試
在重新啟動 NGINX 服務之前,空運行測試至關重要。此措施在即時環境中至關重要,可確保對設定檔的任何修改都不會觸發 NGINX 錯誤:
sudo nginx -t如果您的配置沒有錯誤,則會出現以下輸出:
nginx: the configuration file /etc/nginx/nginx.conf syntax is ok
nginx: configuration file /etc/nginx/nginx.conf test is successful
第 6 步:重新啟動 NGINX 服務
最後,為了使變更生效,請重新啟動 NGINX 服務:
sudo systemctl restart nginx關於為 phpMyAdmin 建立 NGINX 伺服器區塊的部分就到此結束。在下一部分中,您將開啟並登入 phpMyAdmin Web 介面。
瀏覽 phpMyAdmin Web 介面
透過啟動您喜歡的網頁瀏覽器開始與 phpMyAdmin 介面的互動。在網址列中輸入 pma.example.com,確保將「example」替換為您的網域名稱或伺服器 IP 位址。請記住,您也可以在內部環境中使用 localhost。
完成此操作後,您將登陸 phpMyAdmin 登入畫面,如下圖所示:

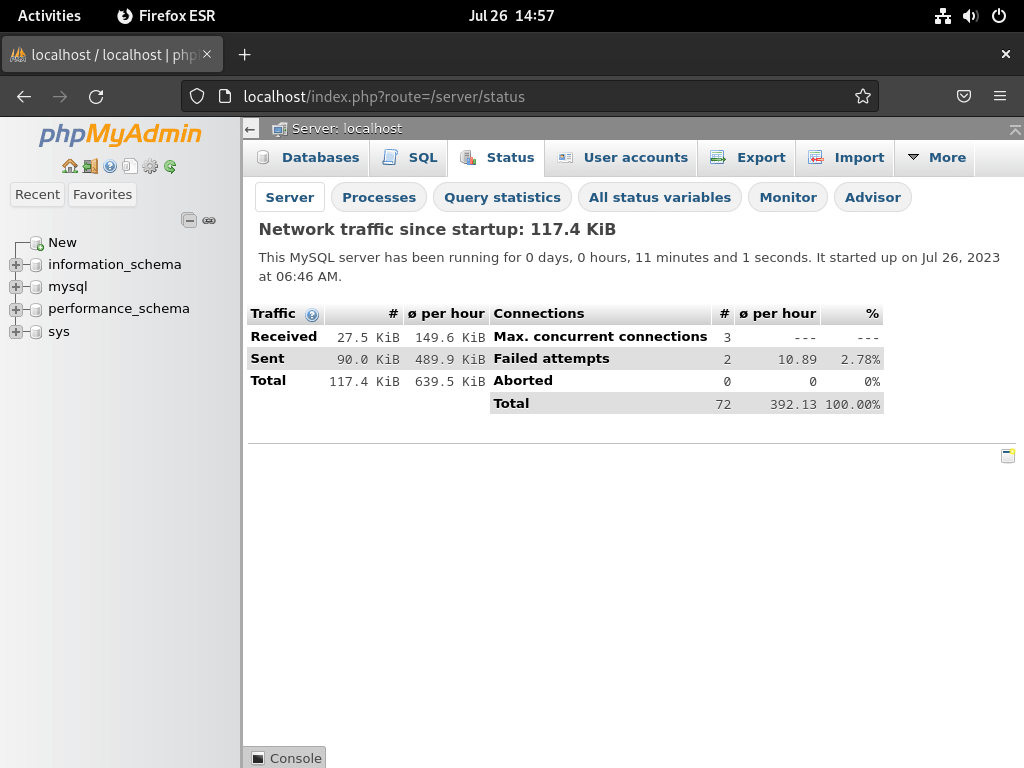
輸入您的憑證並選擇“繼續”或“登入”,瀏覽登入畫面。此操作可讓您存取 phpMyAdmin 儀表板,如下圖所示。
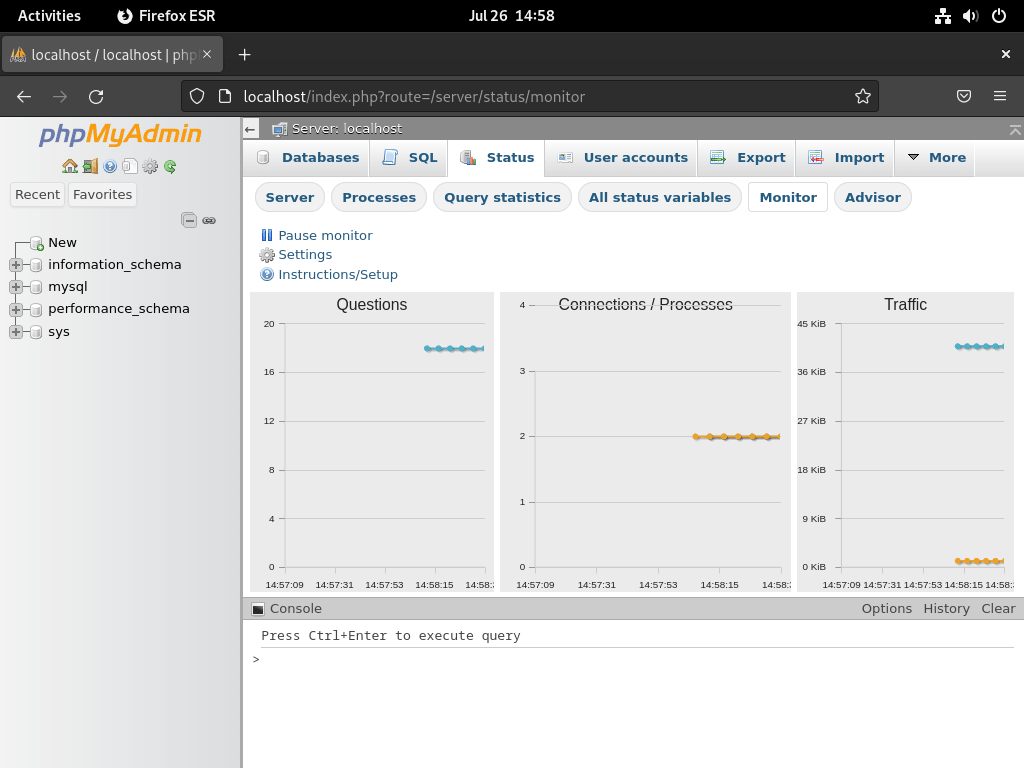
作為 phpMyAdmin 的首次用戶,您可能想熟悉「狀態頁面」。它提供了對資料庫狀態和健康狀況的全面了解。
除了統計頁面之外,phpMyAdmin 還包含一個「顧問系統」。這個方便的功能提供了效能增強的建議。
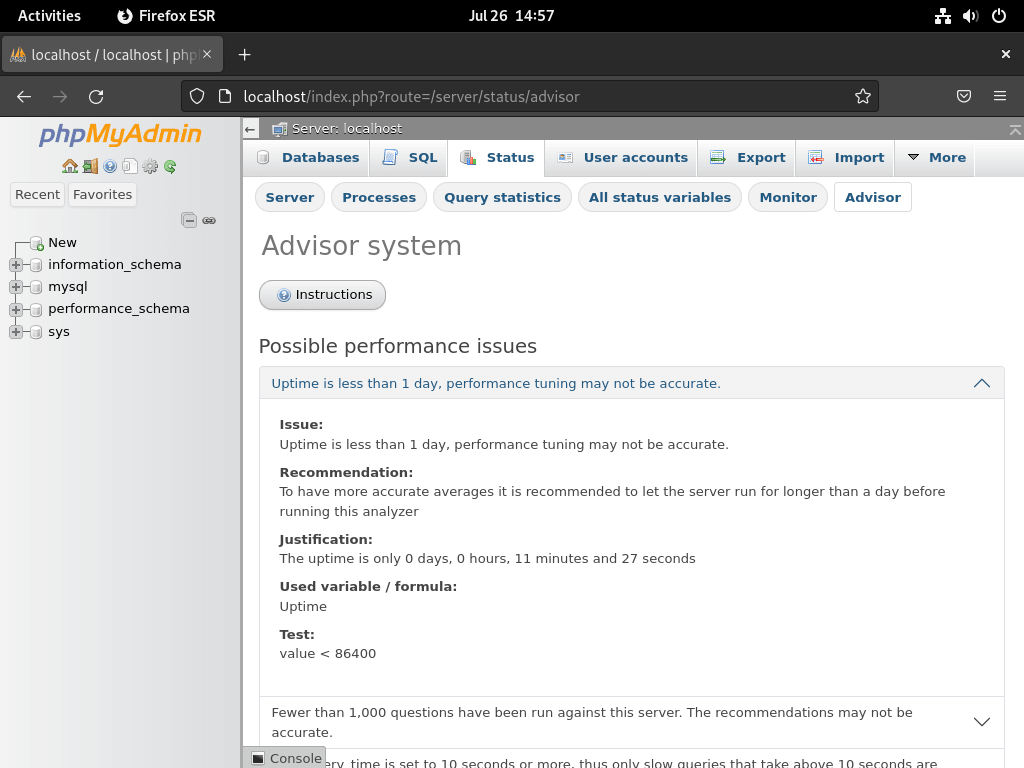
然而,請謹慎記住,雖然顧問建議等待 24 小時,但大多數人認為至少 72 小時更為理想。這可確保資料庫採樣在較長時間內進行,從而提供更準確的建議。
此外,顧問系統不應該是您進行更改的唯一基礎。更改 MySQL 或 MariaDB 設定檔需要仔細考慮、徹底測試,甚至可能需要多次迭代。目標是優化配置以獲得最佳結果,這通常需要時間。
透過 Let's Encrypt SSL 憑證保護 phpMyAdmin
透過 Certbot 建立 SSL 憑證
若要強化 phpMyAdmin 實例的安全性,請使用 SSL 憑證透過 HTTPS 執行 Nginx。利用提供免費、自動化和開放 SSL 憑證的著名憑證授權單位 Let's Encrypt 提供了最直接的方法。
首先,透過執行以下命令安裝 certbot 軟體包,該軟體包有助於管理 Let's Encrypt SSL 憑證:
sudo apt install python3-certbot-nginx -y完成 certbot 軟體包安裝後,執行以下命令建立 SSL 憑證:
sudo certbot --nginx --agree-tos --redirect --hsts --staple-ocsp --email you@example.com -d pma.example.com啟動證書安裝程序後:
- 將出現一條提示,詢問是否接收來自 EFF(電子前沿基金會)的電子郵件。
- 無論您同意(Y)或不同意(N),系統都會自動安裝和設定您的 TLS 憑證。
- 配置包括強制執行 HTTPS 301 重新導向、新增 Strict-Transport-Security 標頭以及實作 OCSP Stapling。
- 請記住將命令中的電子郵件和網域替換為您的準確詳細資訊。
完成此設定後,您的 URL 將從 HTTP://pma.example.com 遷移到 HTTPS://pma.example.com,自動將對先前 HTTP URL 的任何存取重定向到安全 HTTPS URL。
建立用於 SSL 續訂的 Cron 作業
建立一個自動更新憑證的 cron 作業,以進一步簡化流程。 Certbot 為此提供了一個自動續訂腳本。在設定此作業之前,請使用以下命令明智地執行空運行測試,以確認一切正常運行:
sudo certbot renew --dry-run若要排程自動續訂,請透過執行下列命令開啟 crontab 檔案:
sudo crontab -e定期檢查證書續約情況(至少每天一次),以確保您的證書仍然有效。如果需要續訂,腳本將自動更新憑證。使用 cron 語法在您喜歡的時間設定更新。
00 00 */1 * * /usr/sbin/certbot-auto renew結論
在 Debian 系統上成功安裝和設定 phpMyAdmin 後,您可以透過使用者友善的 Web 介面高效管理 MySQL 或 MariaDB 資料庫。定期更新和安全配置可確保您的資料庫管理工具保持安全且最新。享受 phpMyAdmin 為管理 Debian 上的資料庫提供的便利性和強大的功能。
