AppArmor is a powerful Linux security module that enhances system security by restricting the capabilities of programs. It ensures that applications can only access the resources they are explicitly allowed to, reducing the risk of malicious activities.
Key Features:
- Access Control: Defines what files and capabilities a program can access.
- Profile Modes: Offers enforce and complain modes for different security levels.
- Easy Integration: Works seamlessly with various Linux distributions, including Ubuntu.
- Fine-Grained Control: Allows detailed permission settings for applications.
- Logging and Reporting: Provides detailed logs to monitor application behavior.
Benefits:
- Enhanced Security: Limits the actions of potentially vulnerable applications.
- Flexibility: Customizable profiles to meet specific security needs.
- Reduced Attack Surface: Minimizes the risk of exploits by confining applications.
- Compliance: Helps meet regulatory and compliance requirements by enforcing security policies.
Understanding and utilizing AppArmor allows users to bolster their system’s security significantly. Now, let’s delve into how to enable or disable AppArmor on your Ubuntu system.
Prerequisites for Installing AppArmor on Ubuntu
To successfully install AppArmor on Ubuntu, ensure you meet the following requirements:
System Requirements and Supported Ubuntu Versions
| Component | Minimum Requirement |
|---|---|
| Processor | 1 GHz or faster processor |
| RAM | 1 GB or more |
| Disk Space | 10 GB of free space |
| Network | High-speed internet connection |
| Supported Versions | Ubuntu 24.04 (Noble), Ubuntu 22.04 (Jammy), Ubuntu 20.04 (Focal) |
Additional Requirements
| Requirement | Description |
|---|---|
| Internet Connection | Necessary for downloading AppArmor and applying updates. |
| Terminal Conventions | All terminal commands should be executed as a regular user with sudo privileges. |
| CLI Commands | Utilize the Command Line Interface (CLI) for installation and setup. |
| Security Configuration | Ensure proper configuration of security profiles for optimal system protection. |
Pre-Steps Before Managing Apparmor
Install Additional Apparmor Packages
To fully leverage AppArmor’s capabilities, ensure that the apparmor-utils package is installed on your system. This package is essential as it provides various commands for managing AppArmor effectively.
Begin by opening your terminal and executing the installation command:
sudo apt install apparmor-utils apparmor-notify apparmor-profiles apparmor-profiles-extraThis command installs AppArmor’s basic utilities, additional profiles, and notification support, enhancing its functionality.
Check AppArmor Status
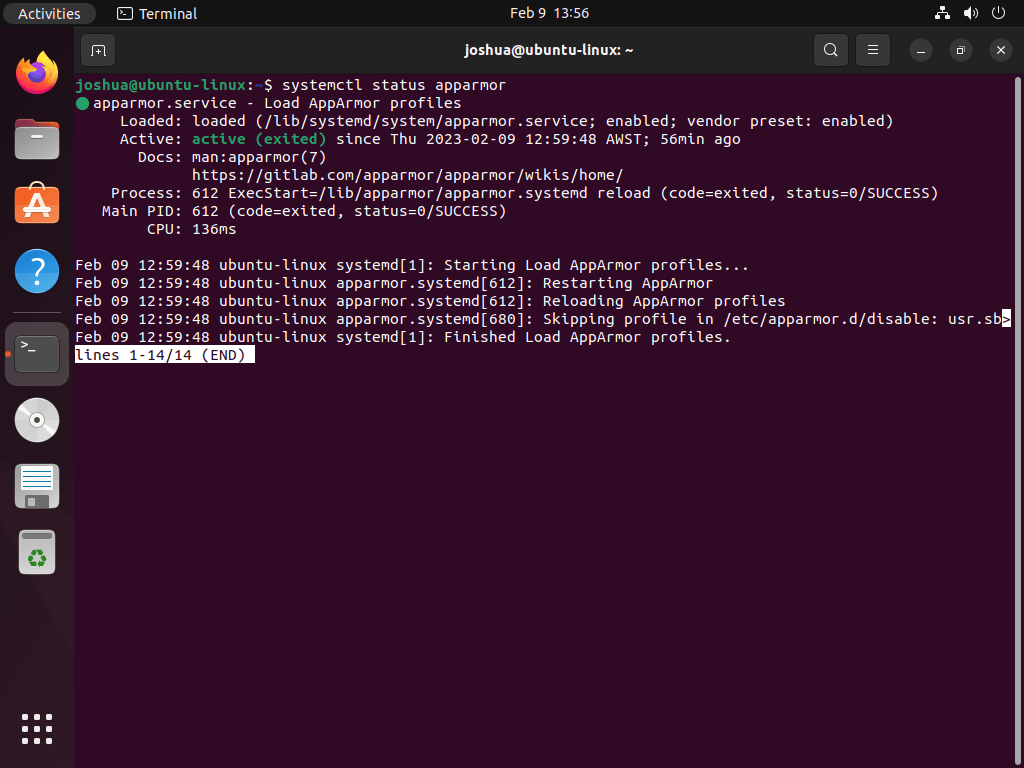
AppArmor typically comes pre-installed and activated on Ubuntu systems. To confirm its current status, use the command:
systemctl status apparmorExample output:

Checking AppArmor’s status through systemctl ensures that the service is operational. This check is crucial as it confirms the active state of AppArmor on your system. While alternative methods exist for this verification, starting with systemctl provides a reliable and straightforward approach.
Managing Systemd Commands for AppArmor
Stopping AppArmor
To stop the AppArmor service, execute:
sudo systemctl stop apparmorDisabling AppArmor on System Boot
If you wish to prevent AppArmor from starting automatically at boot, use:
sudo systemctl disable apparmorStarting AppArmor
To start the AppArmor service, particularly after stopping it, run:
sudo systemctl start apparmorEnabling AppArmor on System Boot (Default)
To revert to the default setting where AppArmor starts at boot, execute:
sudo systemctl enable apparmorRestarting AppArmor
For changes to take effect or to reset the service, restart AppArmor:
sudo systemctl restart apparmorReloading AppArmor
To apply configuration changes without restarting the service, reload AppArmor:
sudo systemctl reload apparmorCheck AppArmor Profiles Loaded
Reviewing Current AppArmor Profiles
Before adjusting AppArmor settings, it’s crucial to examine the status of its profiles. This is done with the apparmor_status command provides a detailed view of the loaded profiles and their operational modes.
Use the following command in the terminal:
sudo apparmor_statusThis command outputs information such as the number of loaded profiles, enforce mode profiles, and associated processes. The enforce mode indicates active profiles restricting application behaviors according to their specific rules. This overview is vital for understanding the security posture before making any modifications.
Example output:
apparmor module is loaded.
63 profiles are loaded.
45 profiles are in enforce mode.
   /snap/snapd/17883/usr/lib/snapd/snap-confine
   /snap/snapd/17883/usr/lib/snapd/snap-confine//mount-namespace-capture-helper
   /snap/snapd/17950/usr/lib/snapd/snap-confine
   /snap/snapd/17950/usr/lib/snapd/snap-confine//mount-namespace-capture-helper
   /usr/bin/evince
   /usr/bin/evince-previewer
   /usr/bin/evince-previewer//sanitized_helper
   /usr/bin/evince-thumbnailer
   /usr/bin/evince//sanitized_helper
   /usr/bin/man
   /usr/bin/pidgin
   /usr/bin/pidgin//sanitized_helper
   /usr/bin/totem
   /usr/bin/totem-audio-preview
   /usr/bin/totem-video-thumbnailer
   /usr/bin/totem//sanitized_helper
   /usr/lib/NetworkManager/nm-dhcp-client.action
   /usr/lib/NetworkManager/nm-dhcp-helper
   /usr/lib/connman/scripts/dhclient-script
   /usr/lib/snapd/snap-confine
   /usr/lib/snapd/snap-confine//mount-namespace-capture-helper
   /usr/sbin/cups-browsed
   /{,usr/}sbin/dhclient
   apt-cacher-ng
   lsb_release
   man_filter
   man_groff
   nvidia_modprobe
   nvidia_modprobe//kmod
   snap-update-ns.firefox
   snap-update-ns.snap-store
   snap-update-ns.snapd-desktop-integration
   snap.firefox.firefox
   snap.firefox.geckodriver
   snap.firefox.hook.configure
   snap.firefox.hook.connect-plug-host-hunspell
   snap.firefox.hook.disconnect-plug-host-hunspell
   snap.firefox.hook.post-refresh
   snap.snap-store.hook.configure
   snap.snap-store.snap-store
   snap.snap-store.ubuntu-software
   snap.snap-store.ubuntu-software-local-file
   snap.snapd-desktop-integration.hook.configure
   snap.snapd-desktop-integration.snapd-desktop-integration
   tcpdump
18 profiles are in complain mode.
   /usr/bin/irssi
   avahi-daemon
   dnsmasq
   dnsmasq//libvirt_leaseshelper
   identd
   klogd
   mdnsd
   nmbd
   nscd
   php-fpm
   ping
   samba-bgqd
   smbd
   smbldap-useradd
   smbldap-useradd///etc/init.d/nscd
   syslog-ng
   syslogd
   traceroute
0 profiles are in kill mode.
0 profiles are in unconfined mode.
3 processes have profiles defined.
3 processes are in enforce mode.
   /usr/sbin/cups-browsed (1025)
   /snap/snapd-desktop-integration/49/usr/bin/snapd-desktop-integration (1632) snap.snapd-desktop-integration.snapd-desktop-integration
   /snap/snapd-desktop-integration/49/usr/bin/snapd-desktop-integration (1717) snap.snapd-desktop-integration.snapd-desktop-integration
0 processes are in complain mode.
0 processes are unconfined but have a profile defined.
0 processes are in mixed mode.
0 processes are in kill mode.
The output will detail the loaded profiles, showing which actively enforce security policies and which are in a more permissive complain mode. For instance, you might see profiles for network services like dnsmasq or applications like snapd. This visibility is key for system administrators aiming to maintain or enhance security measures.
Alternative Status Check: Using aa-status
Another method to check AppArmor profiles is by using the aa-status command. This offers a more in-depth look at the profiles:
sudo aa-statusThis command, similar to apparmor_status, lists all profiles and statuses, including those in enforced, complain, and unconfined modes. Understanding these modes is essential when troubleshooting or optimizing AppArmor’s functionality.
Backing Up AppArmor Profiles
Before making changes to AppArmor, creating a backup of its profiles is a recommended best practice. This ensures that you can revert to a known configuration if needed. Execute the following command to back up the profiles:
sudo cp -R /etc/apparmor.d /etc/apparmor.d.bakThis command duplicates the current AppArmor profiles into a backup directory /etc/apparmor.d.bak safeguarding your original configuration. This backup is a safety net, allowing you to experiment with or modify AppArmor settings without the risk of losing your original configuration.
How to Disable AppArmor Profile
Navigating to the AppArmor Profiles Directory
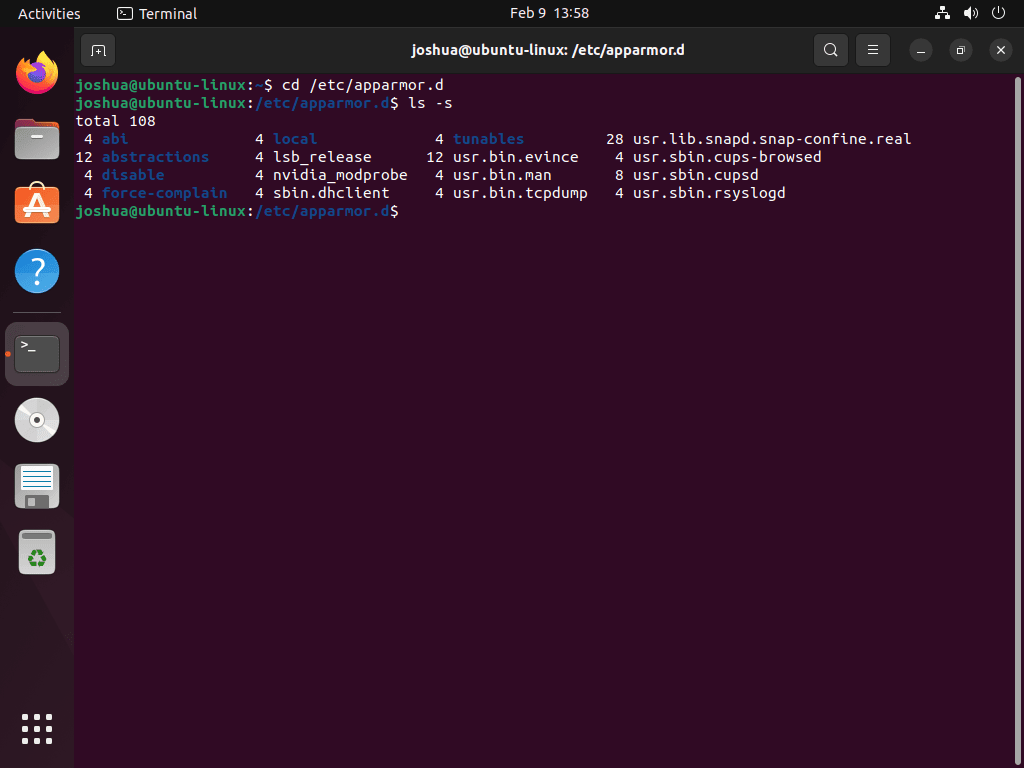
Begin by accessing the directory where AppArmor profiles are stored. This is done by navigating to /etc/apparmor.d:
cd /etc/apparmor.dListing Available AppArmor Profiles
Next, list the profiles within this directory to identify the one you intend to disable:
ls -sThis command displays all profiles stored in the /etc/apparmor.d directory. You can select the specific profile you wish to disable from this list.

Disabling a Specific AppArmor Profile
To disable a chosen profile, use the aa-disable command. This allows you to disable individual profiles without impacting the overall functionality of AppArmor. For instance, to disable the usr.sbin.cupsd profile:
sudo aa-disable /etc/apparmor.d/<profile-name>Example of Command Execution
Executing this command will turn off the usr.sbin.cupsd profile. This action is immediate, allowing you to quickly address any issues caused by this specific profile while retaining AppArmor’s protection for other applications.
sudo aa-disable /etc/apparmor.d/usr.sbin.cupsdExample output:
Disabling /etc/apparmor.d/usr.sbin.cupsdViewing Disabled AppArmor Profiles
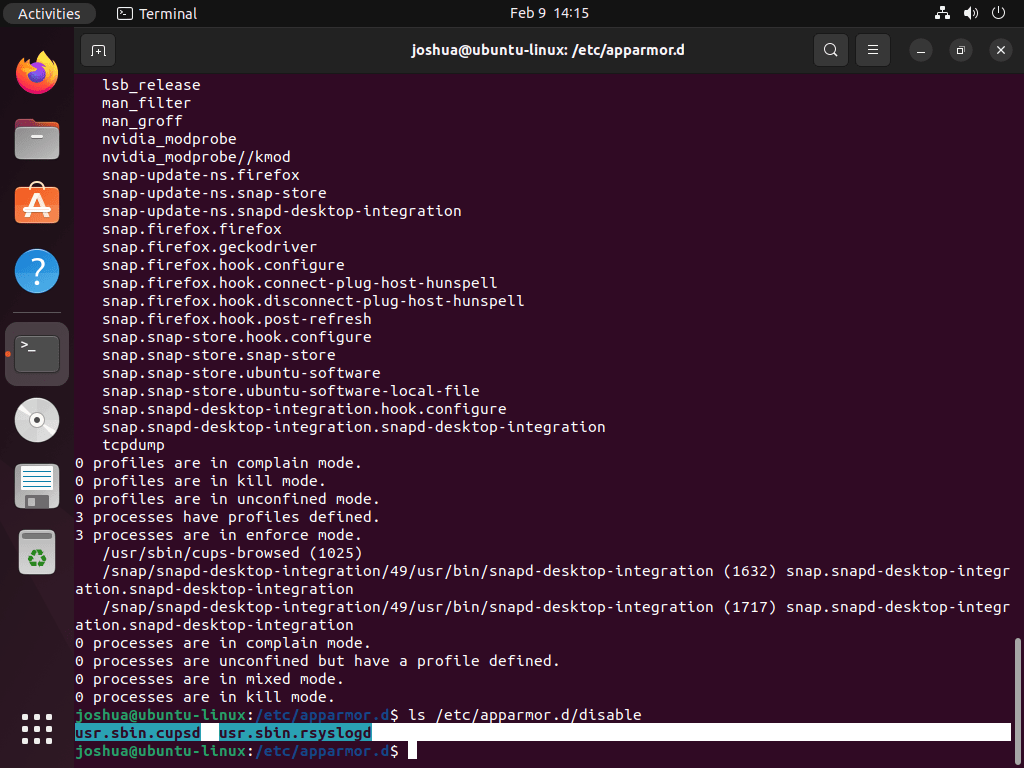
After disabling a profile, you can verify which profiles are currently disabled by checking the /etc/apparmor.d/disable directory:
ls /etc/apparmor.d/disable
This command provides a list of all profiles that are currently disabled in AppArmor.
How to Enable AppArmor Profile
Re-Enabling a Disabled AppArmor Profile
In scenarios where a previously disabled AppArmor profile needs to be reactivated, the aa-enable command comes into play. This straightforward command restores the selected profile to its active state, ensuring its security policies are enforced again.
Here’s how to execute this command:
sudo aa-enable /etc/apparmor.d/<profile-name>Replace <profile-name> with the actual name of the profile you intend to enable.
Example: Enabling the usr.sbin.cupsd Profile
For instance, if you previously disabled the usr.sbin.cupsd profile, the command to re-enable it would be:
sudo aa-enable /etc/apparmor.d/usr.sbin.cupsdExample output:
Setting /etc/apparmor.d/usr.sbin.cupsd to enforce mode.This command will set the usr.sbin.cupsd profile to enforce mode. Enforce mode is crucial as it dictates that the security policies defined within the profile are actively applied, thus ensuring the intended security measures are in place.
Additional Commands with AppArmor Commands
Using the aa-genprof Command
The aa-genprof command is instrumental in generating new AppArmor profiles. It monitors an application’s system calls and crafts a profile based on this activity, especially useful for applications not yet covered by existing profiles.
Example: Creating a Profile for Firefox
To create a new AppArmor profile for Firefox, execute:
sudo aa-genprof firefoxThis command captures Firefox’s interactions with the system, facilitating the creation of a tailored security profile.
Applying the aa-enforce Command
The aa-enforce command is used to enforce AppArmor profiles actively. It is convenient after modifying profiles, as it immediately applies new policies without a system restart.
Example: Enforcing All AppArmor Profiles
To enforce all available profiles:
sudo aa-enforce /etc/apparmor.d/*Alternatively, enforce a specific profile:
sudo aa-enforce /etc/apparmor.d/<profile-name>Utilizing the aa-disable Command
The aa-disable command deactivates a specific AppArmor profile. When a profile is disabled, its restrictions are temporarily lifted, which can help troubleshoot or grant additional permissions to an application.
Example: Disabling the Firefox Profile
To disable the Firefox profile:
sudo aa-disable /etc/apparmor.d/firefoxThis change is temporary and will revert upon system reboot or AppArmor service restart.
Implementing the aa-complain Command
The aa-complain command switches a profile to “complain mode.” AppArmor logs restricted actions instead of blocking them in this mode, aiding in testing and debugging.
Example: Switching to Complain Mode
To switch the usr.sbin.cupsd profile to complain mode:
sudo aa-complain /etc/apparmor.d/usr.sbin.cupsdReplace usr.sbin.cupsd with the desired profile name to observe its potential restrictions without enforcing them.
Executing the aa-remove-unknown Command
The aa-remove-unknown command effectively cleans up AppArmor profiles related to unknown or unused applications.
Example: Removing Unknown Profiles
To purge unknown profiles:
sudo aa-remove-unknownThis action streamlines your AppArmor profiles, ensuring your system maintains an organized and current security stance.
Conclusion
Throughout this guide, we’ve navigated the essential aspects of managing AppArmor on Ubuntu 24.04, 22.04, or 20.04, covering enabling, disabling, and modifying security profiles to suit specific needs. We delved into creating new profiles with aa-genprof, enforcing policies with aa-enforce, and even troubleshooting with modes like aa-complain. Remember, the key to AppArmor’s effectiveness lies in tailoring it to your environment. Regularly review and update your profiles to ensure they align with your security objectives and system updates.
Useful Links
Here are some valuable links related to using AppArmor:
- Ubuntu AppArmor Wiki: The Ubuntu AppArmor Wiki provides information on installing, configuring, and managing AppArmor on Ubuntu.
- AppArmor Official Website: Visit the official AppArmor website for general information, features, and news.
- AppArmor Documentation: Explore the comprehensive documentation for detailed guides and technical details on using AppArmor.
- AppArmor GitLab Wiki: Access the AppArmor GitLab Wiki for additional resources, community contributions, and project information.

