
Writing Debian install media with dd is unforgiving: one wrong target device can overwrite the wrong disk. To install balenaEtcher on Debian with a safer graphical workflow, use the official Linux x64 ZIP when you need one method that works across Debian 13 (trixie), Debian 12 (bookworm), and Debian 11 (bullseye).
The official balenaEtcher GitHub releases also provide an amd64 .deb package for Debian 13 and Debian 12. Debian 11 should stay with the ZIP method because the current .deb uses zstd-compressed Debian control data that Bullseye’s older dpkg cannot unpack. Both official Linux downloads target amd64/x64 systems. There is no current Flathub app record for balenaEtcher, and the old APT repository paths are either dead or stale.
Install balenaEtcher on Debian
Start by refreshing APT and applying available package updates. This reduces dependency conflicts before you add a large desktop application.
sudo apt update && sudo apt upgradeThese commands use
sudofor system changes. If your account cannot run sudo yet, follow the guide to add a user to sudoers on Debian before continuing.
Install the tools used by the GitHub download workflow. curl fetches release metadata and files, jq reads the GitHub JSON safely, and unzip extracts the official Linux archive. The Linux curl command guide explains the download flags in more depth, while the unzip command examples cover archive extraction patterns.
sudo apt install ca-certificates curl jq unzip -yChoose a balenaEtcher Debian Source
Use the ZIP method when you want one path that works on every supported Debian release. Use the .deb method on Debian 13 or Debian 12 when you specifically prefer a package-managed local install. The APT repository and Flatpak rows are included only to reject stale commands that still appear in older instructions.
| Source | Role | Debian support | Status |
|---|---|---|---|
| Official Linux x64 ZIP | Recommended install path | Debian 13, 12, and 11 on amd64 | Installs under /opt/balenaEtcher and supports a reusable update-balenaetcher command. |
Official .deb package | Optional local package install | Debian 13 and 12 on amd64 | Installs cleanly on Trixie and Bookworm, but the current package format is not usable with Debian 11’s older dpkg. |
| Old APT repositories | Rejected source | Stale or broken | deb.etcher.io now returns 404, and the old Cloudsmith package index still exposes older 1.14.x packages. |
| Flatpak or Flathub | Rejected source | No current Flathub app record | Do not publish a Flatpak command until a real Flathub appstream record exists. |
Do not install the ZIP and .deb methods at the same time. Both expose the balena-etcher command and desktop launcher, so mixed installs make updates, removal, and troubleshooting harder to trust.
Install balenaEtcher from the Official Linux ZIP
The ZIP method works across the supported Debian releases because it does not depend on Debian’s local package format support. First, confirm that your Debian system is amd64:
ARCH="$(dpkg --print-architecture)"
printf 'Architecture: %s\n' "$ARCH"
if [ "$ARCH" = "amd64" ]; then
    echo "Architecture supported for the official Linux x64 download."
else
    echo "balenaEtcher publishes official Linux downloads for x64/amd64 only."
fi
Expected output on a supported Debian amd64 installation:
Architecture: amd64
Architecture supported for the official Linux x64 download.
Fetch the latest release metadata and select the Linux x64 ZIP plus its checksum file. Run the download, checksum, and install blocks in the same terminal session so the variables remain available.
RELEASE_JSON="$(curl -fsSL https://api.github.com/repos/balena-io/etcher/releases/latest)"
RELEASE_TAG="$(printf '%s' "$RELEASE_JSON" | jq -r '.tag_name // empty')"
PACKAGE_URL="$(printf '%s' "$RELEASE_JSON" | jq -r '.assets[] | select(.name | test("^balenaEtcher-linux-x64-[0-9.]+[.]zip$")) | .browser_download_url' | head -n 1)"
CHECKSUM_URL="$(printf '%s' "$RELEASE_JSON" | jq -r '.assets[] | select(.name == "SHA256SUMS.Linux.x64.txt") | .browser_download_url')"
if [ -z "$RELEASE_TAG" ] || [ -z "$PACKAGE_URL" ] || [ "$PACKAGE_URL" = "null" ] || [ -z "$CHECKSUM_URL" ] || [ "$CHECKSUM_URL" = "null" ]; then
    echo "Could not find the current Linux x64 ZIP release assets."
    PACKAGE_FILE=""
else
    PACKAGE_FILE="${PACKAGE_URL##*/}"
    printf 'Release: %s\nPackage: %s\n' "$RELEASE_TAG" "$PACKAGE_FILE"
fi
Relevant output includes the current release tag and package filename:
Release: v2.1.6
Package: balenaEtcher-linux-x64-2.1.6.zip
Download the ZIP package and verify it against the upstream SHA256 checksum:
if [ -z "${PACKAGE_FILE:-}" ]; then
    echo "Resolve the release assets before downloading balenaEtcher."
else
    curl -fL --progress-bar -o "$PACKAGE_FILE" "$PACKAGE_URL"
    curl -fsSLo SHA256SUMS.Linux.x64.txt "$CHECKSUM_URL"
    grep " $PACKAGE_FILE$" SHA256SUMS.Linux.x64.txt | sha256sum -c -
fi
The checksum command should report the downloaded archive as valid:
balenaEtcher-linux-x64-2.1.6.zip: OK
The install block replaces any previous manual balenaEtcher ZIP install under
/opt/balenaEtcher. It does not remove your home-directory preferences or saved application state.
Extract balenaEtcher under /opt, expose the launcher through /usr/local/bin, download the matching upstream icon, and create a desktop menu entry:
if dpkg -l balena-etcher 2>/dev/null | grep -q '^ii'; then
    echo "Remove the DEB package before installing the ZIP method."
elif [ -e /usr/local/bin/balena-etcher ] && [ ! -L /usr/local/bin/balena-etcher ]; then
    echo "Refusing to replace non-symlink /usr/local/bin/balena-etcher."
elif [ ! -f "${PACKAGE_FILE:-}" ]; then
    echo "Download and verify the ZIP file before installing balenaEtcher."
else
    sudo rm -rf /opt/balenaEtcher
    sudo unzip -q "$PACKAGE_FILE" -d /opt
    sudo mv /opt/balenaEtcher-linux-x64 /opt/balenaEtcher
    sudo chmod -R a+rX /opt/balenaEtcher
    sudo ln -sf /opt/balenaEtcher/balena-etcher /usr/local/bin/balena-etcher
    sudo curl -fsSLo /opt/balenaEtcher/icon.png "https://raw.githubusercontent.com/balena-io/etcher/${RELEASE_TAG}/assets/icon.png"
    printf '%s\n' "${RELEASE_TAG#v}" | sudo tee /opt/balenaEtcher/.linuxcapable-version > /dev/null
    printf '%s\n' \
    '[Desktop Entry]' \
    'Name=balenaEtcher' \
    'Comment=Flash OS images to SD cards and USB drives' \
    'Exec=/usr/local/bin/balena-etcher %U' \
    'Terminal=false' \
    'Type=Application' \
    'Icon=/opt/balenaEtcher/icon.png' \
    'Categories=Utility;' | sudo tee /usr/share/applications/balena-etcher.desktop > /dev/null
fi
The chmod -R a+rX command keeps executable files runnable and fixes the archive directory permissions so the launcher can read the application files.
Verify that Debian can find the launcher and that the extracted executable is present:
command -v balena-etcher
test -x /opt/balenaEtcher/balena-etcher && echo "balenaEtcher executable is installed"
Expected output:
/usr/local/bin/balena-etcher
balenaEtcher executable is installed
Create the balenaEtcher ZIP Update Command
The ZIP install is not managed by APT, so create a reusable update command while you set up the ZIP method. The script checks your architecture, refuses mixed ZIP and .deb installs, reads the currently installed ZIP version when available, fetches the latest GitHub release, verifies the SHA256 checksum, replaces /opt/balenaEtcher, refreshes the launcher, and recreates the desktop entry.
The setup block checks for an existing helper without the managed helper marker before writing to /usr/local/bin. That guard prevents the managed helper from replacing an unrelated local script.
if [ -e /usr/local/bin/update-balenaetcher ] && ! grep -q 'Managed balenaEtcher ZIP update helper' /usr/local/bin/update-balenaetcher 2>/dev/null; then
    echo "Refusing to replace existing /usr/local/bin/update-balenaetcher without the managed helper marker."
else
    sudo tee /usr/local/bin/update-balenaetcher > /dev/null << 'SCRIPT_EOF'
#!/bin/bash
# Managed balenaEtcher ZIP update helper
set -euo pipefail

APP_DIR="/opt/balenaEtcher"
VERSION_FILE="$APP_DIR/.linuxcapable-version"
LAUNCHER="/usr/local/bin/balena-etcher"
DESKTOP_FILE="/usr/share/applications/balena-etcher.desktop"
API_URL="https://api.github.com/repos/balena-io/etcher/releases/latest"

if [ "$(id -u)" -eq 0 ]; then
    echo "Run update-balenaetcher as your regular user; it will use sudo for system files."
    exit 1
fi

for cmd in curl grep jq unzip sha256sum dpkg mktemp sudo; do
    if ! command -v "$cmd" > /dev/null 2>&1; then
        echo "Missing required command: $cmd"
        echo "Install prerequisites with: sudo apt install ca-certificates curl jq unzip -y"
        exit 1
    fi
done

ARCH="$(dpkg --print-architecture)"
if [ "$ARCH" != "amd64" ]; then
    echo "balenaEtcher publishes Linux downloads for x64/amd64 only."
    echo "Detected architecture: $ARCH"
    exit 1
fi

if dpkg -l balena-etcher 2>/dev/null | grep -q '^ii'; then
    echo "Remove the DEB package before updating the ZIP installation."
    exit 1
fi

if [ -e "$LAUNCHER" ] && [ ! -L "$LAUNCHER" ]; then
    echo "Refusing to replace non-symlink $LAUNCHER."
    exit 1
fi

CURRENT_VERSION="missing"
if [ -r "$VERSION_FILE" ]; then
    CURRENT_VERSION="$(cat "$VERSION_FILE" 2> /dev/null || true)"
    CURRENT_VERSION="${CURRENT_VERSION:-unknown}"
elif [ -x "$APP_DIR/balena-etcher" ]; then
    CURRENT_VERSION="installed"
fi

echo "Checking latest balenaEtcher release..."
RELEASE_JSON="$(curl -fsSL "$API_URL")"
LATEST_TAG="$(printf '%s' "$RELEASE_JSON" | jq -r '.tag_name // empty')"
PACKAGE_URL="$(printf '%s' "$RELEASE_JSON" | jq -r '.assets[] | select(.name | test("^balenaEtcher-linux-x64-[0-9.]+[.]zip$")) | .browser_download_url' | head -n 1)"
CHECKSUM_URL="$(printf '%s' "$RELEASE_JSON" | jq -r '.assets[] | select(.name == "SHA256SUMS.Linux.x64.txt") | .browser_download_url')"
if [ -z "$LATEST_TAG" ] || [ "$LATEST_TAG" = "null" ] || [ -z "$PACKAGE_URL" ] || [ "$PACKAGE_URL" = "null" ] || [ -z "$CHECKSUM_URL" ] || [ "$CHECKSUM_URL" = "null" ]; then
    echo "Could not find the current Linux x64 ZIP release assets."
    exit 1
fi

LATEST_VERSION="${LATEST_TAG#v}"
PACKAGE_FILE="${PACKAGE_URL##*/}"

echo "Current installed version: $CURRENT_VERSION"
echo "Latest available version:  $LATEST_VERSION"

if [ "$CURRENT_VERSION" = "$LATEST_VERSION" ]; then
    echo "balenaEtcher is already up to date."
    exit 0
fi

echo "Preparing sudo access for installation..."
sudo true

WORK_DIR="$(mktemp -d)"
trap 'rm -rf "$WORK_DIR"' EXIT

echo "Downloading $PACKAGE_FILE..."
curl -fL --progress-bar -o "$WORK_DIR/$PACKAGE_FILE" "$PACKAGE_URL"
curl -fsSLo "$WORK_DIR/SHA256SUMS.Linux.x64.txt" "$CHECKSUM_URL"

echo "Verifying checksum..."
cd "$WORK_DIR"
grep " $PACKAGE_FILE$" SHA256SUMS.Linux.x64.txt | sha256sum -c -

echo "Extracting package..."
mkdir -p "$WORK_DIR/extract"
unzip -q "$WORK_DIR/$PACKAGE_FILE" -d "$WORK_DIR/extract"
EXTRACTED_DIR="$WORK_DIR/extract/balenaEtcher-linux-x64"
if [ ! -x "$EXTRACTED_DIR/balena-etcher" ]; then
    echo "Extracted launcher was not found at $EXTRACTED_DIR/balena-etcher."
    exit 1
fi

echo "Installing balenaEtcher $LATEST_VERSION..."
sudo rm -rf "$APP_DIR"
sudo mv "$EXTRACTED_DIR" "$APP_DIR"
sudo chmod -R a+rX "$APP_DIR"
sudo ln -sf "$APP_DIR/balena-etcher" "$LAUNCHER"
sudo curl -fsSLo "$APP_DIR/icon.png" "https://raw.githubusercontent.com/balena-io/etcher/${LATEST_TAG}/assets/icon.png"
printf '%s\n' "$LATEST_VERSION" | sudo tee "$VERSION_FILE" > /dev/null
sudo tee "$DESKTOP_FILE" > /dev/null << DESKTOP_EOF
[Desktop Entry]
Name=balenaEtcher
Comment=Flash OS images to SD cards and USB drives
Exec=/usr/local/bin/balena-etcher %U
Terminal=false
Type=Application
Icon=/opt/balenaEtcher/icon.png
Categories=Utility;
DESKTOP_EOF

if command -v update-desktop-database > /dev/null 2>&1; then
    sudo update-desktop-database /usr/share/applications > /dev/null 2>&1 || true
fi

if [ ! -x "$APP_DIR/balena-etcher" ]; then
    echo "Install failed: $APP_DIR/balena-etcher is missing or not executable."
    exit 1
fi

echo "Update complete: balenaEtcher $LATEST_VERSION"
echo "Launcher: $LAUNCHER"
SCRIPT_EOF
fi
Make the helper executable and confirm Debian can find it:
if grep -q 'Managed balenaEtcher ZIP update helper' /usr/local/bin/update-balenaetcher 2>/dev/null; then
    sudo chmod +x /usr/local/bin/update-balenaetcher
    command -v update-balenaetcher
else
    echo "update-balenaetcher was not created."
fi
/usr/local/bin/update-balenaetcher
Since the command lives in /usr/local/bin, you can run it from any terminal directory. Run it after creating the script to verify the helper sees the installed version, then reuse the same command later when you want to check for a newer balenaEtcher release:
update-balenaetcherIf the ZIP method already installed the current release, the helper stops before downloading another copy:
Checking latest balenaEtcher release...
Current installed version: 2.1.6
Latest available version:  2.1.6
balenaEtcher is already up to date.
Install balenaEtcher from the DEB Package on Debian 13 or 12
This method is optional for Debian 13 (trixie) and Debian 12 (bookworm); it is not required because the ZIP method also works on those releases. Use the .deb package only if you prefer package-managed installation and removal. Debian 11 users should stay with the ZIP method because the current .deb package cannot be unpacked by Bullseye’s older dpkg.
. /etc/os-release
printf 'Debian release: %s (%s)\n' "$VERSION_ID" "$VERSION_CODENAME"
case "$VERSION_ID" in
    13|12) echo "DEB method supported for this release." ;;
    11) echo "Use the ZIP method on Debian 11; the current DEB package uses control.tar.zst." ;;
    *) echo "Use the ZIP method unless you have validated this Debian release." ;;
esac
Fetch the current amd64 .deb package and checksum file from GitHub:
RELEASE_JSON="$(curl -fsSL https://api.github.com/repos/balena-io/etcher/releases/latest)"
PACKAGE_URL="$(printf '%s' "$RELEASE_JSON" | jq -r '.assets[] | select(.name | test("^balena-etcher_[0-9.]+_amd64[.]deb$")) | .browser_download_url' | head -n 1)"
CHECKSUM_URL="$(printf '%s' "$RELEASE_JSON" | jq -r '.assets[] | select(.name == "SHA256SUMS.Linux.x64.txt") | .browser_download_url')"
if [ -z "$PACKAGE_URL" ] || [ "$PACKAGE_URL" = "null" ] || [ -z "$CHECKSUM_URL" ] || [ "$CHECKSUM_URL" = "null" ]; then
    echo "Could not find the current amd64 DEB release assets."
    PACKAGE_FILE=""
else
    PACKAGE_FILE="${PACKAGE_URL##*/}"
    curl -fL --progress-bar -o "$PACKAGE_FILE" "$PACKAGE_URL"
    curl -fsSLo SHA256SUMS.Linux.x64.txt "$CHECKSUM_URL"
    grep " $PACKAGE_FILE$" SHA256SUMS.Linux.x64.txt | sha256sum -c -
fi
Expected checksum result:
balena-etcher_2.1.6_amd64.deb: OK
Install the local package with APT so Debian can resolve any missing dependencies:
if [ -d /opt/balenaEtcher ] || [ -e /usr/local/bin/balena-etcher ]; then
    echo "Remove the ZIP installation before installing the DEB package."
elif [ ! -f "${PACKAGE_FILE:-}" ]; then
    echo "Download and verify the DEB package before installing balenaEtcher."
else
    sudo apt install "./$PACKAGE_FILE" -y
fi
Relevant output on Debian 13 and Debian 12 includes the local package and the final package setup line:
The following NEW packages will be installed:
  balena-etcher
Setting up balena-etcher (2.1.6) ...
chmod: cannot access '/opt/balenaEtcher/chrome-sandbox': No such file or directory
Confirm the package is installed and note the package-managed launcher path:
dpkg -l balena-etcher
command -v balena-etcher
Expected output:
ii  balena-etcher  2.1.6  amd64  Flash OS images to SD cards and USB drives, safely and easily.
/usr/bin/balena-etcher
Create the balenaEtcher DEB Update Command
The local .deb install does not use a live APT repository, so create a separate update helper only when you chose the Debian 13 or Debian 12 package method. The helper refuses mixed ZIP installs, checks the installed package version, verifies the latest GitHub checksum, and installs the newer local package with APT when needed.
The setup block uses a marker guard before writing to /usr/local/bin/update-balenaetcher-deb, so it will not replace an unrelated local helper with the same name.
if [ -e /usr/local/bin/update-balenaetcher-deb ] && ! grep -q 'Managed balenaEtcher DEB update helper' /usr/local/bin/update-balenaetcher-deb 2>/dev/null; then
    echo "Refusing to replace existing /usr/local/bin/update-balenaetcher-deb without the managed helper marker."
else
    sudo tee /usr/local/bin/update-balenaetcher-deb > /dev/null << 'SCRIPT_EOF'
#!/bin/bash
# Managed balenaEtcher DEB update helper
set -euo pipefail

API_URL="https://api.github.com/repos/balena-io/etcher/releases/latest"

if [ "$(id -u)" -eq 0 ]; then
    echo "Run update-balenaetcher-deb as your regular user; it will use sudo for APT."
    exit 1
fi

for cmd in apt curl dpkg dpkg-query grep jq mktemp sha256sum sudo; do
    if ! command -v "$cmd" > /dev/null 2>&1; then
        echo "Missing required command: $cmd"
        echo "Install prerequisites with: sudo apt install ca-certificates curl jq -y"
        exit 1
    fi
done

# shellcheck disable=SC1091
. /etc/os-release
case "$VERSION_ID" in
    13|12) ;;
    *) echo "Use the ZIP method unless you have validated the DEB package on Debian $VERSION_ID."; exit 1 ;;
esac

ARCH="$(dpkg --print-architecture)"
if [ "$ARCH" != "amd64" ]; then
    echo "balenaEtcher publishes Linux DEB packages for amd64 only."
    echo "Detected architecture: $ARCH"
    exit 1
fi

if [ -d /opt/balenaEtcher ] || [ -e /usr/local/bin/balena-etcher ]; then
    echo "Remove the ZIP installation before updating the DEB package."
    exit 1
fi

CURRENT_VERSION="$(dpkg-query -W -f='${Version}' balena-etcher 2>/dev/null || true)"
if [ -z "$CURRENT_VERSION" ]; then
    echo "balena-etcher is not installed from the DEB method."
    exit 1
fi

echo "Checking latest balenaEtcher DEB release..."
RELEASE_JSON="$(curl -fsSL "$API_URL")"
LATEST_TAG="$(printf '%s' "$RELEASE_JSON" | jq -r '.tag_name // empty')"
PACKAGE_URL="$(printf '%s' "$RELEASE_JSON" | jq -r '.assets[] | select(.name | test("^balena-etcher_[0-9.]+_amd64[.]deb$")) | .browser_download_url' | head -n 1)"
CHECKSUM_URL="$(printf '%s' "$RELEASE_JSON" | jq -r '.assets[] | select(.name == "SHA256SUMS.Linux.x64.txt") | .browser_download_url')"
if [ -z "$LATEST_TAG" ] || [ "$LATEST_TAG" = "null" ] || [ -z "$PACKAGE_URL" ] || [ "$PACKAGE_URL" = "null" ] || [ -z "$CHECKSUM_URL" ] || [ "$CHECKSUM_URL" = "null" ]; then
    echo "Could not find the current amd64 DEB release assets."
    exit 1
fi

LATEST_VERSION="${LATEST_TAG#v}"
PACKAGE_FILE="${PACKAGE_URL##*/}"

echo "Current installed version: $CURRENT_VERSION"
echo "Latest available version:  $LATEST_VERSION"

if [ "$CURRENT_VERSION" = "$LATEST_VERSION" ]; then
    echo "balenaEtcher DEB package is already up to date."
    exit 0
fi

echo "Preparing sudo access for APT..."
sudo true

WORK_DIR="$(mktemp -d)"
trap 'rm -rf "$WORK_DIR"' EXIT

echo "Downloading $PACKAGE_FILE..."
curl -fL --progress-bar -o "$WORK_DIR/$PACKAGE_FILE" "$PACKAGE_URL"
curl -fsSLo "$WORK_DIR/SHA256SUMS.Linux.x64.txt" "$CHECKSUM_URL"

echo "Verifying checksum..."
cd "$WORK_DIR"
grep " $PACKAGE_FILE$" SHA256SUMS.Linux.x64.txt | sha256sum -c -

echo "Installing $PACKAGE_FILE with APT..."
sudo apt install "$WORK_DIR/$PACKAGE_FILE" -y

FINAL_VERSION="$(dpkg-query -W -f='${Version}' balena-etcher 2>/dev/null || true)"
echo "Update complete: balenaEtcher $FINAL_VERSION"
SCRIPT_EOF
fi
Make the helper executable and confirm Debian can find it:
if grep -q 'Managed balenaEtcher DEB update helper' /usr/local/bin/update-balenaetcher-deb 2>/dev/null; then
    sudo chmod +x /usr/local/bin/update-balenaetcher-deb
    command -v update-balenaetcher-deb
else
    echo "update-balenaetcher-deb was not created."
fi
/usr/local/bin/update-balenaetcher-deb
Run the helper whenever you want to check whether the local .deb package has a newer GitHub release:
update-balenaetcher-debIf Debian already has the current package version, the helper stops before downloading another copy:
Checking latest balenaEtcher DEB release...
Current installed version: 2.1.6
Latest available version:  2.1.6
balenaEtcher DEB package is already up to date.
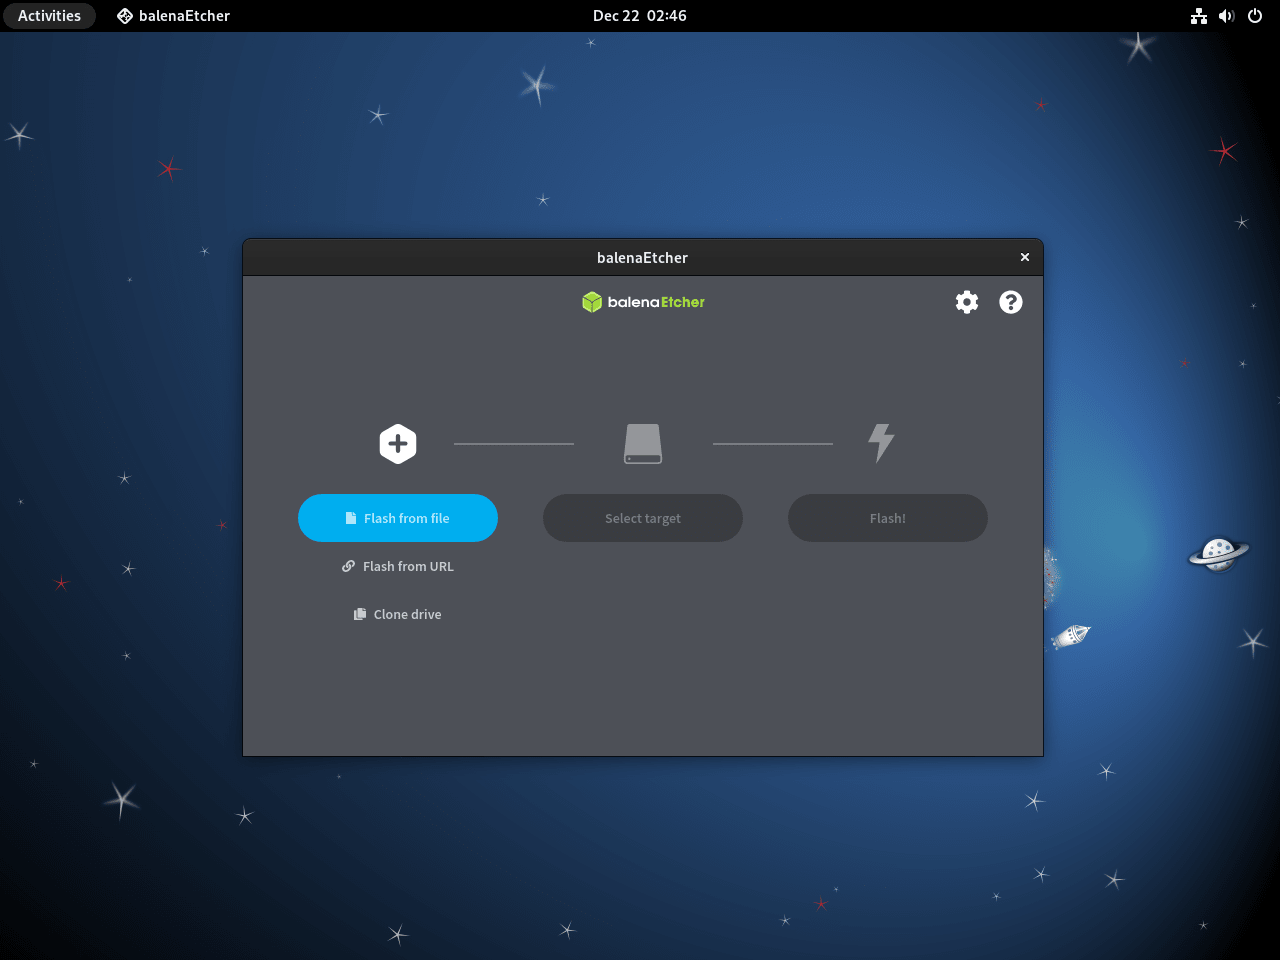
Launch balenaEtcher on Debian
balenaEtcher is a graphical application, so launch it from an active desktop session where Debian can show the app window and authorization prompts for removable-drive writes.
To start balenaEtcher from a terminal inside that desktop session, run:
balena-etcherYou can also launch it from the application menu:
- Open your desktop’s application launcher.
- Search for balenaEtcher.
- Select the balenaEtcher entry to open the flashing interface.
Update balenaEtcher on Debian
The ZIP install does not update through APT. Use the helper command created earlier to check GitHub, verify the latest ZIP checksum, and replace the manual installation when a newer release exists:
update-balenaetcherIf your installation is already current, the command stops before downloading anything:
Checking latest balenaEtcher release...
Current installed version: 2.1.6
Latest available version:  2.1.6
balenaEtcher is already up to date.
For the Debian 13 or Debian 12 .deb method, use the separate helper created for local DEB packages:
update-balenaetcher-debDo not switch to the old APT repositories for updates; the retired deb.etcher.io path is broken, and the old Cloudsmith index does not track the current 2.x releases.
Troubleshoot balenaEtcher on Debian
Old APT Repository Still Appears
If older instructions left a balenaEtcher APT source on your system, APT may still try the retired repository or the stale Cloudsmith index during updates. Check for source files that reference either endpoint:
grep -RIlE 'deb[.]etcher[.]io|dl[.]cloudsmith[.]io/public/balena/etcher' /etc/apt/sources.list /etc/apt/sources.list.d 2>/dev/null || echo "No old balenaEtcher APT source files found"Example output when an old standalone source file exists:
/etc/apt/sources.list.d/balena-etcher.list
If the match is under /etc/apt/sources.list.d, remove only files that contain the old balenaEtcher endpoints, then refresh APT:
for source_file in /etc/apt/sources.list.d/*etcher* /etc/apt/sources.list.d/*balena*; do
    [ -e "$source_file" ] || continue
    if grep -Eq 'deb[.]etcher[.]io|dl[.]cloudsmith[.]io/public/balena/etcher' "$source_file"; then
        sudo rm -f "$source_file"
    fi
done
sudo apt update
If the match appears inside /etc/apt/sources.list, edit that file manually and remove only the balenaEtcher repository line. Retest with the same diagnostic command afterward:
grep -RIlE 'deb[.]etcher[.]io|dl[.]cloudsmith[.]io/public/balena/etcher' /etc/apt/sources.list /etc/apt/sources.list.d 2>/dev/null || echo "No old balenaEtcher APT source files found"No old balenaEtcher APT source files found
Debian 11 Cannot Unpack the Current DEB Package
If you try the current official .deb package on Debian 11, dpkg fails before package installation because Bullseye’s package tools cannot read the archive’s zstd-compressed control data:
dpkg-deb: error: archive 'balena-etcher_2.1.6_amd64.deb' uses unknown compression for member 'control.tar.zst', giving up
dpkg: error processing archive balena-etcher_2.1.6_amd64.deb (--install):
 dpkg-deb --control subprocess returned error exit status 2
Use the ZIP method instead on Debian 11. Do not force the .deb through manual extraction or dependency overrides, because APT and dpkg will not own a clean package state afterward.
The DEB Installer Prints a chrome-sandbox Warning
The .deb install can complete on Debian 13 or Debian 12 while still printing this maintainer-script warning:
chmod: cannot access '/opt/balenaEtcher/chrome-sandbox': No such file or directory
Check the package state before troubleshooting further. If dpkg -l balena-etcher shows ii, the package finished installing despite that warning.
balena-etcher Command Not Found
If the terminal cannot find balena-etcher, check whether the shell can resolve the launcher:
command -v balena-etcher || echo "balena-etcher not found"For the ZIP method, verify the extracted executable before recreating the symlink:
test -x /opt/balenaEtcher/balena-etcher && echo "ZIP executable exists"If the check succeeds, recreate the launcher symlink:
sudo ln -sf /opt/balenaEtcher/balena-etcher /usr/local/bin/balena-etcherFor the .deb method, verify that the package is still installed:
dpkg -l balena-etcher | grep '^ii'Image File Does Not Open
If balenaEtcher reports that it cannot open the source image, confirm the file is readable from your desktop account before blaming the USB drive. A failed download, a file saved under another user account, or a permissions issue can make the image invisible to the app.
test -r "$HOME/Downloads/debian.iso" && echo "Image file is readable"Replace $HOME/Downloads/debian.iso with the actual ISO or image path. If the file is not readable, move it into your home directory or download the image again, then verify the checksum published by the distro or project that provides the image.
Target Drive Does Not Appear
Confirm Debian can see the removable drive before restarting balenaEtcher:
lsblk -o NAME,RM,SIZE,TYPE,MOUNTPOINTS --nodepsExample output showing a USB drive as /dev/sdb:
NAME RM   SIZE TYPE MOUNTPOINTS
sda   0 238.5G disk
sdb   1  14.9G disk
If the drive is missing from lsblk, reconnect it or try another USB port. If the drive appears in lsblk but not inside balenaEtcher, restart the application from the desktop menu so Debian can show any authorization prompt.
Remove balenaEtcher from Debian
Remove the ZIP Installation
These cleanup commands permanently delete the manually installed balenaEtcher application files, launcher symlink, desktop menu entry, and ZIP update helper created earlier. They do not delete your home-directory balenaEtcher preferences.
sudo rm -rf /opt/balenaEtcher
sudo rm -f /usr/local/bin/balena-etcher /usr/share/applications/balena-etcher.desktop
if grep -q 'Managed balenaEtcher ZIP update helper' /usr/local/bin/update-balenaetcher 2>/dev/null; then
    sudo rm -f /usr/local/bin/update-balenaetcher
fi
Confirm the ZIP-owned files are gone:
if [ ! -e /opt/balenaEtcher ] && [ ! -e /usr/local/bin/balena-etcher ]; then
    echo "ZIP installation removed."
fi
ZIP installation removed.
Remove the DEB Package
If you installed the Debian 13 or Debian 12 .deb package, remove it with APT and delete the DEB update helper created earlier when its marker is present:
sudo apt remove balena-etcher -y
if grep -q 'Managed balenaEtcher DEB update helper' /usr/local/bin/update-balenaetcher-deb 2>/dev/null; then
    sudo rm -f /usr/local/bin/update-balenaetcher-deb
fi
Verify the package is no longer installed:
dpkg -l balena-etcher | grep '^ii' || echo "balena-etcher not installed"balena-etcher not installed
If APT reports unused dependencies after removal, review the list before confirming the cleanup:
sudo apt autoremoveRemove balenaEtcher User Data
Check whether balenaEtcher created user configuration or cache directories for your account:
find "$HOME" -maxdepth 3 -type d \( -path "$HOME/.config/balenaEtcher" -o -path "$HOME/.cache/balenaEtcher" \) -printThis cleanup permanently deletes balenaEtcher settings and cache data for your user account. Skip it if you want to keep preferences for a future reinstall.
rm -rf "$HOME/.config/balenaEtcher" "$HOME/.cache/balenaEtcher"Conclusion
balenaEtcher is ready on Debian through the ZIP method across Debian 13, 12, and 11, or through the package-managed .deb method on Debian 13 and 12. Keep checksum verification in the update routine so future downloads stay trustworthy. If you prefer testing an ISO before writing it to USB, you can also install VirtualBox on Debian.

Formatting tips for your comment
You can use basic HTML to format your comment. Useful tags currently allowed in published comments:
<code>command</code>command<strong>bold</strong><em>italic</em><a href="https://example.com">link</a><blockquote>quote</blockquote>