This guide walks you through installing Chkrootkit on Fedora Linux, a lightweight scanner that detects rootkits, worms, and malicious kernel modules hiding on your system. You will have Chkrootkit installed and configured for on-demand scans, automated daily checks via cron, and log-based reporting. This gives you a practical layer of defense against stealthy compromises.
You can install Chkrootkit from the Fedora default repository (recommended for most users) or compile the latest release from source when you need the newest detection signatures. Both methods are covered below.
Choose Your Chkrootkit Installation Method
Chkrootkit offers two installation paths on Fedora: the distribution package provides stability and automatic updates, while source compilation gives you access to the newest rootkit detection signatures immediately after upstream releases.
| Method | Channel | Stability | Best For |
|---|---|---|---|
| Distribution package | Fedora AppStream | Stable, distro-tested | Most users who want automatic updates and minimal maintenance |
| Source archive | Official FTP site | Latest signatures | Security researchers or users needing cutting-edge detection rules |
The distribution package suits most scenarios. Fedora maintains it alongside system updates and integrates cleanly with DNF. Compile from source only when you need detection signatures released within the past few weeks or when troubleshooting a suspected compromise requires the absolute latest scanning logic.
Method 1: Install Chkrootkit with DNF
Update Package Lists Before Chkrootkit Installation
Before initiating the installation of Chkrootkit on Fedora Linux, it’s crucial to update the system’s package lists. This action ensures your system knows all available packages and their latest versions.
To update your Fedora system, execute the following command in the terminal:
sudo dnf upgrade --refreshThis command updates the package database and upgrades installed packages to their most recent versions. Consequently, this step is vital for maintaining system integrity and security.
Install Chkrootkit with DNF
After updating the system, you can install Chkrootkit using Fedora’s package manager, DNF. Specifically, DNF is a robust and efficient tool for software management in Fedora that simplifies the installation process.
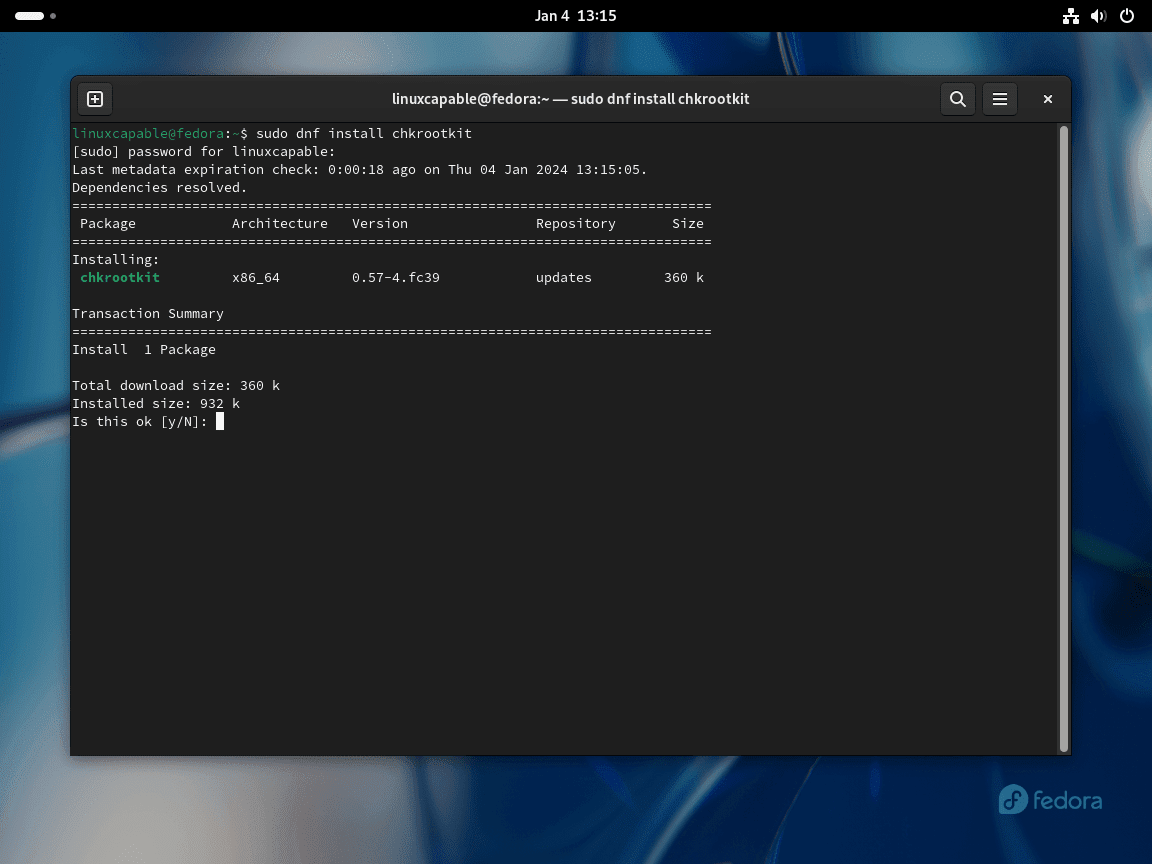
Next, run this command to install Chkrootkit:
sudo dnf install chkrootkit
Verify Chkrootkit Installation
Verify that Chkrootkit has been properly installed on your Fedora system. This confirms the software is operational and ready for use.
To verify Chkrootkit’s installation, execute its version check command:
chkrootkit -VExpected output:
chkrootkit version 0.58b
A version string confirms successful installation. The Fedora repository version may lag slightly behind upstream releases for stability, which is normal and recommended for most users.
Method 2: Install Chkrootkit via Source Archive
Download Chkrootkit Source Code
First, begin by downloading the Chkrootkit source code directly from the official site. This step ensures access to the latest version. Then, open a terminal and navigate to the desired download directory.
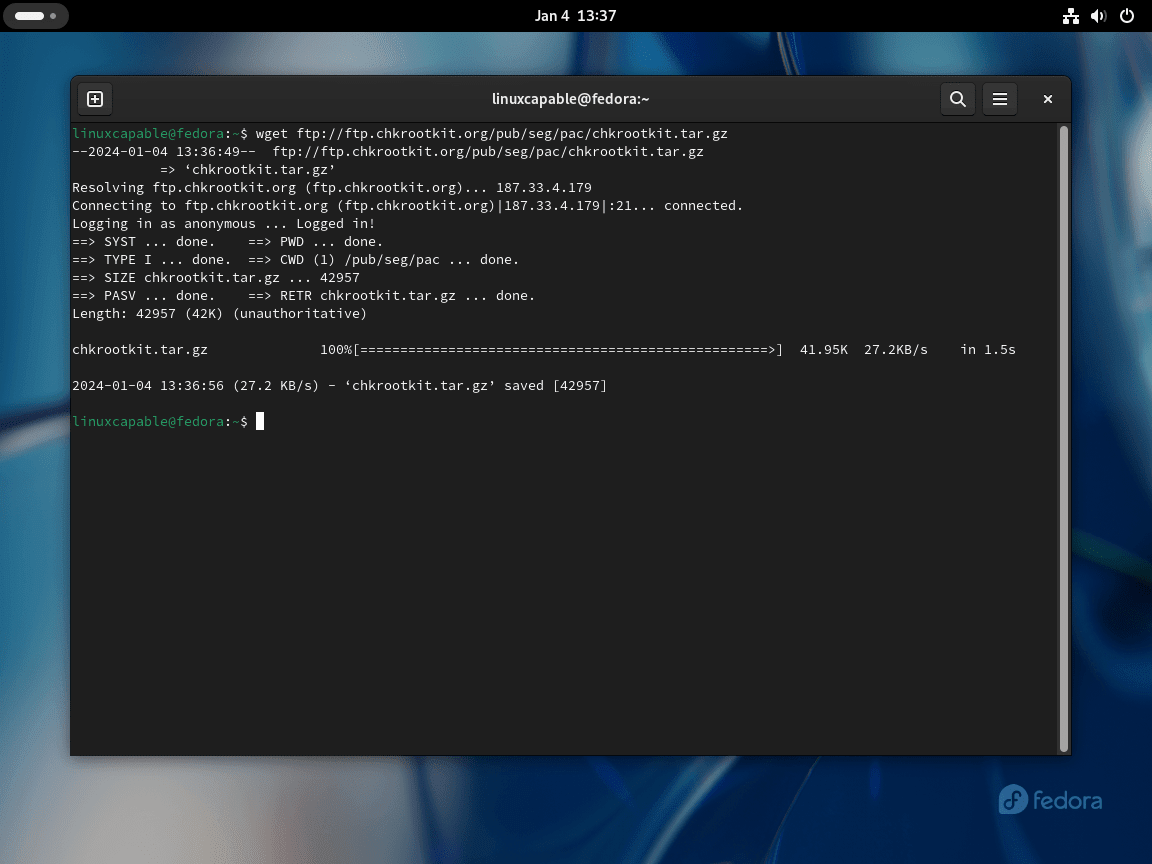
Execute the following command to start the download:
wget ftp://chkrootkit.org/pub/seg/pac/chkrootkit.tar.gzThe version number
0.58bused throughout this guide is an example current at the time of writing. Check the official Chkrootkit website for the latest release and substitute accordingly in all commands below.
Subsequently, this command retrieves the Chkrootkit source code archive to your specified directory.

Extract Source Archive
Extract the downloaded source code to access the files needed for compilation:
tar -xvzf chkrootkit.tar.gzCompile and Install Chkrootkit
Install the build tools required for compilation:
sudo dnf install gcc make glibc-static
sudo dnf groupinstall "Development Tools"
Afterwards, list the extracted directory to find the version number:
ls -d chkrootkit-*/Expected output:
chkrootkit-0.58b/
Then, navigate into the directory and compile:
cd chkrootkit-0.58b
make sense
Replace 0.58b with your extracted directory name if different. In turn, this compiles the Chkrootkit source code.
Verify Source Installation
Confirm Chkrootkit compiled successfully by checking its version:
./chkrootkit -VExpected output:
chkrootkit version 0.58b
Setting Up Chkrootkit for Global Accessibility
At this point, organize Chkrootkit on your Fedora system for global use, adhering to Linux file system structures.
Positioning Chkrootkit in a Standard Directory
Move the Chkrootkit directory to a standardized location for better organization and accessibility. Typically, software like this resides in /usr/local/bin. To begin, move Chkrootkit to /usr/local/share:
Ensure you’re in the parent directory of Chkrootkit. Execute this command to move the directory:
cd ..
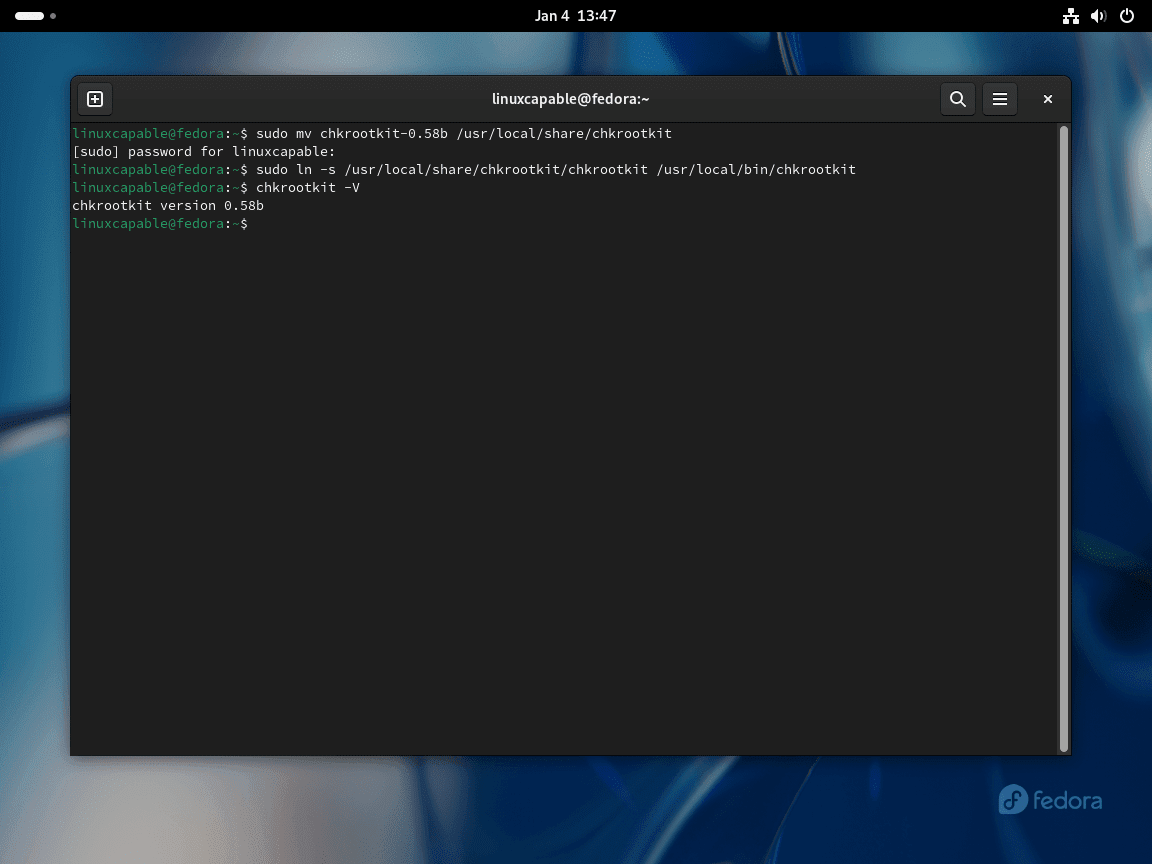
sudo mv chkrootkit-0.58b /usr/local/share/chkrootkit
As a result, this command moves Chkrootkit to /usr/local/share, a common location for shared data.
Create a Symbolic Link
Next, create a symbolic link in /usr/local/bin for easy Chkrootkit access. This link acts as a shortcut, thereby allowing you to run Chkrootkit from any location in the terminal.
Execute the following to create the symbolic link:
sudo ln -s /usr/local/share/chkrootkit/chkrootkit /usr/local/bin/chkrootkitVerify Global Accessibility
Test Chkrootkit’s global accessibility. Run the version check command:
chkrootkit -VExpected output:
chkrootkit version 0.58b
Once again, a version string confirms the symlink works and Chkrootkit is globally accessible.

Basic Commands with Chkrootkit
Run a Scan for Rootkits with Chkrootkit
After installing Chkrootkit on your Fedora system, you can initiate a rootkit scan. Simply open your terminal and enter the following command:
sudo chkrootkitThis command triggers a detailed scan, thereby identifying any potential rootkits on your system.
Alternatively, for a more streamlined output highlighting only possible threats, opt for the quiet mode:
sudo chkrootkit -qConfigure Automatic Scanning with Chkrootkit
Create a Scan Script
First, create a script that runs Chkrootkit and logs the output. Use nano or your preferred editor:
sudo nano /usr/local/bin/chkrootkit_scan.shThen, add the following content:
#!/bin/bash
LOG="/var/log/chkrootkit.log"
echo "===== Chkrootkit Scan: $(date) =====" >> "$LOG"
/usr/local/bin/chkrootkit >> "$LOG" 2>&1
Afterward, save your changes (CTRL+O, then Enter) and exit (CTRL+X).
Make the Script Executable
sudo chmod +x /usr/local/bin/chkrootkit_scan.shVerify the script is executable:
ls -l /usr/local/bin/chkrootkit_scan.shExpected output showing executable permissions:
-rwxr-xr-x 1 root root 123 Nov 28 10:00 /usr/local/bin/chkrootkit_scan.sh
Schedule Daily Scans with Cron
Cron jobs are used to schedule tasks at regular intervals. Therefore, use the crontab command to edit the cron jobs:
sudo crontab -eSubsequently, add the following line to schedule the script to run daily (you can adjust the time as needed):
0 2 * * * /usr/local/bin/chkrootkit_scan.shThe five time fields are: minute (0), hour (2), day of month (*), month (*), day of week (*). In effect, this schedules the scan to run every day at 2:00 AM. Adjust the first two values to change the time. Additionally, the output appends to /var/log/chkrootkit.log with timestamps.
Verify the Cron Service
sudo systemctl status crond.serviceExpected output when running:
● crond.service - Command Scheduler
     Loaded: loaded (/usr/lib/systemd/system/crond.service; enabled)
     Active: active (running)
However, if it’s not running, start it with:
sudo systemctl enable crond.service --nowVerify the service started successfully:
sudo systemctl status crond.serviceConfirm it shows active (running).
Test the Script Manually
To ensure that everything is set up correctly, you can run the script manually:
/usr/local/bin/chkrootkit_scan.shAfterwards, check the log file:
cat /var/log/chkrootkit.logSample output showing a clean scan:
ROOTDIR is `/'
Checking `amd'... not found
Checking `basename'... not infected
Checking `biff'... not found
Checking `chfn'... not infected
Checking `chsh'... not infected
Checking `cron'... not infected
In this output, lines showing “not infected” or “not found” indicate a clean system. Conversely, any line showing “INFECTED” requires immediate investigation.
Explore Chkrootkit Commands and Documentation
To familiarize yourself with Chkrootkit’s functionalities, access its Help menu:
chkrootkit -hFurthermore, delve into the manual pages for comprehensive information:
man chkrootkitTroubleshoot Common Chkrootkit Issues
Understanding False Positives
Chkrootkit occasionally flags legitimate system files as suspicious, particularly on modern Linux distributions with security features.
Run a scan and look for warnings:
sudo chkrootkitCommon false positive example:
Searching for suspicious files and dirs, it may take a while...
/usr/lib/.libcrypto.so.1.1.hmac
/usr/lib/.libssl.so.1.1.hmac
These .hmac files are FIPS integrity checksums used by OpenSSL and are legitimate system files. Before taking action on any “INFECTED” warning, research the specific file or process flagged. Cross-reference findings with Debian and Ubuntu Chkrootkit guides for known false positives across distributions.
Cron Job Not Executing
If automated scans are not running, verify the cron service is active and the job is properly configured.
Check cron service status:
sudo systemctl status crond.serviceIf inactive, start and enable it:
sudo systemctl enable crond.service --nowVerify your cron job syntax by listing the root crontab:
sudo crontab -lExpected output showing the scheduled job:
0 2 * * * /usr/local/bin/chkrootkit_scan.sh
Check the log file to confirm scans have run. If the log is empty or missing recent entries, the script path or permissions may be incorrect. Consider pairing Chkrootkit with SSH for remote system monitoring to review scan results from another machine.
Permission Denied Errors
Chkrootkit requires root privileges to scan system directories and processes. If you see permission errors, ensure you are running the scan with sudo.
Incorrect command (will fail):
chkrootkitError output:
chkrootkit: cannot open `/proc/kcore' for reading: Permission denied
Correct command with elevated privileges:
sudo chkrootkitFor automated scans via cron, ensure the crontab is edited for the root user (sudo crontab -e), not your regular user account.
Remove Chkrootkit
If you installed Chkrootkit from the Fedora repository and need to remove it:
sudo dnf remove chkrootkitAlternatively, for source installations, remove the binary and symlink:
sudo rm /usr/local/bin/chkrootkit
sudo rm -rf /usr/local/share/chkrootkit
Additionally, to disable the automated scan cron job, edit the root crontab and remove the Chkrootkit line:
sudo crontab -eFinally, delete the line containing /usr/local/bin/chkrootkit_scan.sh, then optionally remove the script and log:
sudo rm /usr/local/bin/chkrootkit_scan.sh
sudo rm /var/log/chkrootkit.log
Conclusion
You now have Chkrootkit installed on Fedora with either the DNF package or compiled from source. The cron job configuration automates daily scans, logging results to /var/log/chkrootkit.log for review. Run sudo chkrootkit -q periodically for quick checks that surface only potential threats.
For a more comprehensive security posture, pair Chkrootkit with ClamAV for malware scanning, Fail2Ban with Firewalld for intrusion prevention, and secure Apache configurations if running web services. Together, these tools complement rootkit detection by covering different attack vectors.


Formatting tips for your comment
You can use basic HTML to format your comment. Useful tags currently allowed:
<code>command</code>command<strong>bold</strong><em>italic</em><a href="URL">link</a><blockquote>quote</blockquote>