RAW photo work gets awkward fast when every adjustment has to be permanent or scattered across separate files. Darktable gives Ubuntu users a non-destructive darkroom workflow, with a lighttable view for organizing shoots, editing history saved separately from the originals, and color tools built for camera raw files. If you want to install Darktable on Ubuntu for photo development rather than quick image viewing, the package source you choose mainly decides how current the app is and how updates are handled.
Ubuntu 26.04, 24.04, and 22.04 all provide Darktable through the universe repository, but each release freezes a different branch. Flatpak and Snap can be useful when you want a store-managed build, while the official AppImage and source tarball are better treated as advanced paths rather than the normal package-manager choice.
Install Darktable on Ubuntu
Several Darktable install paths work on Ubuntu because the distro package, store packages, and upstream release assets move on different schedules. Use the quick APT path for the default Ubuntu package, or compare the methods first if version freshness or store-managed updates matter more.
Quick Darktable Install Commands for Ubuntu
Use this path when you want the Ubuntu archive package and normal APT updates. Ubuntu 24.04 and 22.04 install older release-frozen branches, so use the method comparison first if you specifically need the current upstream branch.
sudo apt update
sudo apt install darktable
These commands use
sudofor system changes. If your account cannot run administrative commands yet, add the user to sudoers or follow the Ubuntu sudoers workflow before continuing: Add a user to sudoers on Ubuntu.
Choose the Darktable Installation Method on Ubuntu
| Method | Source or Channel | Update Behavior | Best For | Trade-offs |
|---|---|---|---|---|
| APT | Ubuntu package search (universe) | Updates with normal APT upgrades | Most Ubuntu desktop users | Release-frozen on 24.04 and 22.04 |
| Flatpak | Flathub app | Updates with Flatpak | Users who want the current Flathub build | Unverified Flathub listing with broad host filesystem and device permissions |
| Snap | Snap Store latest/stable | Automatic Snap refreshes | Users who prefer background store updates | Unproven publisher account and currently behind upstream 5.4.1 |
| Source build | Official release tarball | Manual rebuilds with update-darktable-source | Advanced users who need a custom local build | Long build, source dependencies, manual cleanup |
For APT installs, Ubuntu currently ships darktable 5.4.1-1 on Ubuntu 26.04, 4.6.1-2ubuntu1 on Ubuntu 24.04, and 3.8.1-2 on Ubuntu 22.04. Choose APT for the cleanest distro-managed install, Flatpak when you want the newest Flathub release, Snap only when automatic background updates matter more than upstream-published packaging, and source only when you are prepared to maintain a local build yourself.
Darktable Download, PPA, and AppImage Notes
The official darktable install page publishes a Linux AppImage and source tarball, and it also links Open Build Service packages for some Ubuntu releases. That OBS list currently includes Ubuntu 22.04 and 24.04 but not Ubuntu 26.04, so OBS does not cover the full Ubuntu scope. These install paths also do not require a Launchpad PPA.
If you specifically want the portable AppImage, download it from the official darktable release page and use the separate guide to set up AppImage support on Ubuntu. The current stable AppImage is published for x86_64, so ARM Ubuntu systems should use APT, Flatpak, Snap, or a source build unless upstream publishes a matching AppImage asset for that architecture.
Update Ubuntu Before Installing Darktable
Refresh APT metadata before using the Ubuntu repository path. Review any pending upgrades before accepting them, especially if kernel or graphics-driver packages are included.
sudo apt update
sudo apt upgrade
Install Darktable with APT
APT installs Darktable from Ubuntu’s universe repository and keeps it tied to normal system updates. If APT cannot find the package, confirm that universe is enabled first; the Ubuntu component guide explains the difference between main, universe, and multiverse: Enable Universe and Multiverse on Ubuntu.
sudo apt install darktableCheck the installed version after APT finishes. The example output reflects the current Ubuntu 26.04 package; Ubuntu 24.04 and 22.04 show their older release-frozen versions.
darktable --versionthis is darktable 5.4.1
Install Darktable with Snap
Ubuntu desktop installs normally include Snap support. The Darktable Snap is published by Sergio Schvezov (sergiusens) under an unproven Snap Store publisher account, and the stable channel can lag behind the newest upstream point release. Use it when background Snap refreshes are more important to you than upstream-published packaging.
sudo snap install darktableVerify the installed Snap package with snap list. Revision numbers can differ by architecture, so focus on the package name, version, and tracking channel.
snap list darktableName Version Rev Tracking Publisher Notes darktable 5.4.0 394 latest/stable sergiusens -
On minimal Ubuntu installs, containers, or systems where Snap was removed,
snapmay be missing. Installsnapdwithsudo apt install snapd, sign out and back in if the command path is not refreshed, then rerun the Snap install command.
Install Darktable with Flatpak
Flatpak is not pre-installed on Ubuntu. If you have not set it up yet, follow the guide to install Flatpak on Ubuntu before continuing.
Add Flathub at system scope if the remote is not already configured. The --if-not-exists flag keeps the command safe to rerun.
sudo flatpak remote-add --if-not-exists flathub https://dl.flathub.org/repo/flathub.flatpakrepoInstall the Darktable Flatpak from Flathub:
sudo flatpak install flathub org.darktable.Darktable -yFor a GUI Flatpak, flatpak info is a safer verification command than launching the app only to check a version flag. Relevant fields should show the app ID, branch, version, origin, and system installation scope.
flatpak info org.darktable.DarktableID: org.darktable.Darktable Version: 5.4.1 Branch: stable Origin: flathub Installation: system
The Flathub listing is not verified, and the current manifest grants broad access such as host filesystem and device permissions. Treat Flatpak here as a Flathub packaging and update choice, not as a strict isolation boundary.
Compile Darktable from Source
Use a source build only when you need a custom local build or an upstream release that you cannot get from APT, Flatpak, Snap, or AppImage. Source installs are not tracked by APT, so you are responsible for rebuilds, dependency changes, and cleanup.
Install Source Build Dependencies
Ubuntu can install most Darktable build dependencies from source package metadata. Create a narrow source metadata file for the Ubuntu universe component, then install the build dependencies, download tools, JSON parser, and XZ extractor.
. /etc/os-release
sudo tee /etc/apt/sources.list.d/ubuntu-universe-source.sources >/dev/null <<EOF
Types: deb-src
URIs: http://archive.ubuntu.com/ubuntu
Suites: ${VERSION_CODENAME}
Components: universe
Signed-By: /usr/share/keyrings/ubuntu-archive-keyring.gpg
EOF
sudo apt update
sudo apt build-dep darktable
sudo apt install curl ca-certificates jq xz-utils
Download and Verify the Darktable Source Tarball
Use a stable source workspace instead of ~/Downloads, then download the official 5.4.1 release tarball with curl. The Darktable release notes publish the checksum used here. If you need a refresher on the download flags, the curl command guide covers common Linux usage.
mkdir -p "$HOME/darktable-source-build"
cd "$HOME/darktable-source-build"
curl -fLO https://github.com/darktable-org/darktable/releases/download/release-5.4.1/darktable-5.4.1.tar.xz
printf 'afdc7c88a338a8cd2fac31c8450d076edbf73e956e4307260c83ebc195f845e4  darktable-5.4.1.tar.xz\n' | sha256sum -c -
darktable-5.4.1.tar.xz: OK
Build and Install Darktable from Source
Extract the release archive and install Darktable under /opt/darktable. That prefix keeps the source build separate from APT-managed files and makes removal predictable later.
tar -xf darktable-5.4.1.tar.xz
cd darktable-5.4.1
./build.sh --prefix /opt/darktable --build-type Release --install --sudo
Create a memorable source-build launcher, then verify the installed binary:
sudo ln -sf /opt/darktable/bin/darktable /usr/local/bin/darktable-source
darktable-source --version
this is darktable 5.4.1
Create the Darktable Source Update Command
Create a reusable update-darktable-source command while the source method is fresh. The helper checks the latest GitHub release, selects the matching darktable-*.tar.xz asset, reads the checksum from the release notes, builds in $HOME/darktable-source-build, backs up the current /opt/darktable tree during installation, and restores that backup if the new build does not verify.
sudo tee /usr/local/bin/update-darktable-source >/dev/null <<'EOF'
#!/usr/bin/env bash
set -euo pipefail

API_URL="https://api.github.com/repos/darktable-org/darktable/releases/latest"
INSTALL_PREFIX="${DARKTABLE_SOURCE_PREFIX:-/opt/darktable}"
BUILD_ROOT="${DARKTABLE_SOURCE_BUILD_DIR:-$HOME/darktable-source-build}"
LAUNCHER="${DARKTABLE_SOURCE_LAUNCHER:-/usr/local/bin/darktable-source}"

if [ "$(id -u)" -eq 0 ]; then
  echo "Run this command as your regular user; it uses sudo only for install steps."
  exit 1
fi

for cmd in awk curl jq sed tr; do
  if ! command -v "$cmd" >/dev/null 2>&1; then
    echo "Error: $cmd is required."
    echo "Run the Darktable source dependency commands, then retry."
    exit 1
  fi
done

current_version="$("$INSTALL_PREFIX/bin/darktable" --version 2>/dev/null | sed -n 's/^this is darktable \([0-9][0-9.]*\).*/\1/p' || true)"
current_version="${current_version:-none}"

release_json="$(curl -fsSL "$API_URL")"
tag="$(printf '%s' "$release_json" | jq -r '.tag_name // empty')"

if [ -z "$tag" ] || [ "${tag#release-}" = "$tag" ]; then
  echo "Error: could not resolve the latest darktable release tag."
  exit 1
fi

latest_version="${tag#release-}"

case "$latest_version" in
  *[!0-9.]*|'')
    echo "Error: unexpected darktable release version: $latest_version"
    exit 1
    ;;
esac

archive="darktable-${latest_version}.tar.xz"
asset_url="$(printf '%s' "$release_json" | jq -r --arg name "$archive" '.assets[]? | select(.name == $name) | .browser_download_url' | sed -n '1p')"
checksum="$(printf '%s' "$release_json" | jq -r '.body // ""' | tr -d '\r' | awk -v file="$archive" 'length($1) == 64 && $1 ~ /^[0-9a-f]+$/ && $2 == file { print $1; exit }')"

if [ -z "$asset_url" ] || [ -z "$checksum" ]; then
  echo "Error: could not find the source tarball URL or checksum for $archive."
  exit 1
fi

echo "Current version: $current_version"
echo "Latest version:  $latest_version"

if [ "$current_version" = "$latest_version" ]; then
  echo "Already up to date."
  exit 0
fi

for cmd in cmake make nproc sha256sum sudo tar xz; do
  if ! command -v "$cmd" >/dev/null 2>&1; then
    echo "Error: $cmd is required for building Darktable."
    echo "Run the Darktable source dependency commands, then retry."
    exit 1
  fi
done

sudo true

mkdir -p "$BUILD_ROOT"
cd "$BUILD_ROOT"

echo "Downloading $archive..."
rm -rf "darktable-${latest_version}" "$archive"
curl -fL -o "$archive" "$asset_url"
printf '%s  %s\n' "$checksum" "$archive" | sha256sum -c -

echo "Extracting source..."
tar -xf "$archive"
source_dir="$BUILD_ROOT/darktable-${latest_version}"

if [ ! -d "$source_dir" ]; then
  echo "Error: expected source directory not found: $source_dir"
  exit 1
fi

cd "$source_dir"

echo "Configuring and compiling darktable. This can take a while."
./build.sh --prefix "$INSTALL_PREFIX" --build-type Release

backup_dir=""
restore_backup() {
  if [ -n "$backup_dir" ] && [ -d "$backup_dir" ]; then
    sudo rm -rf "$INSTALL_PREFIX"
    sudo mv "$backup_dir" "$INSTALL_PREFIX"
  fi
}

if [ -d "$INSTALL_PREFIX" ]; then
  backup_dir="${INSTALL_PREFIX}.backup.$(date +%Y%m%d-%H%M%S)"
  echo "Backing up current install to $backup_dir..."
  sudo rm -rf "$backup_dir"
  sudo mv "$INSTALL_PREFIX" "$backup_dir"
fi

echo "Installing darktable to $INSTALL_PREFIX..."
if ! sudo cmake --build "$source_dir/build" --target install -- -j"$(nproc)"; then
  echo "Install failed; restoring previous build if available."
  restore_backup
  exit 1
fi

installed_version="$("$INSTALL_PREFIX/bin/darktable" --version 2>/dev/null | sed -n 's/^this is darktable \([0-9][0-9.]*\).*/\1/p' || true)"

if [ "$installed_version" != "$latest_version" ]; then
  echo "Verification failed; restoring previous build if available."
  restore_backup
  exit 1
fi

if ! sudo ln -sf "$INSTALL_PREFIX/bin/darktable" "$LAUNCHER"; then
  echo "Launcher update failed; restoring previous build if available."
  restore_backup
  exit 1
fi

if [ -n "$backup_dir" ]; then
  sudo rm -rf "$backup_dir"
fi

echo "Updated to darktable $installed_version."
echo "Launch command: darktable-source"
EOF
Make the helper executable, confirm it is discoverable in PATH, and run it once. Because you just installed the same release manually, the first run should use the no-op path.
sudo chmod +x /usr/local/bin/update-darktable-source
command -v update-darktable-source
update-darktable-source
/usr/local/bin/update-darktable-source Current version: 5.4.1 Latest version: 5.4.1 Already up to date.
When the helper installs or updates a source build, expect progress lines like these before the normal compiler output:
Current version: none
Latest version:  5.4.1
Downloading darktable-5.4.1.tar.xz...
darktable-5.4.1.tar.xz: OK
Extracting source...
Configuring and compiling darktable. This can take a while.
Installing darktable to /opt/darktable...
Updated to darktable 5.4.1.
Launch command: darktable-source
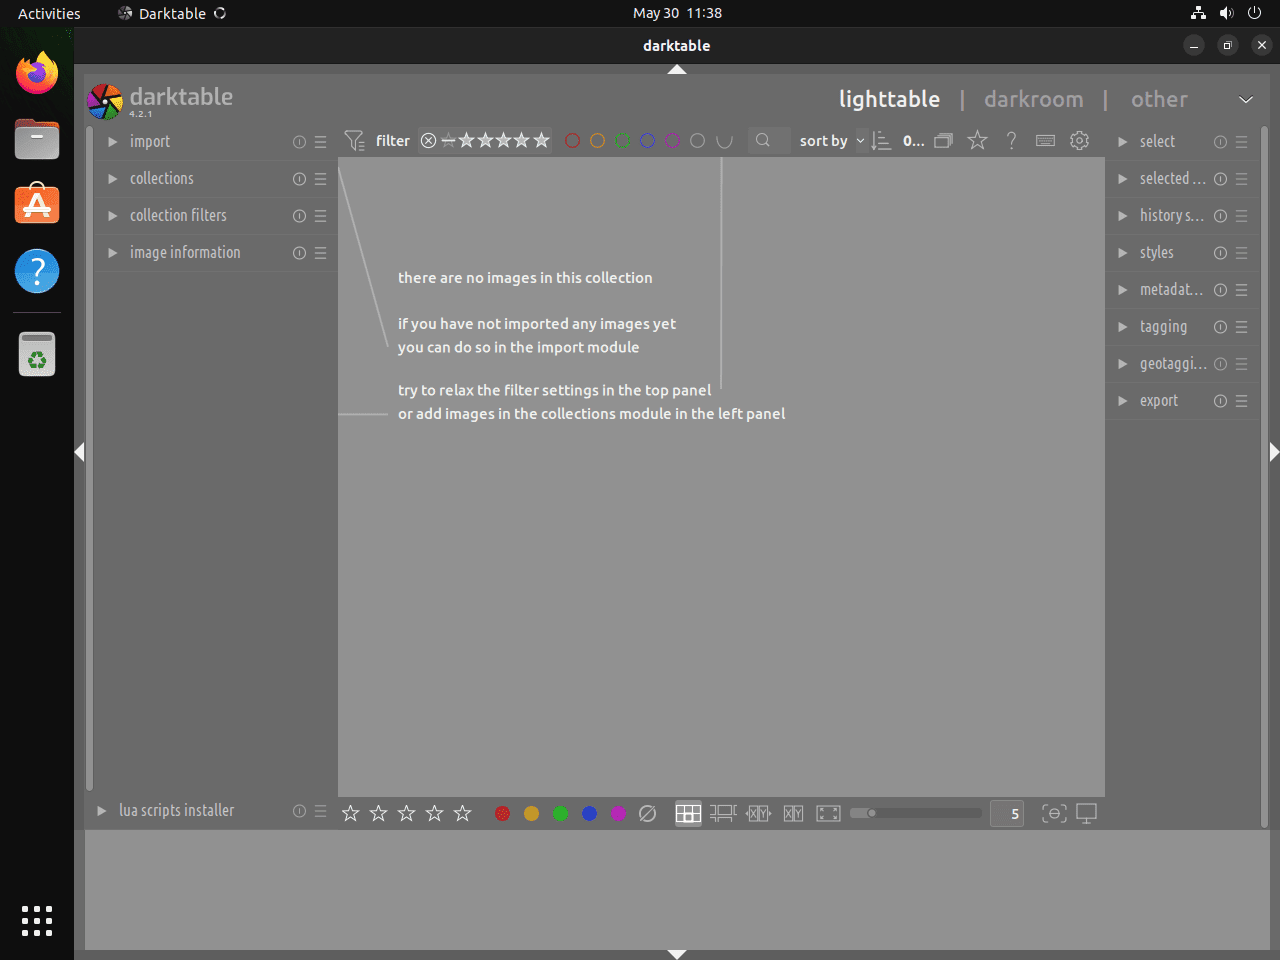
Launch Darktable on Ubuntu
Darktable can start from the terminal or from the desktop application menu. Use the launch command that matches the install method.
Launch Darktable from the Terminal
APT installs expose the standard darktable launcher when the desktop package is installed:
darktableFor Snap installs, snap run avoids ambiguity if another Darktable package is also installed:
snap run darktableFor Flatpak installs, use the Flatpak app ID:
flatpak run org.darktable.DarktableFor the source build installed under /opt/darktable, use the launcher created during the source method:
darktable-sourceLaunch Darktable from the Application Menu
The desktop launcher normally appears as Darktable after APT, Snap, or Flatpak installation. If it does not appear immediately, sign out and back in so the desktop refreshes application entries. Source builds installed under /opt/darktable are more reliable from the terminal launcher unless you add a desktop entry for that prefix.
- Open the Ubuntu application overview.
- Search for Darktable.
- Open the launcher and import a test image or photo folder.
Update or Remove Darktable on Ubuntu
Use the same package family for updates and removal that you used for installation. Before major branch changes, make sure important edits have XMP sidecar files if your workflow relies on them. For APT and source builds, back up the native configuration directory before switching branches; Flatpak and Snap use different app-data paths covered in the removal and reset notes.
if [ -d ~/.config/darktable ]; then
  cp -a ~/.config/darktable ~/.config/darktable.backup.$(date +%Y%m%d-%H%M%S)
fi
Update Darktable by Install Method
Update APT Darktable Packages
sudo apt update
sudo apt install --only-upgrade darktable
Update Snap Darktable Packages
sudo snap refresh darktableUpdate Flatpak Darktable Packages
sudo flatpak update org.darktable.DarktableUpdate Source-Built Darktable
Source builds do not receive automatic package-manager updates. Run the reusable helper after checking Darktable release notes and backing up important edits or configuration. It can run from any terminal directory.
update-darktable-sourceCurrent version: 5.4.1 Latest version: 5.4.1 Already up to date.
Do not schedule this helper with cron or another unattended runner. Darktable branch changes can affect the library and configuration format, so run source updates manually after reviewing upstream notes.
Remove Darktable by Install Method
Remove APT Darktable Packages
APT may offer to remove dependencies that are no longer required. Review the package list before confirming autoremove on long-running systems, because it can include packages unrelated to Darktable.
sudo apt remove darktable
sudo apt autoremove
Remove Snap Darktable Packages
The --purge option removes the Snap without saving snapd’s automatic recovery snapshot. Back up any user data under ~/snap/darktable first if you need to keep it.
sudo snap remove --purge darktable
snap list darktable 2>/dev/null || echo "darktable not installed"
darktable not installed
Remove Flatpak Darktable Packages
The --delete-data flag removes Darktable’s Flatpak app data under ~/.var/app/org.darktable.Darktable/. Export or back up any presets and settings you want to keep before using it.
sudo flatpak uninstall --delete-data org.darktable.Darktable
flatpak list --app --columns=application | grep -Fx org.darktable.Darktable || echo "NOT_INSTALLED"
NOT_INSTALLED
If Flatpak offers to remove unused runtimes afterward, review the list before confirming so you do not remove runtimes still needed by other Flatpak apps.
Remove Source-Built Darktable
If you used the /opt/darktable prefix, the darktable-source launcher, the update-darktable-source helper, and the source workspace from this guide, remove them together. Review the commands before running them if you changed the prefix or workspace.
sudo rm -rf /opt/darktable
sudo rm -f /usr/local/bin/darktable-source /usr/local/bin/update-darktable-source
rm -rf "$HOME/darktable-source-build"
hash -r
command -v update-darktable-source || echo "update-darktable-source removed"
command -v darktable-source || echo "darktable-source removed"
update-darktable-source removed darktable-source removed
If you created the source metadata file only for this build, remove it and refresh APT afterward:
sudo rm -f /etc/apt/sources.list.d/ubuntu-universe-source.sources
sudo apt update
Troubleshoot Darktable on Ubuntu
APT Cannot Locate the Darktable Package
Darktable is in Ubuntu’s universe component. If sudo apt install darktable returns Unable to locate package darktable, enable universe, refresh package metadata, and try again.
sudo add-apt-repository universe
sudo apt update
sudo apt install darktable
Darktable Crashes on Startup
Startup crashes can come from OpenCL driver problems. Start Darktable with OpenCL disabled for the install method you used, then update or change GPU drivers if the app opens normally without OpenCL.
darktable --disable-opencl
snap run darktable --disable-opencl
flatpak run org.darktable.Darktable --disable-opencl
darktable-source --disable-opencl
Use only the matching line. Inside Darktable, the OpenCL setting lives under preferences for processing and CPU/GPU behavior, though exact labels can change between branches.
Colors Look Wrong in Darktable
Incorrect display color usually points to missing or mismatched color profiles. Install colord on APT or source-built systems, then check the Color Management preferences inside Darktable.
sudo apt install colordFlatpak builds already request access to the system color manager, so troubleshoot the active display profile before adding Flatpak overrides.
Reset Darktable Configuration
For APT installs and source builds, move the native configuration directory aside and launch Darktable again. This keeps a backup you can inspect later.
if [ -d ~/.config/darktable ]; then
  mv ~/.config/darktable ~/.config/darktable.backup.$(date +%Y%m%d-%H%M%S)
fi
darktable
For a source build, replace the final launch command with darktable-source.
For Flatpak installs, the app-specific configuration path is different:
if [ -d ~/.var/app/org.darktable.Darktable/config/darktable ]; then
  mv ~/.var/app/org.darktable.Darktable/config/darktable ~/.var/app/org.darktable.Darktable/config/darktable.backup.$(date +%Y%m%d-%H%M%S)
fi
flatpak run org.darktable.Darktable
Snap installs store user data under ~/snap/darktable/. Inspect that directory before deleting or moving files, especially if you imported presets or changed export settings.
Conclusion
Darktable is ready on Ubuntu from the package source that fits your update preference: APT for the distro-managed path, Flatpak for the current Flathub build, Snap for background store refreshes, or source when you need a custom local build. The official darktable resources are useful for module-specific editing workflows, while GIMP on Ubuntu and digiKam on Ubuntu cover adjacent image-editing and library-management needs.

Formatting tips for your comment
You can use basic HTML to format your comment. Useful tags currently allowed in published comments:
<code>command</code>command<strong>bold</strong><em>italic</em><blockquote>quote</blockquote>