Google Chrome is not in Linux Mint’s default repositories because it is proprietary software, so the first decision is the package source. To install Google Chrome on Linux Mint from the terminal, use Google’s official APT repository for the 64-bit amd64 package and normal APT updates. Use Flathub only when you specifically want Flatpak packaging and accept its unverified wrapper, broad browser permissions, and possible lag behind Google’s APT package.
Choose Chrome when you need DevTools, Google account sync, Chrome Web Store compatibility, Widevine playback, and proprietary media codecs that Chromium does not ship. If you want a Chrome-compatible browser without Google’s proprietary package, see the guide to install Chromium Browser on Linux Mint.
Install Google Chrome on Linux Mint
Google distributes Chrome through a codename-neutral APT repository that works on Linux Mint 22.x and 21.x without Mint-to-Ubuntu codename mapping. The same commands apply to Cinnamon, MATE, and Xfce editions because Chrome does not depend on edition-specific packages.
| Method | Source or Channel | Update Behavior | Best For | Trade-offs |
|---|---|---|---|---|
| Google APT Repository (Recommended) | Google repository; Stable, Beta, Dev, and Canary on amd64 | APT-managed updates | Most users and official channel testing | Adds a Google source file and keyring |
| Flatpak | Flathub apps com.google.Chrome and com.google.ChromeDev on x86_64 | Flatpak-managed updates | Flatpak-first desktop workflows | Unverified wrapper with broad Flatpak permissions |
Use the Google APT repository unless Flatpak packaging is the main reason you want this install. APT consumes Google’s repository directly and is the better choice when version freshness, desktop integration, or Beta/Canary channel access matters. Flathub’s Chrome wrappers are not Google-verified packages and request broad browser permissions, so treat them as Flatpak packaging choices rather than Google’s official Linux packages.
Understand Google Chrome Build Channels
Google’s APT repository publishes four parallel Chrome channels for amd64. Flathub provides Stable and Dev app IDs, but it does not provide a separate Beta or Canary Flatpak app.
| Build | Package or App ID | Stability | Best For |
|---|---|---|---|
| Stable | google-chrome-stable or com.google.Chrome | Best tested | Daily browsing, work, and general use |
| Beta | google-chrome-beta | Minor issues possible | Previewing upcoming features before public release |
| Unstable (Dev) | google-chrome-unstable or com.google.ChromeDev | Frequent changes | Web developers testing newer web platform behavior |
| Canary | google-chrome-canary | Highest churn | Testing bleeding-edge features away from primary browsing |
For most users, Stable is the right choice. If you develop websites or test browser changes, install Beta, Dev, or Canary beside Stable rather than replacing your daily browser; each APT channel has its own command, desktop entry, and profile directory.
Install Google Chrome with APT Repository on Linux Mint
This method imports Google’s signing key, writes a DEB822 source file, installs the Chrome package, and then lets APT handle future updates. Google’s Chrome download page also offers a 64-bit .deb for Debian and Ubuntu-based systems, but the repository method reaches the same package family without a repeat manual download. If you want another Chromium-based browser with Microsoft 365 integration, see the guide to install Microsoft Edge on Linux Mint.
Prepare Linux Mint for Google Chrome
Refresh APT metadata, then install the small tools needed to download and convert Google’s signing key:
sudo apt update
sudo apt install curl ca-certificates gnupg -y
The curl command in Linux downloads the key over HTTPS, while gnupg provides the key conversion tool used in the next step.
These commands use
sudofor tasks that need root privileges. If your account is not in the sudoers file yet, see how to create and add users to sudoers on Linux Mint.
Check Google Chrome Architecture Support
The Chrome packages covered here target 64-bit x86 systems: amd64 in APT and x86_64 in Flatpak. Confirm the architecture before adding the source:
dpkg --print-architectureamd64
Continue only when the output is amd64. On other Linux Mint architectures, use Chromium from Mint’s repositories instead of writing a Google Chrome source that cannot provide packages for that system.
Import Google Chrome GPG Key
Download Google’s package signing key and convert it to the binary format APT expects:
sudo install -d -m 0755 /usr/share/keyrings
curl -fsSL https://dl.google.com/linux/linux_signing_key.pub | sudo gpg --dearmor --yes -o /usr/share/keyrings/google-chrome.gpg
gpg --dearmor converts the ASCII-armored key to the binary format APT expects, and --yes lets you rerun the command without an overwrite prompt. The resulting file in /usr/share/keyrings/ stays valid for future Chrome updates.
Add Google Chrome Repository
Create the repository configuration using the DEB822 .sources format. This block checks the architecture again and refuses to write the source file on unsupported systems:
arch="$(dpkg --print-architecture)"
case "$arch" in
  amd64)
    printf '%s\n' \
      'X-Repolib-Name: Google Chrome' \
      'Types: deb' \
      'URIs: https://dl.google.com/linux/chrome-stable/deb/' \
      'Suites: stable' \
      'Components: main' \
      'Architectures: amd64' \
      'Signed-By: /usr/share/keyrings/google-chrome.gpg' | sudo tee /etc/apt/sources.list.d/google-chrome.sources > /dev/null
    ;;
  *)
    printf 'Google Chrome for Linux Mint is available from this source for amd64 systems only. This system reports %s.\n' "$arch" >&2
    false
    ;;
esac
The case block prevents an unusable source file on unsupported systems. On supported systems, tee writes the DEB822 file as root because a plain > redirection would not inherit sudo. APT ignores X-Repolib-Name, but software-source tools can use it as a readable label.
After adding the repository, refresh the package index to make the new packages available:
sudo apt updateRelevant output includes the Google repository line:
Get:2 https://dl.google.com/linux/chrome-stable/deb stable InRelease
Install Google Chrome
With the repository configured, install your preferred Chrome build. For most users, Stable is the right package:
sudo apt install google-chrome-stable -yAPT should show Chrome as a new package without unrelated removals. If your transaction proposes removing unrelated desktop packages, stop and inspect your package sources before confirming.
If you need another Google channel, install the matching package name:
Beta (preview upcoming features, roughly 4-6 weeks ahead of Stable):
sudo apt install google-chrome-beta -yUnstable (Dev) (frequent development builds for testing new features):
sudo apt install google-chrome-unstable -yCanary (highest-churn builds for isolated testing):
sudo apt install google-chrome-canary -yBeta, Dev, and Canary builds are not recommended for primary browsing. Use them for testing, keep Stable for daily work, and install only the channels you actually need.
Verify Google Chrome Installation
Confirm that the installed browser runs and that APT pulls Chrome from Google’s repository:
google-chrome-stable --versionGoogle Chrome 149.0.7827.53
apt-cache policy google-chrome-stablegoogle-chrome-stable:
Installed: 149.0.7827.53-1
Candidate: 149.0.7827.53-1
Version table:
*** 149.0.7827.53-1 500
500 https://dl.google.com/linux/chrome-stable/deb stable/main amd64 Packages
100 /var/lib/dpkg/status
Your version number can differ after Google publishes a newer build. The important check is that the candidate comes from dl.google.com and the installed package matches the channel you chose.
Install Google Chrome with Flatpak on Linux Mint
Flatpak skips APT repository setup and installs Chrome from Flathub at system scope. On standard Linux Mint desktop installs, Flathub is already configured, so this method is a short path when Flatpak packaging matters more than using Google’s newest APT package:
sudo flatpak install flathub com.google.ChromeThe sudo prefix installs Chrome system-wide so all user accounts on the machine can access it. Review the app, runtime, and permission prompt before confirming; Flatpak pulls the runtime and codec dependencies automatically on first install.
A Flatpak-only install does not place google-chrome-stable on your host PATH, so terminal launches use flatpak run with the application ID instead.
A Dev build is also available on Flathub. This app tracks the development channel; it is not a Canary replacement:
sudo flatpak install flathub com.google.ChromeDevFlatpak Chrome uses broad Flatpak permissions and a shared runtime, so file access, desktop integration, password-store behavior, and update timing can differ from the APT package. Use the APT method when you want Google’s package source and normal host integration.
Verify Google Chrome Flatpak Installation
Check the installed Flatpak metadata:
flatpak info com.google.ChromeRelevant output includes:
Google Chrome - The browser built to be yours
ID: com.google.Chrome
Ref: app/com.google.Chrome/x86_64/stable
Arch: x86_64
Branch: stable
Version: 149.0.7827.53-1
Origin: flathub
Flatpak version numbers can lag Google’s APT repository. For this method, confirm the app ID, x86_64 architecture, and flathub origin.
Launch Google Chrome on Linux Mint
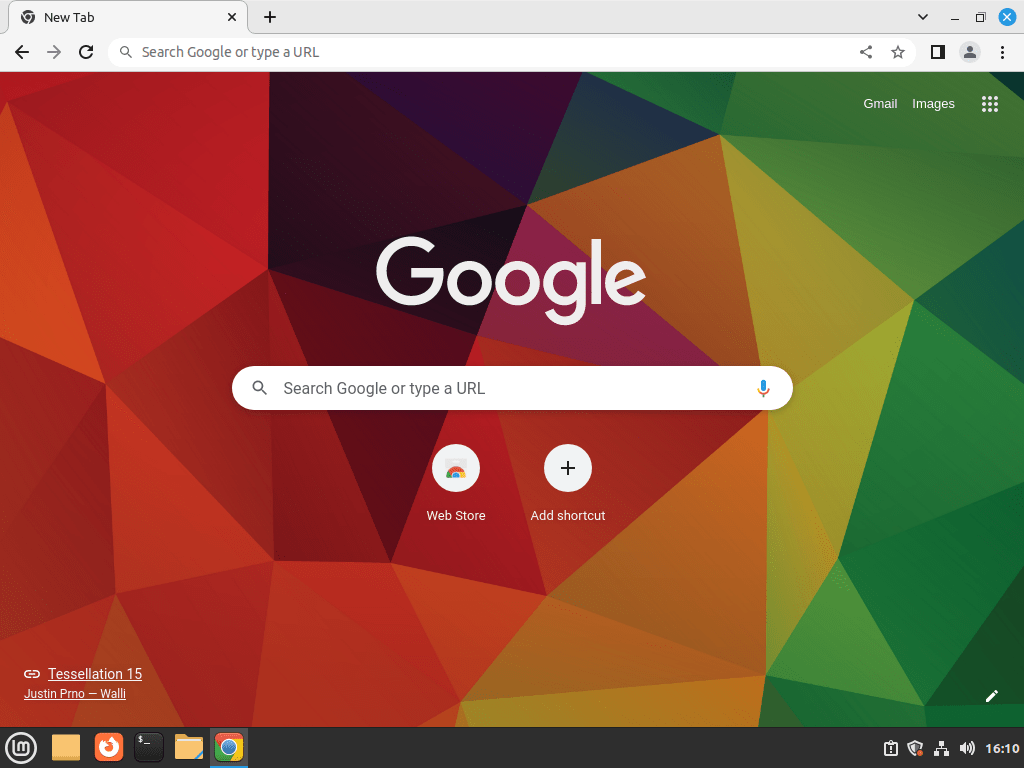
Chrome appears in the applications menu immediately after installation regardless of the method you used.
Launch Google Chrome from Terminal
APT and Flatpak installs use different terminal commands. Run the command that matches the method and channel you installed:
google-chrome-stableAPT Beta, Dev, and Canary builds use their matching package names as launch commands:
google-chrome-beta
google-chrome-unstable
google-chrome-canaryFor the Flathub builds, use the Flatpak application ID instead:
flatpak run com.google.Chrome
flatpak run com.google.ChromeDevLaunch Google Chrome from Applications Menu
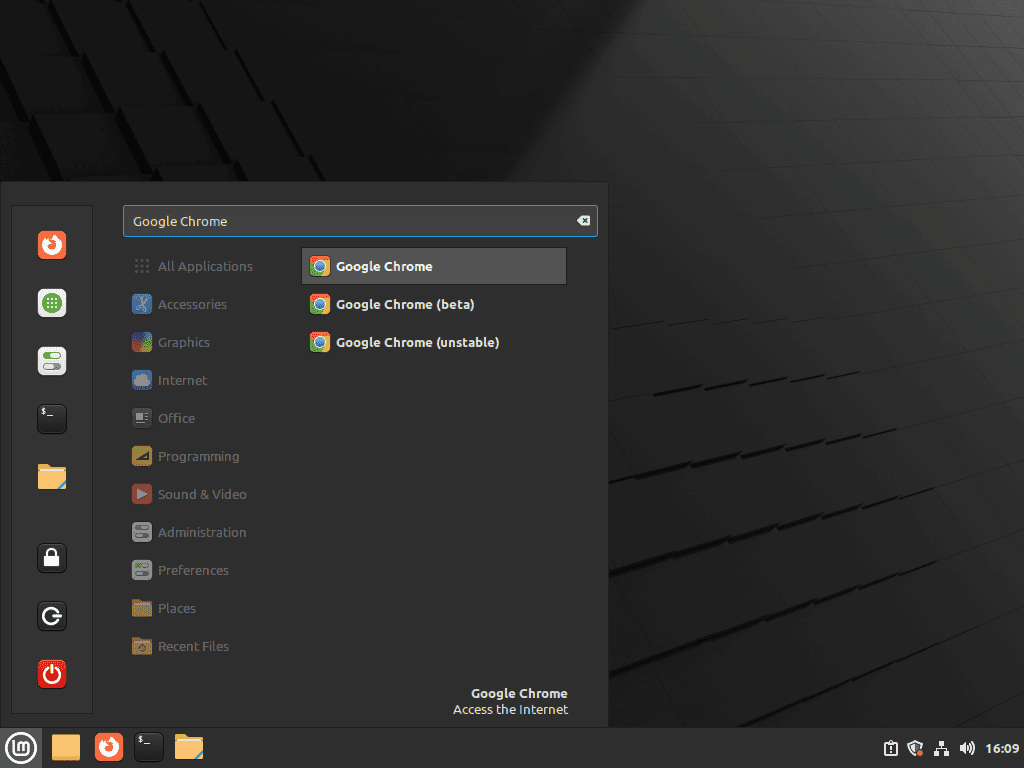
In Linux Mint, Chrome appears under the Internet category in the applications menu:
Menu > Internet > Google Chrome
On first launch, Chrome asks to become the default browser and requests permission to send usage statistics. Decline both if you want to keep Firefox as default and minimize data sent to Google.
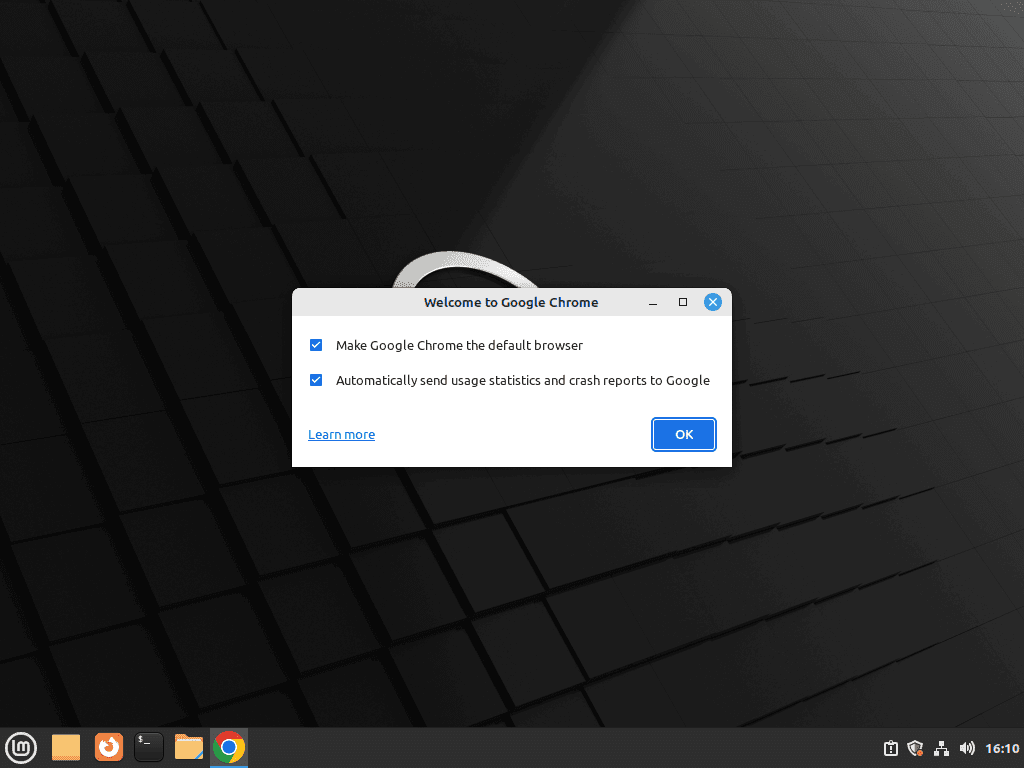
Chrome works fully without a Google account. Signing in unlocks cross-device sync for bookmarks, passwords, and history, but it is entirely optional.
Manage Google Chrome on Linux Mint
Update Google Chrome on Linux Mint
APT-installed Chrome updates through the Google source during normal package maintenance. A full system upgrade picks up any pending Chrome release:
sudo apt update && sudo apt upgradeTo update only Stable Chrome after refreshing package metadata:
sudo apt update
sudo apt install --only-upgrade google-chrome-stableReplace google-chrome-stable with google-chrome-beta, google-chrome-unstable, or google-chrome-canary when you installed a different APT channel.
Flatpak installs update separately from APT. For broader Flatpak maintenance, see how to upgrade Flatpak on Linux Mint:
sudo flatpak update com.google.ChromeIf you installed the Flathub Dev app, update that app ID separately:
sudo flatpak update com.google.ChromeDevUninstall Google Chrome on Linux Mint
If Stable is the only APT Chrome channel installed, remove it and its package-managed configuration with purge:
Do not purge one APT Chrome channel while keeping another channel installed. Google’s package purge removes the shared Chrome source file and keyring, so use
apt removefor single-channel cleanup when another APT Chrome package should keep receiving updates.
sudo apt purge google-chrome-stable
sudo apt autoremoveautoremove lists packages APT considers unused. Review the package list before confirming, because older unused packages unrelated to Chrome can appear on long-used systems.
Confirm that neither the installed package nor a residual configuration record remains:
dpkg-query -W -f='${db:Status-Abbrev} ${binary:Package}\n' google-chrome-stable 2>/dev/null | grep -E '^(ii|rc)' || echo "google-chrome-stable is fully removed"google-chrome-stable is fully removed
Flatpak installs use a separate removal command:
sudo flatpak uninstall com.google.Chrome
sudo flatpak uninstall --unusedThe --unused flag removes runtimes that no other Flatpak application needs. If you installed the Dev app, remove it before cleaning unused runtimes:
sudo flatpak uninstall com.google.ChromeDev
sudo flatpak uninstall --unusedWhen Flatpak says no matching installed app exists, that app ID was not installed for the current system scope.
If you installed every APT channel and want to remove all of them, purge the package names together:
sudo apt purge google-chrome-stable google-chrome-beta google-chrome-unstable google-chrome-canary
sudo apt autoremoveIf you are keeping another APT channel installed, remove only the channel you no longer need without purging the shared Google source state:
sudo apt remove google-chrome-betaRemove Google Chrome Repository on Linux Mint
Google’s package normally removes its package-created source file and keyring during a purge. If you added the repository manually, stopped before installing Chrome, or still see Google Chrome source files after uninstalling every APT channel, remove the current source, known legacy source files, and the Chrome keyring:
sudo rm -f /etc/apt/sources.list.d/google-chrome.sources
sudo rm -f /etc/apt/sources.list.d/google-chrome*.list
sudo rm -f /etc/apt/sources.list.d/extrepo_google_chrome.sources
sudo rm -f /usr/share/keyrings/google-chrome.gpgFinally, refresh your package index to apply the repository changes:
sudo apt updateRemove Google Chrome User Data on Linux Mint (Optional)
After uninstalling Chrome, you can optionally remove your personal data to complete the cleanup.
These commands permanently delete your Google Chrome user data including bookmarks, saved passwords, browsing history, cookies, extensions, and settings. Export any data you want to keep before proceeding. This action cannot be undone.
List matching Chrome profile and cache paths before deleting anything:
for path in ~/.config/google-chrome* ~/.cache/google-chrome* ~/.var/app/com.google.Chrome*; do
if [ -e "$path" ]; then
printf '%s\n' "$path"
fi
doneNo output means no matching Chrome profile or cache directories were found for your account.
APT installs store data in ~/.config/ and ~/.cache/:
rm -rf ~/.config/google-chrome/
rm -rf ~/.cache/google-chrome/Flatpak installs store data in a separate sandbox directory:
rm -rf ~/.var/app/com.google.Chrome/Flatpak Dev installs store data under their own app ID:
rm -rf ~/.var/app/com.google.ChromeDev/If you installed Beta, Dev, or Canary APT packages, they use separate directories that also need removal:
rm -rf ~/.config/google-chrome-beta/
rm -rf ~/.config/google-chrome-unstable/
rm -rf ~/.config/google-chrome-canary/
rm -rf ~/.cache/google-chrome-beta/
rm -rf ~/.cache/google-chrome-unstable/
rm -rf ~/.cache/google-chrome-canary/Troubleshoot Google Chrome Issues on Linux Mint
These checks cover the most common repository-side problems: missing keyrings, duplicate source warnings, conflicting keyring paths, and missing Google repository metadata after cleanup or a partial uninstall.
Fix Google Chrome GPG Key Errors
If the keyring is missing or stale, sudo apt update can stop with a NO_PUBKEY message for Google’s Chrome repository:
The following signatures couldn't be verified because the public key is not available: NO_PUBKEY FD533C07C264648F
Reinstall the Google Linux package signing key, then refresh APT:
sudo install -d -m 0755 /usr/share/keyrings
curl -fsSL https://dl.google.com/linux/linux_signing_key.pub | sudo gpg --dearmor --yes -o /usr/share/keyrings/google-chrome.gpg
sudo apt updateIf the key error remains, check for duplicate Chrome source entries with different Signed-By paths.
Fix Google Chrome Duplicate Source or Signed-By Errors
Older Chrome installs, legacy tutorials, or previous extrepo setups can leave more than one source entry for Google’s Chrome repository. APT may report duplicate targets or stop with a stricter Conflicting values set for option Signed-By error.
E: Conflicting values set for option Signed-By regarding source https://dl.google.com/linux/chrome-stable/deb/ stable: /usr/share/keyrings/old-google.gpg != /usr/share/keyrings/google-chrome.gpg E: The list of sources could not be read.
Inventory Google Chrome source entries before removing anything:
grep -RIn "dl.google.com/linux/chrome" /etc/apt/sources.list /etc/apt/sources.list.d 2>/dev/null || echo "No Google Chrome source entries found"Example output with a legacy .list file and the current .sources file looks like this. Older entries can use the chrome/deb URI while the current DEB822 source uses chrome-stable/deb:
/etc/apt/sources.list.d/google-chrome.list:1:deb [arch=amd64 signed-by=/usr/share/keyrings/old-google.gpg] https://dl.google.com/linux/chrome/deb/ stable main /etc/apt/sources.list.d/google-chrome.sources:2:URIs: https://dl.google.com/linux/chrome-stable/deb/
If you want to keep the DEB822 source at /etc/apt/sources.list.d/google-chrome.sources, remove legacy Chrome source files:
sudo rm -f /etc/apt/sources.list.d/google-chrome*.list
sudo rm -f /etc/apt/sources.list.d/extrepo_google_chrome.sources
sudo apt updateRoutine Chrome updates should leave legacy
.listfiles gone. If APT still reports a Signed-By conflict after this cleanup, rerun the key import and DEB822 source-file commands from the APT setup so the remaining source and keyring agree.
Restore Missing Google Chrome Repository Configuration
If Chrome is installed but no longer receives APT updates, first check whether the source file exists:
ls -l /etc/apt/sources.list.d/google-chrome.sourcesIf the file exists, refresh APT:
sudo apt updateThen check whether APT can still see Google’s package candidate:
apt-cache policy google-chrome-stableIf the output shows a candidate version from dl.google.com, your repository is configured correctly:
google-chrome-stable:
  Installed: 149.0.7827.53-1
  Candidate: 149.0.7827.53-1
  Version table:
 *** 149.0.7827.53-1 500
        500 https://dl.google.com/linux/chrome-stable/deb stable/main amd64 Packages
        100 /var/lib/dpkg/status
If the output shows Candidate: (none) or N: Unable to locate package, recreate the Google keyring and DEB822 source file, then run sudo apt update and repeat the policy check.
Conclusion
Google Chrome is ready on Linux Mint with updates handled by the source you chose: Google’s APT repository for the official desktop package and all four channels, or Flathub for a Flatpak-packaged build. For less Google integration, install Chromium Browser on Linux Mint or install LibreWolf on Linux Mint. If Microsoft 365 integration matters more, install Microsoft Edge on Linux Mint.

I followed the stable extrepo guide for my Mint Cinnamon system; Chrome works alright, but shortly after, I got a warning: “E:Conflicting values set for option Signed-By regarding source http://dl.google.com/linux/chrome/deb/ stable: /var/lib/extrepo/keys/google_chrome.asc != , E:The list of sources could not be read.” Update Manager advises not to update, install or reboot. any idea how I fix this?
Good catch, Hanzo85. That error means APT is seeing more than one Chrome source with different signing-key settings. Check the duplicated Google entries first, then keep only the Chrome source you intend to use. For the DEB822 setup in the refreshed article, keep
/etc/apt/sources.list.d/google-chrome.sourcesand remove the older Chrome source files:This keeps the DEB822
google-chrome.sourcesfile and removes the stale duplicate source that causes the Signed-By conflict. The article now covers this as a legacy-source cleanup case.Thanks for responding. The error seems to have been resolved after inputting those two lines.