
qBittorrent is a free, open-source BitTorrent client with a clean, user-friendly interface and powerful features. It is designed to meet the needs of both casual and power users, providing functionalities such as a built-in search engine, RSS feed support, and advanced download management. Whether you prefer a graphical user interface (GUI) or need a web interface for remote management, qBittorrent has you covered.
To install qBittorrent on Linux Mint 22, 21, or 20, you can use the qBittorrent team PPA, which provides the latest stable and pre-release builds. This guide will demonstrate the commands to install the desktop GUI version and qBittorrent-nox for those who want to use the web interface locally or remotely.
Update Linux Mint before qBittorrent Installation
Before installing qBittorrent, it’s essential to ensure your system is up-to-date. Open the terminal and run the command:
sudo apt update && sudo apt upgradeImport qBittorrent PPA For the Latest Stable or Pre-Release
Install Required Packages for qBittorrent
Once your system is up-to-date, you must install the necessary dependencies for qBittorrent. Run the command:
sudo apt install dirmngr ca-certificates software-properties-common apt-transport-https -yThis command will either install the necessary packages or check if they are already installed.
Import qBittorrent PPA
To install qBittorrent, import the “qBittorrent Team” PPA containing the latest version. Run the following command to import the PPA:
Option 1: Import qBittorrent stable PPA for Linux Mint:
sudo add-apt-repository ppa:qbittorrent-team/qbittorrent-stable -yOption 2: Import qBittorrent unstable PPA for Linux Mint:
sudo add-apt-repository ppa:qbittorrent-team/qbittorrent-unstable -yOption 1: Install qBittorrent Desktop
Finalize qBittorrent Installation
After importing the qBittorrent PPA repository, you must run a quick APT update to reflect the newly added PPA. This will ensure your system recognizes the new repository and can install qBittorrent.
To run the APT update, open the terminal and run the following command:
sudo apt updateThis command will update your system’s package list to include the newly added qBittorrent PPA. Once the APT update is complete, you can proceed with installing qBittorrent using the updated package list using the following command:
sudo apt install qbittorrentLaunching qBittorrent Desktop GUI
To launch the qBittorrent desktop version of stable or unstable, you can use the following command in your terminal session:
qbittorrentIf you prefer to launch qBittorrent using an application icon, you can use the following path:
Taskbar > Internet > qBittorrent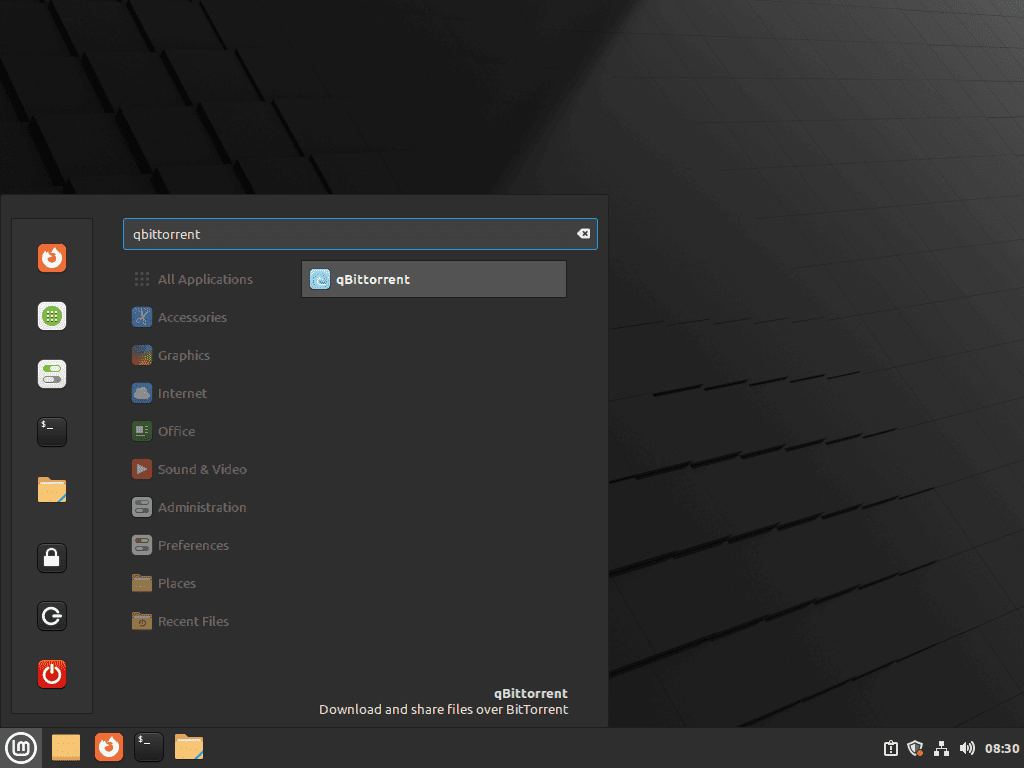
When you first launch qBittorrent, you’ll have a pop-up window containing a legal notice. This notice is a standard disclaimer that many torrent clients display, and it’s essential to read it carefully to understand the risks and responsibilities of torrenting.
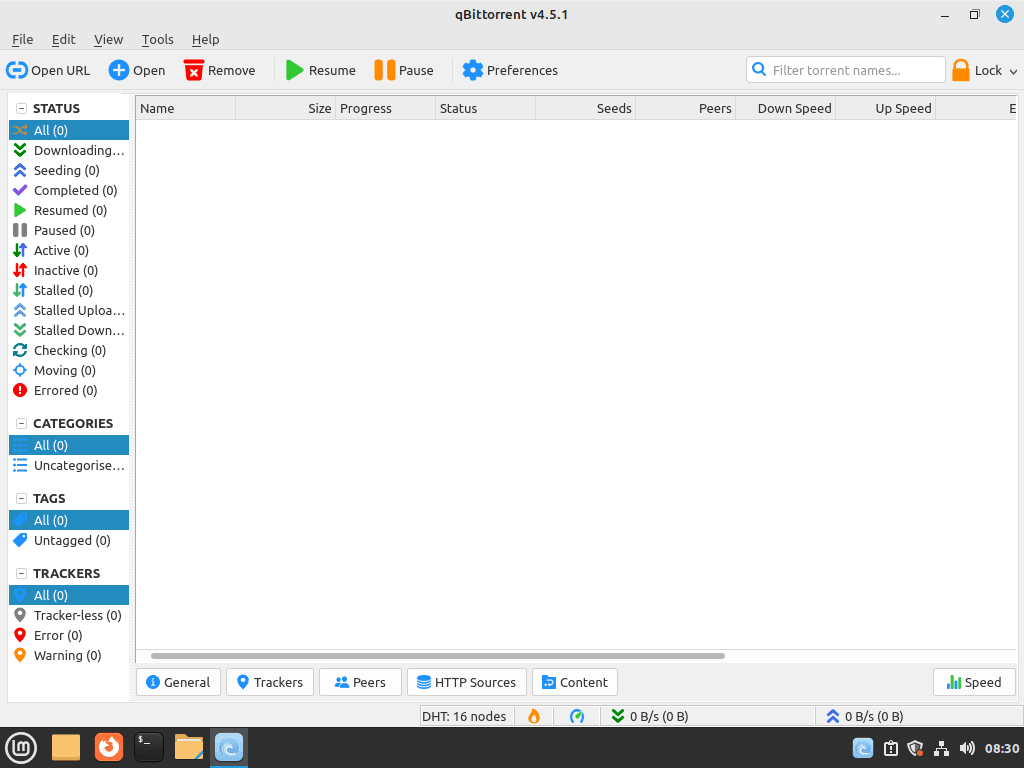
After agreeing to the legal notice, you’ll see the qBittorrent interface. This is where you can manage your torrent downloads and uploads. The interface is designed to be user-friendly and easy to use, even for novice Linux users.
In the qBittorrent window, you’ll see a menu bar at the top with options for adding torrents, managing downloads, and configuring the application settings. You can also see the progress of your current downloads, including the download speed, remaining time, and the number of seeds and peers.
Option 2: Install qBittorrent-nox (Web User Interface)
qBittorrent can be installed on a Linux desktop or a headless server like Ubuntu and efficiently managed using a WebUI interface accessible from your favorite browser. This section will cover installing qBittorrent-nox, the headless version of qBittorrent, designed to run through a web interface accessible on the default localhost location at http://localhost:8080.
Update System Package List
Before installing qBittorrent-nox, updating your system’s package list is essential. This ensures you have the latest updates and dependencies. Execute the following command in the terminal:
sudo apt updateInstall qBittorrent-nox
qBittorrent-nox is the non-graphical version of qBittorrent, designed for headless servers like Ubuntu. It is managed through a WebUI interface. Install it using this command:
sudo apt install qbittorrent-noxqBittorrent-nox differs from the desktop version because it cannot be used interactively on a terminal. A systemd service unit must run in the background and start automatically at boot.
Create a System User and Group for qBittorrent-nox
To manage qBittorrent-nox effectively, create a dedicated user and group. This improves security and management. Use this command:
sudo adduser --system --group qbittorrent-noxAdd User to qBittorrent-nox Group
Add your user account to the qBittorrent-nox group to manage the service. Replace your-username with your actual username:
sudo adduser your-username qbittorrent-noxExample for a specific user:
sudo adduser joshua qbittorrent-nox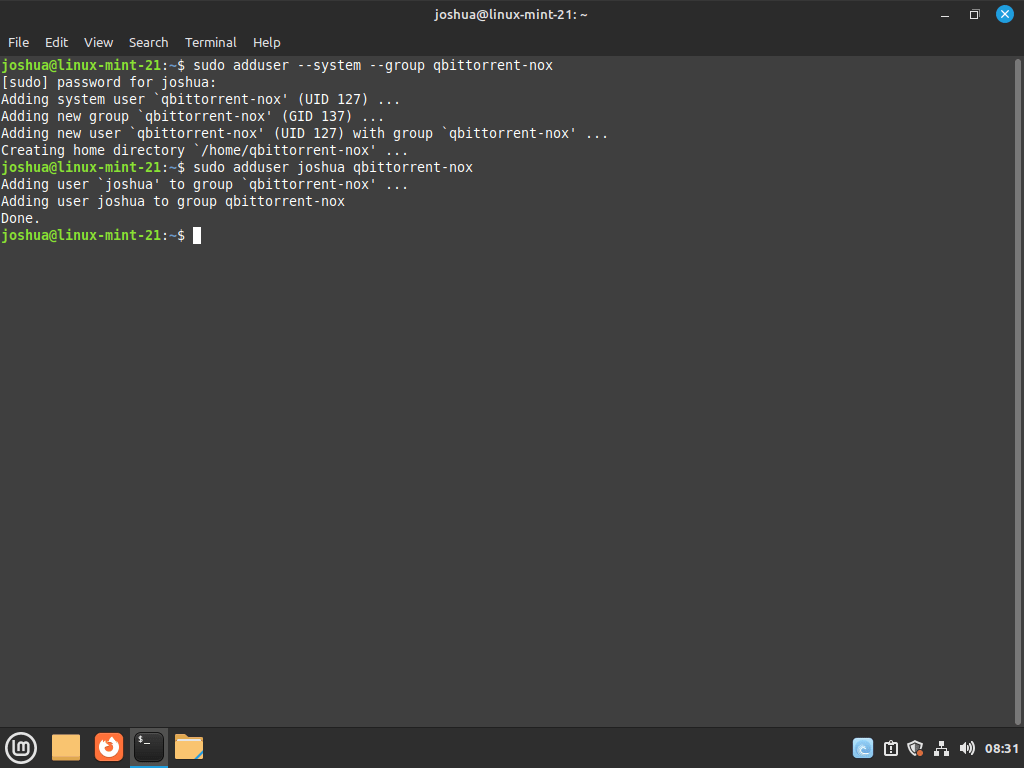
Create Systemd Service File for qBittorrent-nox Service
To run qBittorrent-nox as a service, create a systemd service file. This allows the application to start at boot and run in the background. Use the following command to create and edit the service file:
sudo nano /etc/systemd/system/qbittorrent-nox.serviceCopy and paste these lines into the file:
[Unit]
Description=qBittorrent Command Line Client
After=network.target

[Service]
Type=forking
User=qbittorrent-nox
Group=qbittorrent-nox
UMask=007
ExecStart=/usr/bin/qbittorrent-nox -d --webui-port=8080
Restart=on-failure

[Install]
WantedBy=multi-user.target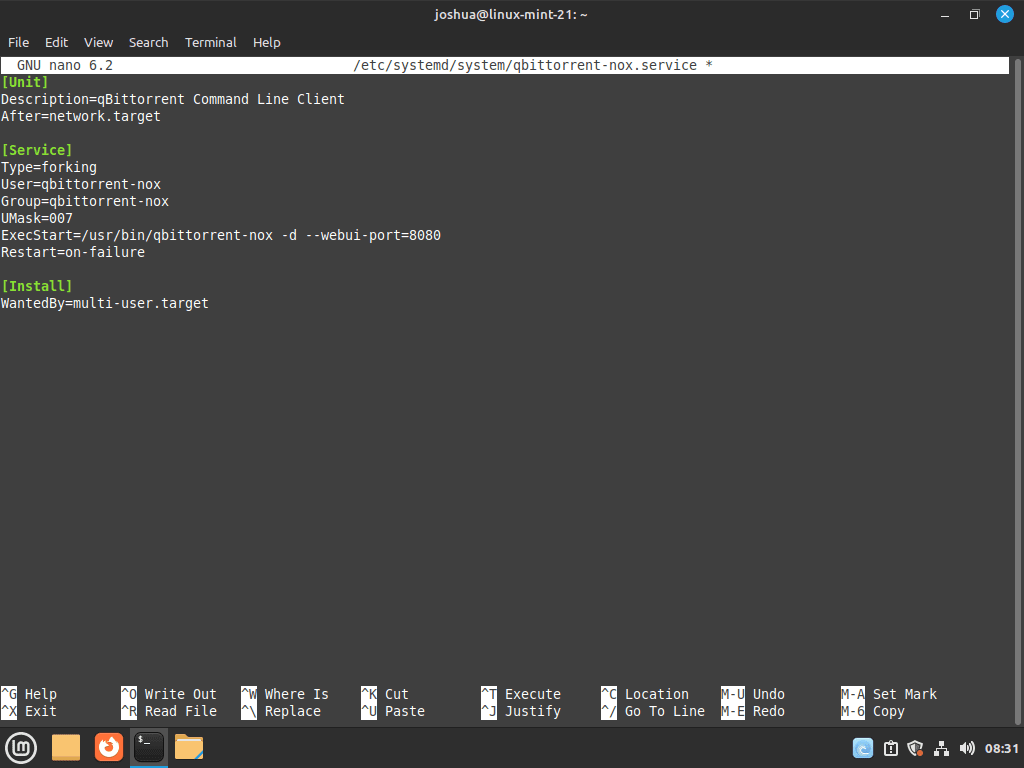
Reload Systemd and Start Service
After saving and closing the file, reload the systemd daemon to apply the changes:
sudo systemctl daemon-reloadStart the qBittorrent-nox service:
sudo systemctl start qbittorrent-noxTo ensure qBittorrent-nox starts on system boot:
sudo systemctl enable qbittorrent-noxVerify Service qBittorrent-nox Status
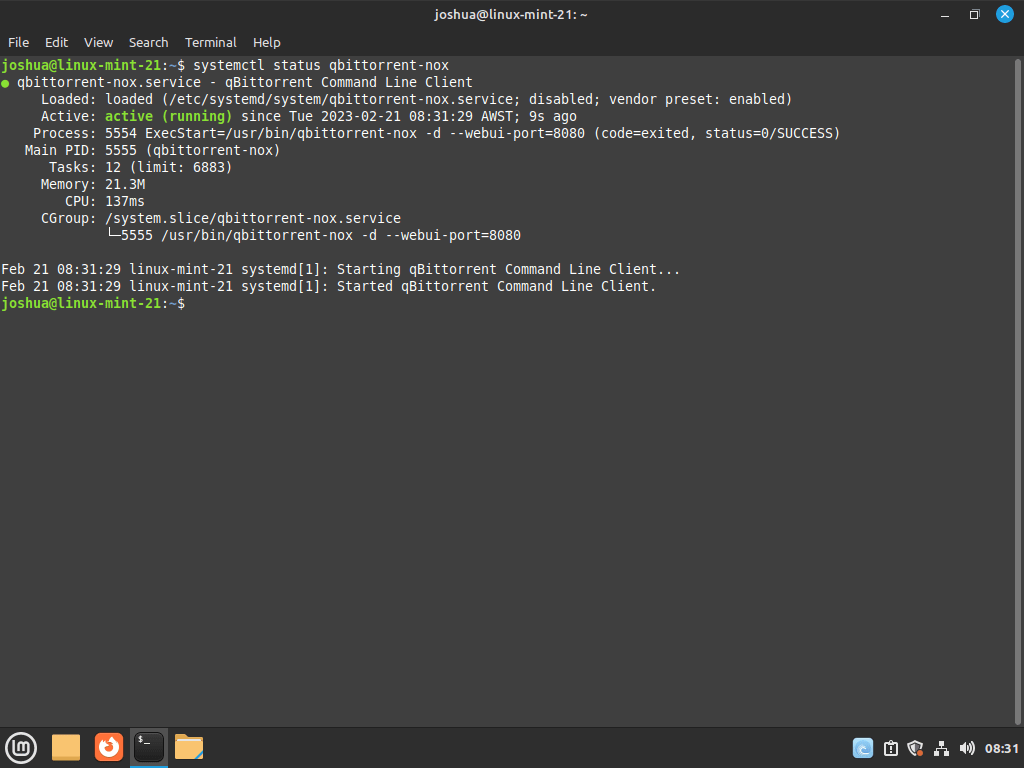
Check the status of qBittorrent-nox to confirm it’s running correctly:
systemctl status qbittorrent-noxIf the status is green and shows no errors, qBittorrent-nox is operational. Access the WebUI by navigating to http://localhost:8080 in your web browser. The default login credentials are admin for both username and password, which you should change promptly for security.
Accessing qBittorrent Web UI
Open the Web UI
The qBittorrent Web UI is accessible from any device on your local network. To access it, enter the server’s internal IP address and port number (default 8080) into your web browser. For instance, if your server’s IP is 192.168.55.156, you would type 192.168.55.156:8080 in the address bar. Alternatively, access it on the host machine by typing 127.0.0.1:8080.
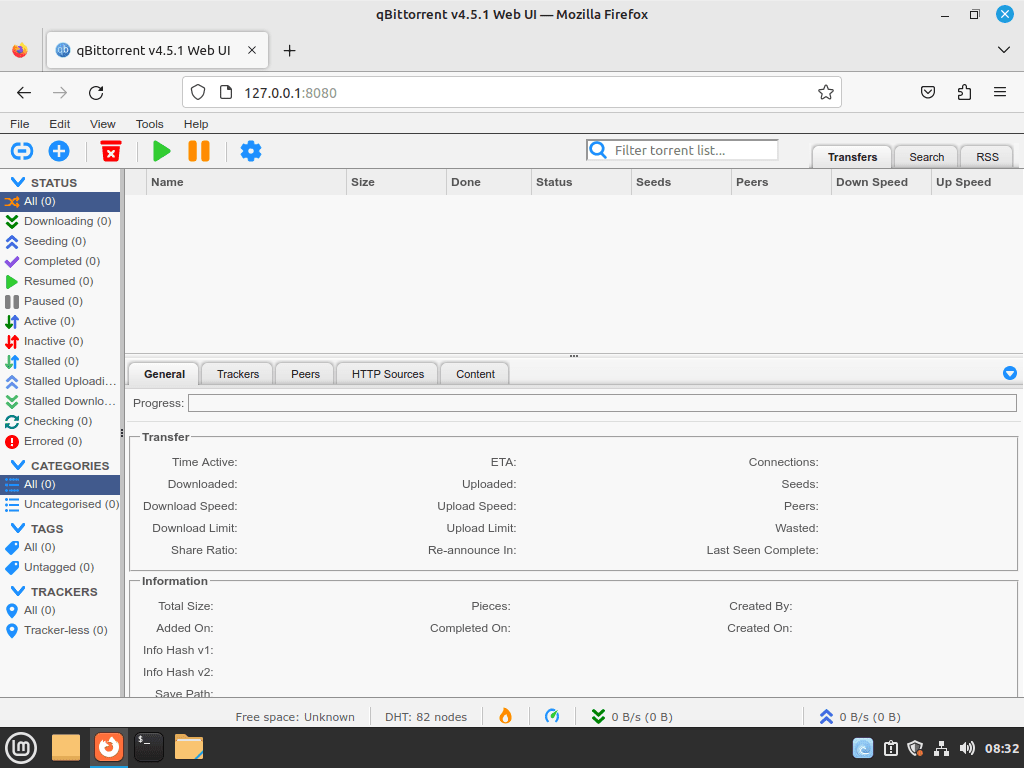
Interface Overview
Upon accessing the Web UI, you’ll encounter an interface that mirrors the qBittorrent desktop application, offering functionalities like adding torrents, monitoring downloads, and adjusting settings. Its intuitive design ensures easy use for those acquainted with the desktop version.
Secure Your Web UI
The Web UI is initially secured with default credentials: username admin and password adminadmin. For security reasons, modifying these credentials is highly advised.
Changing Default Credentials
- Open Authentication Settings: In the Web UI, navigate to Tools > Options > Web UI > Authentication.
- Set New Credentials: Replace the default username and password with secure alternatives. Opt for a robust, unique password to deter unauthorized access.
- Consider a Password Manager: For enhanced security, a password manager can help generate and manage strong passwords.
Adjusting the default username and password is a straightforward yet critical step for bolstering system security. This preventive measure safeguards your system against external threats and unauthorized access.
Managing qBittorrent
Update qBittorrent or qBittorrent-nox
Keeping your qBittorrent up-to-date is essential for optimal performance and security. Updating and upgrading qBittorrent can be done quickly and easily using the command line terminal. First, run the following command to update your system and ensure all packages are current.
sudo apt updateUpgrade to the latest version using the following command if an update is available for qBittorrent or qBittorent-nox.
sudo apt upgradeRemove qBittorrent or qBittorrent-nox
If you decide to remove qBittorrent from your system, it’s a simple process. First, you need to remove the custom PPA that you added. If you installed it using the desktop GUI, use the following command to remove qBittorrent.
sudo apt remove qbittorrentIf you installed qBittorrent-nox, use the following command.
sudo apt remove qbittorrent-noxFinally, remove the PPA that you imported with the following command.
sudo add-apt-repository --remove ppa:qbittorrent-team/qbittorrent-stable -y
sudo add-apt-repository --remove ppa:qbittorrent-team/qbittorrent-unstable -y
Once you’ve removed qBittorrent, you can repeat the installation process to reinstall it on your system. Keeping your software up-to-date and removing any unnecessary programs is an integral part of maintaining the performance and security of your Linux system.
Conclusion
With qBittorrent successfully installed on your Linux Mint system, you can now enjoy a feature-rich BitTorrent client with either a desktop GUI or a web interface for remote management. Regularly check for updates from the qBittorrent team PPA to ensure you have the latest features and improvements.
For any issues or further customization, refer to the qBittorrent documentation and community forums. With qBittorrent, you can enjoy efficient and powerful torrent management.

- How to Install ModSecurity 2 with Apache on Debian 12 or 11 - Tuesday, September 17, 2024
- How to Install Remi RPM on Rocky Linux 9 or 8 - Monday, September 16, 2024
- How to Install Akregator on Ubuntu 24.04, 22.04 or 20.04 - Tuesday, September 3, 2024