qBittorrent gives Linux Mint a full BitTorrent client for downloading Linux ISOs, managing RSS-fed torrents, and handling long-running transfers without ads or bundled extras. You can download and install qBittorrent on Linux Mint as the desktop app for everyday graphical use or as qbittorrent-nox when you want the Web UI on a headless system.
The official project at qBittorrent.org publishes the upstream Linux releases, but Linux Mint can install qBittorrent from the default repositories, the qBittorrent Team PPA, or Flathub. Those paths cover desktop use, remote access through qbittorrent-nox, updates, and clean removal on Linux Mint 22.x and 21.x.
Install qBittorrent on Linux Mint
Linux Mint 22.x and 21.x can use the same three install paths here. Because the PPA uses add-apt-repository, Mint handles the Ubuntu base automatically and you do not need a manual codename mapping table for this workflow.
| Method | Source or Channel | Update Behavior | Best For |
|---|---|---|---|
| Default repositories | Ubuntu Universe | Updates through normal Linux Mint APT upgrades | Most users who prefer distro-tested desktop and headless packages |
| qBittorrent Team PPA | Launchpad PPA | Updates through APT from the qBittorrent Team PPA | Users who want a newer APT-managed build than the Mint default package |
| Flatpak | Flathub | Updates through Flatpak with the app and its runtime | Desktop users who want the current Flathub build separate from APT packages |
The default repository build is the simplest fit for most Linux Mint desktops and servers. Use the PPA only when you specifically want the qBittorrent Team package source inside APT; it can lag behind upstream, especially on older Mint bases. Use Flathub when you want the current desktop release without replacing the APT packages.
The official qBittorrent download page does not require a separate Linux Mint installer for this workflow. Use these package sources instead of third-party download mirrors, especially pages that misspell the project as qbittorent or qbitorrent.
Install qBittorrent from Default Repositories on Linux Mint
Linux Mint’s default packages are the cleanest APT path when you want a desktop torrent client or a Web UI daemon without adding another source. Mint 22.x installs qBittorrent 4.6.3 from the Ubuntu noble base, while Mint 21.x installs 4.4.1 from jammy.
Update Linux Mint Before Installing qBittorrent
Refresh the package lists first so APT sees the current Linux Mint repository metadata.
sudo apt updateThese commands use
sudofor package and service management. If your account does not have sudo access yet, follow the guide on creating and adding users to sudoers on Linux Mint before continuing.
Install the qBittorrent Desktop Client on Linux Mint
Download and install qBittorrent on Linux Mint from the default repositories with the standard APT package.
sudo apt install qbittorrentCheck the installed package state after APT finishes.
apt-cache policy qbittorrentRelevant output on Linux Mint 22.x includes:
qbittorrent:
  Installed: 4.6.3-1build2
  Candidate: 4.6.3-1build2
  Version table:
 *** 4.6.3-1build2 500
        500 http://archive.ubuntu.com/ubuntu noble/universe amd64 Packages
        100 /var/lib/dpkg/status
Relevant output on Linux Mint 21.x includes:
qbittorrent:
  Installed: 4.4.1-2
  Candidate: 4.4.1-2
  Version table:
 *** 4.4.1-2 500
        500 http://archive.ubuntu.com/ubuntu jammy/universe amd64 Packages
        100 /var/lib/dpkg/status
If you want a newer APT-managed build than the Mint defaults, switch to the stable PPA in the next section. If you prefer the current Flathub desktop package instead, use the Flatpak method further down.
Install qBittorrent-nox on Linux Mint
Install qbittorrent-nox when you want browser-based management instead of the desktop application.
sudo apt install qbittorrent-noxThe qbittorrent command opens the graphical client. The qbittorrent-nox package installs the headless daemon for a Web UI on port 8080. Running it at boot is handled with a dedicated account and a custom systemd unit.
Install qBittorrent from the Stable PPA on Linux Mint
The qBittorrent Team stable PPA gives Linux Mint a newer APT-managed build than the default repositories while keeping updates inside the package workflow. It is not always the newest upstream qBittorrent release on every Mint base, so treat it as an APT-managed alternative rather than a guaranteed latest-release channel.
Check the PPA Helper for qBittorrent on Linux Mint
Linux Mint normally provides add-apt-repository through mintsources. Check for the helper first, then install the Mint package only when a customized system is missing it.
command -v add-apt-repository >/dev/null 2>&1 || sudo apt install mintsourcesAdd the qBittorrent Stable PPA on Linux Mint
Add the qBittorrent Team stable PPA. On Linux Mint, add-apt-repository detects the underlying Ubuntu base automatically, so you do not need to hardcode noble or jammy in this workflow.
sudo add-apt-repository ppa:qbittorrent-team/qbittorrent-stable -yRun a normal APT refresh once the source is present so the Launchpad fetch lines confirm the repository is active.
sudo apt updateRelevant output on Linux Mint 22.x includes:
Get:11 https://ppa.launchpadcontent.net/qbittorrent-team/qbittorrent-stable/ubuntu noble InRelease [17.8 kB]
Get:12 https://ppa.launchpadcontent.net/qbittorrent-team/qbittorrent-stable/ubuntu noble/main amd64 Packages [1,668 B]
Relevant output on Linux Mint 21.x includes:
Get:9 https://ppa.launchpadcontent.net/qbittorrent-team/qbittorrent-stable/ubuntu jammy InRelease [18.1 kB]
Get:10 https://ppa.launchpadcontent.net/qbittorrent-team/qbittorrent-stable/ubuntu jammy/main amd64 Packages [1,908 B]
The team also publishes an unstable PPA, but that channel is better left for bug testing than a normal Linux Mint install.
Confirm that the PPA became the live package candidate before you install anything from it.
apt-cache policy qbittorrentRelevant output on Linux Mint 22.x currently includes:
qbittorrent:
  Installed: (none)
  Candidate: 1:4.6.7.99~202504281220-8155-91943e481~ubuntu24.04.1
  Version table:
     1:4.6.7.99~202504281220-8155-91943e481~ubuntu24.04.1 500
        500 https://ppa.launchpadcontent.net/qbittorrent-team/qbittorrent-stable/ubuntu noble/main amd64 Packages
     4.6.3-1build2 500
        500 http://archive.ubuntu.com/ubuntu noble/universe amd64 Packages
Relevant output on Linux Mint 21.x currently includes:
qbittorrent:
  Installed: (none)
  Candidate: 1:4.5.5.99~202308312232-7899-7d7097b02~ubuntu22.04.1
  Version table:
     1:4.5.5.99~202308312232-7899-7d7097b02~ubuntu22.04.1 500
        500 https://ppa.launchpadcontent.net/qbittorrent-team/qbittorrent-stable/ubuntu jammy/main amd64 Packages
     4.4.1-2 500
        500 http://archive.ubuntu.com/ubuntu jammy/universe amd64 Packages
Install qBittorrent from the Stable PPA on Linux Mint
Install the desktop client with the PPA-backed package.
sudo apt install qbittorrentIf you only need the Web UI daemon, install qbittorrent-nox instead.
sudo apt install qbittorrent-noxVerify the installed package version with dpkg-query. Use qbittorrent-nox in the same command if you installed the headless package instead of the desktop client.
dpkg-query -W -f='${Status} ${Version}\n' qbittorrentRelevant output on Linux Mint 22.x includes:
install ok installed 1:4.6.7.99~202504281220-8155-91943e481~ubuntu24.04.1
Relevant output on Linux Mint 21.x includes:
install ok installed 1:4.5.5.99~202308312232-7899-7d7097b02~ubuntu22.04.1
Install qBittorrent via Flatpak on Linux Mint
Flatpak is the quickest way to install the current qBittorrent desktop build on Linux Mint without replacing the APT package. Start by checking the remote scope with flatpak remotes; when it shows flathub system, keep the install, update, and removal commands on that same system scope with sudo.
Confirm the Flathub Remote for qBittorrent on Linux Mint
Check the current Flatpak remote scope before you install the app.
flatpak remotes --columns=name,optionsflathub system
Install qBittorrent from Flathub on Linux Mint
Install the Flathub package with the same system scope used by the default Linux Mint remote. Review the runtime and permission summary before confirming the transaction.
sudo flatpak install flathub org.qbittorrent.qBittorrentThe first install can be much larger than the app itself because qBittorrent currently pulls the KDE runtime from Flathub.
Inspect the installed Flatpak metadata after the download finishes.
flatpak info org.qbittorrent.qBittorrentRelevant output currently includes:
ID: org.qbittorrent.qBittorrent
Ref: app/org.qbittorrent.qBittorrent/x86_64/stable
Arch: x86_64
Branch: stable
Version: 5.2.1
Origin: flathub
Installation: system
The current Flathub metadata grants qBittorrent broad host filesystem access and uses the KDE runtime, so choose this method for Flathub packaging and newer desktop releases rather than for strict file isolation.
Launch the qBittorrent Flatpak Build on Linux Mint
Start the Flatpak build from a graphical session. The flatpak run command opens the desktop window, so it is not a substitute for the headless qbittorrent-nox daemon.
flatpak run org.qbittorrent.qBittorrentLaunch qBittorrent on Linux Mint
APT and Flatpak installs both add a graphical launcher on Linux Mint. Use qbittorrent for the APT package or flatpak run org.qbittorrent.qBittorrent for the Flathub build; both commands open the desktop window, so qbittorrent-nox remains the headless option.
Launch qBittorrent from the Terminal on Linux Mint
Run the desktop launcher from any graphical terminal session when you installed the APT package.
qbittorrentThis command opens the graphical client. It does not switch qBittorrent into a text-mode interface.
Launch qBittorrent from the Applications Menu on Linux Mint
Use the Linux Mint menu if you prefer not to start qBittorrent from a terminal.
Menu > Internet > qBittorrent
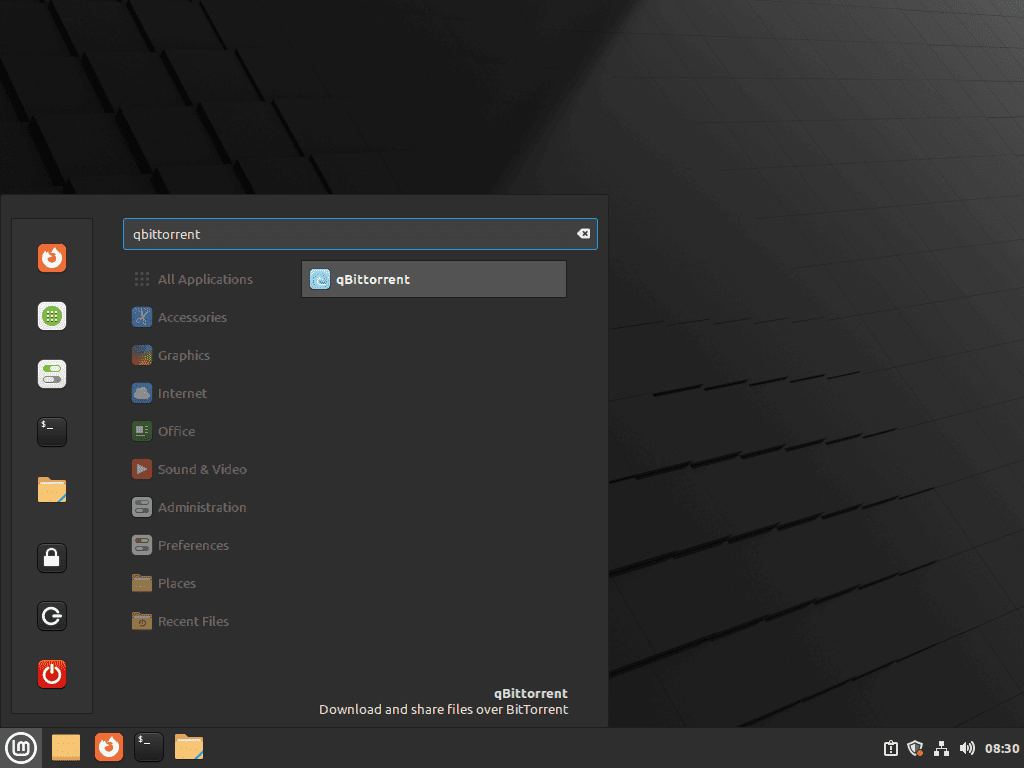
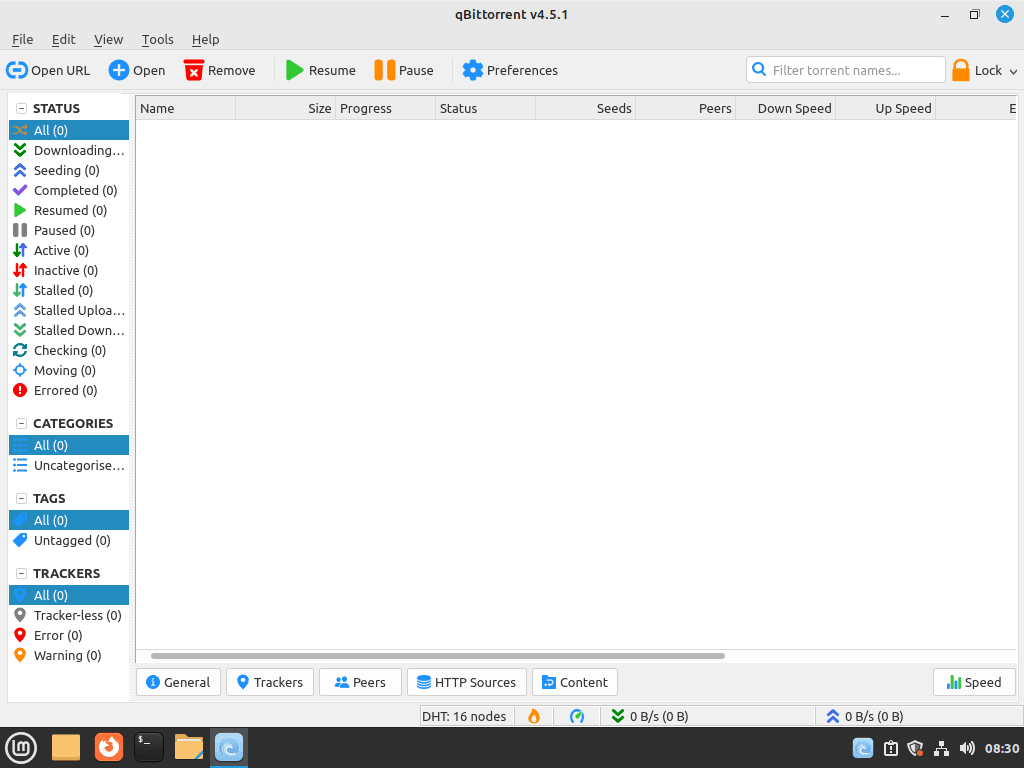
After launch, qBittorrent opens its main window for torrent, RSS, and transfer management in a graphical session.
Configure qBittorrent-nox as a System Service on Linux Mint
The package install alone does not create a consistent always-on service across both supported Mint bases. One dedicated account and one custom qbittorrent-nox.service unit keep the Web UI setup the same on Linux Mint 22.x and 21.x.
Create the qBittorrent Service Account on Linux Mint
Create a dedicated service user so qBittorrent stores its downloads and settings away from your everyday desktop account.
sudo adduser --system --group --home /var/lib/qbittorrent qbittorrentThe --system flag creates a locked-down account that cannot log in interactively. The explicit --home /var/lib/qbittorrent path matters because the daemon needs a real writable home instead of the default /nonexistent path used by many system accounts.
Create the qBittorrent-nox Systemd Unit on Linux Mint
Write a dedicated service unit next. The tee command is used because plain shell redirection would not write to the root-owned /etc/systemd/system/ directory.
printf '%s\n' '[Unit]' 'Description=qBittorrent-nox service' 'After=network-online.target' 'Wants=network-online.target' '' '[Service]' 'User=qbittorrent' 'Group=qbittorrent' 'WorkingDirectory=/var/lib/qbittorrent' 'ExecStart=/usr/bin/qbittorrent-nox --profile=/var/lib/qbittorrent' 'Restart=on-failure' '' '[Install]' 'WantedBy=multi-user.target' | sudo tee /etc/systemd/system/qbittorrent-nox.service > /dev/nullThe --profile=/var/lib/qbittorrent flag keeps the service data under /var/lib/qbittorrent/qBittorrent/, which makes the cleanup path predictable later.
Reload systemd, enable the service, and start it immediately.
sudo systemctl daemon-reload
sudo systemctl enable --now qbittorrent-nox
Verify the service state after the first start.
systemctl status qbittorrent-nox --no-pagerRelevant output includes:
qbittorrent-nox.service - qBittorrent-nox service
     Loaded: loaded (/etc/systemd/system/qbittorrent-nox.service; enabled; preset: enabled)
     Active: active (running) since Tue 2026-04-21 14:01:32 AWST; 371ms ago
   Main PID: 59904 (qbittorrent-nox)
     CGroup: /system.slice/qbittorrent-nox.service
             59904 /usr/bin/qbittorrent-nox --profile=/var/lib/qbittorrent
This custom unit is the compatibility layer for Linux Mint 21.x, where the default qbittorrent-nox package does not ship the templated unit file found on newer builds.
Retrieve the qBittorrent Web UI Credentials on Linux Mint
The Web UI listens on port 8080 and the username is admin. Mint 22.x uses qBittorrent 4.6.3 from the default repository, which generates a temporary password. Mint 21.x uses 4.4.1 by default, where the initial password remains adminadmin until you change it.
On Mint 22.x, read the temporary password from recent journal entries after starting or restarting the service. The --since window avoids older service history, while the grep filter keeps only the login lines.
sudo journalctl -u qbittorrent-nox --since "10 minutes ago" -o cat --no-pager | grep -E "WebUI administrator|temporary password"Relevant Mint 22.x output includes:
The WebUI administrator username is: admin
The WebUI administrator password was not set. A temporary password is provided for this session: HbGkeDNSa
On Mint 21.x, sign in with username admin and password adminadmin only long enough to save your own Web UI credentials. Older journal entries can still show that legacy warning, so do not treat an old log line as proof that a changed password has reverted.
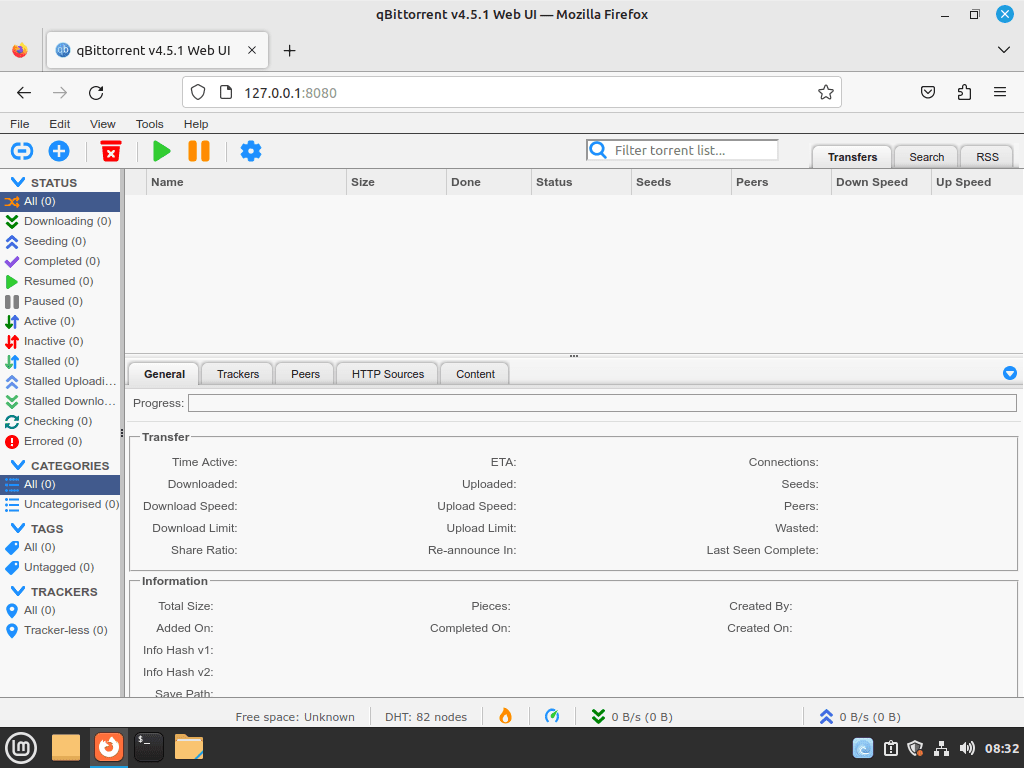
Sign In to the qBittorrent Web UI on Linux Mint
Open http://localhost:8080 on the local machine or http://YOUR-SERVER-IP:8080 from another device on the same network. Sign in with username admin and the temporary Mint 22.x password from the recent journal check, or the initial Mint 21.x password adminadmin.
Immediately change the Web UI credentials from the gear icon under Web UI > Authentication so the daemon no longer depends on temporary or default login details.
Mint 22.x generates a new temporary password on each restart until you save your own credentials. Mint 21.x keeps the legacy adminadmin login until you replace it in the Web UI.
Open the qBittorrent Web UI Port on Linux Mint
If UFW is active on your Linux Mint system, allow the Web UI port before connecting from another device. Restrict the rule to your local network instead of opening the qBittorrent Web UI to every source; replace 192.168.1.0/24 with your own LAN subnet.
sudo ufw allow from 192.168.1.0/24 to any port 8080 proto tcpCheck the firewall state after adding the rule.
sudo ufw status numberedRelevant output includes:
Status: active

     To                         Action      From
     --                         ------      ----
[ 1] 22/tcp                     ALLOW IN    Anywhere
[ 2] 8080/tcp                   ALLOW IN    192.168.1.0/24
[ 3] 22/tcp (v6)                ALLOW IN    Anywhere (v6)
Set a strong Web UI password before you leave port 8080 reachable on your network. For internet access, place the service behind a VPN or another authenticated tunnel instead of exposing the port directly.
Update or Remove qBittorrent on Linux Mint
Update qBittorrent on Linux Mint
APT-managed installs update through the usual Linux Mint package workflow.
sudo apt update
sudo apt upgrade
Use the package-only upgrade form when you want to refresh just the APT package you installed. Replace qbittorrent with qbittorrent-nox if you are running the headless daemon instead of the desktop client.
sudo apt install --only-upgrade qbittorrentFor the Flathub build, keep the same system scope used at install time. The broader Flatpak upgrade guide for Linux Mint covers full runtime maintenance as well.
sudo flatpak update org.qbittorrent.qBittorrentRemove qBittorrent on Linux Mint
Remove the package that matches the method you used, then clean up the optional repository or data paths that still apply to your setup.
Remove the desktop APT package and its unused dependencies with one command.
sudo apt remove --autoremove qbittorrentStop and remove the custom service unit first if you created it for qbittorrent-nox.
sudo systemctl disable --now qbittorrent-nox
sudo rm -f /etc/systemd/system/qbittorrent-nox.service
sudo systemctl daemon-reload
Then remove the headless package itself.
sudo apt remove --autoremove qbittorrent-noxRemove the Flathub build with the same system scope you used during installation.
sudo flatpak uninstall org.qbittorrent.qBittorrentRemove the stable PPA only if you used the PPA method. Default-repository and Flatpak installs do not need this cleanup step.
sudo add-apt-repository --remove ppa:qbittorrent-team/qbittorrent-stable -y
sudo apt update
Confirm the APT packages are gone after removal.
apt-cache policy qbittorrent qbittorrent-noxRelevant output after package removal includes:
qbittorrent:
  Installed: (none)
  Candidate: 4.6.3-1build2
  Version table:
     4.6.3-1build2 500
        500 http://archive.ubuntu.com/ubuntu noble/universe amd64 Packages
qbittorrent-nox:
  Installed: (none)
  Candidate: 4.6.3-1build2
  Version table:
     4.6.3-1build2 500
        500 http://archive.ubuntu.com/ubuntu noble/universe amd64 Packages
If you also removed the stable PPA, the candidate line falls back to the Linux Mint default package instead of the Launchpad build.
Remove qBittorrent Data on Linux Mint
Package removal does not clear the desktop profile, the dedicated service account, or any Flatpak app data you created later. Check those locations separately if you want a full cleanup.
These cleanup commands permanently delete qBittorrent settings, RSS feeds, queue history, and saved credentials. Back up anything you want to keep before removing those directories.
Because the desktop client creates user data only after you run it in a graphical session, check which qBittorrent directories actually exist before deleting them.
find "$HOME/.config" "$HOME/.local/share" "$HOME/.cache" "$HOME/.var/app" -maxdepth 1 -type d \( -name 'qBittorrent' -o -name 'org.qbittorrent.qBittorrent' \) 2>/dev/nullIf that check prints any qBittorrent paths, remove only the directories you actually found.
rm -rf "$HOME/.config/qBittorrent" "$HOME/.local/share/qBittorrent" "$HOME/.cache/qBittorrent" "$HOME/.var/app/org.qbittorrent.qBittorrent"Remove the dedicated service account data created for the headless daemon when you no longer need it.
sudo rm -rf /var/lib/qbittorrentRemove the dedicated service account itself only if you created it for qBittorrent-nox.
sudo userdel qbittorrentTroubleshoot qBittorrent on Linux Mint
These checks cover the qBittorrent issues most likely to interrupt a Linux Mint desktop install or a headless qbittorrent-nox deployment.
Fix qBittorrent-nox Startup Failures on Linux Mint
Read the service journal first when the headless daemon refuses to start.
sudo journalctl -u qbittorrent-nox -n 30 --no-pagerA common failure appears when the service account was created without a real home directory.
qbittorrent-nox: /nonexistent: No such file or directory
Recreate the dedicated service account with the explicit /var/lib/qbittorrent home path used in the service setup.
sudo systemctl disable --now qbittorrent-nox
sudo userdel qbittorrent
sudo rm -rf /var/lib/qbittorrent
sudo adduser --system --group --home /var/lib/qbittorrent qbittorrent
Then start the service again and recheck its state.
sudo systemctl restart qbittorrent-nox
systemctl status qbittorrent-nox --no-pager
Fix qBittorrent Web UI Port Conflicts on Linux Mint
Check whether another service already owns port 8080 before you blame qBittorrent itself.
sudo ss -lntp | grep 8080Relevant output can look like this when another application already owns the port:
LISTEN 0 50 *:8080 *:* users:(("java",pid=1234,fd=12))
Either stop the conflicting service or move qBittorrent to a different Web UI port. The --webui-port flag is already supported by qbittorrent-nox, so update the systemd unit you created earlier.
sudo sed -i 's#ExecStart=/usr/bin/qbittorrent-nox --profile=/var/lib/qbittorrent#ExecStart=/usr/bin/qbittorrent-nox --profile=/var/lib/qbittorrent --webui-port=9090#' /etc/systemd/system/qbittorrent-nox.service
sudo systemctl daemon-reload
sudo systemctl restart qbittorrent-nox
After the restart, point your browser and firewall rules at the new port instead of 8080.
Fix Missing qBittorrent Web UI Password Lines on Linux Mint
Restart the daemon when Mint 22.x does not show a recent temporary-password line.
sudo systemctl restart qbittorrent-nox
sudo journalctl -u qbittorrent-nox --since "2 minutes ago" -o cat --no-pager | grep -E "WebUI administrator|temporary password"
Mint 22.x should print a fresh temporary password after the restart. Mint 21.x may not print a new credential line on every restart; use adminadmin only for the initial sign-in, then save your own password through the Web UI.
Conclusion
qBittorrent is ready on Linux Mint for either desktop downloads or a browser-managed qbittorrent-nox service, with the headless profile stored under /var/lib/qbittorrent for cleaner cleanup later. Before you expose the Web UI beyond your local network, replace the default or temporary password and keep access behind a VPN or another authenticated tunnel.

I have been struggling for over a week, trying to install it from the appimage without success!
I sailed through this in just a few minutes. Really excellent and clear, I couldn’t possibly go wrong!
This is a model of how it should be done.
Thank you so much.
Thank you for the feedback.
Thank Im just getting starting with Linux. This has been a great help thank you.
Hi Robert, appreciate the feedback.