

LXQt is a lightweight, Qt-based desktop environment designed for speed and low resource consumption. If you need a responsive desktop that runs smoothly on older hardware, virtual machines, or systems where you want to maximize available resources for other applications, LXQt provides a practical alternative to heavier environments like GNOME. This guide walks through installing LXQt on Ubuntu, switching between desktop environments, and removing LXQt if you decide to return to your previous setup.
Choose Your LXQt Installation Method
Ubuntu offers two LXQt installation approaches, each suited to different use cases. The table below summarizes the key differences:
| Method | Package | Includes | Best For |
|---|---|---|---|
| Full Desktop | task-lxqt-desktop | LXQt, SDDM display manager, LibreOffice, accessibility tools, recommended applications | Desktop users who want a complete, ready-to-use environment |
| Minimal | lxqt | Core LXQt components only, no display manager or office suite | Server GUI access, custom setups, or systems where you manage display managers separately |
We recommend the full desktop method for most users because it installs SDDM (Simple Desktop Display Manager) and configures everything needed for a complete desktop experience. The minimal installation requires manual configuration of a display manager and lacks productivity applications.
These steps cover Ubuntu 22.04 LTS, 24.04 LTS, and 26.04 LTS. Ubuntu’s default repositories include LXQt, so commands work identically across all supported LTS releases.
Update Ubuntu Before Installing LXQt
Before installing a new desktop environment, update your package lists and upgrade existing packages. This ensures you install the latest available versions and reduces potential dependency conflicts:
sudo apt update && sudo apt upgradeThe update command refreshes package metadata from Ubuntu’s repositories, while upgrade installs newer versions of packages already on your system. For more details on keeping Ubuntu current, see our guide on updating packages via the Ubuntu command line.
Install LXQt Desktop Environment
Install the Full LXQt Desktop
The full desktop installation pulls in LXQt along with SDDM, LibreOffice, and recommended applications. Run the following command to install:
sudo apt install task-lxqt-desktopDuring installation, a configuration screen appears asking you to select a display manager. SDDM is the default display manager for LXQt and provides the login screen where you choose your desktop session. Press TAB to highlight <Ok> and press ENTER to continue.
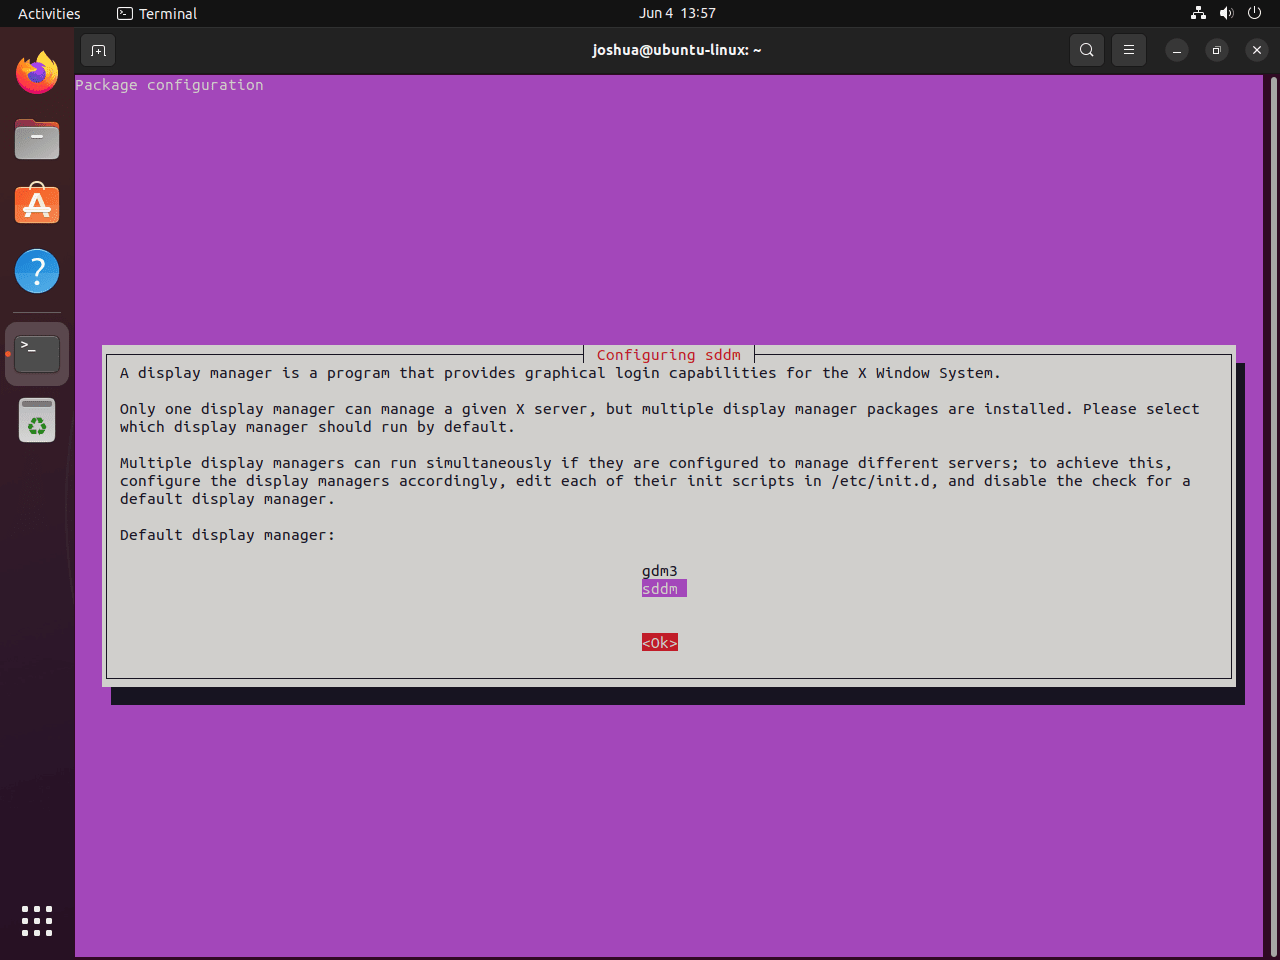
If you select GDM3 (GNOME’s display manager) instead, LXQt still installs correctly, but you will use the GNOME login screen rather than SDDM. Both work, though SDDM integrates more naturally with LXQt’s appearance.
Install the Minimal LXQt Package
For minimal installations, such as adding a lightweight GUI to a server or building a custom desktop configuration, install only the core LXQt components:
sudo apt install lxqtThis installs LXQt’s core desktop components without SDDM, LibreOffice, or other bundled applications. If you use this method, you need to install and configure a display manager separately (such as LightDM or GDM3) before you can log into the graphical environment.
Reboot to Apply Changes
After installation completes, reboot your system to initialize the new desktop environment and display manager:
sudo rebootOnce the system restarts, SDDM loads automatically and presents the login screen. At this point, LXQt appears as a session option in the dropdown menu.
Log Into the LXQt Desktop
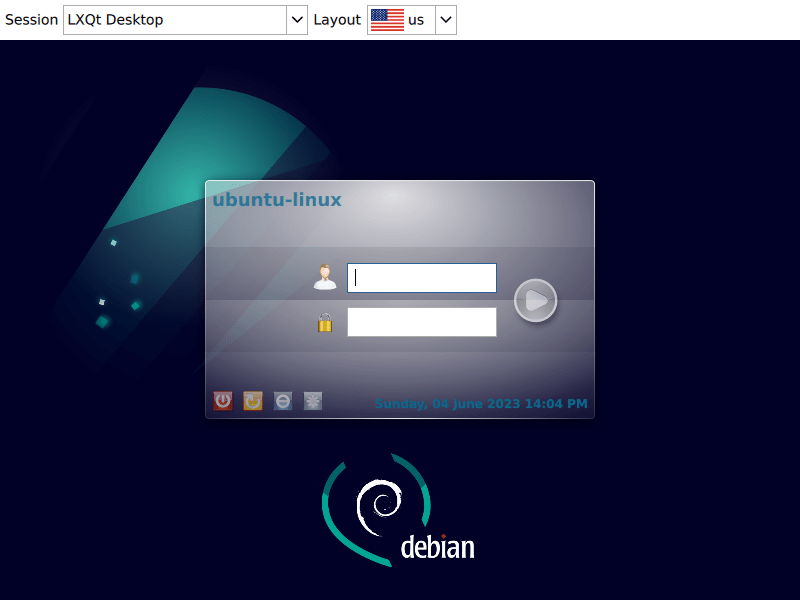
The SDDM login screen appears after rebooting. Before entering your password, verify that the session selector shows LXQt as your desktop session. You can find the session selector in the top-left corner of the login screen. Click the dropdown and select LXQt if you see a different option selected.
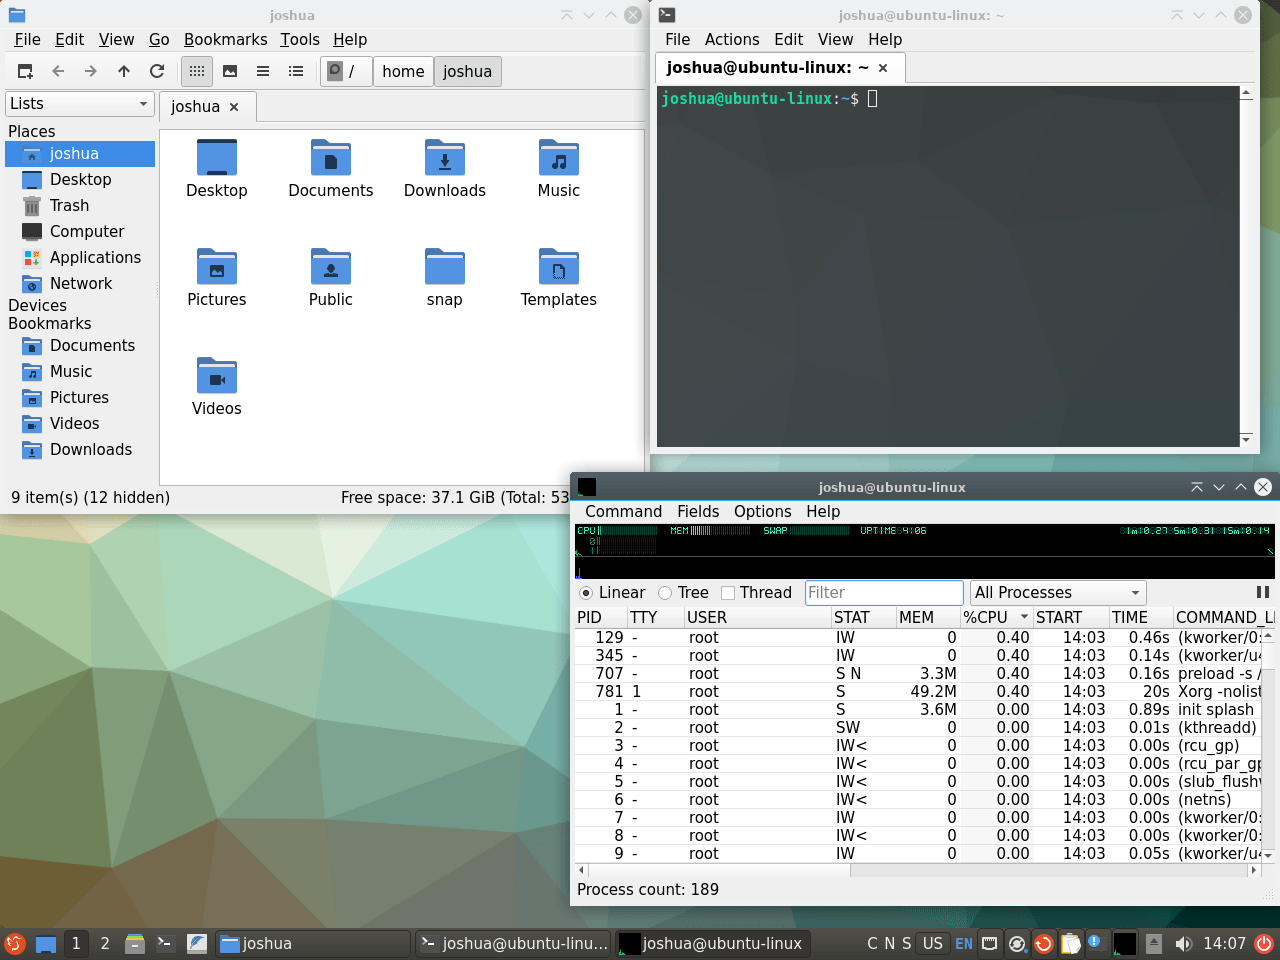
Once you log in, you will see the LXQt desktop. The default appearance uses Debian-themed styling because LXQt’s upstream packages originate from Debian, which Ubuntu builds upon. This styling is purely cosmetic and does not affect functionality. LXQt provides extensive customization options through its Configuration Center, where you can change themes, icons, panel layouts, and other visual elements.
Manage Display Managers
If you want to switch between SDDM and GDM3 (GNOME’s display manager) after installation, you can reconfigure the default display manager at any time. This is useful if you switch between LXQt and GNOME regularly and prefer a consistent login screen.
Switch from SDDM to GDM3
To reconfigure your display manager and select GDM3, run:
sudo dpkg-reconfigure sddmThis command opens the same selection screen you saw during installation. Use the arrow keys to select gdm3, then press TAB to highlight <Ok> and press ENTER. After changing the display manager, reboot for the change to take effect:
sudo rebootRegardless of which display manager you use, both GNOME and LXQt sessions remain available in the session selector at login.
Remove LXQt from Ubuntu
If you decide to remove LXQt and return to your previous desktop environment, follow the steps below. The removal process uninstalls LXQt packages and cleans up dependencies that are no longer needed.
Switch Back to GDM3 Before Removal
Before removing LXQt, switch your display manager back to GDM3 to avoid login issues after removal:
sudo dpkg-reconfigure sddmSelect gdm3 from the list and confirm. This step ensures you have a working login screen after removing LXQt packages.
Remove LXQt Packages
Remove LXQt and its associated packages with the following commands:
sudo apt remove lxqt 'lxqt-*' task-lxqt-desktop sddm
sudo apt autoremove
The first command removes the main LXQt packages and SDDM. The autoremove command then cleans up dependencies that were installed automatically with LXQt but are no longer required by any other package.
Reinstall GNOME Desktop if Needed
Removing LXQt may also remove some shared packages that GNOME relies on. If GNOME does not start correctly after removal, reinstall the Ubuntu desktop meta-package:
sudo apt install ubuntu-desktopThis reinstalls any missing GNOME components and restores the default Ubuntu desktop experience. After reinstalling, reboot to complete the process:
sudo rebootVerify LXQt Removal
After the system restarts, confirm that LXQt packages are no longer installed:
dpkg -l | grep -E "^ii.*lxqt"If removal was successful, this command produces no output. Any remaining packages appear in the list and can be removed individually with sudo apt remove package-name.
Troubleshoot Common LXQt Issues
LXQt Session Not Appearing at Login
If LXQt does not appear in the session dropdown after installation, verify the package installed correctly:
dpkg -l | grep lxqt-sessionA successful installation shows output similar to:
ii lxqt-session 1.x.x-xubuntux amd64 session manager component for LXQt
If no output appears, the installation may have failed or something interrupted the process. In that case, reinstall the full desktop package:
sudo apt install --reinstall task-lxqt-desktopBlank Screen After Selecting LXQt
A blank screen after login can indicate display driver issues. Press Ctrl+Alt+F2 to switch to a text console, log in, and check for graphics driver problems:
journalctl -b -p errThis displays error messages from the current boot. Look for lines mentioning your graphics hardware, X11, or Wayland. Common culprits include missing firmware, driver conflicts, or compositor failures.
Display Manager Conflict
If your login screen does not appear after rebooting, you may have a display manager conflict. Boot into recovery mode or use a text console to reconfigure:
sudo dpkg-reconfigure sddmSelect either SDDM or GDM3 and reboot. If neither works, you can temporarily start a graphical session manually:
startx startlxqtExplore Other Desktop Environments
Ubuntu supports multiple desktop environments, each with different design philosophies and resource requirements. If LXQt does not suit your workflow, consider these alternatives:
- XFCE on Ubuntu provides another lightweight option with a traditional desktop layout and extensive customization
- KDE Plasma on Ubuntu offers a feature-rich, modern experience with Qt-based applications that integrate well with LXQt apps
- GNOME Flashback on Ubuntu delivers a classic GNOME 2-style interface for users who prefer a traditional workflow
Conclusion
LXQt runs efficiently on Ubuntu, providing a responsive desktop environment that works well on systems where resource conservation matters. The installation configures SDDM as the default display manager and makes switching between desktop environments straightforward. You can customize LXQt’s appearance through its Configuration Center, and removal is clean if you later decide to return to GNOME or try a different environment.