Most self-hosted stacks need a web server or reverse proxy before the rest of the application can do much. That is why many admins install Nginx on Debian for reverse proxies, PHP sites, API front ends, and simple static deployments.
Debian 13 (Trixie), Debian 12 (Bookworm), and Debian 11 (Bullseye) all make Nginx available from the default APT sources, although it is not installed by default on fresh server or minimal images. From those default APT sources, Debian 13 installs Nginx 1.26, Debian 12 installs 1.22, and Debian 11 installs 1.18; if you need newer upstream features, see how to install Nginx mainline on Debian.
Install Nginx on Debian
Start with the standard Debian package unless you already know you need a larger module bundle or the nginx.org mainline repository.
Update Debian Before Installing Nginx
Refresh the package index and install any pending updates before you add the web server.
sudo apt update && sudo apt upgrade -yThese commands use
sudofor root privileges. If your account does not have sudo access yet, run the commands as root or follow the guide on how to add a user to sudoers on Debian.
Choose an Nginx Package on Debian
Debian splits Nginx into the standard web server package and optional module bundles. For most servers, nginx is the right starting point because it follows Debian’s default package source and avoids the larger add-on sets unless you need them.
| Package | What Debian installs | Best for |
|---|---|---|
nginx | The standard web server package plus nginx-common on Debian 13 and 12; on Debian 11, APT also pulls nginx-core | Most reverse proxies, static sites, and PHP stacks |
nginx-light | The standard server plus the Echo module bundle | Minimal installs that specifically need Echo |
nginx-core | GeoIP, image filter, XSLT, mail, and stream modules | Servers that need Debian’s standard dynamic modules |
nginx-full | auth PAM, DAV, GeoIP2, Echo, subs-filter, upstream-fair, and stream GeoIP2 modules | Broader feature coverage without the largest extras set |
nginx-extras | Lua, cache purge, headers-more, nchan, Perl, upload progress, and the larger module bundle | Advanced setups that need extra dynamic modules |
Current default APT candidates are Nginx 1.26.3 on Debian 13, 1.22.1 on Debian 12, and 1.18.0 on Debian 11. Security revision suffixes can change as Debian publishes updates, so treat the major and minor branch as the important release signal.
If you need custom builds or modules outside Debian’s packaged set, see how to build Nginx from source on Debian.
Install the Nginx Package on Debian
Install the standard Nginx package with APT.
sudo apt install nginx -yIf you picked one of the larger Debian module bundles instead, replace nginx with nginx-light, nginx-core, nginx-full, or nginx-extras.
Verify the Nginx Installation on Debian
On Debian SSH sessions, the nginx binary may live in /usr/sbin, which is not always on an unprivileged user’s PATH. Use sudo nginx -v for a reliable version check.
sudo nginx -vExpected output on Debian 13:
nginx version: nginx/1.26.3
Debian 12 reports
nginx/1.22.1, and Debian 11 reportsnginx/1.18.0from the current default package sources.
Confirm that systemd started the service and enabled it at boot.
systemctl is-active nginx
systemctl is-enabled nginx
Expected output:
active
enabled
Allow Nginx Through UFW on Debian
UFW is optional, but it is the quickest way to keep SSH open while only exposing the HTTP and HTTPS ports you actually need. If you want a full firewall walkthrough, see how to install UFW on Debian.
Install UFW on Debian
Install UFW from Debian’s default repositories.
sudo apt install ufw -yAllow SSH Before Enabling UFW on Debian
If you are connected over SSH, allow SSH before you enable UFW so you do not lock yourself out of the server.
Use the generic ssh profile name here. It works cleanly across Debian installs and avoids relying on a profile label that may differ on minimal systems.
sudo ufw allow sshReview Available Nginx UFW Profiles on Debian
Check which Nginx application profiles UFW already knows about.
sudo ufw app list | grep NginxExpected output on Debian 12 and 11:
Nginx Full
Nginx HTTP
Nginx HTTPS
Debian 13 also shows an
Nginx QUICprofile. If you are not configuring HTTP/3 right now,Nginx Fullis still the normal rule set for a standard web server.
Allow Nginx Traffic and Enable UFW on Debian
Use one profile for the ports you want to expose. Nginx HTTP opens port 80, Nginx HTTPS opens port 443, and Nginx Full opens both ports for the usual HTTP-to-HTTPS web server path.
sudo ufw allow 'Nginx Full'Use Nginx HTTP or Nginx HTTPS instead when the server should expose only one of those ports.
sudo ufw enableVerify that both the SSH rule and the Nginx rule are active.
sudo ufw status numberedExpected output after allowing SSH and Nginx Full:
Status: active

     To                         Action      From
     --                         ------      ----
[ 1] 22/tcp                     ALLOW IN    Anywhere
[ 2] Nginx Full                 ALLOW IN    Anywhere
[ 3] 22/tcp (v6)                ALLOW IN    Anywhere (v6)
[ 4] Nginx Full (v6)            ALLOW IN    Anywhere (v6)
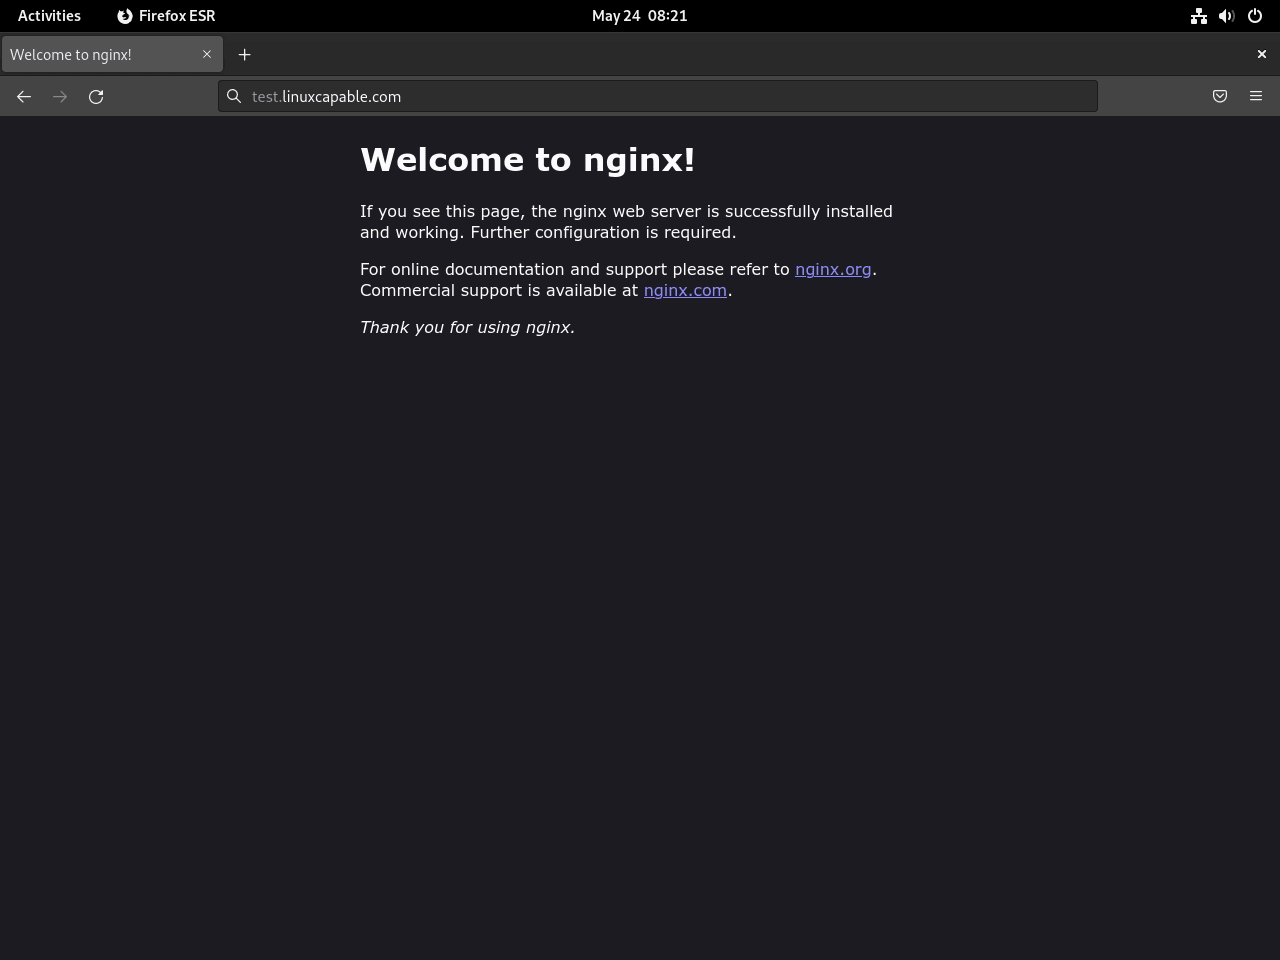
Test the Nginx Welcome Page on Debian
Open your server IP address in a browser after the service and firewall rules are in place. On a local Debian machine, you can also test with http://localhost.
If the welcome page loads, Nginx is listening and the firewall is not blocking the request path you just opened.
Configure an Nginx Server Block on Debian
Server blocks let one Debian host serve multiple domains with separate document roots and site-specific settings. Replace example.com with your own domain name before you save the configuration; for deeper virtual host patterns, see how to configure Nginx server blocks and virtual hosts.
For production sites, you may also want to redirect non-www or www in Nginx, add rewrite rules in Nginx, or put an application behind a reverse proxy in Nginx.
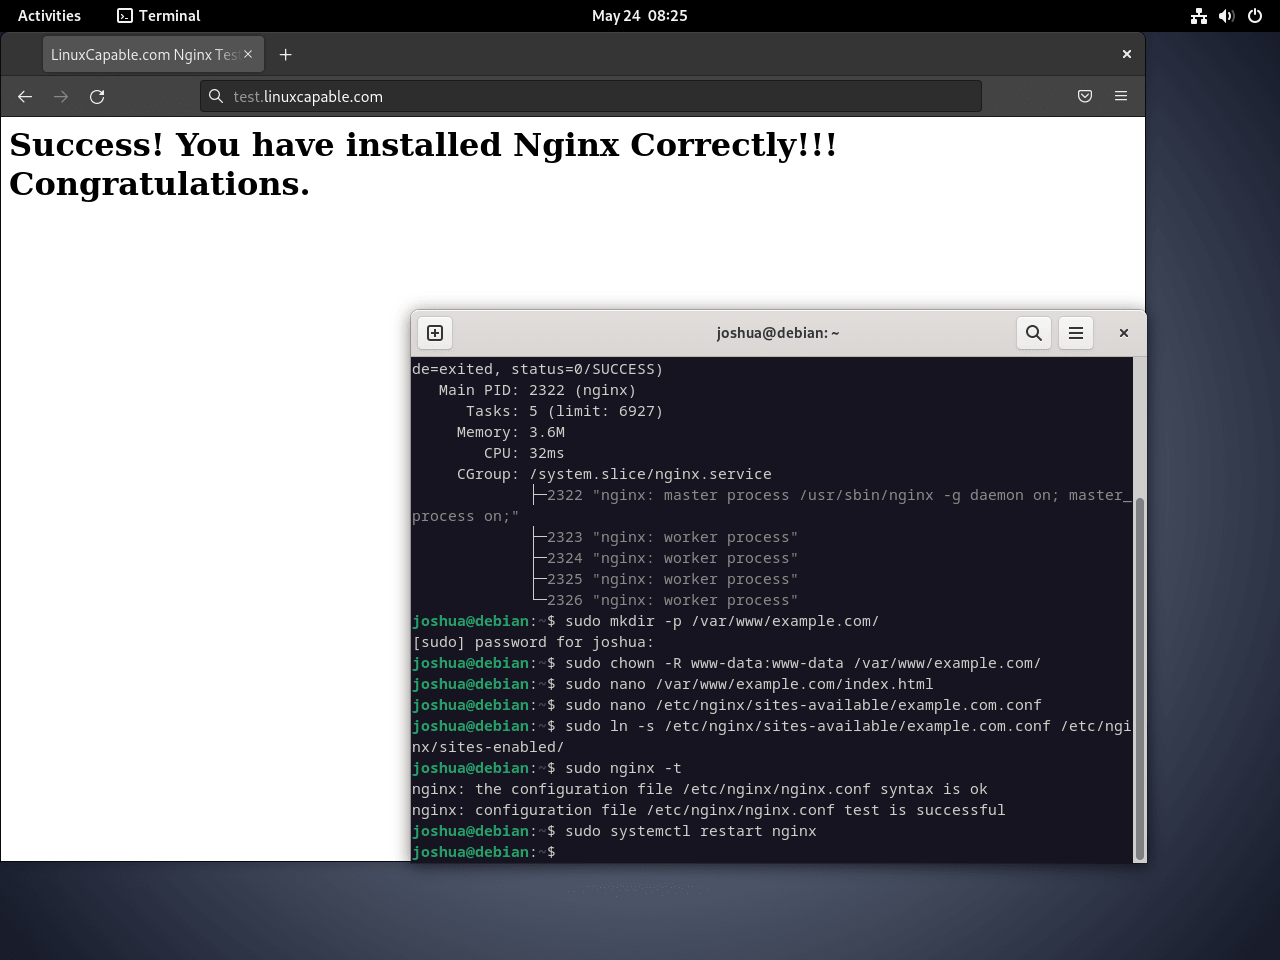
Create the Web Root for Your Nginx Site on Debian
Create the document root and assign it to the www-data account that Debian’s Nginx service uses.
sudo install -d -o www-data -g www-data /var/www/example.comCreate a Test Page for the Nginx Server Block on Debian
Write a simple test page so you can tell the custom server block apart from Debian’s default welcome page.
printf '%s\n' \
'<html>' \
'  <head><title>Welcome to Example.com</title></head>' \
'  <body><h1>Success! The Nginx server block is working!</h1></body>' \
'</html>' | sudo tee /var/www/example.com/index.html > /dev/null
The tee command writes the file with root privileges. A plain > redirection would still run in your regular shell and fail against a root-owned path.
Create the Nginx Server Block on Debian
Write the site configuration into /etc/nginx/sites-available/.
printf '%s\n' \
'server {' \
'    listen 80;' \
'    listen [::]:80;' \
'    server_name example.com www.example.com;' \
'    root /var/www/example.com;' \
'    index index.html;' \
'    location / {' \
'        try_files $uri $uri/ =404;' \
'    }' \
'}' | sudo tee /etc/nginx/sites-available/example.com.conf > /dev/null
This server block listens on port 80 for both the apex domain and the www hostname, then serves files from /var/www/example.com.
Enable the Nginx Server Block on Debian
Enable the site by creating the symlink that Debian’s Nginx package reads from sites-enabled.
sudo ln -sfn /etc/nginx/sites-available/example.com.conf /etc/nginx/sites-enabled/example.com.confDebian also enables a default site in
/etc/nginx/sites-enabled/default. You can leave it in place, but if you do not want the welcome page to answer unmatched requests, remove that symlink after your own site is working.
sudo rm -f /etc/nginx/sites-enabled/defaultTest and Reload the Nginx Configuration on Debian
Validate the configuration before you reload the service.
sudo nginx -tExpected output:
nginx: the configuration file /etc/nginx/nginx.conf syntax is ok
nginx: configuration file /etc/nginx/nginx.conf test is successful
Reload Nginx once the syntax check passes.
sudo systemctl reload nginxTest the Nginx Server Block on Debian
If your DNS already points at the server, open the domain in a browser. For a quick local test, send a request with the expected host header.
Some minimal Debian installs do not include
curlyet. Install it withsudo apt install curl -yif needed, or run the same request from another machine that can reach the server.
curl --noproxy '*' -H 'Host: example.com' http://127.0.0.1/Expected output:
<html>
  <head><title>Welcome to Example.com</title></head>
  <body><h1>Success! The Nginx server block is working!</h1></body>
</html>
Manage Nginx on Debian
After the web server is online, the next jobs are usually TLS, log review, and routine package updates.
Use systemctl to manage Nginx on Debian
Use reload after configuration changes, restart after deeper package or module changes, and enable --now when you need to bring the service back immediately.
| Task | Command |
|---|---|
| Reload after a valid configuration edit | sudo systemctl reload nginx |
| Restart after package, module, or deeper service changes | sudo systemctl restart nginx |
| Enable and start the service | sudo systemctl enable --now nginx |
| Stop and disable the service | sudo systemctl disable --now nginx |
Find Important Nginx Files and Directories on Debian
These are the Debian paths you will return to most often when you manage sites, logs, and the stock welcome page.
| Path | Purpose |
|---|---|
/etc/nginx/nginx.conf | Main global Nginx configuration file |
/etc/nginx/sites-available/ | Site definitions that are available but not necessarily enabled |
/etc/nginx/sites-enabled/ | Symlinks for the server blocks Nginx actually loads |
/var/www/html/ | Debian’s default web root for the stock welcome page |
/var/log/nginx/access.log | Request log |
/var/log/nginx/error.log | Error log for syntax, permissions, and upstream failures |
Debian’s Nginx worker processes run as www-data by default, which matters when you set ownership on web roots, PHP-FPM sockets, cache directories, or upload paths.
Secure Nginx with Let’s Encrypt on Debian
Install the Debian Certbot package for Nginx, then confirm that Debian’s renewal timer is active.
sudo apt install python3-certbot-nginx -yIf APT reports Unable to locate package python3-certbot-nginx, refresh the package index with sudo apt update and confirm the main Debian repository is enabled. The package is available from Debian’s main repository on Debian 13, 12, and 11.
systemctl is-enabled certbot.timer
systemctl is-active certbot.timer
Expected output:
enabled
active
Once your DNS records already point at the server, request the certificate and let Certbot update the Nginx configuration for you. Replace the email address and domains with values you control.
sudo certbot --nginx --non-interactive --agree-tos --no-eff-email --redirect --email admin@example.com -d example.com -d www.example.comRun sudo certbot renew --dry-run only after at least one certificate exists. On a fresh install with no certificates yet, Certbot simply reports No simulated renewals were attempted. Add stricter options such as HSTS only after the HTTPS site is stable, because HSTS tells browsers to keep forcing HTTPS for the domain. For a full walkthrough, see how to secure Nginx with Let’s Encrypt on Debian.
For extra HTTPS hardening after the certificate is in place, see how to configure security headers in Nginx.
Monitor Nginx Logs on Debian
Check the access and error logs when you need to confirm requests, trace reload failures, or inspect traffic. For a fuller log workflow, see the Nginx access and error logs guide.
sudo ls -l /var/log/nginx/sudo tail -f /var/log/nginx/access.logsudo tail -f /var/log/nginx/error.logUpdate Nginx on Debian
Use --only-upgrade when you want to update Nginx without turning the command into a full system upgrade.
sudo apt update
sudo apt install --only-upgrade nginx nginx-common -y
If you installed nginx-extras, nginx-full, nginx-core, or nginx-light instead of the standard package, include that package name in the upgrade command too so the matching module bundle stays in sync.
Troubleshoot Nginx on Debian
These checks cover the failure modes most readers hit first: missing commands in SSH sessions, broken configuration syntax, port conflicts with another web service, and the stock welcome page still appearing after you add your own site.
Fix Nginx Command Not Found on Debian
If nginx -v reports command not found, check whether the package is installed before you assume the installation failed.
apt-cache policy nginxExpected output after installation:
nginx:
  Installed: 1.x.x
  Candidate: 1.x.x
  Version table:
 *** 1.x.x 500
        500 http://security.debian.org/debian-security [your-release]-security/main amd64 Packages
If the package is installed, use sudo nginx -v or the full path /usr/sbin/nginx -v. On some Debian SSH sessions, /usr/sbin is not part of the regular user PATH.
Fix Nginx Configuration Errors on Debian
When a reload fails, test the configuration first so Nginx tells you which file and line caused the problem.
sudo nginx -tRelevant error output can look like this when a directive is misspelled:
nginx: [emerg] unknown directive "server_nam" in /etc/nginx/sites-enabled/example.com.conf:4
Expected output after you correct the file:
nginx: the configuration file /etc/nginx/nginx.conf syntax is ok
nginx: configuration file /etc/nginx/nginx.conf test is successful
Fix Port 80 and 443 Conflicts for Nginx on Debian
If Nginx cannot bind to port 80 or 443, check which process is already listening there.
nginx: [emerg] bind() to 0.0.0.0:80 failed (98: Address already in use)
sudo ss -tlnp | grep -E ':(80|443)\b'Example output when Apache already owns port 80:
LISTEN 0 511 0.0.0.0:80 0.0.0.0:* users:(("apache2",pid=1234,fd=4))
Stop the conflicting service or move one of the listeners to another port. If you need to change Nginx itself, see how to change ports in Nginx.
sudo systemctl start nginx
systemctl is-active nginx
systemctl is-enabled nginx
Expected output after the conflict is resolved:
active
enabled
Fix the Welcome to nginx page after adding a site on Debian
If the browser still shows the stock welcome page, the usual causes are unfinished DNS propagation or Debian’s default site still being enabled.
curl --noproxy '*' -H 'Host: example.com' http://127.0.0.1/If that request returns your custom page, Nginx is already serving the right server block and DNS is the remaining issue. If it still lands on the stock page and this server only needs your own site, remove the default symlink and reload Nginx.
sudo rm -f /etc/nginx/sites-enabled/default
sudo systemctl reload nginx
Remove Nginx from Debian
Stop the service first, then purge the package and Debian’s shared Nginx files. Keep UFW installed if it manages rules for SSH or other services; remove only Nginx-specific firewall profiles that you no longer need.
sudo systemctl disable nginx --nowIf you opened Nginx through UFW, remove the profile rule before purging nginx-common. Debian’s Nginx package owns the UFW application profile file, so deleting the rule is cleaner while the profile still exists.
sudo ufw --force delete allow 'Nginx Full'Purging only
nginxleavesnginx-commonand can leave the optional module bundle on Debian 11. Include the common package and bundle names when you want a clean removal.
sudo apt purge nginx nginx-common nginx-core nginx-full nginx-light nginx-extras -yIf you installed the Certbot Nginx plugin for this site and no other certificate workflows need it, purge those packages explicitly. APT marks python3-certbot-nginx as manually installed when you install it directly, so autoremove alone is not the right cleanup path.
sudo apt purge certbot python3-certbot python3-certbot-nginx -yapt -s autoremove --purgeRun the real autoremove only after you review the simulation and confirm the listed packages belong to this Nginx or Certbot cleanup. Do not delete site content under
/var/www/until you are sure no other server block uses it.
sudo apt autoremove --purge -yVerify that the main Nginx packages are gone.
sudo apt updateapt-cache policy nginx nginx-commonExpected output:
nginx:
  Installed: (none)
  Candidate: 1.x.x

nginx-common:
  Installed: (none)
  Candidate: 1.x.x
Conclusion
Nginx is running on Debian and ready for static sites, reverse proxies, and the front end of a full web stack. The usual next steps are to secure Nginx with Let’s Encrypt on Debian, install PHP on Debian for dynamic applications, or install MariaDB on Debian when you need a database-backed site.

Reading package lists… Done
Building dependency tree… Done
Reading state information… Done
E: Unable to locate package python3-certbot-nginx
Thanks for reporting this, schel4ok. The
python3-certbot-nginxpackage is in the main repository on all current Debian releases (11, 12, and 13). This error typically occurs when the package cache is stale or the main repository is missing from your sources configuration.First, refresh your package cache and retry:
If it still fails, check whether the package is available from your configured repositories:
If the output shows “Candidate: (none)”, your main Debian repository is missing. Some minimal server installations only include security repositories. Check your sources with
cat /etc/apt/sources.list /etc/apt/sources.list.d/*and ensure you have an entry for your release’s main repository (bullseye, bookworm, or trixie).