
Older Windows programs often need more than a plain Wine prefix, especially when each app expects different libraries, Windows versions, or installer workarounds. You can install PlayOnLinux on Ubuntu to manage those prefixes through a graphical Wine front end instead of configuring every Windows application by hand.
Ubuntu 24.04 and 22.04 still list PlayOnLinux 4.3.4 in the Multiverse repository, but Ubuntu 24.04 needs an extra Python compatibility package to avoid a startup error. Ubuntu 26.04 has no APT candidate, so the Flathub package is the practical path on that release.
Install PlayOnLinux on Ubuntu
Choose the PlayOnLinux Installation Method on Ubuntu
Use the method that matches your Ubuntu release and package preference. The APT package is older and release-limited, while Flatpak gives one install path across Ubuntu 26.04, 24.04, and 22.04.
| Method | Source | Current Build | Updates | Best Fit |
|---|---|---|---|---|
| APT | Ubuntu Multiverse package | PlayOnLinux 4.3.4 | Standard APT upgrades | Ubuntu 24.04 or 22.04 users who want the distro package and can accept the older 4.x branch |
| Flatpak | Flathub | PlayOnLinux 4.4 | sudo flatpak update | Ubuntu 26.04 users, or anyone who wants the same PlayOnLinux package across current Ubuntu LTS releases |
The Flatpak package grants broad host and device access because Windows installers and Wine prefixes often need files, audio, graphics, and removable media. Treat it as a Flathub packaging and update path, not as a tightly isolated sandbox.
The upstream PlayOnLinux download page still offers a standalone 4.3.4 .deb and legacy Ubuntu repository snippets for old codenames. Those paths are not used here because the Ubuntu package and Flathub remote provide clearer update and removal behavior for current Ubuntu releases. Snap is not a current PlayOnLinux install option. If you were looking for a newer Wine environment manager instead, see how to install Bottles on Ubuntu.
Install PlayOnLinux with APT on Ubuntu 24.04 or 22.04
Skip this APT method on Ubuntu 26.04. The
playonlinuxpackage has no APT candidate on Ubuntu 26.04, so use the Flatpak method instead.
Refresh Ubuntu Package Metadata
Refresh the package index before installing the APT package:
sudo apt updateInstall PlayOnLinux on Ubuntu 24.04
Ubuntu 24.04 uses Python 3.12, which no longer includes the old asyncore module that PlayOnLinux imports. Install python3-pyasyncore with PlayOnLinux so the application can start normally:
sudo apt install playonlinux python3-pyasyncoreInstall PlayOnLinux on Ubuntu 22.04
Ubuntu 22.04 still includes the Python module that PlayOnLinux expects, so the normal package install is enough:
sudo apt install playonlinuxVerify the APT Package
Confirm that APT installed the PlayOnLinux package:
dpkg-query -W -f='${db:Status-Abbrev} ${binary:Package} ${Version}\n' playonlinuxRelevant output on Ubuntu 24.04 shows the Noble package revision:
ii playonlinux 4.3.4-3
Ubuntu 22.04 reports the Jammy package revision, 4.3.4-2.
Install PlayOnLinux with Flatpak on Ubuntu
Flatpak is not pre-installed on Ubuntu. If you have not set it up yet, follow the guide to install Flatpak on Ubuntu before continuing.
Enable Flathub for PlayOnLinux
Add Flathub as a system remote if it is not already configured:
sudo flatpak remote-add --if-not-exists flathub https://dl.flathub.org/repo/flathub.flatpakrepoInstall the PlayOnLinux Flatpak
Install PlayOnLinux from the Flathub remote:
sudo flatpak install flathub com.playonlinux.PlayOnLinux4 -yThe first Flatpak install downloads PlayOnLinux plus its Freedesktop and Wine runtime components, so it can take longer than a small APT package.
Verify the Flatpak Package
Confirm that the installed Flatpak app ref matches PlayOnLinux:
flatpak info --show-ref com.playonlinux.PlayOnLinux4Expected output:
app/com.playonlinux.PlayOnLinux4/x86_64/stable
Launch PlayOnLinux on Ubuntu
Launch PlayOnLinux from the Applications Menu
Open the Activities overview and search for PlayOnLinux. For Flatpak installs, log out and back in if the desktop icon does not appear immediately after the first install.
Launch PlayOnLinux from the Terminal
For the APT package, run the desktop launcher command directly:
playonlinuxFor the Flatpak package, use the Flathub app ID:
flatpak run com.playonlinux.PlayOnLinux4Use PlayOnLinux on Ubuntu
On first launch, PlayOnLinux may refresh its script list or prompt for Wine-related components. Allow those updates before installing Windows software so the application has its current installer scripts.
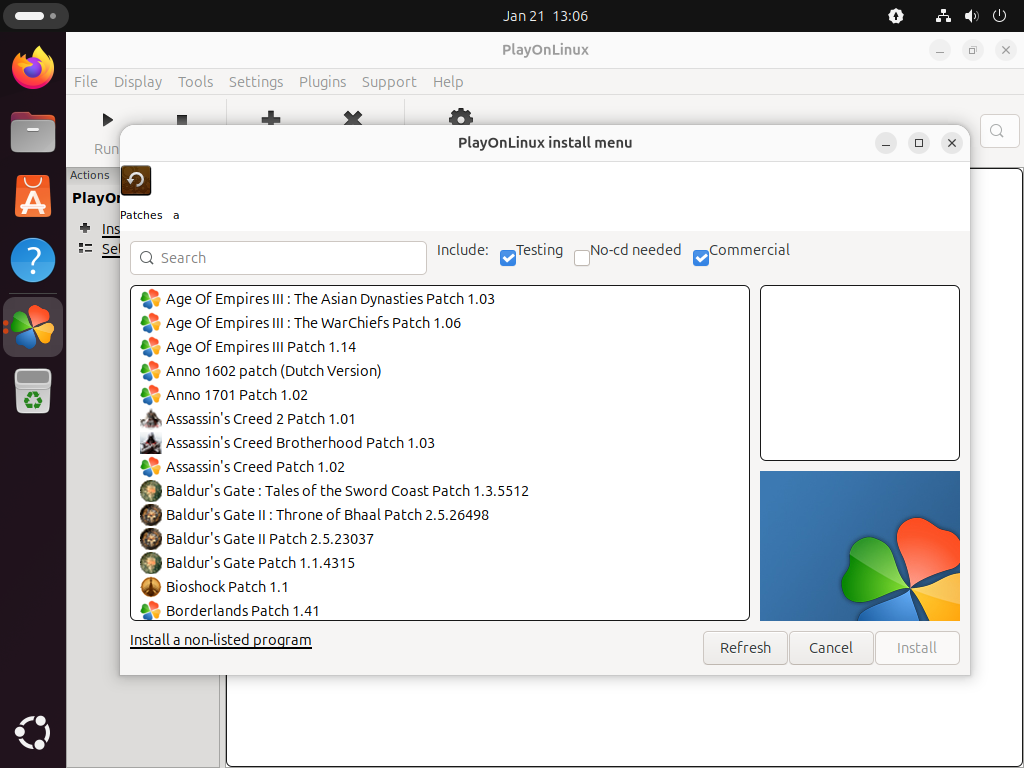
Install a Windows Application
Use the graphical install menu for supported applications:
- Click Install in the main toolbar.
- Browse or search the available installation scripts.
- Select the application you want to install and follow the wizard.
- Provide the Windows installer when PlayOnLinux asks for it.
Each installation creates a separate Wine prefix, which keeps one Windows application’s libraries and registry changes from affecting another. For more control over Wine itself, see the guide to install Wine on Ubuntu.
Install a Non-Listed Program
If the application is not listed, use the Install a non-listed program link in the install menu. This creates a custom Wine prefix and lets you run the vendor’s Windows installer manually. Manual installs need more Wine knowledge, but they are often the right fallback when a prebuilt PlayOnLinux script is outdated.
Manage Wine Versions
PlayOnLinux can manage multiple Wine versions independently of the host system’s default Wine package. Open Tools > Manage Wine Versions when a specific Windows application needs a newer or older Wine branch than the default.
Update or Remove PlayOnLinux on Ubuntu
Update PlayOnLinux
APT installs update with normal Ubuntu package upgrades:
sudo apt update
sudo apt upgrade
Flatpak installs update through the Flathub remote:
sudo flatpak update com.playonlinux.PlayOnLinux4Remove the APT Package
Remove the Ubuntu package while keeping any user Wine prefixes:
sudo apt remove playonlinuxConfirm that the package no longer has an installed state:
dpkg-query -W -f='${db:Status-Abbrev} ${binary:Package}\n' playonlinux 2>/dev/null | grep '^ii' || echo "NOT_INSTALLED"Expected output after removal:
NOT_INSTALLED
If you installed python3-pyasyncore only for PlayOnLinux on Ubuntu 24.04, remove it separately:
sudo apt remove python3-pyasyncoreUse purge instead of remove only when you want to delete package-level configuration managed by APT:
sudo apt purge playonlinuxPreview orphaned dependencies before removing them, because APT may also list unrelated packages left over from earlier system changes:
sudo apt autoremove --dry-runIf the preview lists only packages you no longer need, run the cleanup:
sudo apt autoremoveAPT removal does not delete Windows applications and Wine prefixes stored under
~/.PlayOnLinux/. Delete that directory only when you intentionally want to remove those installed Windows programs and their data.
rm -rf "$HOME/.PlayOnLinux"Remove the Flatpak Package
Remove the system Flatpak application first:
sudo flatpak uninstall com.playonlinux.PlayOnLinux4Confirm the app ID is no longer installed:
flatpak list --app --columns=application | grep -Fx com.playonlinux.PlayOnLinux4 || echo "NOT_INSTALLED"Flatpak package removal does not necessarily remove every PlayOnLinux profile or Windows application stored in your user account. Delete the Flatpak profile directory only when you intentionally want to remove that user data.
rm -rf "$HOME/.var/app/com.playonlinux.PlayOnLinux4"After reviewing Flatpak’s confirmation prompt, remove unused runtimes that are no longer needed by any Flatpak app:
sudo flatpak uninstall --unusedTroubleshoot PlayOnLinux on Ubuntu
Package Has No Installation Candidate
On Ubuntu 26.04, this error is expected because Ubuntu does not currently publish a playonlinux package for that release:
E: Package 'playonlinux' has no installation candidate
Use the Flatpak method on Ubuntu 26.04. On Ubuntu 24.04 or 22.04, the same error usually means Multiverse is disabled. If add-apt-repository is missing on a minimal install, install its helper package first:
sudo apt install software-properties-commonThen enable Multiverse and refresh APT:
sudo add-apt-repository multiverse
sudo apt update
apt-cache policy playonlinux
Relevant output on Ubuntu 24.04 should show a candidate from noble/multiverse. Ubuntu 22.04 should show a candidate from jammy/multiverse. For more detail, see how to enable Universe and Multiverse repositories on Ubuntu.
No Module Named asyncore on Ubuntu 24.04
If the APT package fails to open on Ubuntu 24.04, the terminal may show this Python error:
ModuleNotFoundError: No module named 'asyncore'
Install the compatibility package that restores the removed module for Python 3.12, then launch PlayOnLinux again:
sudo apt install python3-pyasyncoreMissing 32-bit Wine Libraries
Some older Windows programs need 32-bit Wine libraries. For APT-based installs on Ubuntu 24.04 or 22.04, enable the i386 architecture and install wine32:
sudo dpkg --add-architecture i386
sudo apt update
sudo apt install wine32
The Flatpak package already uses a Wine runtime with 32-bit compatibility extensions, so do not install host-side wine32 just to fix a Flatpak PlayOnLinux install.
Windows Installer Script Fails
Preconfigured scripts can break when a Windows software vendor changes an installer URL, version, or download flow. Refresh the script list inside PlayOnLinux first. If the script still fails, check the PlayOnLinux forums for that specific application, or use Install a non-listed program and provide the Windows installer manually.
Graphics or 3D Application Issues
Games and 3D applications depend on the host graphics stack even when PlayOnLinux manages the Wine prefix. NVIDIA users should use the packaged proprietary driver path when Nouveau is not enough, and AMD or Intel users may need a newer Mesa stack for recent GPUs. See the Ubuntu guides to install NVIDIA drivers on Ubuntu and upgrade Mesa drivers on Ubuntu when graphics support is the real blocker.
Conclusion
PlayOnLinux is now installed through the method that fits your Ubuntu release: Flatpak for Ubuntu 26.04 or a consistent Flathub package across releases, and APT for Ubuntu 24.04 or 22.04 when you prefer the older Multiverse package and apply the Ubuntu 24.04 Python compatibility fix.

Running version updated version of PlayOnLinux. Trying to create a 64-bit virtual drive but I get the error:
“Error in POL_Wine
Starting 64-bit process /home/brian/Autostakkert4/AutoStakkert.exe is not supported in 32-bit virtual drives”
I am (trying) to install a 64-bit process using a 64-bit computer on a program I assume is 64-bit as well but being told that I am creating a 32-bit virtual drive.
Confused!!!
Good question, Brian. By default, PlayOnLinux creates 32-bit Wine prefixes because they have broader compatibility with older Windows software. To run 64-bit applications like AutoStakkert4, you need to explicitly create a 64-bit virtual drive.
In PlayOnLinux, go to Tools > Manage Wine Versions and install a 64-bit Wine version (look for versions with “amd64” in the name). Then create a new virtual drive by clicking Configure > New, selecting your 64-bit Wine version, and choosing 64-bit Windows installation when prompted.
Alternatively, use the manual installation option from the main menu. When the wizard asks about the virtual drive architecture, select 64-bit. After creating the 64-bit prefix, you can install AutoStakkert4 into it. The key is that the virtual drive architecture must be set during creation, as it cannot be changed afterward.