
A Debian server becomes a practical Plex host when the package source, service account, media permissions, and network path all line up. Plex Media Server runs as its own plex user, listens on TCP port 32400, stores its application data under /var/lib/plexmediaserver, and now uses Plex’s newer v2 APT repository for package updates. On Debian 13 (Trixie), Debian 12 (Bookworm), and Debian 11 (Bullseye), the reliable path is Plex’s current APT repository followed by service checks, media-library permissions, and a deliberate firewall or reverse-proxy choice.
The APT repository path matters more than it used to. Plex changed its Linux repository beginning with Plex Media Server 1.43.0, according to its official repository update instructions, so older examples that still use https://downloads.plex.tv/repo/deb or the original PlexSign.key can leave Debian users with stale package metadata or key-signature errors. The commands here use https://repo.plex.tv/deb/ and PlexSign.v2.key.
Install Plex Media Server on Debian
Choose the Plex Installation Source
Most Debian users should install Plex from the official Plex APT repository. It gives you the same server package as a manual .deb download, but future updates arrive through apt instead of requiring a new file from the Plex downloads page.
| Path | Update Behavior | Best For | Trade-off |
|---|---|---|---|
| Official Plex APT repository | Managed by APT with sudo apt update and package upgrades. | Normal Debian servers, headless installs, and long-term media libraries. | Requires adding Plex’s signing key and source file correctly. |
Manual .deb download | Manual unless you add the repository later. | One-off testing or systems where you cannot add a repository. | Easy to forget updates and cleanup; not used as the main method here. |
| Docker | Managed by container image updates. | Users who already manage services with containers. | Different storage, device, networking, and hardware-transcoding setup; use a dedicated Docker on Debian workflow. |
| Jellyfin alternative | Depends on the Jellyfin package source. | Users who want a fully open-source media server without a Plex account. | Different client ecosystem and feature set; see Install Jellyfin on Debian. |
The repository metadata currently publishes packages for common Debian architectures such as amd64, arm64, armhf, and i386. The source file uses your system’s own dpkg --print-architecture value, so APT will fail clearly if Plex does not publish a package for the architecture you are running.
Update Debian Packages First
Refresh the package index and apply pending Debian updates before adding Plex. This avoids solving new repository problems on top of old package-manager state.
sudo apt update
sudo apt upgrade
These commands use
sudobecause package updates and repository changes require root privileges. If your account cannot runsudo, add the account to sudoers on Debian before continuing.
For a full walkthrough of Debian administrative access, see add a user to sudoers on Debian.
Install Repository Prerequisites
Minimal Debian installs may not include curl, gpg, or current certificate bundles. Install them before downloading the Plex signing key.
sudo apt install ca-certificates curl gpgca-certificateslets APT and curl verify HTTPS endpoints.curldownloads the Plex signing key from the official Plex host.gpgconverts the ASCII-armored Plex key into a keyring file APT can use throughSigned-By.
Remove Old Plex Repository Files
Skip this step only on a completely fresh Plex install. If Plex was installed from an older article, a manual .deb package, or the old repository, remove the old source files before writing the current DEB822 file. This prevents duplicate-source errors and old key paths from shadowing the new repository.
sudo rm -f \
  /etc/apt/sources.list.d/plex.list \
  /etc/apt/sources.list.d/plexmediaserver.list \
  /etc/apt/sources.list.d/plexmediaserver.sources \
  /usr/share/keyrings/plex.gpg \
  /usr/share/keyrings/plexmediaserver.gpg \
  /etc/apt/keyrings/plexmediaserver.gpg \
  /etc/apt/keyrings/plexmediaserver.v2.gpg
The command removes only common Plex source and keyring paths. It does not remove the installed Plex package, media files, library metadata, or your /var/lib/plexmediaserver data.
Import the Current Plex Signing Key
Create the APT keyring directory, download Plex’s v2 signing key, dearmor it, and make the resulting keyring readable by APT.
sudo install -m 0755 -d /etc/apt/keyrings
curl -fsSL https://downloads.plex.tv/plex-keys/PlexSign.v2.key | sudo gpg --dearmor --yes -o /etc/apt/keyrings/plexmediaserver.v2.gpg
sudo chmod 0644 /etc/apt/keyrings/plexmediaserver.v2.gpg
You can verify the saved key if you want to confirm that the v2 key was imported. The current key fingerprint is 6EFF EB47 8A65 59D7 5C7C 4FE7 06C5 2179 0B9C FFDE.
gpg --show-keys --with-fingerprint /etc/apt/keyrings/plexmediaserver.v2.gpgpub ed25519 2024-02-20 [C]
6EFF EB47 8A65 59D7 5C7C 4FE7 06C5 2179 0B9C FFDE
uid Plex Inc. (SHA-512)
sub ed25519 2024-02-20 [S] [expires: 2029-02-18]
Add the Plex DEB822 Source File
Plex’s support page still shows a traditional one-line .list example. Debian refreshes should prefer a DEB822 .sources file because the repository fields are easier to audit and cleanup is clearer.
printf '%s\n' \
'Types: deb' \
'URIs: https://repo.plex.tv/deb/' \
'Suites: public' \
'Components: main' \
"Architectures: $(dpkg --print-architecture)" \
'Signed-By: /etc/apt/keyrings/plexmediaserver.v2.gpg' | sudo tee /etc/apt/sources.list.d/plexmediaserver.sources > /dev/null
The Suites: public value is Plex’s repository suite, not a Debian codename. Do not replace it with trixie, bookworm, or bullseye; Plex uses the same public suite for supported Debian-family packages.
Refresh APT and Confirm the Plex Candidate
Refresh APT after adding the source, then confirm that plexmediaserver comes from repo.plex.tv.
sudo apt update
apt-cache policy plexmediaserver
The exact Plex version changes as Plex publishes updates. The important success signal is a non-empty candidate from https://repo.plex.tv/deb.
plexmediaserver:
  Installed: (none)
  Candidate: 1.43.2.10687-563d026ea
  Version table:
     1.43.2.10687-563d026ea 500
        500 https://repo.plex.tv/deb public/main amd64 Packages
Install the Plex Media Server Package
Install the server package after APT sees the Plex candidate.
sudo apt install plexmediaserverThe package installs the Plex binaries under /usr/lib/plexmediaserver, creates the plex service account on a new install, registers the plexmediaserver.service systemd unit, and stores application data under /var/lib/plexmediaserver.
| Installed Surface | Value | Why It Matters |
|---|---|---|
| Package name | plexmediaserver | Use this name for install, update, remove, and package-policy checks. |
| Systemd service | plexmediaserver.service | Controls the server process on Debian. |
| Runtime user | plex | Needs read and execute access to media folders. |
| Application data | /var/lib/plexmediaserver | Contains metadata, settings, server identity, posters, and watch state. |
| Installed binaries | /usr/lib/plexmediaserver | Package-owned program files; do not edit these for configuration. |
| Default web port | 32400/tcp | Used by Plex Web App, local clients, and remote access. |
Verify Plex Service and Listener
Plex normally starts automatically after installation. Check the installed package, service state, and default listener.
dpkg-query -W -f='${db:Status-Abbrev} ${binary:Package} ${Version}\n' plexmediaserver
systemctl is-active plexmediaserver
systemctl is-enabled plexmediaserver
sudo ss -tlnp | grep ':32400'
A healthy installation reports the package as installed, the service as active, the unit as enabled, and a listener on TCP port 32400. If the service is not active yet, start it manually.
sudo systemctl start plexmediaserver
sudo systemctl enable plexmediaserver
Use a restart only after changing Plex settings, permissions, or reverse proxy behavior that requires the service to reload its runtime state.
sudo systemctl restart plexmediaserverConfigure the Debian Firewall for Plex
Debian does not enable UFW by default on every install, so treat firewall work as a separate decision. Local-only Plex servers may need no public inbound rule at all. LAN and remote-access servers usually need TCP port 32400 open on the Debian host, and internet access also needs router or upstream firewall forwarding.
Install and Enable UFW Safely
Install UFW if you want a simple firewall manager for this Debian server.
sudo apt install ufwAllow SSH before enabling UFW on a remote server. Enabling a firewall without an SSH rule can lock you out of the machine you are administering.
sudo ufw allow 22/tcp
sudo ufw enable
sudo ufw status
For a fuller firewall setup and rule cleanup workflow, see install and configure UFW on Debian.
Allow the Required Plex Port
Plex’s required server port is TCP 32400. Open this port when other devices must reach the Plex server from your LAN or through router port forwarding.
sudo ufw allow 32400/tcp
sudo ufw status numbered
If the Debian server has a public IP address, keep the rule as narrow as your setup allows. For a LAN-only server, replace 192.168.1.0/24 with your real local subnet to limit access to local clients. If you already added the broader rule, ufw delete asks for confirmation before removing it. Replace 22/tcp in the earlier SSH rule if your server listens on a custom SSH port.
sudo ufw delete allow 32400/tcp
sudo ufw allow from 192.168.1.0/24 to any port 32400 proto tcp
Add Optional Local Discovery Ports
Plex’s firewall port reference documents several additional ports for local discovery, DLNA, and companion features. Do not forward these optional ports to the public internet. Use them only when a local device or Plex feature needs them, and scope them to your LAN subnet whenever possible.
| Port | Protocol | Purpose | Typical Exposure |
|---|---|---|---|
1900 | UDP | DLNA discovery. | Local network only. |
5353 | UDP | Older Bonjour or Avahi discovery. | Local network only. |
8324 | TCP | Plex Companion control, such as Roku control. | Local network only. |
32410, 32412, 32413, 32414 | UDP | Current GDM network discovery. | Local network only. |
32469 | TCP | DLNA server access. | Local network only. |
sudo ufw allow from 192.168.1.0/24 to any port 1900 proto udp
sudo ufw allow from 192.168.1.0/24 to any port 5353 proto udp
sudo ufw allow from 192.168.1.0/24 to any port 8324 proto tcp
sudo ufw allow from 192.168.1.0/24 to any port 32410 proto udp
sudo ufw allow from 192.168.1.0/24 to any port 32412 proto udp
sudo ufw allow from 192.168.1.0/24 to any port 32413 proto udp
sudo ufw allow from 192.168.1.0/24 to any port 32414 proto udp
sudo ufw allow from 192.168.1.0/24 to any port 32469 proto tcp
Router forwarding is a separate layer. Plex remote access normally maps a WAN or external TCP port to the Debian server’s LAN TCP port 32400. Plex’s own remote-access documentation allows a different external port, but the internal LAN destination remains 32400.
Access Plex Web App for Initial Setup
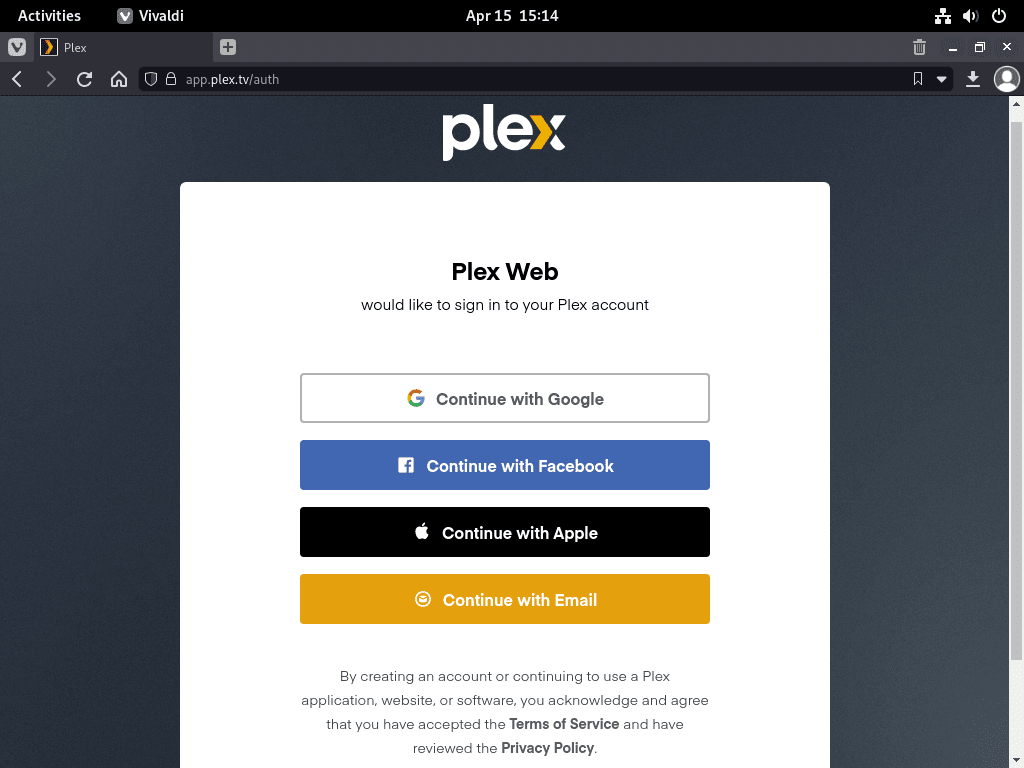
The first Plex setup must be performed from the server itself, from another device on the same network, or through an SSH tunnel that makes the remote server look local to your browser. Plex uses the web app for account sign-in, server claiming, library creation, remote access choices, and Plex Pass prompts.
Open Plex Locally on the Debian Server
Use http://127.0.0.1:32400/web or http://localhost:32400/web when the browser is running on the same Debian machine as Plex.
If the web app does not load immediately after installation, give the service a short moment to finish its first startup and confirm the service is active with systemctl is-active plexmediaserver.
Open Plex from Another LAN Device
Use the Debian server’s local IP address from another computer, phone, or tablet on the same network. Replace 192.168.1.50 with the server’s actual address, then open http://192.168.1.50:32400/web.
Find the server’s local address with hostname -I or your router’s DHCP lease page if you do not already know it.
hostname -IUse an SSH Tunnel for a Headless Remote Server
An SSH tunnel is useful when Plex is installed on a remote Debian server and the initial setup page only trusts local access. Keep the tunnel open while you claim the server and complete the first setup.
Install and start the SSH server on Debian if inbound SSH is not already configured.
sudo apt install openssh-server
sudo systemctl enable ssh --now
For a complete SSH setup, including service checks and firewall rules, see install and enable SSH on Debian. For SSH client syntax and tunneling options, see the SSH command guide.
Run the tunnel command on your local computer, not inside the remote SSH session. Replace joshua and 203.0.113.10 with your real remote username and server address.
ssh -L 8888:127.0.0.1:32400 joshua@203.0.113.10Then open http://localhost:8888/web from your local browser.
Check the local tunnel listener if the browser cannot connect.
ss -tln | grep ':8888'Complete Initial Plex Setup
Plex setup is account-based. The server package is free to install, but you need a Plex account to claim the server and connect it to Plex clients. Plex Pass is optional; the free tier is enough for basic library organization, local streaming, and many remote-access setups. Plex Pass adds paid features such as hardware transcoding, HDR tone mapping, mobile sync, live TV and DVR features, and early-access builds.
Understand Account, Cost, and Media Ownership
Plex Media Server is safe to install when the package comes from Plex’s official download or repository source, and APT verifies the package with Plex’s signing key. Legal use depends on the media you add to the server. Use Plex to organize and stream media you own, licensed media, or media you otherwise have the right to store and stream.
A Plex account is free, and a Plex Pass subscription is not required for the basic Debian server install. Treat Plex Pass as a feature upgrade rather than an installation requirement. Hardware transcoding, DVR workflows, and some mobile/offline features are the common reasons users consider it later.
Sign In to Plex Web App
Open the Plex Web App address that matches your access path and sign in with a Plex account. New users can create an account with email or one of the listed identity providers.
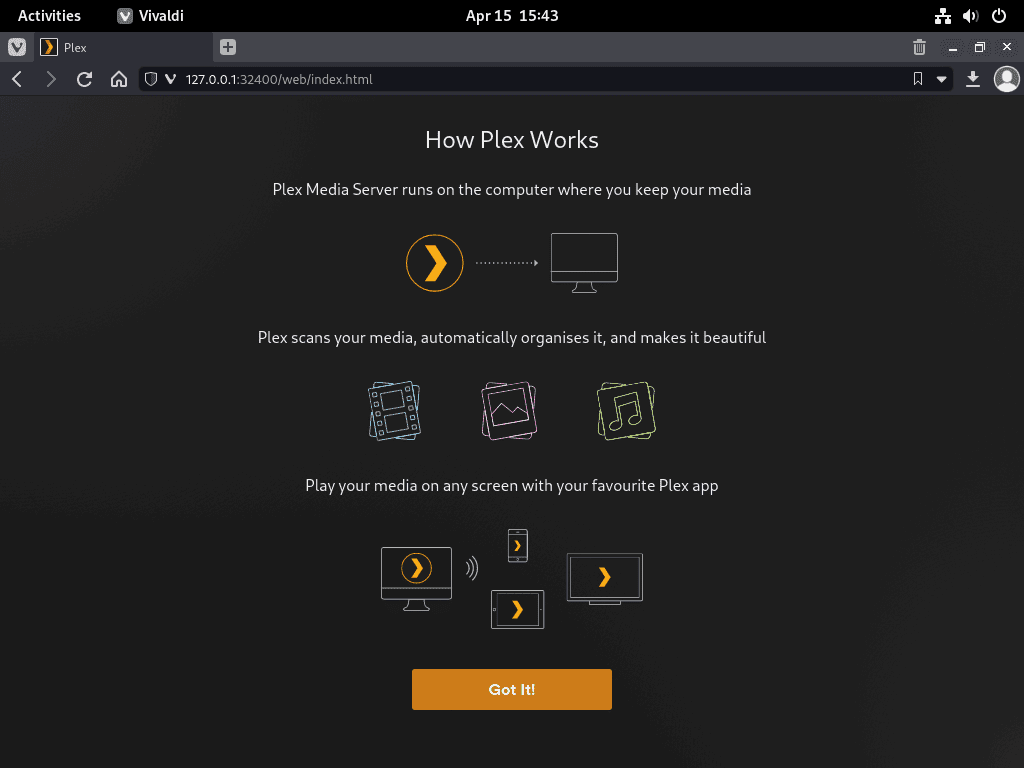
Review the Welcome Screen
The welcome screen introduces the server setup flow. Firefox users may see a DRM prompt because Plex Web App can depend on browser media playback components. Enable DRM if the browser requests it and you plan to use the web player.
Select GOT IT! to continue.
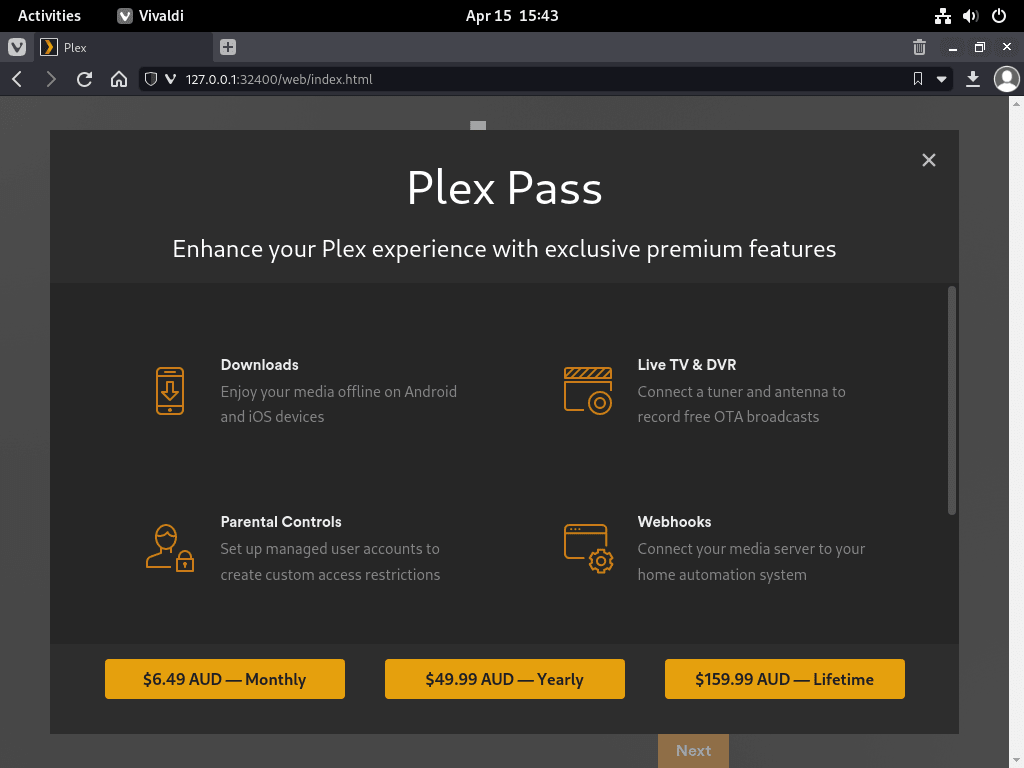
Skip or Choose Plex Pass
The Plex Pass prompt is optional. Close it if you want to finish the server setup first and decide on paid features later.
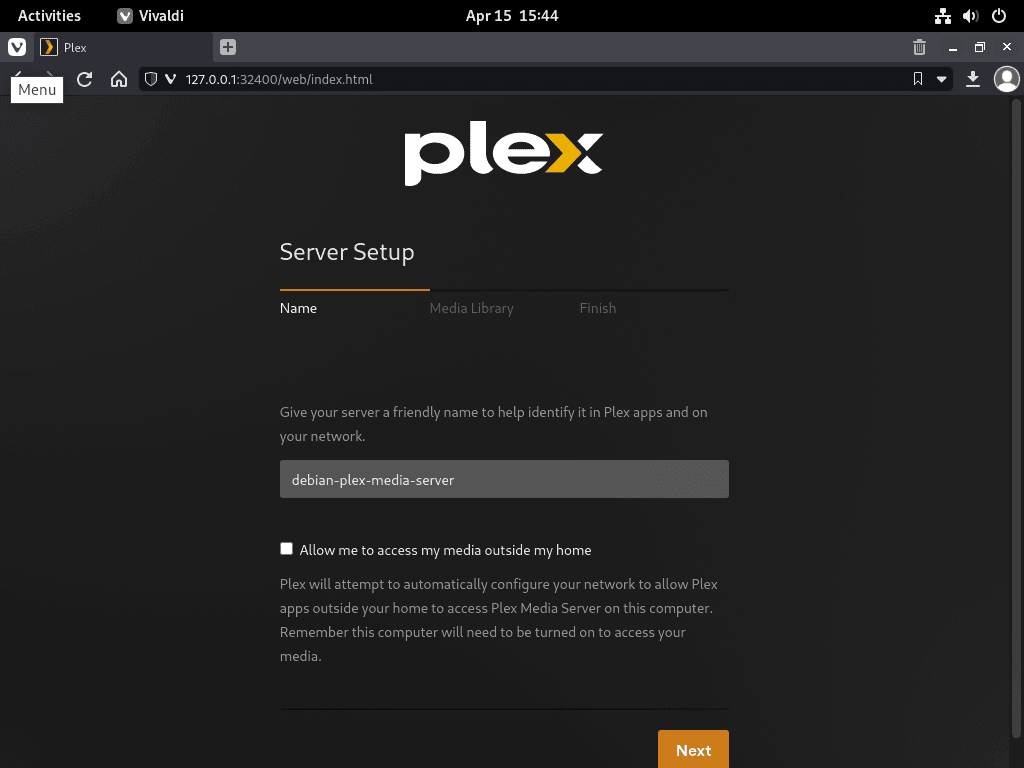
Name the Plex Server and Decide on Remote Access
Choose a server name that helps you recognize this Debian machine in Plex clients, such as debian-media, living-room-plex, or home-nas. Disable remote access if the server should stay LAN-only.
Plan Media Library Folders
Plex matches media more reliably when each library type has its own directory and files use recognizable names. Keep movies, TV shows, music, and photos separated instead of dropping everything into one folder.
- Movies:
/media/plex/movies/Avatar (2009)/Avatar (2009).mkv - TV shows:
/media/plex/tv/Show Name/Season 01/Show Name - S01E01.mkv - Music:
/media/plex/music/Artist/Album/Track Name.flac
You can add libraries during first setup or later from Plex settings. If your media path does not appear in the browser, finish the setup and correct Debian filesystem permissions before rescanning.
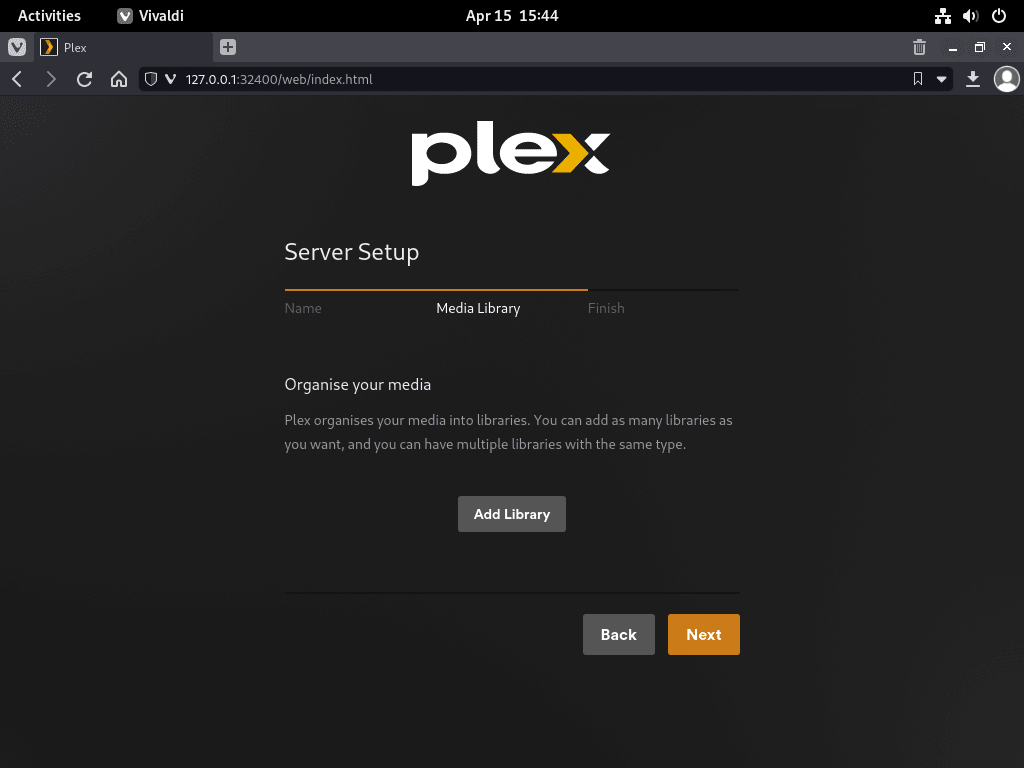
Select ADD LIBRARY, choose the library type, select the media folder, and use the advanced options only when you need a specific scanner, agent, or matching behavior.
Finish Setup and Open the Dashboard
Finish the setup when the server name, remote-access choice, and first libraries are ready. Plex opens the dashboard after the final confirmation.
Get Started with a First Plex Library
Start with one small library before pointing Plex at a large disk. A small first scan makes permission mistakes, naming issues, and mount problems easier to isolate than a multi-terabyte library with several media types mixed together.
- Create or choose one media folder, such as
/media/plex/movies. - Add one or two correctly named files first, then run the library scan.
- Fix permissions and naming before adding the rest of the library.
- Use separate libraries for movies, TV shows, music, and photos so Plex can apply the right scanner and metadata matching behavior.
If Plex finds the first files and metadata looks correct, add the larger folders and trigger another scan from the library menu. If Plex finds the folder but not the files, check the naming pattern. If Plex cannot see the folder at all, move to the Debian permissions checks next.
Configure Plex Media Permissions on Debian
Media permissions are the most common Debian-specific Plex problem after installation. The service runs as the plex user, so that user needs permission to traverse every parent directory and read the media files. Granting access only to the final folder is not enough when a parent directory blocks execute permission.
Check the Plex Service User
Confirm that the service account exists and note its group memberships.
id plexThen test whether the plex user can see a media directory. Replace /media/plex/movies with your real path.
sudo -u plex test -r /media/plex/movies && sudo -u plex test -x /media/plex/movies
sudo -u plex ls /media/plex/movies
If the test fails, inspect the whole path. The x permission on each directory is what lets Plex walk through the path to reach the files.
namei -l /media/plex/moviesGrant Access with ACLs
ACLs are usually the cleanest option for shared media folders because they let Plex read the library without changing file ownership away from your normal user or media-management workflow. Install the ACL tools first if setfacl is missing.
sudo apt install aclGrant the plex user read and execute access to the media tree. The default ACL line helps new files and folders inherit the same access later.
sudo setfacl -R -m u:plex:rX /media/plex
sudo find /media/plex -type d -exec setfacl -m d:u:plex:rX {} +
The uppercase X grants execute permission to directories while avoiding unnecessary execute permission on normal media files. For media stored under a home directory, grant execute access on the parent directories as well. Without these parent-directory permissions, Plex can still fail even when the media folder itself looks readable.
sudo setfacl -m u:plex:x /home /home/joshua
sudo setfacl -R -m u:plex:rX /home/joshua/media
sudo find /home/joshua/media -type d -exec setfacl -m d:u:plex:rX {} +
For more ACL examples and verification patterns, see the setfacl command guide.
Use Ownership Only for Dedicated Media Storage
Changing ownership is simpler but more disruptive. Use chown only when the directory is dedicated to Plex or when you intentionally want the Plex service account to own the files.
sudo chown -R plex:plex /media/plexIf another user also manages the files, ACLs are safer than changing ownership recursively. Review Linux chmod examples before broad permission changes that affect shared data.
Handle Mounted Drives Carefully
External drives and NAS mounts add another layer. For Linux filesystems such as ext4 or XFS, normal ownership and ACLs usually work. For NTFS, exFAT, FAT, SMB, or NFS mounts, the mount options may control what the plex user can read, regardless of what chmod or setfacl appears to do.
- Mount media consistently, such as under
/media/plexor/mnt/media, so Plex does not lose the path after reboot. - Check
/etc/fstabfor the mount options that assign ownership or masks on non-Linux filesystems. - Verify the final path as the
plexuser after remounting, not only as your normal admin account.
When a drive mounts below a user-specific path such as /media/joshua/MediaDisk, Plex also needs execute access on the parent mount directories. Replace joshua and MediaDisk with the real mount path from findmnt.
sudo setfacl -m u:plex:x /media /media/joshua
sudo setfacl -R -m u:plex:rX /media/joshua/MediaDisk
sudo find /media/joshua/MediaDisk -type d -exec setfacl -m d:u:plex:rX {} +
Back Up Plex Data on Debian
Plex stores library metadata, watch state, posters, preferences, and server configuration under /var/lib/plexmediaserver. Back up this directory before major Debian upgrades, storage migrations, package-source changes, or destructive cleanup.
backup_file="$HOME/plexmediaserver-backup-$(date +%Y%m%d).tar.gz"
sudo systemctl stop plexmediaserver
sudo tar -C /var/lib -czf "$backup_file" plexmediaserver
sudo chown "$USER:$USER" "$backup_file"
sudo systemctl start plexmediaserver
ls -lh "$backup_file"
Store the archive on another disk, NAS, or backup target. A backup stored on the same disk as the Plex data will not help if that disk fails.
Restore a Plex Backup
Restore only after reinstalling Plex or intentionally replacing the current library state. Replace the backup_file value with your actual archive name, stop Plex first, move the current data directory aside when it exists, extract the archive back under /var/lib, and return ownership to the plex user.
backup_file="$HOME/plexmediaserver-backup-YYYYMMDD.tar.gz"
sudo systemctl stop plexmediaserver
if [ -d /var/lib/plexmediaserver ]; then
  sudo mv /var/lib/plexmediaserver "/var/lib/plexmediaserver.before-restore-$(date +%Y%m%d%H%M%S)"
fi
sudo tar -C /var/lib -xzf "$backup_file"
sudo chown -R plex:plex /var/lib/plexmediaserver
sudo systemctl start plexmediaserver
systemctl is-active plexmediaserver
Set Up an Nginx Reverse Proxy for Plex
A reverse proxy is optional. Use it when you want Plex available through a real domain, standard HTTPS on port 443, or one public entry point for several self-hosted services. If you only use Plex on your LAN, direct access to http://server-ip:32400/web is simpler.
This example uses the Debian Nginx package and a subdomain named plex.example.com. Replace that hostname with your real domain, and make sure DNS points to the Debian server before requesting a certificate. For broader Nginx concepts, see create a reverse proxy in Nginx, configure Nginx server blocks, and install Nginx on Debian.
Install and Start Nginx
sudo apt install nginx
sudo systemctl enable nginx --now
Confirm that Nginx is running before adding the Plex server block.
systemctl is-active nginxactive
Create the Plex Server Block
Write a dedicated Nginx configuration file for the Plex subdomain. The quoted heredoc keeps Nginx variables such as $host and $http_upgrade intact instead of letting the shell expand them.
sudo tee /etc/nginx/conf.d/plex.conf > /dev/null <<'EOF'
map $http_upgrade $connection_upgrade {
    default upgrade;
    '' close;
}

server {
    listen 80;
    listen [::]:80;
    server_name plex.example.com;

    location / {
        proxy_pass http://127.0.0.1:32400;
        proxy_http_version 1.1;
        proxy_set_header Host $host;
        proxy_set_header X-Real-IP $remote_addr;
        proxy_set_header X-Forwarded-For $proxy_add_x_forwarded_for;
        proxy_set_header X-Forwarded-Proto $scheme;
        proxy_set_header Upgrade $http_upgrade;
        proxy_set_header Connection $connection_upgrade;
        proxy_redirect off;
        proxy_buffering off;
        proxy_read_timeout 3600s;
        proxy_send_timeout 3600s;
    }
}
EOF
The WebSocket headers matter because Plex Web App uses long-lived connections for parts of the browser experience. For a deeper explanation of upgrade headers, see configure Nginx WebSocket proxying.
Test and Reload Nginx
sudo nginx -t
sudo systemctl reload nginx
nginx: the configuration file /etc/nginx/nginx.conf syntax is ok nginx: configuration file /etc/nginx/nginx.conf test is successful
Add HTTPS with Let’s Encrypt
Install Certbot’s Nginx plugin after the HTTP server block works and the domain resolves to the Debian server.
sudo apt install python3-certbot-nginx
sudo certbot --nginx --non-interactive --agree-tos --redirect --no-eff-email --email you@example.com -d plex.example.com
Replace the email address and domain before running the command. For a complete certificate workflow and renewal checks, use secure Nginx with Let’s Encrypt on Debian.
Verify Certificate Renewal
Debian packages normally install a systemd timer for certificate renewals. Check the timer and run a dry run after the certificate is issued.
systemctl is-active certbot.timeractive
Then run a renewal dry run so certificate renewal issues show up before the live certificate is near expiry.
sudo certbot renew --dry-runUpdate Plex Media Server on Debian
The Plex APT repository owns package updates after the source file is installed. Refresh package metadata, then upgrade only Plex or upgrade all pending packages depending on your maintenance window.
sudo apt update
sudo apt install --only-upgrade plexmediaserver
Use a normal package upgrade when you also want Debian security and maintenance updates applied.
sudo apt upgradeAfter an update, confirm the service returned to an active state.
systemctl is-active plexmediaserver
apt-cache policy plexmediaserver
Remove Plex Media Server from Debian
Removal has three separate surfaces: the package, the Plex repository and keyring, and the library data under /var/lib/plexmediaserver. Keep them separate unless you are intentionally wiping the server.
Remove the Plex Package but Keep Library Data
Use apt remove when you want to remove the installed binaries and service while keeping library metadata available for a future reinstall.
sudo apt remove plexmediaserverRemove the Plex Repository and Keyring
Remove the current DEB822 file plus common legacy Plex source and key paths, then refresh APT so the repository no longer contributes candidates.
sudo rm -f \
  /etc/apt/sources.list.d/plexmediaserver.sources \
  /etc/apt/sources.list.d/plex.list \
  /etc/apt/sources.list.d/plexmediaserver.list \
  /etc/apt/keyrings/plexmediaserver.v2.gpg \
  /etc/apt/keyrings/plexmediaserver.gpg \
  /usr/share/keyrings/plex.gpg \
  /usr/share/keyrings/plexmediaserver.gpg
sudo apt update
apt-cache policy plexmediaserver
After source cleanup, apt-cache policy plexmediaserver should no longer show repo.plex.tv. It may still show an installed package until you remove it.
Delete Plex Library Data
Deleting
/var/lib/plexmediaserverremoves Plex metadata, settings, posters, watch history, and server identity. Back up this directory first if you might reinstall Plex later.
If the Plex service is still installed, stop it before deleting the data directory. The guard keeps the cleanup block usable even after the package has already been removed.
if systemctl cat plexmediaserver > /dev/null 2>&1; then
  sudo systemctl stop plexmediaserver
fi
sudo rm -rf /var/lib/plexmediaserver
A package purge can also remove Plex’s package-managed configuration and data. Do not run it when you want to preserve your library metadata.
sudo apt purge plexmediaserverRemove the Plex Nginx Server Block
If Nginx hosts other sites, remove only the Plex configuration file and reload Nginx after a syntax test. Do not disable the whole Nginx service unless Plex was the only site using it.
sudo rm -f /etc/nginx/conf.d/plex.conf
sudo nginx -t
sudo systemctl reload nginx
Troubleshoot Plex on Debian
APT Still Uses the Old Plex Repository
Old Plex instructions used downloads.plex.tv/repo/deb and the original PlexSign.key. On Debian 13, stale key material can also trigger Sequoia PGP or SHA1-related signature failures. Do not bypass signature verification with Trusted: yes; replace the old repository and key with the current v2 source.
grep -R --line-number 'downloads.plex.tv/repo/deb\|PlexSign.key\|repo.plex.tv/deb' /etc/apt/sources.list /etc/apt/sources.list.d 2>/dev/nullIf the old URL or old key appears, repeat the old-source cleanup, key import, DEB822 source creation, and sudo apt update steps from the install section.
Permission Denied While Writing a Source File
An error such as -bash: /etc/apt/sources.list.d/plex.list: permission denied usually means a shell redirection was run with sudo echo. The echo command runs with root privileges, but the redirection is still handled by your unprivileged shell.
Use sudo tee for repository files, as the DEB822 setup command does, so the write operation itself runs with the required privileges.
APT Cannot Locate plexmediaserver
If sudo apt install plexmediaserver reports that the package cannot be located, check the source file, refresh APT, and inspect the package policy.
cat /etc/apt/sources.list.d/plexmediaserver.sources
sudo apt update
apt-cache policy plexmediaserver
The source file should use URIs: https://repo.plex.tv/deb/, Suites: public, and Signed-By: /etc/apt/keyrings/plexmediaserver.v2.gpg. A Candidate: (none) result usually points to a failed apt update, a typo in the source file, a missing keyring, or an unsupported architecture.
Plex Service Fails to Start
Start with the service state and recent logs. Avoid guessing from the browser alone because the web app can be unavailable while the service is still starting.
systemctl status plexmediaserver
sudo journalctl -u plexmediaserver --no-pager -n 80
Check whether another service is already listening on Plex’s default port.
sudo ss -tlnp | grep ':32400'If another process owns port 32400, stop that process or change the conflicting application. Plex remote access expects the internal server port to remain 32400 unless you have deliberately changed Plex’s own network settings.
Plex Cannot See Media Files
The common symptom is a library scan that finds no files or a playback error saying Plex cannot find the file or required drive. Confirm the path is mounted, then test access as the plex user.
findmnt /media/plex
sudo -u plex ls -la /media/plex
namei -l /media/plex/movies
If the path is under /home, check parent directories first. Plex needs execute permission on /home, the user’s home directory, and every directory between that home directory and the media files.
Plex Remote Access Does Not Work
Remote access needs more than one successful local browser test. Confirm the Debian firewall allows TCP 32400, the router forwards the chosen external TCP port to the Debian server’s internal TCP 32400, and Plex remote access is enabled in the server settings.
sudo ufw status numbered
hostname -I
Double NAT, carrier-grade NAT, VPN routing, and cloud security groups can block remote access even when Debian itself is configured correctly. Plex’s remote access troubleshooting page is useful when the local service works but external clients cannot connect.
Nginx Reverse Proxy Returns 502
A 502 error usually means Nginx cannot reach Plex on the local upstream. Check Plex first, then test and reload Nginx.
systemctl is-active plexmediaserver
sudo ss -tlnp | grep ':32400'
sudo nginx -t
sudo systemctl reload nginx
If Plex is active and listening, inspect the Nginx error log for the active server block.
sudo tail -n 80 /var/log/nginx/error.logConclusion
Plex Media Server is installed on Debian from the current Plex APT repository, with the service account, port, Web App setup path, library permissions, update flow, and cleanup surfaces accounted for. Keep media folders readable by the plex user, expose only the ports your setup needs, and back up /var/lib/plexmediaserver before major storage or package changes.

amazing tutorial, one thing to add – I was following along and found after adding folder permissions for plex, it still couldn’t find them – anything after home/user/ was not visible to it, so I ended up having to add that high level directory before it could see everything else, wondering what I missed in setting up permissions etc. to require this?
Thanks for the kind words and for flagging this, DB. Plex runs under the plex system user, so it needs execute permissions on every directory in the path, not just the final media folders. In your case, the plex user could read /home/user/media but not traverse /home or /home/user until you granted access higher up.
The safest approach is to give plex execute access on the parent directories, then read/execute ACLs on the media tree with setfacl:
That way you avoid changing ownership while still letting Plex walk the directories. The uppercase X grants execute permission to directories without making ordinary media files executable. I will clarify this point in the permissions section of the guide, thanks again for the helpful note.
thanks !
Thank you worked perfectly except for acessing files on external drive.
But changing its mount location from `/media//ExtDrive` to `/mnt/ExtDrive` worked without any additional permission setting.
Thanks for sharing this, LP. Glad the guide worked for you. The /media directory is typically owned by root with restricted traverse permissions, which blocks the plex user from descending into mounted drives. The /mnt directory usually has more permissive defaults, so mounting there sidesteps the issue entirely.
For anyone who prefers keeping drives under /media, granting the plex user execute access on the parent directories resolves it:
Appreciate you documenting the workaround for others.
great, thank you so much
great tutorial, thank you!