Sysdig captures system calls and operating system events, giving you deep visibility into container and host behavior. Whether you troubleshoot performance issues, debug applications, or investigate security incidents, Sysdig provides the raw data you need without instrumenting your code. As a result, the tool works equally well for monitoring Kubernetes pods, Docker containers, or traditional Linux servers.
By the end of this guide, you will have Sysdig installed from the official repository with the kernel module loaded and ready to capture system activity. In addition, you will learn basic commands for viewing processes, network connections, and CPU usage through both the interactive interface and command-line filters.
These steps cover Ubuntu 22.04 LTS, 24.04 LTS, and 26.04 LTS. The Sysdig repository provides universal packages that work across all supported Ubuntu releases. Commands are identical on all versions.
Update Ubuntu Before Installing Sysdig
First, refresh your package index and upgrade existing packages. This ensures dependency resolution works correctly and prevents version conflicts during the Sysdig installation.
sudo apt update && sudo apt upgradeInstall Prerequisites
Before adding the repository, Sysdig requires several packages for repository setup and kernel module compilation. Install these dependencies now:
sudo apt install software-properties-common ca-certificates curl gnupg dkms ncurses-term -yThe dkms package (Dynamic Kernel Module Support) automatically rebuilds the Sysdig kernel module when you install kernel updates. Without DKMS, you would need to manually recompile the module after each kernel upgrade. The ncurses-term package provides terminal definitions that the csysdig interactive interface requires.
Add the Sysdig Repository
Although Ubuntu’s universe repositories include an older Sysdig version, the official Sysdig repository provides significantly newer releases with additional features and bug fixes. Therefore, adding the vendor repository ensures you receive the latest version and timely security updates.
Import the GPG Key
First, download and convert the Sysdig GPG key to the binary format that APT expects. This key verifies package authenticity:
curl -fsSL https://download.sysdig.com/DRAIOS-GPG-KEY.public | sudo gpg --dearmor -o /usr/share/keyrings/sysdig.gpgCreate the Repository File
Next, create a DEB822-format repository file that points to the Sysdig stable repository:
echo "Types: deb
URIs: https://download.sysdig.com/stable/deb
Suites: stable-$(dpkg --print-architecture)/
Signed-By: /usr/share/keyrings/sysdig.gpg" | sudo tee /etc/apt/sources.list.d/sysdig.sources
This guide uses the modern DEB822
.sourcesformat. TheSuites:line ends with a trailing slash because Sysdig uses a flat repository structure without separate components.
Refresh the Package Index
After adding the repository, update APT to include the new package source:
sudo apt updateAs a result, the output should include a line fetching from download.sysdig.com, confirming the repository was added correctly:
Get:1 https://download.sysdig.com/stable/deb stable-amd64/ InRelease [1390 B]
Get:2 https://download.sysdig.com/stable/deb stable-amd64/ Packages [48.5 kB]
Install Sysdig
Once the repository is configured, install Sysdig along with the kernel headers matching your running kernel. The headers are required to compile the Sysdig kernel module:
sudo apt install linux-headers-$(uname -r) sysdig -yThe
linux-headers-$(uname -r)package must match your currently running kernel. If you recently updated your kernel but have not rebooted, this command may fail because headers for the old kernel are no longer available. Reboot first if you see a “package not found” error.
During installation, DKMS compiles the scap kernel module that Sysdig uses to capture system calls. Consequently, you will see output similar to:
Building initial module for 6.8.0-51-generic
Done.

scap:
Running module version sanity check.
 - Original module
 - Installation
   - Installing to /lib/modules/6.8.0-51-generic/updates/dkms/
Verify the Installation
Once installation completes, confirm that Sysdig is working by checking the version:
sysdig --versionYou should see output showing the installed version:
sysdig version 0.41.3
Additionally, verify that the kernel module loaded successfully:
lsmod | grep scapWhen the module is loaded, you will see output similar to:
scap 217088 0
If the output is empty, this means the module has not loaded yet. It loads automatically when you first run sysdig or csysdig.
Basic Sysdig Usage
Sysdig provides two interfaces: the command-line sysdig tool for scripting and filtering, and the interactive csysdig interface for real-time exploration. However, both require root privileges because they access kernel-level data through /proc, /dev/sysdig* devices, and the kernel module.
Launch the Interactive Interface
To start the ncurses-based interactive interface, run:
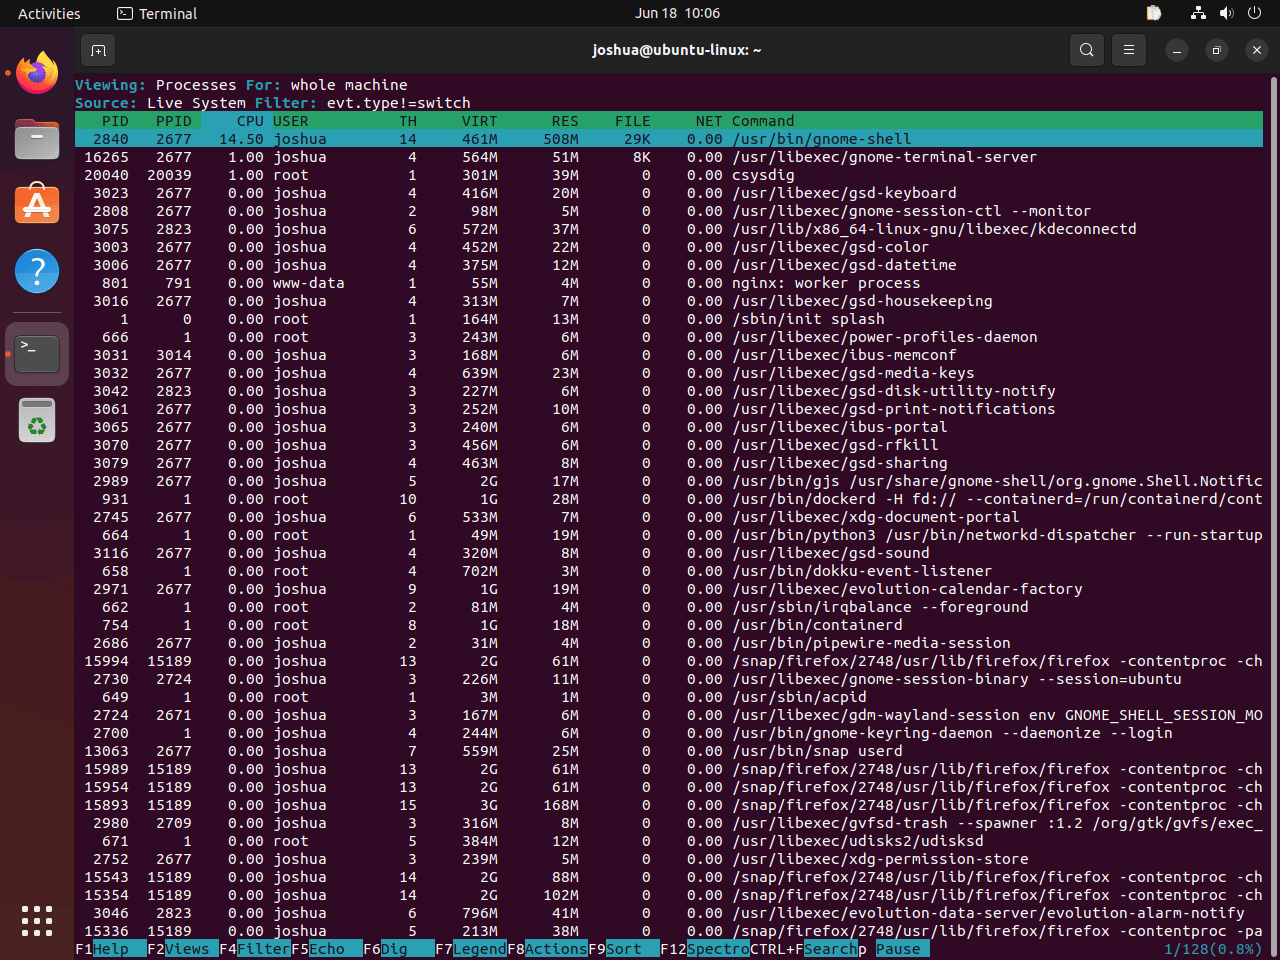
sudo csysdigThis opens a top-like display showing real-time system activity. Press F2 to access the view menu, where you can switch between different perspectives such as Processes, Containers, Connections, and Files. Use the arrow keys to navigate and Enter to select. Press q to exit.
View Top Processes by CPU Usage
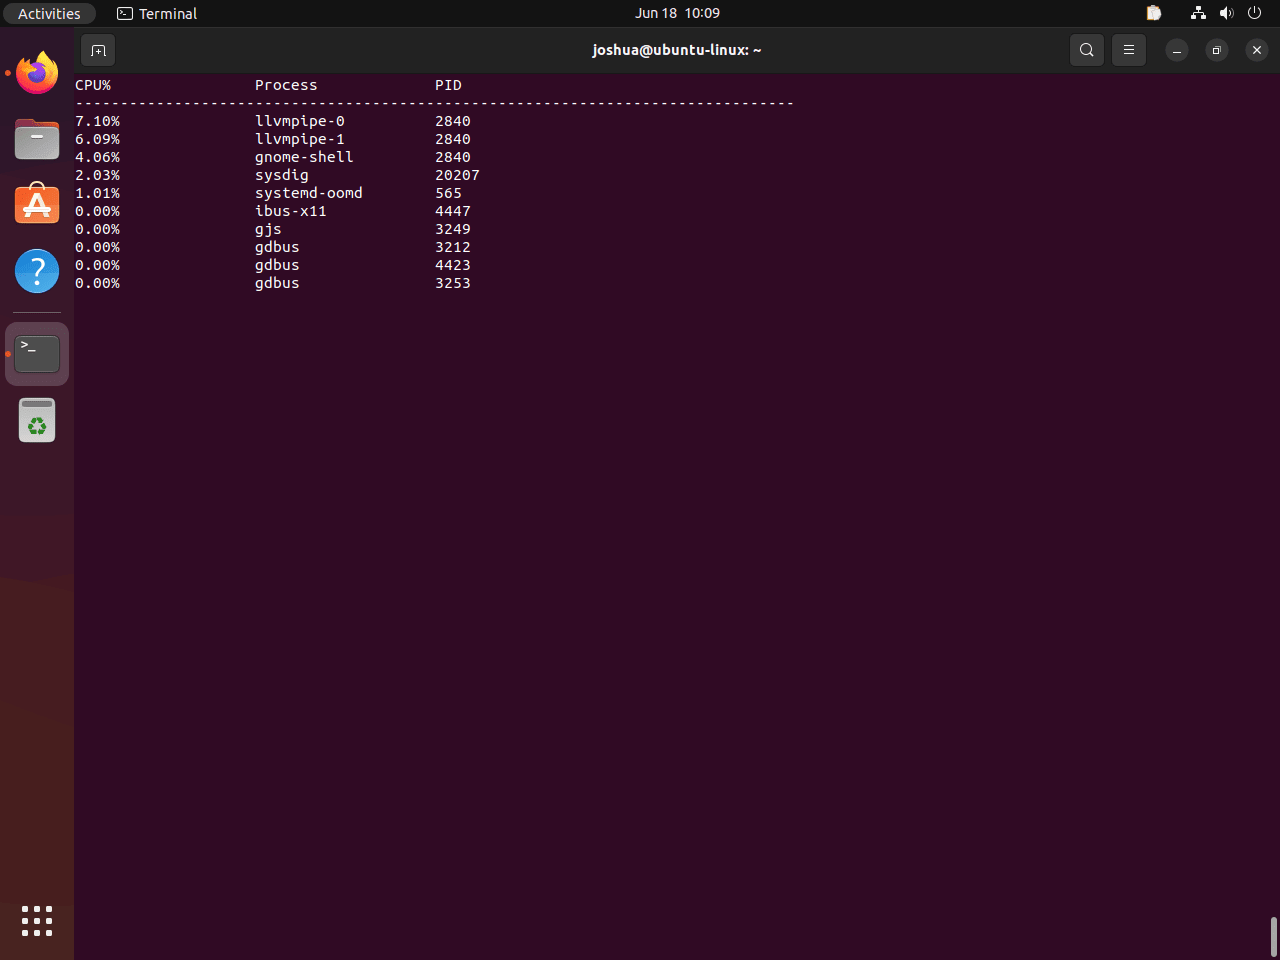
Similarly, for a quick view of processes ranked by CPU utilization, use the topprocs_cpu chisel (Sysdig’s term for built-in analysis scripts):
sudo sysdig -c topprocs_cpuThis continuously displays the top CPU consumers. Press Ctrl+C to stop. For process monitoring, you may also find htop on Ubuntu useful as a complementary tool.
Display Network Connections
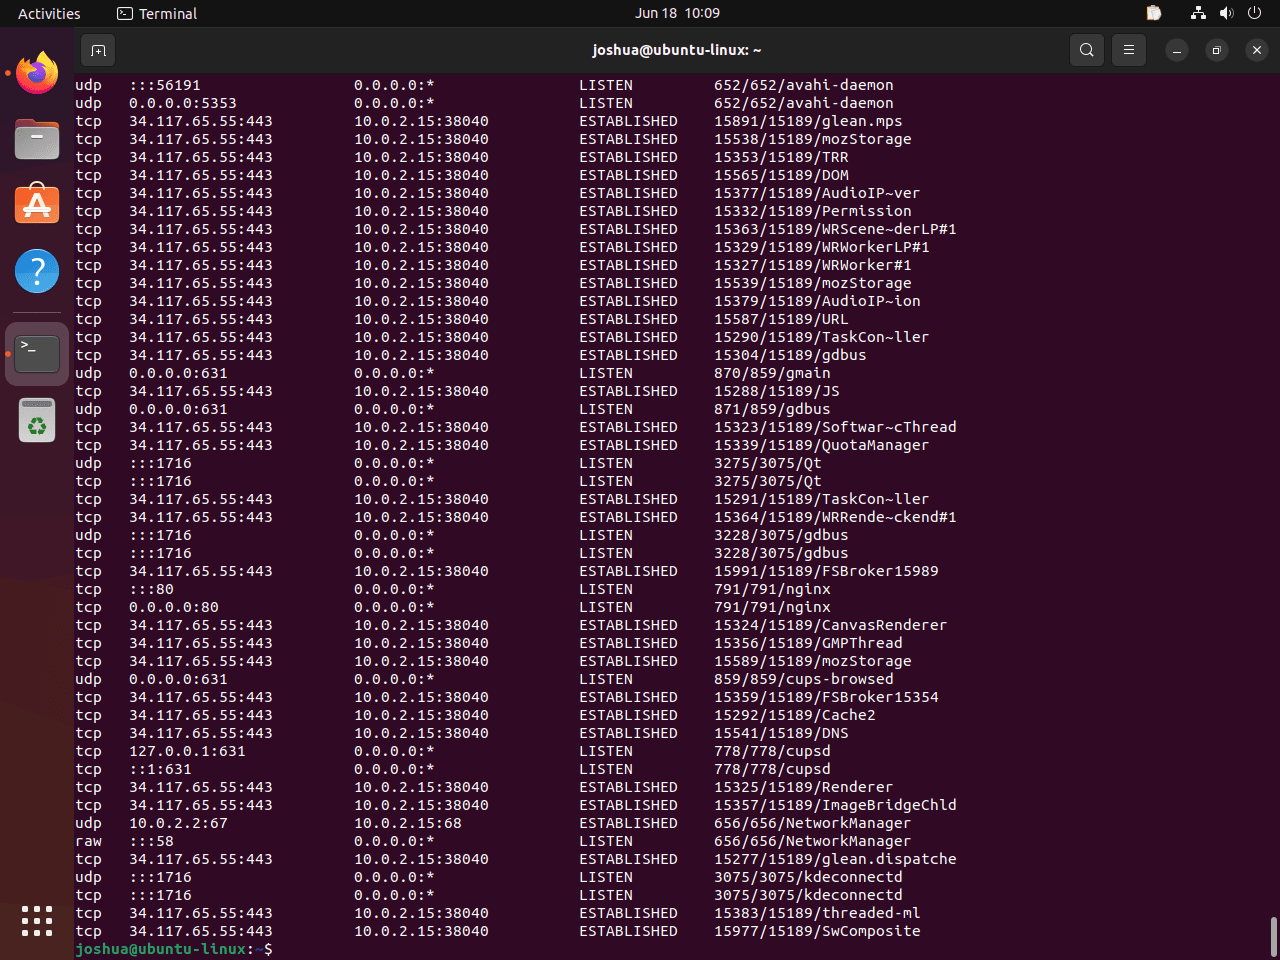
To view active network connections similar to the traditional netstat command:
sudo sysdig -c netstatThis command shows all current TCP and UDP connections with their states, local and remote addresses.
List All Processes
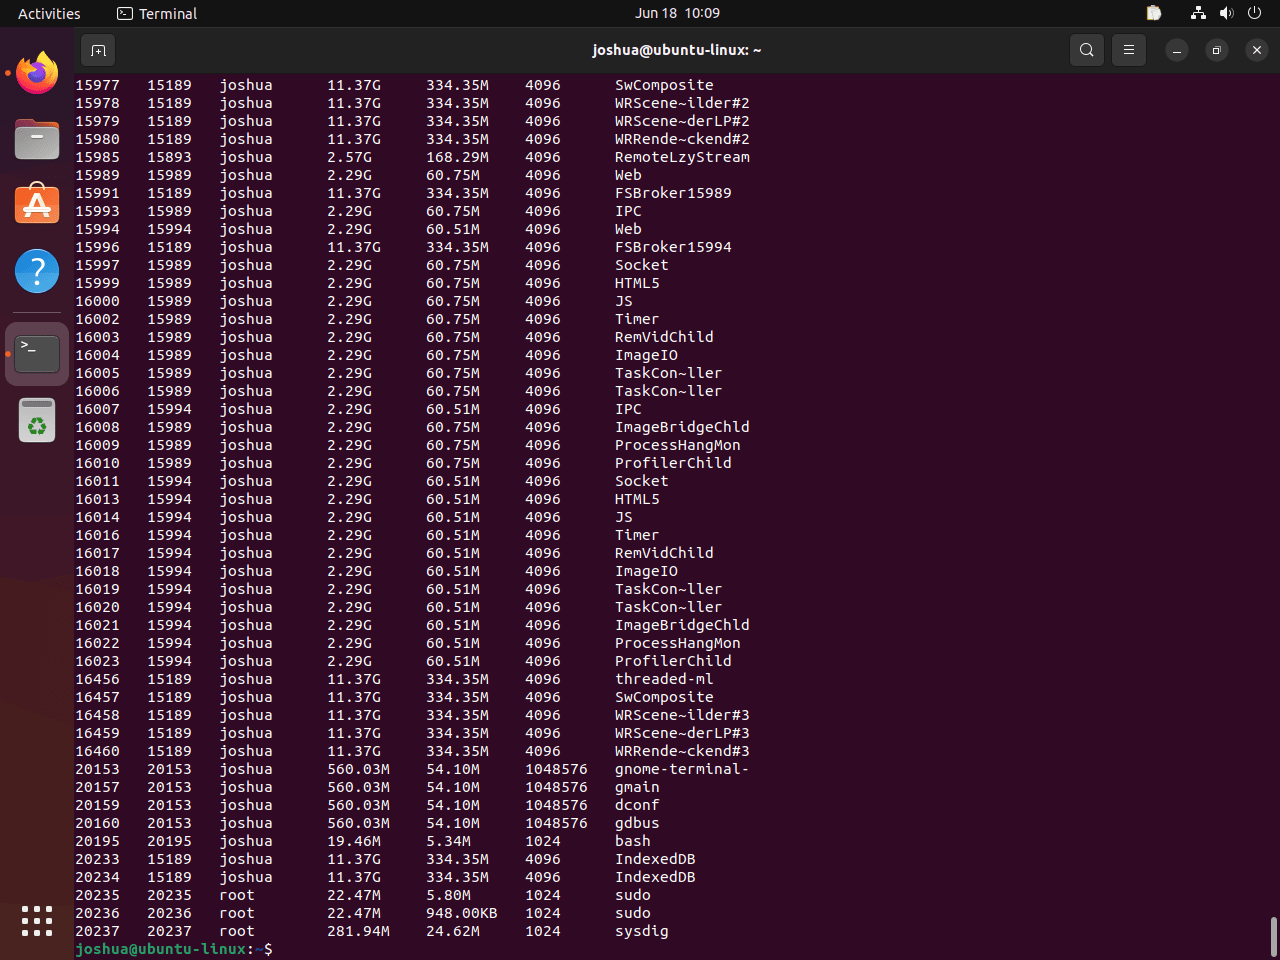
To capture a snapshot of all running processes:
sudo sysdig -c psThis command provides output similar to the ps aux command but captured through Sysdig’s kernel module.
Explore Available Chisels
Sysdig includes many built-in chisels for common tasks. To see the full list and descriptions, run:
sysdig -clIn addition, some useful chisels include topfiles_bytes for file I/O analysis, topconns for network bandwidth by connection, and spy_users for monitoring user activity.
Troubleshooting Common Issues
Terminal Error: xterm-256color
If you encounter this error when starting csysdig:
Error opening terminal: xterm-256color
This error indicates missing terminal definitions. To fix it, install the ncurses-term package:
sudo apt install ncurses-termHowever, if you followed this guide, the package should already be installed. Verify by running csysdig again.
Kernel Module Fails to Load
If Sysdig reports that it cannot load the kernel module, check whether DKMS compiled it successfully:
dkms statusYou should see scap listed with status installed. Otherwise, if it shows added but not installed, the compilation failed. In that case, check the build log:
sudo cat /var/lib/dkms/scap/*/build/make.logCommon causes include missing kernel headers or a kernel version mismatch. To resolve this, ensure you have the correct headers installed:
sudo apt install linux-headers-$(uname -r)After installing headers, rebuild the module:
sudo dkms autoinstallPermission Denied Errors
Because Sysdig requires root privileges to access the kernel module and /proc filesystem, you will see permission errors if running without elevated access. Therefore, ensure you are running with sudo:
sudo sysdig -c psOtherwise, running without sudo will fail because regular users cannot access the required kernel interfaces.
Remove Sysdig
If you no longer need Sysdig, you can remove the package and clean up the repository configuration completely.
Uninstall the Package
First, remove the Sysdig package and its dependencies:
sudo apt remove --purge sysdig -y
sudo apt autoremove -y
This command cleans up packages that were installed as dependencies and are no longer needed.
Remove the Repository
Next, delete the repository file and GPG key to prevent APT from checking the Sysdig server during future updates:
sudo rm /etc/apt/sources.list.d/sysdig.sources
sudo rm /usr/share/keyrings/sysdig.gpg
Finally, refresh APT to remove the repository from the cache:
sudo apt updateVerify Removal
To confirm that Sysdig is no longer available from the vendor repository:
apt-cache policy sysdigYou should see output confirming the package is not available:
N: Unable to locate package sysdig
Conclusion
You now have Sysdig installed on Ubuntu with the kernel module ready for system call tracing. The csysdig interface provides an intuitive way to explore processes, containers, and network activity, while the command-line sysdig tool offers powerful filtering for scripts and forensic analysis. Experiment with different chisels to build familiarity, and consult the Sysdig GitHub repository for advanced filtering syntax and container-specific use cases.



Formatting tips for your comment
You can use basic HTML to format your comment. Useful tags currently allowed:
<code>command</code>command<strong>bold</strong><em>italic</em><a href="URL">link</a><blockquote>quote</blockquote>