
Privacy on a home connection usually stops at the front door. Your internet provider sees every site you visit, advertisers fingerprint the browser, and censored networks quietly drop traffic to anything they do not recognize. Tor Browser solves all three problems at once by wrapping Firefox in hardened anti-tracking defaults and routing every request through three volunteer relays before it reaches the open web. To install Tor Browser on Linux Mint, you have two solid paths: the Flatpak launcher from Flathub (Mint enables the Flathub remote out of the box on Cinnamon, Xfce, and MATE) or the verified archive straight from the Tor Project.
Both methods give you the same hardened browser, obfs4 and Snowflake bridges for restricted networks, and the familiar “new identity” and “new circuit” shortcuts. The difference is where the browser lives and how its updates arrive. The Flatpak method keeps Tor Browser Launcher in Mint’s normal Flatpak maintenance flow, while the launcher still downloads and refreshes the actual browser inside its Flatpak data area. The archive method keeps everything under your home directory, verifies the Tor Project signature, and adds a reusable update-tor-browser helper for repeatable terminal updates. Either path stays current on Mint 22.x and 21.x without changing your system-wide packages. If you need the Ubuntu variant instead, use how to install Tor Browser on Ubuntu Linux.
Install Tor Browser on Linux Mint
Compare Tor Browser Install Methods on Linux Mint
Two installation paths are available on Linux Mint. Both deliver the current stable Tor Browser; pick one based on how you prefer to install, verify, and update the browser bundle.
| Method | Channel | Install Form | Updates | Best For |
|---|---|---|---|---|
| Flatpak | Flathub | Flatpak launcher | Targeted Flatpak update; browser via Tor Browser Launcher | Readers who want the lower-effort Mint desktop path |
| Official Archive | Tor Project | User-local .tar.xz bundle with helper | In-browser updater plus the update-tor-browser helper | Readers who want the direct upstream archive with signature-checked terminal recovery |
Flatpak is the lower-effort path for most desktops because Mint already ships Flathub and the launcher installs cleanly at system scope. The official archive is the better manual path when you want the Tor Project’s Linux bundle directly and a repeatable helper that verifies the detached signature before replacing files. Do not install both at once; they create duplicate launcher entries and separate profile folders that will drift apart.
The Tor Project does not publish a Mint-specific .deb for the full browser bundle. If older instructions send you toward torbrowser-launcher through APT, treat that as a launcher package rather than the browser itself; the two methods here keep the main workflow on Mint’s default Flathub setup or the Tor Project archive.
Update Linux Mint Before Installing Tor Browser
Refresh the package index and install pending updates before touching Tor Browser. A current system avoids SSL and certificate-store mismatches that can block the first-run download.
sudo apt update && sudo apt upgradeIf
sudoprompts for your password and the account is not yet in the sudoers group, see how to add a user to sudoers on Linux Mint before continuing.
Install Tor Browser via Flatpak on Linux Mint
Flatpak ships Tor Browser Launcher, a thin wrapper that fetches and verifies the real Tor Browser from the Tor Project on first run. Mint already enables the Flathub remote at system scope on Cinnamon, Xfce, and MATE, so no remote-add boilerplate is needed.
Install Tor Browser Launcher from Flathub on Linux Mint
Install the system-scope Flatpak so every user on the machine can launch it:
sudo flatpak install flathub org.torproject.torbrowser-launcherReview the runtime list and confirm the prompt when Flatpak asks. Flatpak also pulls the platform runtime the launcher depends on, which is why the initial install can touch several hundred megabytes.
Handle the First Tor Browser Launch and Download on Linux Mint
Open Tor Browser Launcher from the applications menu, or from a terminal:
flatpak run org.torproject.torbrowser-launcherOn first launch the wrapper downloads the current Tor Browser build from the Tor Project, verifies the GPG signature, and unpacks it into the Flatpak app data area. Subsequent launches skip straight to the browser. The wrapper also handles version bumps inside that app data area when upstream ships a new release.
Verify the Tor Browser Flatpak Install on Linux Mint
Confirm the Flatpak package and scope:
flatpak list --app --columns=application,version,branch,installation | grep org.torproject.torbrowser-launcherorg.torproject.torbrowser-launcher 0.3.9 stable system
The columns confirm the application ID, current launcher version, Flathub branch, and system-wide install scope. The exact launcher version moves forward over time, but the browser it fetches is always the latest Tor Project stable.
Install Tor Browser from the Official Archive on Linux Mint
The archive method installs the direct upstream Tor Browser bundle from the Tor Project. Keep the extracted folder inside your home directory so Tor Browser can write its own updates without needing root privileges; a root-owned copy under /usr/local or /opt can block the browser updater.
Install Archive Download Tools on Linux Mint
The archive workflow uses the curl command to download the current release, GnuPG to verify the signature, XZ tools to extract the archive, and desktop file tools to refresh the application launcher database:
sudo apt update
sudo apt install curl ca-certificates gpg xz-utils desktop-file-utils
Create the Tor Browser Archive Update Helper on Linux Mint
Create a user-local helper named update-tor-browser. The setup block refuses to overwrite an existing file with that name unless it already carries this helper marker. The helper resolves the latest Linux x86_64 archive, downloads the matching .asc signature, imports the Tor Browser Developers key into a temporary GnuPG home, checks the documented fingerprint, verifies the archive, stages the replacement folder, preserves the existing Tor Browser data directory, registers the desktop entry, and creates a tor-browser command wrapper.
mkdir -p "$HOME/.local/bin"
helper="$HOME/.local/bin/update-tor-browser"

if [ -e "$helper" ] && ! grep -Fq 'LinuxCapable Tor Browser archive helper' "$helper" 2>/dev/null; then
  printf 'Refusing to overwrite existing file: %s\n' "$helper" >&2
  printf 'Move that file or choose a different helper name before continuing.\n' >&2
  false
else
  cat > "$helper" <<'EOF'
#!/usr/bin/env bash
# LinuxCapable Tor Browser archive helper
set -euo pipefail

dist_url='https://dist.torproject.org/torbrowser'
key_url='https://openpgpkey.torproject.org/.well-known/openpgpkey/torproject.org/hu/kounek7zrdx745qydx6p59t9mqjpuhdf'
key_fingerprint='EF6E286DDA85EA2A4BA7DE684E2C6E8793298290'
install_parent="$HOME/.local/share"
install_dir="$install_parent/tor-browser"
release_file="$install_dir/.linuxcapable-tor-browser-release"
desktop_dir="$install_parent/applications"
bin_dir="$HOME/.local/bin"
work_dir=''
backup_dir=''

die() {
  printf 'Error: %s\n' "$*" >&2
  exit 1
}

need_cmd() {
  command -v "$1" >/dev/null 2>&1 || die "Missing required command: $1"
}

cleanup() {
  status=$?
  if [ "$status" -ne 0 ]; then
    restore_backup || true
  fi
  if [ -n "$work_dir" ] && [ -d "$work_dir" ]; then
    rm -rf "$work_dir"
  fi
  exit "$status"
}

restore_backup() {
  if [ -n "$backup_dir" ]; then
    if [ -e "$backup_dir" ] && [ ! -e "$install_dir" ]; then
      mv "$backup_dir" "$install_dir"
      printf 'Restored previous Tor Browser folder after failure.\n' >&2
    fi
  fi
}

latest_version() {
  page=$(curl -fsSL "$dist_url/")
  versions=$(printf '%s\n' "$page" | sed -n 's/.*href="\([0-9][0-9.]*\)\/".*/\1/p')
  [ -n "$versions" ] || die 'Could not find Tor Browser release directories.'
  printf '%s\n' "$versions" | sort -V | tail -n 1
}

installed_version() {
  if [ -r "$release_file" ]; then
    sed -n '1p' "$release_file"
  fi
}

ensure_not_running() {
  if command -v pgrep >/dev/null 2>&1; then
    if pgrep -u "$(id -u)" -f "$install_dir/Browser/firefox|$install_dir/start-tor-browser.desktop" >/dev/null 2>&1; then
      die 'Close Tor Browser before updating the archive install.'
    fi
  fi
}

register_desktop() {
  [ -x "$install_dir/start-tor-browser.desktop" ] || die "Missing launcher: $install_dir/start-tor-browser.desktop"
  install -d "$desktop_dir"
  (
    cd "$install_dir"
    ./start-tor-browser.desktop --register-app
  )
  if command -v update-desktop-database >/dev/null 2>&1; then
    update-desktop-database "$desktop_dir" >/dev/null 2>&1 || true
  fi
}

write_launcher_wrapper() {
  install -d "$bin_dir"
  launcher="$bin_dir/tor-browser"
  if [ -e "$launcher" ] && ! grep -Fq 'LinuxCapable Tor Browser archive wrapper' "$launcher" 2>/dev/null; then
    die "Refusing to overwrite existing non-helper file: $launcher"
  fi
  cat >"$launcher" <<WRAPPER
#!/usr/bin/env bash
# LinuxCapable Tor Browser archive wrapper
cd "$install_dir"
exec ./start-tor-browser.desktop "\$@"
WRAPPER
  chmod 0755 "$launcher"
}

if [ "$(id -u)" -eq 0 ]; then
  die 'Run this helper as your normal desktop user, not root.'
fi

for cmd in awk chmod cp curl date gpg grep id install mkdir mktemp mv rm sed sort tail tar uname xz; do
  need_cmd "$cmd"
done

case "$(uname -m)" in
x86_64 | amd64)
  archive_arch='x86_64'
  ;;
*)
  die 'The automatic archive helper supports the Tor Browser Linux x86_64 build.'
  ;;
esac

install -d "$install_parent"
install -d "$desktop_dir"
install -d "$bin_dir"

target_version=$(latest_version)
current_version=$(installed_version || true)
printf 'Latest Tor Browser version: %s\n' "$target_version"

if [ -n "$current_version" ] && [ "$current_version" = "$target_version" ]; then
  register_desktop
  write_launcher_wrapper
  printf 'Tor Browser %s is already current.\n' "$target_version"
  exit 0
fi

ensure_not_running

work_dir=$(mktemp -d "${TMPDIR:-/tmp}/tor-browser-update.XXXXXX")
trap cleanup EXIT
export GNUPGHOME="$work_dir/gnupg"
install -m 0700 -d "$GNUPGHOME"

archive="tor-browser-linux-${archive_arch}-${target_version}.tar.xz"
signature="${archive}.asc"
base_url="${dist_url}/${target_version}"

curl -fsSL --retry 3 -o "$work_dir/$archive" "$base_url/$archive"
curl -fsSL --retry 3 -o "$work_dir/$signature" "$base_url/$signature"
printf 'Downloaded %s and signature.\n' "$archive"

curl -fsSL "$key_url" | gpg --batch --import >/dev/null
fingerprint=$(gpg --batch --with-colons --fingerprint "$key_fingerprint" | awk -F: '$1 == "fpr" {print $10; exit}')
[ "$fingerprint" = "$key_fingerprint" ] || die 'Tor Browser signing key fingerprint mismatch.'
gpg --batch --verify "$work_dir/$signature" "$work_dir/$archive"
printf 'Signature verified with Tor Browser Developers key.\n'

tar -xJf "$work_dir/$archive" -C "$work_dir"
stage_dir="$work_dir/tor-browser"
[ -x "$stage_dir/start-tor-browser.desktop" ] || die 'Extracted archive is missing start-tor-browser.desktop.'
app_name=$(awk -F= '$1 == "RemotingName" {print $2; exit}' "$stage_dir/Browser/application.ini")
[ "$app_name" = 'Tor Browser' ] || die 'Extracted archive did not identify as Tor Browser.'
printf '%s\n' "$target_version" >"$stage_dir/.linuxcapable-tor-browser-release"

if [ -d "$install_dir/Browser/TorBrowser/Data" ]; then
  rm -rf "$stage_dir/Browser/TorBrowser/Data"
  mkdir -p "$stage_dir/Browser/TorBrowser"
  cp -a "$install_dir/Browser/TorBrowser/Data" "$stage_dir/Browser/TorBrowser/Data"
  printf 'Preserved existing Tor Browser profile and Tor data.\n'
fi

if [ -e "$install_dir" ]; then
  backup_dir="${install_dir}.backup-$(date +%Y%m%d%H%M%S)"
  mv "$install_dir" "$backup_dir"
fi

mv "$stage_dir" "$install_dir"
register_desktop
write_launcher_wrapper

if [ -n "$backup_dir" ] && [ -e "$backup_dir" ]; then
  rm -rf "$backup_dir"
fi

printf 'Installed Tor Browser %s in %s\n' "$target_version" "$install_dir"
EOF

  chmod 0755 "$helper"
  export PATH="$HOME/.local/bin:$PATH"
  hash -r
  command -v update-tor-browser >/dev/null && printf 'update-tor-browser helper ready\n'
fi
Expected setup output:
update-tor-browser helper ready
If the setup block prints a refusal, move the existing file out of the way before rerunning it. If it does not print the ready line, open a new terminal or add $HOME/.local/bin to your shell PATH before running the helper by name.
Close Tor Browser before running the archive helper. Updating browser files while Tor Browser is open can leave a partial replacement or force the helper to restore the previous folder.
Install or Update Tor Browser with the Helper on Linux Mint
Run the helper to download, verify, extract, and register the current Tor Browser archive:
update-tor-browserOn a fresh archive install, the helper creates $HOME/.local/share/tor-browser, registers the desktop launcher, and creates the tor-browser command in $HOME/.local/bin. On later runs, it exits without replacing files when the installed archive already matches the latest Tor Project release.
A later no-op run after a current install should end with:
Latest Tor Browser version: 15.0.14
Launching './Browser/start-tor-browser --detach --register-app'...
Tor Browser has been registered as a desktop app for this user in ~/.local/share/applications/
Tor Browser 15.0.14 is already current.
Verify the Archive Helper Installation on Linux Mint
Confirm the helper, wrapper command, and archive launcher are present:
command -v update-tor-browser >/dev/null && printf 'update-tor-browser helper found\n'
command -v tor-browser >/dev/null && printf 'tor-browser command found\n'
test -x "$HOME/.local/share/tor-browser/start-tor-browser.desktop" && printf 'Archive Tor Browser install ready\n'
Expected output:
update-tor-browser helper found
tor-browser command found
Archive Tor Browser install ready
The helper uses the Tor Project’s published Tor Browser Developers fingerprint EF6E286DDA85EA2A4BA7DE684E2C6E8793298290, matching the Tor Browser signature verification instructions.
Launch and Configure Tor Browser on Linux Mint
With either method installed, Tor Browser appears in the Mint menu and on the command line. The first-run connection dialog is the same regardless of how you installed it.
Launch Tor Browser from the Applications Menu on Linux Mint
Open the Mint menu and go to the Internet category:
Menu > Internet > Tor Browser
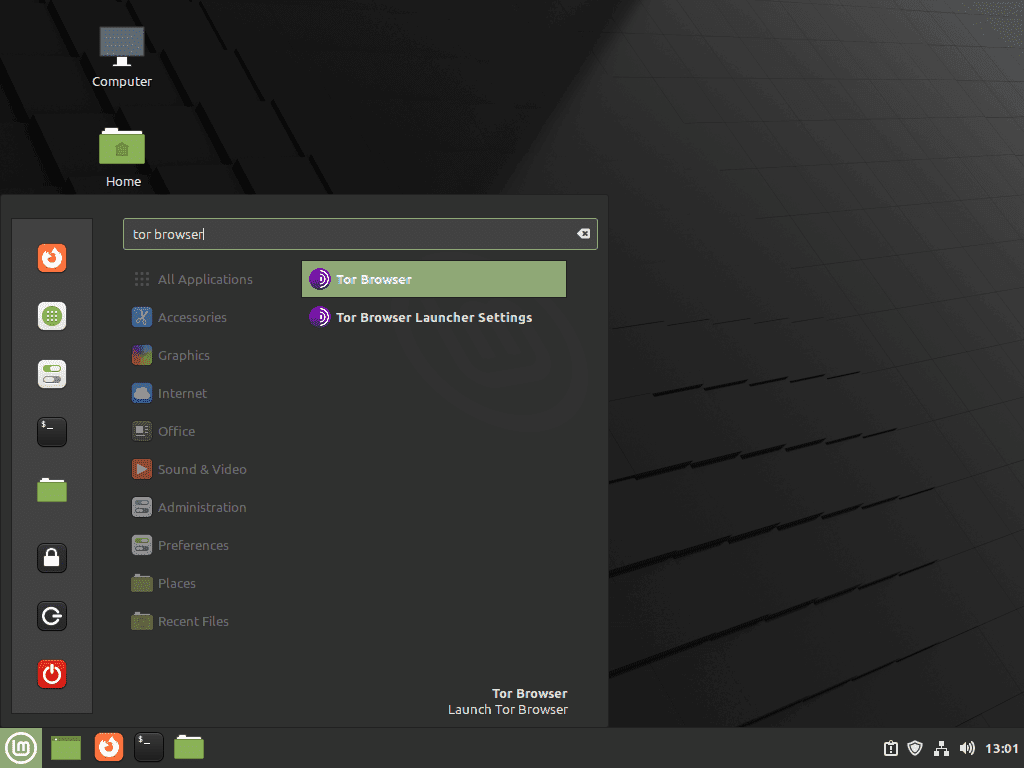
Flatpak users see an extra download window the first time while Tor Browser Launcher fetches the browser from upstream. Archive helper users go straight to the connection dialog because the browser files are already unpacked. Tor Browser needs an active graphical session, so launch it from the Mint desktop rather than a remote shell.
Launch Tor Browser from a Terminal on Linux Mint
For the Flatpak install:
flatpak run org.torproject.torbrowser-launcherFor the archive install, use the wrapper created by the helper:
tor-browserIf the current terminal cannot find tor-browser immediately after creating the helper, open a new terminal or refresh PATH once with export PATH="$HOME/.local/bin:$PATH".
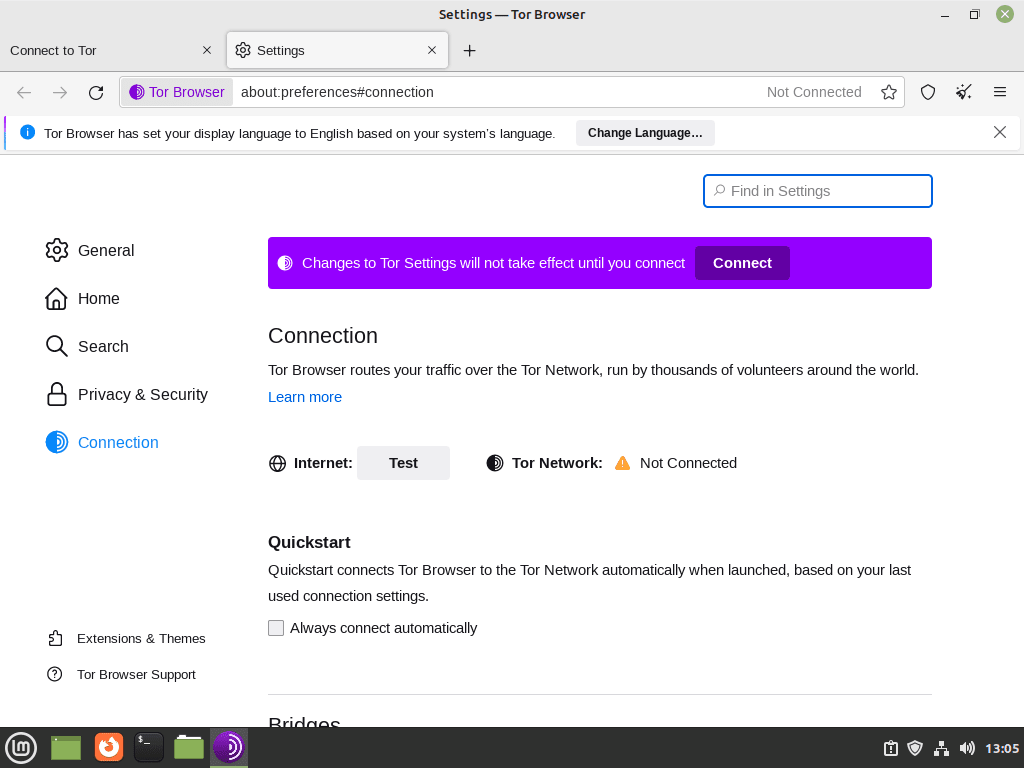
Set Up the Initial Tor Browser Connection on Linux Mint
On first launch, Tor Browser shows a connection dialog with two paths.

Connect is the right choice on unfiltered networks:
- Joins the Tor network using default entry guards.
- Works on most home connections and public Wi-Fi without tweaks.
- Typically completes in 15 to 60 seconds.
Configure Connection is the right choice when your network blocks Tor or forces a proxy:
- Lets you pick a built-in pluggable transport such as obfs4 or Snowflake.
- Accepts custom bridge lines for heavily censored networks.
- Supports HTTP or SOCKS proxies required by corporate or campus networks.
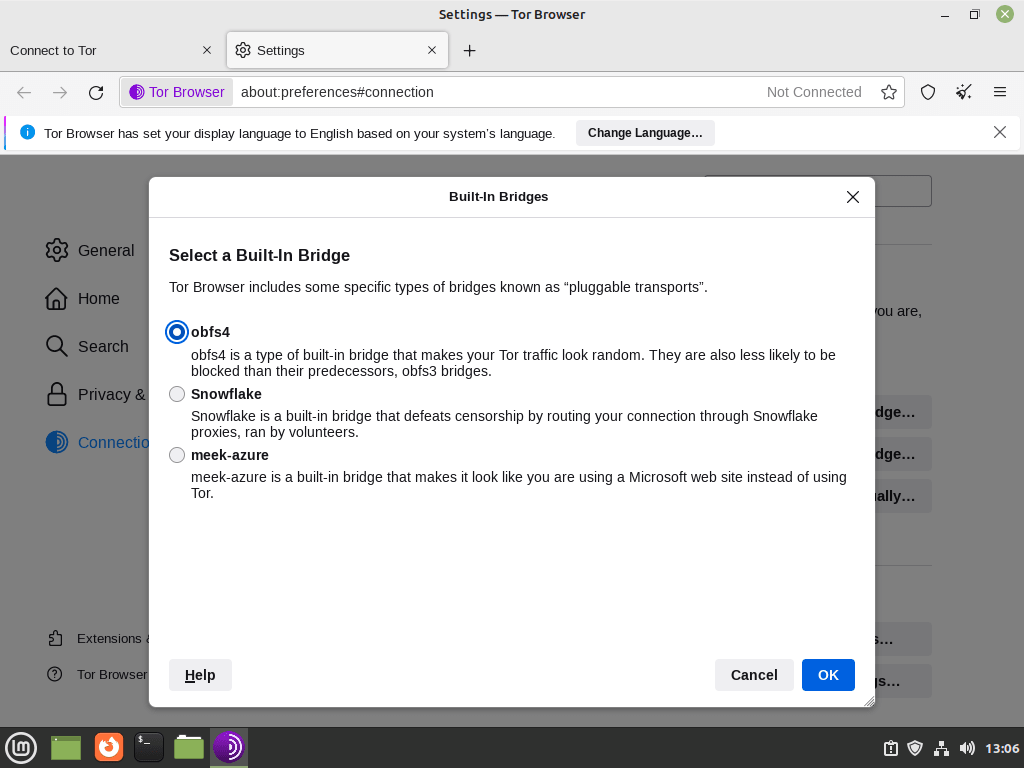
Configure Tor Browser Bridges for Restricted Networks on Linux Mint
When the direct connection is blocked, bridges give Tor an unlisted entry point. They are volunteer relays that do not appear in the public Tor directory, which keeps them usable for longer on filtered networks.
Pick Configure Connection, then select a built-in bridge. The short list of what each one is good at:
- obfs4: the default for most censored networks; disguises Tor traffic as random data.
- Snowflake: uses short-lived volunteer WebRTC proxies; effective when obfs4 is already blocked.
- meek-azure: tunnels through Microsoft Azure and is worth trying only when the other two fail.
Confirm a Successful Tor Browser Connection on Linux Mint
Once the circuit is built, Tor Browser opens the standard start page with DuckDuckGo as the default search engine and every request now flowing through three Tor relays.
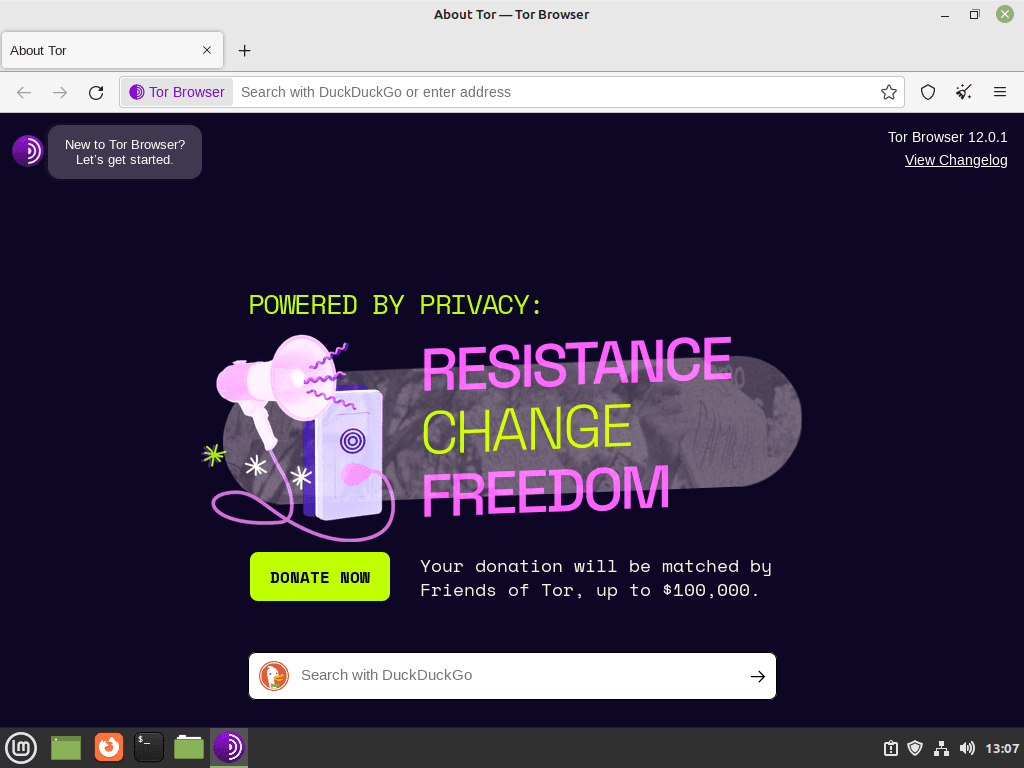
Visit check.torproject.org as your first sanity check. The page prints “Congratulations. This browser is configured to use Tor.” when the circuit is working and shows your exit node’s IP address.
Update Tor Browser on Linux Mint
Tor Browser ships frequent security releases and both install paths have a low-effort update story. Use whichever matches the method you picked.
Update the Tor Browser Flatpak on Linux Mint
Pull the latest Tor Browser Launcher and its runtime from Flathub:
sudo flatpak update org.torproject.torbrowser-launcherThat updates Tor Browser Launcher and the runtime it depends on. The browser itself is still refreshed by Tor Browser Launcher when upstream ships a new Tor Browser release. For wider Flatpak maintenance, see how to upgrade Flatpak on Linux Mint.
Update the Tor Browser Archive Install on Linux Mint
Tor Browser still checks for updates from inside the archive install and prompts when a new release is available. When you choose the restart/update action in the browser, Tor Browser downloads and applies the update, then restarts.
For a terminal recovery path, close Tor Browser and run the helper again. It checks the current Tor Project release, verifies the detached signature, preserves the existing Browser/TorBrowser/Data directory, and replaces the archive folder only after the staged copy passes its checks:
update-tor-browserIf the in-browser updater does nothing after several restarts, check that
~/.local/share/tor-browseris still owned by your user. A straysudoduring a manual move can flip ownership to root and block the updater.
Troubleshoot Tor Browser Issues on Linux Mint
Most Tor Browser problems fall into three buckets: the initial circuit never builds, pages load intermittently, or specific sites refuse Tor exit nodes. Start with connection failures, then move on to circuit rotation and exit-node blocks.
APT Cannot Find torbrowser-launcher on Linux Mint
The methods above do not require the APT torbrowser-launcher package. If an older command prints Package 'torbrowser-launcher' has no installation candidate, the Ubuntu universe component may be disabled, package metadata may be stale, or the system may be using a filtered mirror. Use the Flatpak method or the official archive helper instead of replacing it with sudo apt install tor; the tor package installs the daemon and command-line tools, not the Tor Browser desktop application.
Fix Tor Connection Failures and Timeouts on Linux Mint
When Tor Browser sits at “Establishing a Tor circuit” for several minutes, your network is almost certainly filtering or throttling Tor traffic. Work through these checks:
- Verify the system clock: Tor relays reject circuits when the client clock is off by more than a minute. Confirm with
timedatectl statusand look for “System clock synchronized: yes”. - Try a different network: a mobile hotspot or a second Wi-Fi network quickly isolates whether the block is coming from the current gateway.
- Enable a built-in bridge: open Settings > Connection, choose Configure Connection, and pick obfs4 first, Snowflake second.
- Request custom bridges: if every built-in option fails, request fresh obfs4 bridges from bridges.torproject.org and paste them into the connection settings.
Fix Blank Pages or Stuck Loads in Tor Browser on Linux Mint
If Tor connects but individual pages never finish loading, the circuit has probably picked a slow or flaky exit. Rotate it instead of tearing the whole session down.
- Click the padlock next to the address bar and choose New Circuit for this Site to swap the middle and exit relays for that tab.
- Give the new circuit a few seconds to settle, then reload.
- If the whole browser feels sluggish, use New Identity from the menu to rebuild every circuit and clear session cookies.
Work Around Sites That Block Tor Exit Nodes on Linux Mint
Cloudflare, banks, and some streaming services deliberately block known Tor exit IPs. That is a policy call by the site, not a bug on your end. Your options are narrow but real:
- Rotate the circuit with New Circuit for this Site until you land on an exit the site accepts.
- Check whether the site publishes an onion version and use that instead.
- Accept that some sites will never serve Tor and use a regular browser for those specific tasks.
Remove Tor Browser from Linux Mint
Use the section that matches the method you installed. The Flatpak and archive profiles live in different places, so cleaning up one does not touch the other.
Remove the Flatpak Tor Browser on Linux Mint
Remove the system-scope launcher first:
sudo flatpak uninstall org.torproject.torbrowser-launcherThat removes the launcher from the Mint menu. If you already opened Tor Browser Launcher and want to delete the downloaded browser files plus its profile too, remove the per-user data directory:
The next command permanently deletes the Tor Browser files, bookmarks, history, and bridge settings stored under
~/.var/app/org.torproject.torbrowser-launcher. Skip it if you plan to reinstall and keep that profile.
rm -rf ~/.var/app/org.torproject.torbrowser-launcherFinish with a runtime cleanup only if you do not plan to keep other Flatpak apps installed soon:
sudo flatpak uninstall --unusedRemove the Archive Tor Browser Install on Linux Mint
List the archive installation directory, desktop entry, update helper, and command wrapper before deleting them:
for path in "$HOME/.local/share/tor-browser" "$HOME/.local/share/applications/start-tor-browser.desktop" "$HOME/.local/bin/update-tor-browser" "$HOME/.local/bin/tor-browser"; do
  if [ -e "$path" ]; then
    printf '%s\n' "$path"
  fi
done
The archive removal commands permanently delete the manual Tor Browser folder and desktop shortcut, then remove the update helper and command wrapper only when they carry the markers added by this setup block. Review the paths before pressing Enter, especially the
rm -rfcommand, because bookmarks and profile data inside that manual installation will be removed.
helper="$HOME/.local/bin/update-tor-browser"
wrapper="$HOME/.local/bin/tor-browser"

rm -rf "$HOME/.local/share/tor-browser"
rm -f "$HOME/.local/share/applications/start-tor-browser.desktop"
if [ -e "$helper" ] && grep -Fq 'LinuxCapable Tor Browser archive helper' "$helper" 2>/dev/null; then
  rm -f "$helper"
fi
if [ -e "$wrapper" ] && grep -Fq 'LinuxCapable Tor Browser archive wrapper' "$wrapper" 2>/dev/null; then
  rm -f "$wrapper"
fi
Conclusion
Tor Browser is available from the Mint menu through the Flathub launcher or the verified Tor Project archive helper, with update ownership clear for each path. Before relying on it for sensitive browsing, open check.torproject.org once to confirm the circuit is live, then switch to obfs4 bridges if the network starts throttling direct Tor traffic. For a privacy-focused daily driver outside Tor, add install LibreWolf on Linux Mint or install Brave Browser on Linux Mint alongside it.

I just wanted to let you know there’s a small mistake in the code. Under “Method 2 Install as tarball”, under “Register as Desktop Application” the code “./start-tor-browser.desktop --register-app” should be “./start-tor-browser --register-app”. That also goes for the part under “Remove Tarball Installation” that is further down the page.
FYI this comment system is making my double dashes look like a single dash.
You were right, Travis. The tarball section should call
./start-tor-browser, not./start-tor-browser.desktop, for both the register and unregister commands. I have corrected both command blocks now, so the article matches the actual launcher script. Also appreciate the note about the comment form flattening the double dashes, that makes your formatting note make sense.