XFCE provides a lightweight desktop environment that balances performance with usability, making it ideal for older hardware, virtual machines, and users who prefer a responsive interface over heavy visual effects. This guide walks through installing XFCE on Debian, configuring the LightDM display manager, and managing the desktop environment. By the end, you will have a fully functional XFCE desktop ready for daily use.
Choose Your XFCE Installation Method
Debian offers several approaches for installing XFCE, ranging from a complete desktop experience to a minimal environment. The table below summarizes your options:
| Method | Package | What It Includes | Best For |
|---|---|---|---|
| Full Desktop (Recommended) | task-xfce-desktop | XFCE, LightDM, LibreOffice, Synaptic, accessibility tools, media players | Most users who want a complete desktop experience |
| Minimal Desktop | xfce4 | Core XFCE components only (panel, file manager, window manager) | Users who prefer to install applications manually |
| Minimal + Extras | xfce4 + xfce4-goodies | Core XFCE plus additional plugins, utilities, and panel applets | Users wanting enhanced functionality without full desktop apps |
We recommend the full desktop installation for most users because it provides everything needed for daily use, including office applications, a software manager, and proper display manager integration. The minimal installation requires additional configuration and manual application installation.
XFCE versions vary by Debian release: Debian 13 (Trixie) includes XFCE 4.20, Debian 12 (Bookworm) provides XFCE 4.18, and Debian 11 (Bullseye) ships with XFCE 4.16. All versions follow identical installation steps.
Update Debian Packages Before Installation
Before installing any new packages, refresh your system’s package index to ensure you receive the latest available versions. This step also installs any pending security updates.
Run the following command in your terminal:
sudo apt update && sudo apt upgradeThe apt update command downloads the latest package information from configured repositories, while apt upgrade installs newer versions of currently installed packages. Confirm any prompts to proceed with the upgrade.
Install XFCE Desktop Environment
With your system updated, install the XFCE desktop environment using the task package. This metapackage pulls in all necessary components for a complete XFCE experience:
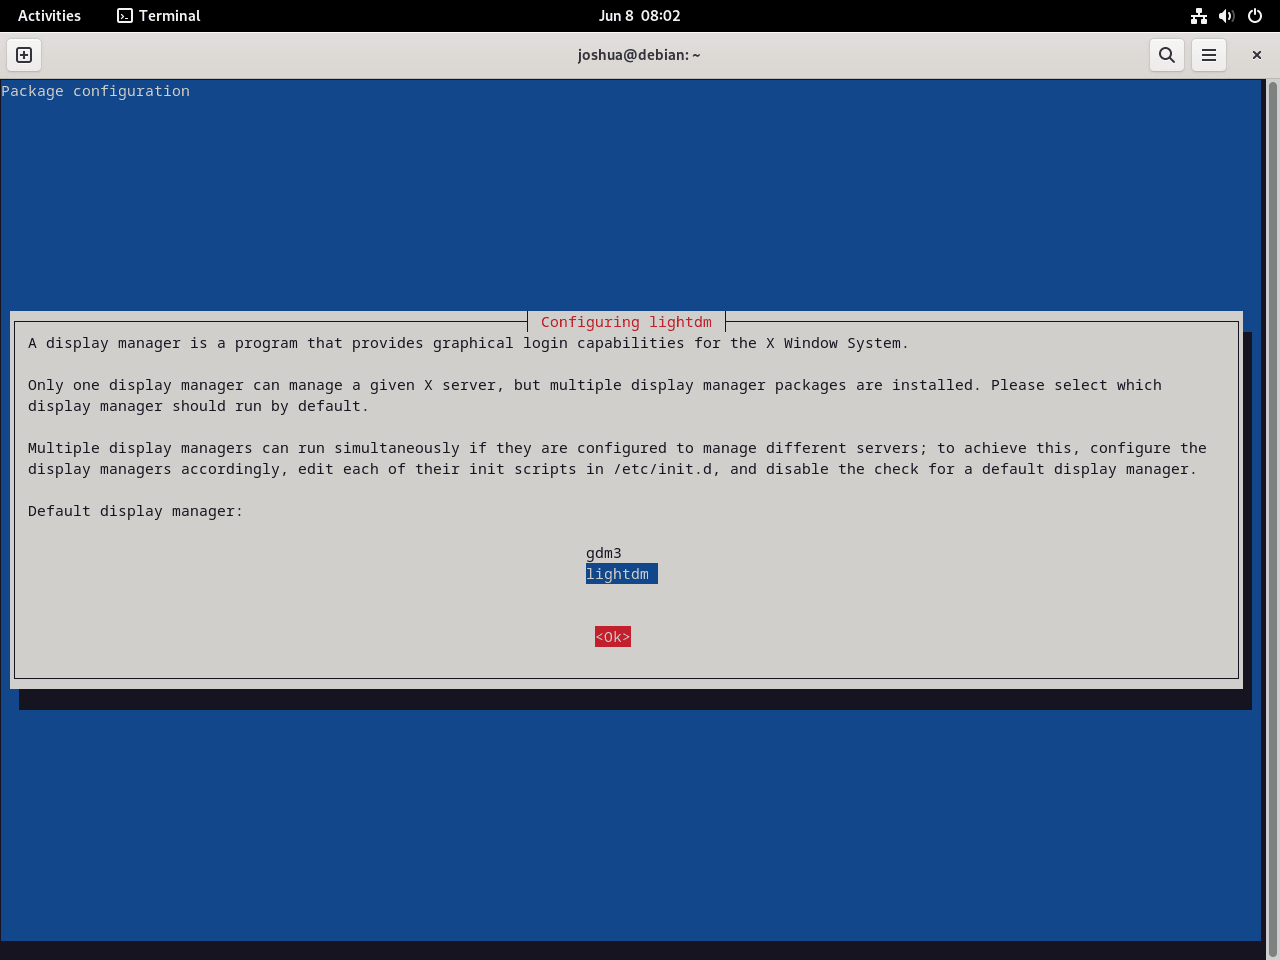
sudo apt install task-xfce-desktopThis installation typically downloads several hundred megabytes of packages. During the process, a configuration dialog appears for selecting the default display manager.
Important: When prompted to select a display manager, choose LightDM. XFCE integrates best with LightDM, which provides the login screen and session management. Use the TAB key to navigate to <Ok> and press ENTER to confirm.

After the installation completes, restart your system to apply the changes and load the new desktop environment:
sudo rebootOptional: Install XFCE Goodies Package
The xfce4-goodies package provides additional panel plugins, utilities, and enhancements beyond the base installation. If you want extra functionality such as a clipboard manager, weather widget, or system monitors, install it with:
sudo apt install xfce4-goodiesThis package includes the Whisker menu (an alternative application launcher), screenshot tools, additional panel plugins for CPU monitoring, network statistics, and more. Debian 13 users also have access to newer plugins like xfce4-docklike-plugin for a modern taskbar appearance and xfce4-notes-plugin for desktop sticky notes.
Log In to XFCE Desktop
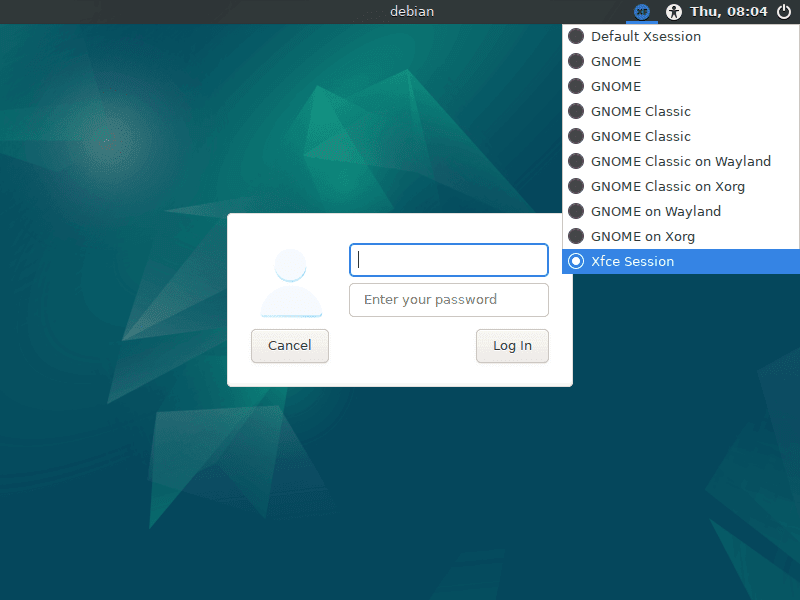
After rebooting, the LightDM login screen appears. Before entering your credentials, verify that you have selected XFCE as your session type.
Select the XFCE Session
Click the session selector icon (typically located at the top-right corner of the login screen) to view available desktop environments. From the dropdown menu, select Xfce Session instead of “Default Xsession.” This selection persists across reboots, so you only need to configure it once.

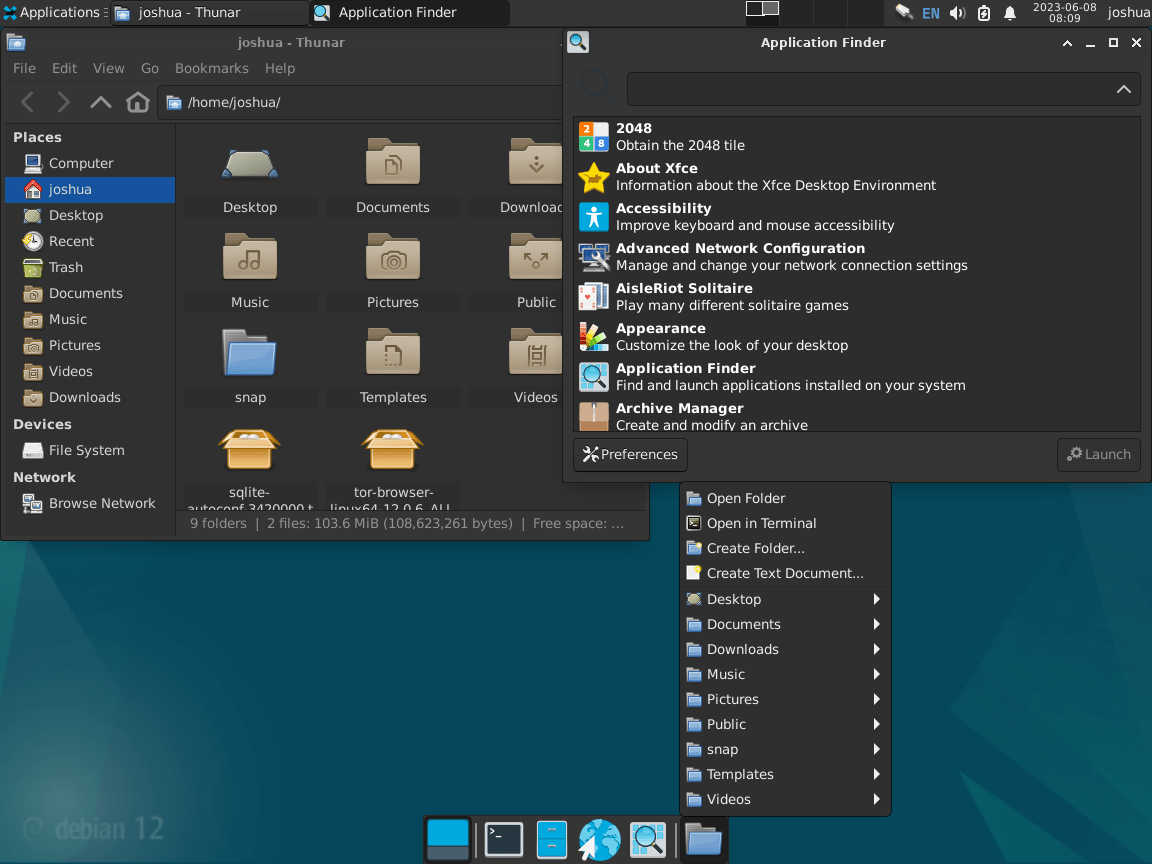
Enter your username and password to log in. The XFCE desktop loads with the default Debian theme and configuration.

Verify XFCE Installation
After logging in, confirm that XFCE installed correctly by checking the session version. Open a terminal (right-click on the desktop and select “Open Terminal Here” or find Terminal in the applications menu) and run:
xfce4-session --versionExpected output:
xfce4-session 4.x.x (Xfce 4.x)

Copyright (c) 2003-2024
        The Xfce development team. All rights reserved.
...
The version number varies based on your Debian release. Debian 13 shows version 4.20.x, Debian 12 shows 4.18.x, and Debian 11 shows 4.16.x.
Manage XFCE Desktop
Update XFCE and System Packages
XFCE receives updates through the standard Debian package system. To update XFCE along with all other system packages, run the standard update commands periodically:
sudo apt update && sudo apt upgradeThis command updates all installed packages, including XFCE components, panel plugins, and associated applications. Major XFCE version upgrades typically only occur with new Debian releases.
Switch Between Display Managers
If you have multiple desktop environments installed and want to change the default display manager, use the following command:
sudo dpkg-reconfigure lightdmA dialog appears allowing you to select from installed display managers (LightDM, GDM3, SDDM, etc.). After making your selection, reboot for the change to take effect. This is useful if you switch between XFCE (which prefers LightDM) and GNOME or KDE (which use GDM3 or SDDM respectively).
Troubleshoot XFCE Issues
Blue Screen During Remote Desktop Session
If you connect to your Debian system via RDP (Remote Desktop Protocol) and see only a blue screen instead of the XFCE desktop, install the xorgxrdp package:
sudo apt install xorgxrdpThis package provides the necessary X.org modules for XRDP to properly display the graphical session. After installation, disconnect and reconnect via RDP. This issue does not affect local (direct) logins.
Remove XFCE Desktop Environment
If you decide to remove XFCE and return to another desktop environment, follow these steps to cleanly uninstall all XFCE components.
First, remove the XFCE packages using a pattern that matches all packages beginning with “xfce”:
sudo apt autoremove '^xfce' task-xfce-desktop --purgeThe '^xfce' pattern is a regular expression that matches any package name starting with “xfce”. The --purge flag removes configuration files along with the packages, and autoremove cleans up dependencies that are no longer needed.
User configuration files in
~/.config/xfce4/and~/.cache/xfce4/are not removed by this command. Delete these directories manually if you want a complete cleanup.
Reinstall GNOME Desktop (If Previously Installed)
If you previously had GNOME installed and want to restore it, update the package cache and reinstall the GNOME components:
sudo apt updatesudo apt install gnome gdm3 task-gnome-desktop --reinstallNext, enable the GDM3 display manager and start it immediately:
sudo systemctl enable gdm3 --nowFinally, reboot to complete the transition:
sudo rebootAfter rebooting, the GDM3 login screen appears, and you can select GNOME as your session.
Explore Other Desktop Environments
If you want to compare XFCE with other lightweight options or explore different desktop experiences on Debian, consider these alternatives:
- LXQt on Debian offers an even lighter Qt-based desktop, ideal for very old hardware
- Budgie Desktop on Debian provides a modern, elegant interface with GNOME integration
- Cinnamon Desktop on Debian delivers a traditional desktop layout familiar to Windows users
- KDE Plasma on Debian offers extensive customization and a feature-rich experience
For more information about XFCE features and customization options, visit the official XFCE project website.
Conclusion
Your Debian system now runs the XFCE desktop environment with LightDM handling session management. XFCE delivers a responsive computing experience while consuming fewer system resources than heavier alternatives like GNOME or KDE. You covered installation using the task metapackage, display manager configuration, session selection, and removal procedures. Customize your desktop further through the Settings Manager, or extend functionality with additional panel plugins from the xfce4-goodies package.


That’s a very well put together webpage, and very easy to follow.
With many thanks.
Though I have used Xfce on Mint as (almost) my only Linux DE since saying goodbye to Mr. Gates’s and Mr. Jobs’s offerings, and have not had to know much at all about the backend, I have recently started distro-hopping, just for the sake of playing and learning, and this page is a must.
Thanks for the comment, Matthew, enjoy the Linux distro hopping. It is something we all do in our spare time 🙂