Nginx is usually the better fit when you want WordPress on Ubuntu without the extra Apache layer, especially on a VPS where memory use and straightforward request handling matter. That makes it practical to install WordPress on Ubuntu with Nginx, MariaDB, and PHP-FPM while keeping the stack lean and easy to tune.
Ubuntu 26.04, 24.04, and 22.04 stay in scope here, and the main release-specific differences are the default package branches and PHP-FPM service names. The setup runs from the LEMP stack through HTTPS, the WordPress installer, update checks, upload-limit tuning, and common redirect or session fixes.
Install WordPress on Ubuntu with Nginx
The package names stay consistent across Ubuntu 26.04, 24.04, and 22.04, but the default branches do not. The PHP-FPM service name and socket path are the main release-specific details you need to reuse later in the Nginx server block.
| Ubuntu release | Nginx | MariaDB | PHP-FPM service |
|---|---|---|---|
| 26.04 LTS | 1.28.x | 11.8.x | php8.5-fpm |
| 24.04 LTS | 1.24.x | 10.11.x | php8.3-fpm |
| 22.04 LTS | 1.18.x | 10.6.x | php8.1-fpm |
WordPress.org currently recommends PHP 8.3 or newer and MariaDB 10.6 or newer. Ubuntu 22.04’s default PHP 8.1 branch can still run WordPress, but new public sites should prefer Ubuntu 24.04 or 26.04 unless the server must stay on 22.04.
Update Ubuntu Packages Before Installation
Refresh the package index and install any pending updates before you start the stack setup. That keeps the package metadata current and reduces the chance of avoidable dependency conflicts.
sudo apt update && sudo apt upgradeThese commands use
sudofor tasks that need root privileges. If your user is not in the sudoers file yet, follow the guide on how to add a new user to sudoers on Ubuntu before continuing.
Install Initial Packages for WordPress on Ubuntu
Install the small helper packages used later for downloading and extracting the WordPress archive.
sudo apt install curl unzip -yInstall Nginx on Ubuntu – LEMP Stack Part 1
Start with Ubuntu’s default Nginx package. If you still need the wider Nginx-specific walkthrough, install Nginx on Ubuntu first.
sudo apt install nginx -yUbuntu enables and starts nginx.service during installation, so confirm both states before you continue.
systemctl is-active nginx
systemctl is-enabled nginx
active enabled
Install Nginx Mainline on Ubuntu (Optional)
If you want newer HTTP, TLS, or reverse-proxy features than the Ubuntu package provides, install Nginx Mainline on Ubuntu instead. The default package is still fine for a standard WordPress deployment.
Configure UFW Firewall for Nginx and WordPress
If this server does not already use UFW, set it up before you expose WordPress over HTTP or HTTPS. The broader guide to install and configure UFW firewall on Ubuntu covers extra rules and logging, while this section focuses on the SSH and Nginx profiles WordPress needs.
Install UFW if the package is missing:
sudo apt install ufw -yAllow SSH before enabling the firewall, or a remote VPS session can lock itself out. If SSH listens on a custom port, allow that port before you enable UFW.
sudo ufw allow OpenSSHList the available UFW application profiles so you can pick the Nginx rule that matches your exposure level:
sudo ufw app listAvailable applications: Nginx Full Nginx HTTP Nginx HTTPS OpenSSH
Nginx HTTP opens port 80, Nginx HTTPS opens port 443, and Nginx Full opens both. Use Nginx Full for this workflow because Certbot needs HTTP reachability before it can redirect the site to HTTPS.
Ubuntu 26.04 may also show an Nginx QUIC profile. Leave that profile closed unless you intentionally configure HTTP/3 over UDP port 443.
sudo ufw allow 'Nginx Full'Enable UFW after both SSH and Nginx have allow rules:
sudo ufw enableConfirm the active rules before continuing:
sudo ufw status verboseStatus: active To Action From -- ------ ---- OpenSSH ALLOW IN Anywhere Nginx Full ALLOW IN Anywhere
Install MariaDB on Ubuntu – LEMP Stack Part 2
MariaDB is the database layer for this stack, and Ubuntu’s default packages are enough for a normal WordPress site. If you need a newer upstream branch or a separate repository path, install MariaDB on Ubuntu with the versioned guide instead.
Install the server and client packages together so you can create the WordPress database locally from the same machine.
sudo apt install mariadb-server mariadb-client -yUbuntu also enables and starts mariadb.service during installation, so verify the service before you move on.
systemctl is-active mariadb
systemctl is-enabled mariadb
active enabled
Ubuntu 26.04 installs MariaDB 11.8.x, while Ubuntu 24.04 and 22.04 use the same service name with the older 10.11.x and 10.6.x branches.
Secure MariaDB on Ubuntu with the Security Script
Run MariaDB’s hardening helper before you create the WordPress database. It lets you remove the anonymous accounts, lock down remote root access, and delete the default test database in one pass.
Start the hardening script with:
sudo mariadb-secure-installationKeep unix-socket authentication for the local MariaDB root account unless your policy requires password authentication, then remove anonymous accounts, block remote root logins, delete the test database, and reload the privilege tables.
MariaDB Security Script Prompts
The exact wording can vary slightly by MariaDB branch, but the important prompts look like this:
Enter current password for root (enter for none):
OK, successfully used password, moving on...

Switch to unix_socket authentication [Y/n] Y
Enabled successfully!

Change the root password? [Y/n] n

Remove anonymous users? [Y/n] Y
 ... Success!

Disallow root login remotely? [Y/n] Y
 ... Success!

Remove test database and access to it? [Y/n] Y
 ... Success!

Reload privilege tables now? [Y/n] Y
 ... Success!

All done! Your MariaDB installation should now be secure.
Install PHP on Ubuntu – LEMP Stack Part 3
Install the PHP-FPM, CLI, and extension packages WordPress actually uses instead of the broad php metapackage. On Ubuntu 24.04 and 22.04, that metapackage can drag Apache helpers into the stack, which is the last thing you want on an Nginx deployment. If you still need the wider package breakdown, install PHP on Ubuntu from the dedicated guide.
PHP-FPM and several WordPress extensions, including php-imagick, come from Ubuntu’s universe component. If a minimal or customized server cannot locate one of these packages, enable Universe on Ubuntu, refresh APT, and retry the install command.
Install PHP-FPM with the common WordPress extensions in one step:
sudo apt install php-cli php-fpm php-mbstring php-bcmath php-xml php-mysql php-gd php-curl php-zip php-imagick php-intl -yUbuntu names the PHP-FPM service after the installed branch, so match the service name to your release:
- Ubuntu 22.04:
php8.1-fpm - Ubuntu 24.04:
php8.3-fpm - Ubuntu 26.04:
php8.5-fpm
Check the active PHP branch first:
php -v | head -1The first line should show PHP 8.5 on Ubuntu 26.04, PHP 8.3 on Ubuntu 24.04, or PHP 8.1 on Ubuntu 22.04. If a generic php-fpm.service check fails, list the versioned PHP-FPM unit names:
systemctl list-unit-files --no-legend 'php*-fpm.service'php8.5-fpm.service enabled enabled
Use the matching service name for the active-state check:
systemctl is-active php8.5-fpmactive
Install the WordPress Backend on Ubuntu
With Nginx, MariaDB, and PHP-FPM ready, finish the local WordPress setup by unpacking the files, creating a database, and writing the WordPress configuration file.
Create the WordPress Directory Structure on Ubuntu
WordPress publishes a direct latest.zip archive on WordPress.org. Download it into /tmp, then extract it into /var/www/html/.
cd /tmp
curl -fsSLO https://wordpress.org/latest.zip
Extract the archive into the web root directory:
sudo unzip -q latest.zip -d /var/www/html/
rm latest.zip
Give the extracted files to the web server user so Nginx and PHP-FPM can read them and WordPress can manage uploads later.
sudo chown -R www-data:www-data /var/www/html/wordpress/Then normalize the directory and file modes. WordPress does not need world-writable permissions for a standard Nginx deployment.
Use 755 for directories and 644 for files:
sudo find /var/www/html/wordpress -type d -exec chmod 755 {} \;
sudo find /var/www/html/wordpress -type f -exec chmod 644 {} \;
That leaves www-data as the owner, while 755 keeps directories searchable and 644 keeps regular files readable without making them writable for every user on the server.
Create a Database for WordPress on Ubuntu
Create a dedicated database and user instead of reusing the MariaDB root account. That keeps WordPress limited to the one database it actually needs.
sudo mariadb -u rootInside the MariaDB shell, create the database and local database user. Replace the example password before you paste the statements.
CREATE DATABASE wordpressdb;
CREATE USER 'wpuser'@'localhost' IDENTIFIED BY 'change-this-password';
GRANT ALL PRIVILEGES ON wordpressdb.* TO 'wpuser'@'localhost';
FLUSH PRIVILEGES;
EXIT;
If you prefer a browser-based database tool later, you can also install phpMyAdmin with the LEMP stack on Ubuntu.
Configure WordPress Files on Ubuntu
Next, turn the sample configuration into the live wp-config.php file and add the database credentials you just created.
cd /var/www/html/wordpress/Copy the sample file and keep the original as a fallback.
sudo cp wp-config-sample.php wp-config.phpOpen the new configuration file in your preferred editor:
sudo nano wp-config.phpUpdate the database name, username, and password fields. Leave DB_HOST as localhost unless your MariaDB server runs on another host.
define( 'DB_NAME', 'wordpressdb' );
define( 'DB_USER', 'wpuser' );
define( 'DB_PASSWORD', 'change-this-password' );
define( 'DB_HOST', 'localhost' );
define( 'DB_CHARSET', 'utf8' );
define( 'DB_COLLATE', '' );
Add Optional WordPress Settings
While you are already in wp-config.php, add a couple of sensible WordPress defaults for direct updates and a larger PHP memory limit.
/** ## Save files direct method ## */
define( 'FS_METHOD', 'direct' );

/** ## Increase memory limit, 256MB is recommended ## */
define('WP_MEMORY_LIMIT', '256M');
Keep the memory limit in line with the RAM you actually have. On a small VPS, 128M may be enough, while plugin-heavy sites often need 256M or more.
Configure WordPress Security Salt Keys on Ubuntu
Replace WordPress’s placeholder security salts before you finish the install. These values protect cookie signing and session data inside the application.
Generate a fresh set from the WordPress secret-key API, then replace the example lines in wp-config.php immediately.
Do not copy the salt keys shown in this article. They are examples only. Generate your own unique keys from the WordPress API and paste those values into your
wp-config.phpfile.
Open your wp-config.php file with a text editor to add the new security salt keys:
sudo nano /var/www/html/wordpress/wp-config.phpThen, find the lines in the file that correspond to the example keys:
define('AUTH_KEY',         'replace-with-unique-auth-key');
define('SECURE_AUTH_KEY',  'replace-with-unique-secure-auth-key');
define('LOGGED_IN_KEY',    'replace-with-unique-logged-in-key');
define('NONCE_KEY',        'replace-with-unique-nonce-key');
define('AUTH_SALT',        'replace-with-unique-auth-salt');
define('SECURE_AUTH_SALT', 'replace-with-unique-secure-auth-salt');
define('LOGGED_IN_SALT',   'replace-with-unique-logged-in-salt');
define('NONCE_SALT',       'replace-with-unique-nonce-salt');
Replace each example line with the unique salt line returned by the WordPress API. Save and exit the file once you have replaced every example value.
Configure the Nginx Server Block for WordPress on Ubuntu
Before the browser installer can load, Nginx needs a server block that points at the WordPress directory and forwards PHP requests to the correct PHP-FPM socket. Keep the try_files $uri $uri/ /index.php?$args; line intact, because dropping ?$args can break parts of the WordPress REST API.
Create a new server-block file and replace the example domain with your real host name:
sudo nano /etc/nginx/sites-available/example.com.confUse this server block as the starting point, then adjust the server names and keep the PHP socket matched to your release.
server {
  listen 80;
  listen [::]:80;
  server_name www.example.com example.com;
  root /var/www/html/wordpress;
  index index.php index.html index.htm index.nginx-debian.html;

  location / {
    try_files $uri $uri/ /index.php?$args;
  }

  location ~* /wp-sitemap.*\.xml {
    try_files $uri $uri/ /index.php$is_args$args;
  }

  client_max_body_size 100M;

  location ~ \.php$ {
    include snippets/fastcgi-php.conf;
    fastcgi_pass unix:/run/php/php8.5-fpm.sock;
    fastcgi_buffer_size 128k;
    fastcgi_buffers 4 128k;
    fastcgi_intercept_errors on;
  }

  gzip on;
  gzip_comp_level 6;
  gzip_min_length 1000;
  gzip_proxied any;
  gzip_disable "msie6";
  gzip_types application/atom+xml application/geo+json application/javascript application/x-javascript application/json application/ld+json application/manifest+json application/rdf+xml application/rss+xml application/xhtml+xml application/xml font/eot font/otf font/ttf image/svg+xml text/css text/javascript text/plain text/xml;

  location ~* \.(?:css(\.map)?|js(\.map)?|jpe?g|png|gif|ico|cur|heic|webp|tiff?|mp3|m4a|aac|ogg|midi?|wav|mp4|mov|webm|mpe?g|avi|ogv|flv|wmv)$ {
    expires 90d;
    access_log off;
  }

  location ~* \.(?:svgz?|ttf|ttc|otf|eot|woff2?)$ {
    add_header Access-Control-Allow-Origin "*";
    expires 90d;
    access_log off;
  }

  location ~ /\.ht {
    access_log off;
    log_not_found off;
    deny all;
  }
}
Update the
fastcgi_passline to match your PHP version. The socket path format is/run/php/phpX.X-fpm.sockwhere X.X is your version number:
- Ubuntu 22.04:
fastcgi_pass unix:/run/php/php8.1-fpm.sock;- Ubuntu 24.04:
fastcgi_pass unix:/run/php/php8.3-fpm.sock;- Ubuntu 26.04:
fastcgi_pass unix:/run/php/php8.5-fpm.sock;
Enable and Test Nginx Configuration
Disable the default Nginx site if it is still present, then enable the WordPress server block.
sudo rm -f /etc/nginx/sites-enabled/default
sudo ln -s /etc/nginx/sites-available/example.com.conf /etc/nginx/sites-enabled/
Check the Nginx syntax before reloading the service:
sudo nginx -tnginx: the configuration file /etc/nginx/nginx.conf syntax is ok nginx: configuration file /etc/nginx/nginx.conf test is successful
If the test passes, reload Nginx to apply the server block without dropping active connections:
sudo systemctl reload nginxProbe the enabled server block locally with the intended host name. A successful response confirms that Nginx is not serving the default welcome page for your WordPress domain.
curl -I -H 'Host: example.com' http://127.0.0.1/Configure PHP Upload Limits for WordPress on Ubuntu
WordPress uploads often fail for predictable reasons: PHP allows a smaller payload than Nginx, or the default form and memory limits are too low for themes, plugins, and media imports. Fix those limits now instead of waiting for a 413 Request Entity Too Large error in the dashboard.
Resolve the active PHP branch, then open the matching PHP-FPM php.ini file:
PHP_VERSION=$(php -r 'echo PHP_MAJOR_VERSION . "." . PHP_MINOR_VERSION;')
sudo nano "/etc/php/${PHP_VERSION}/fpm/php.ini"
Update the upload, post, execution, and memory limits to values that fit your site:
## Increase this to the maximum file size you want to upload ##
upload_max_filesize = 100M

## Increase this to the maximum post size you want to allow ##
post_max_size = 100M

## Increase this to the maximum execution time (seconds) ##
max_execution_time = 300

## Increase this for complex forms and plugins ##
max_input_vars = 5000

## Increase memory limit - ensure your system has enough RAM ##
memory_limit = 256M
Make sure the Nginx server block uses a matching body-size limit as well. Set client_max_body_size to the same value as upload_max_filesize, or slightly higher if you prefer.
Restart the matching PHP-FPM service after you save php.ini, then reload Nginx so both services pick up the new limits.
PHP_VERSION=$(php -r 'echo PHP_MAJOR_VERSION . "." . PHP_MINOR_VERSION;')
sudo systemctl restart "php${PHP_VERSION}-fpm"
sudo systemctl reload nginx
Secure WordPress on Ubuntu with Let’s Encrypt
Move the site to HTTPS before you finish the browser installer. Certbot’s Nginx plugin can request the certificate, update the server block, and add the HTTP-to-HTTPS redirect for you.
For a more detailed certificate walkthrough, see how to secure Nginx with Let’s Encrypt on Ubuntu.
Before requesting a certificate, make sure the DNS records for every domain in the command point to this server and that port 80 is reachable from the internet. Let’s Encrypt must validate the HTTP site before Certbot can install the HTTPS redirect.
Install Certbot and the Nginx plugin:
sudo apt install python3-certbot-nginx -yRequest the certificate for both the apex and www host names if your Nginx server block contains both names:
sudo certbot --nginx --agree-tos --redirect --hsts --staple-ocsp --email you@example.com -d example.com -d www.example.comCertbot asks whether you want renewal notices from the EFF. Choose the email preference that fits your setup.
That command enables HTTPS redirection, HSTS, and OCSP stapling as part of the initial setup.
Test renewal once so you know the certificate can renew cleanly:
sudo certbot renew --dry-runUbuntu’s packaged Certbot setup enables a systemd timer by default, so verify the timer instead of creating a second renewal job in cron:
systemctl is-active certbot.timer
systemctl is-enabled certbot.timer
active enabled
Finish the WordPress Installation on Ubuntu
Open the site in a browser to finish the web-based installer. If the root URL does not redirect automatically, go straight to the installer path yourself.
Start with your domain, such as https://www.example.com. If WordPress has not redirected you yet, open https://www.example.com/wp-admin/install.php directly.
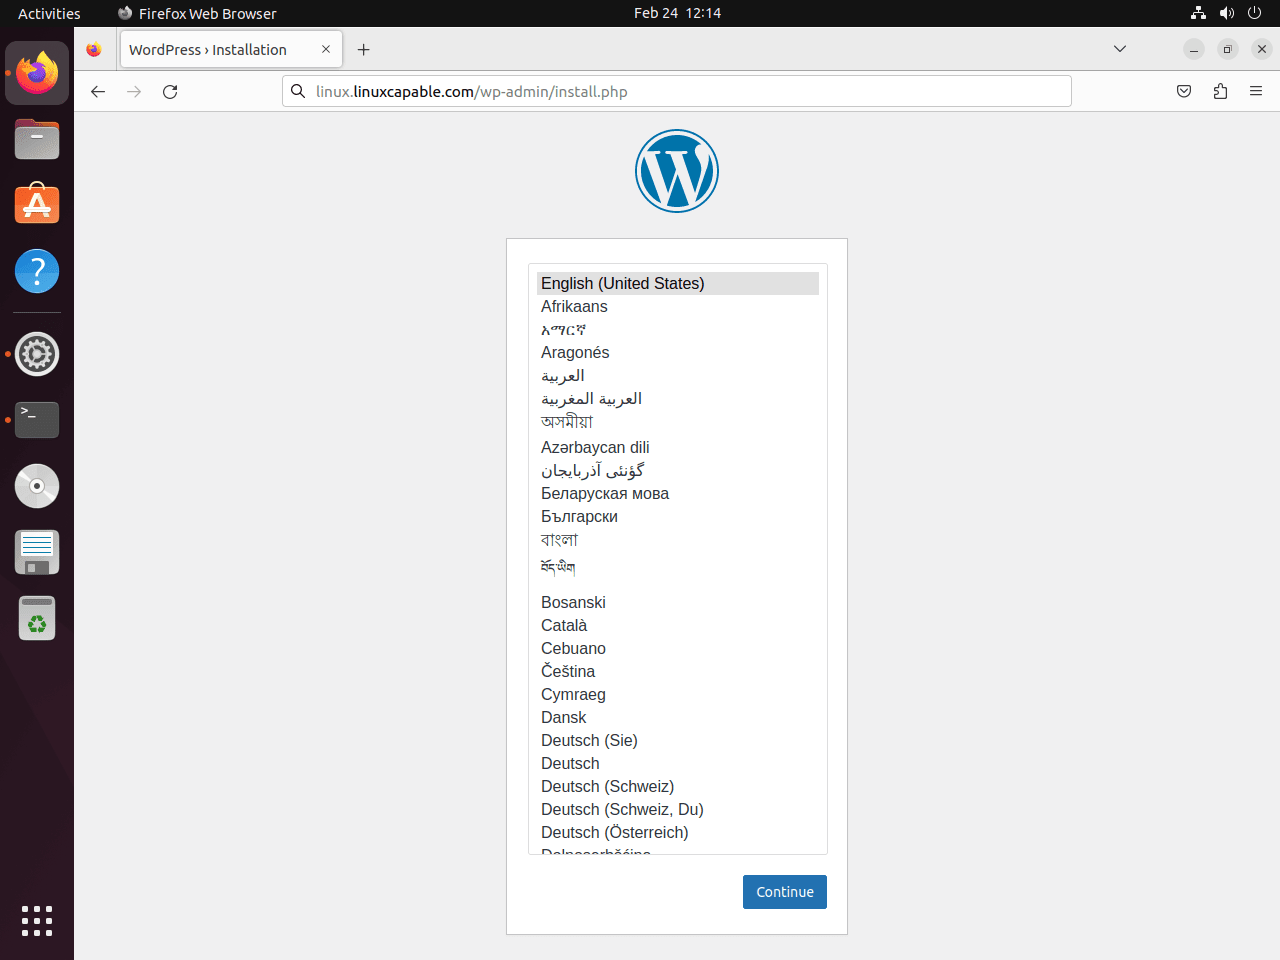
Choose a Language in the WordPress Installer on Ubuntu
The installer opens with the language screen. Choose the language you want for the WordPress dashboard, then continue.
Add Site Details in the WordPress Installer on Ubuntu
Enter the site title, admin username, password, and the main email address you want WordPress to use. Pick a strong password here, because this account controls the entire site.
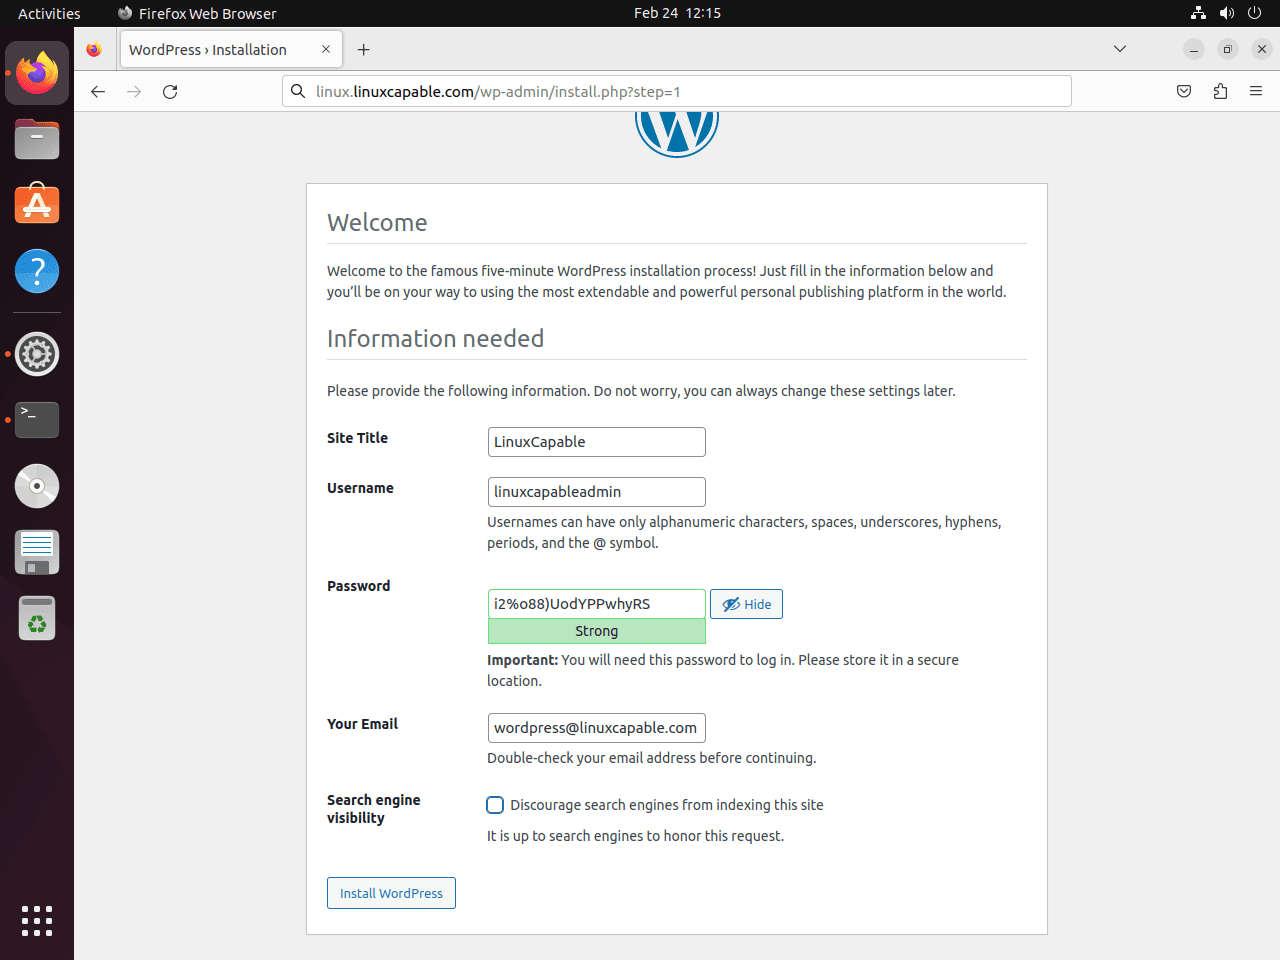
If the site is still private or under construction, check the option that discourages search-engine indexing until you are ready to launch.
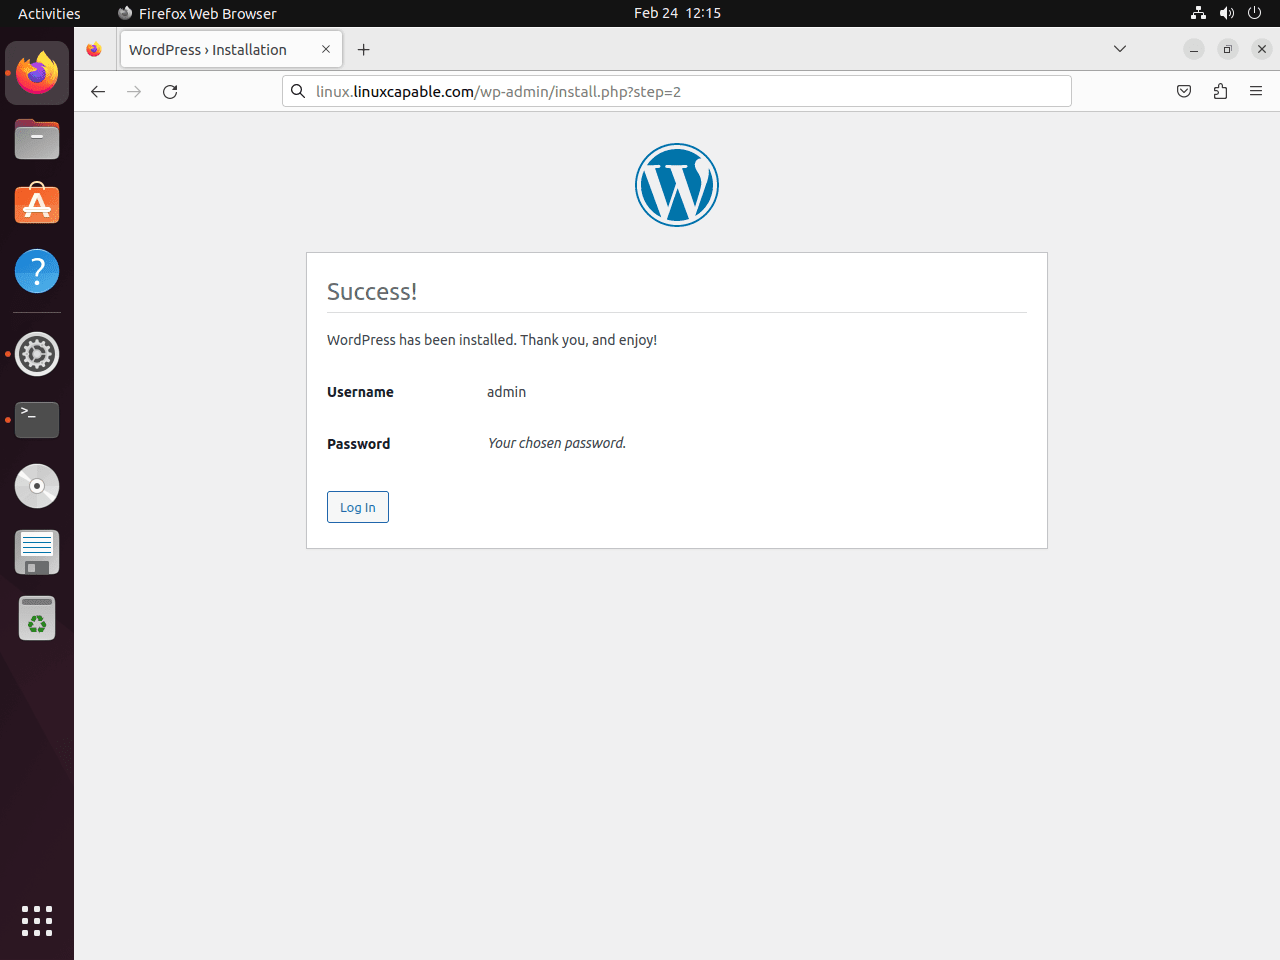
Run the WordPress Installer on Ubuntu
Submit the form to let WordPress write the first site settings and admin account. A successful run ends on the login screen.
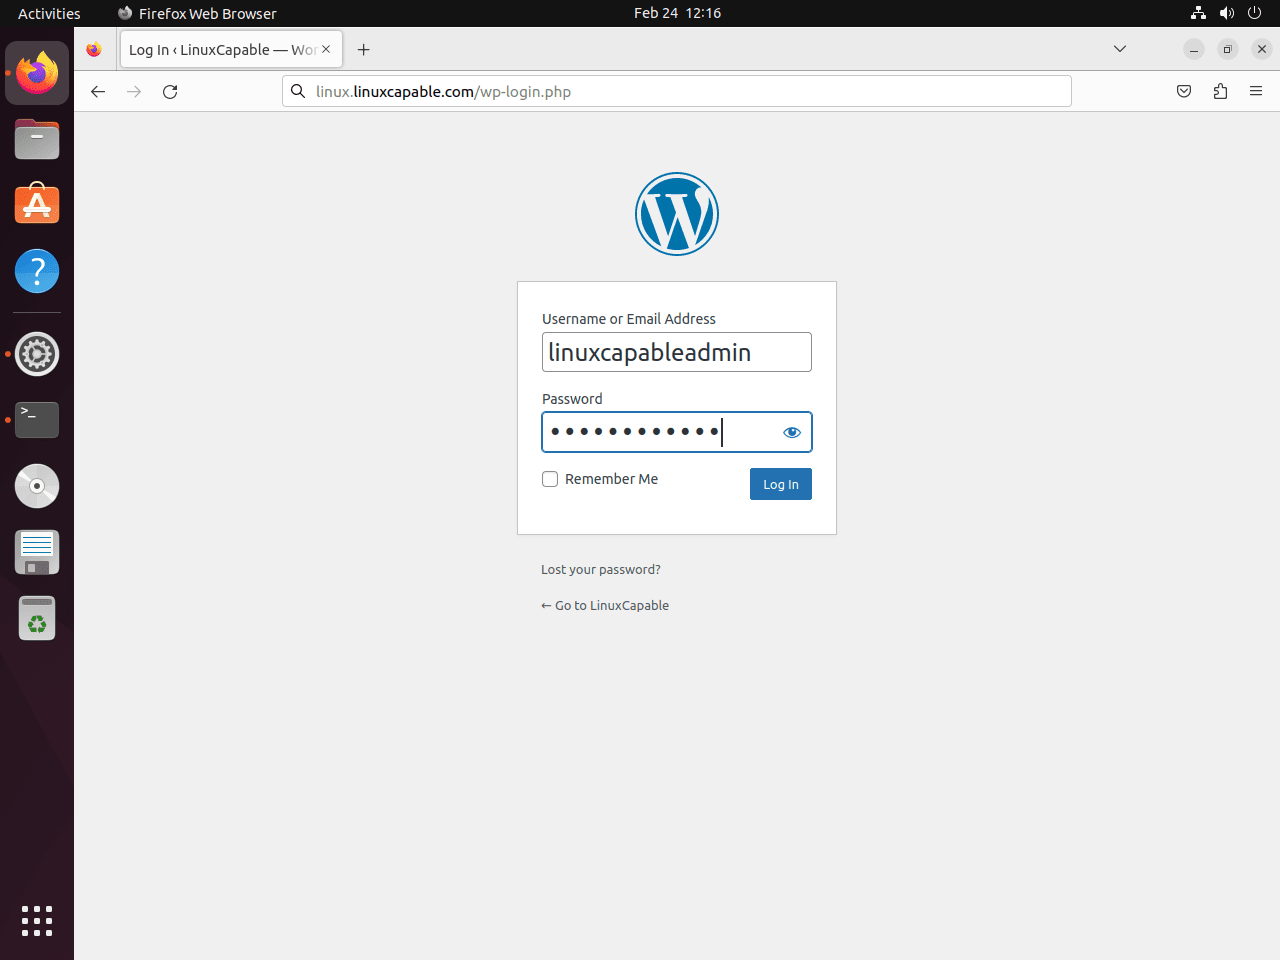
Sign In to WordPress on Ubuntu
Sign in with the admin username and password you just created. That takes you straight to the dashboard where the site setup continues.
The dashboard is the control panel for themes, plugins, pages, users, and updates. From here, you can start publishing content, import an existing site, or harden the install before you put it into production.
Open the WordPress Dashboard on Ubuntu
At this point, WordPress is usable. The remaining work is the site itself: theme choice, plugins, media, menus, and whatever content structure your project needs.

Fix Common WordPress on Ubuntu Issues
Keep a few common WordPress-on-Nginx fixes nearby after the installer completes. These issues usually trace back to PHP session permissions, forwarded HTTPS headers, or mismatched site URLs.
Fix WordPress PHP Session Errors on Ubuntu
Some plugins fail when PHP cannot write session data under /var/lib/php/sessions/. Reset the ownership if plugin logins, imports, or admin actions start throwing session-write errors.
sudo chown -R www-data:www-data /var/lib/php/sessions/That returns the directory to the web-server user, which is usually enough to clear the session-write failure immediately.
Fix HTTPS Redirect Loops in WordPress on Ubuntu
If WordPress sits behind another proxy or load balancer, the admin area can get stuck in an HTTPS redirect loop because the forwarded protocol header is not reaching WordPress correctly.
Add this wp-config.php snippet so WordPress respects the forwarded HTTPS header:
define('FORCE_SSL_ADMIN', true);

if (!empty($_SERVER['HTTP_X_FORWARDED_PROTO']) && strpos($_SERVER['HTTP_X_FORWARDED_PROTO'], 'https') !== false) {
    $_SERVER['HTTPS'] = 'on';
}
This forces the admin area onto HTTPS and tells WordPress to treat requests forwarded as HTTPS as secure requests.
Open wp-config.php in a text editor to add it:
sudo nano /var/www/html/wordpress/wp-config.phpPaste it just before the line that says That's all, stop editing! Happy blogging., then save the file.
After that change, the admin area should stop bouncing between HTTP and HTTPS.
Fix Domain Redirect Loops in WordPress on Ubuntu
A second redirect-loop pattern shows up when the site URL stored in WordPress does not match the real domain name you are using.
Check the URL definitions in wp-config.php and make sure both values match the live site:
define('WP_HOME','https://example.com');
define('WP_SITEURL','https://example.com');
If either value points to the wrong host name, update it and reload the site.
If the values already match and the loop continues, recheck the Nginx server block and any reverse-proxy headers in front of WordPress.
Update WordPress and the LEMP Stack on Ubuntu
Back up the database and WordPress files before major application, theme, plugin, PHP, MariaDB, or Nginx updates. Run the backup commands from the directory where you want the archive files saved, and replace wordpressdb if you used a different database name.
sudo mariadb-dump wordpressdb > wordpressdb-backup.sql
sudo tar -czf wordpress-files-backup.tar.gz -C /var/www/html wordpress
Use the WordPress dashboard or your deployment workflow for WordPress core, theme, and plugin updates. Keep the Ubuntu-managed stack current through APT:
sudo apt update
sudo apt upgrade
After package updates, confirm that the web server, database, and active PHP-FPM branch are still running:
PHP_VERSION=$(php -r 'echo PHP_MAJOR_VERSION . "." . PHP_MINOR_VERSION;')
systemctl is-active nginx mariadb "php${PHP_VERSION}-fpm"
Remove WordPress and the LEMP Stack on Ubuntu
If this host is dedicated to WordPress, you can remove the site files, database, and the Nginx, MariaDB, and PHP packages in one pass. If the server still hosts other sites or PHP applications, stop after the WordPress-specific cleanup and keep the shared packages installed.
Remove WordPress Files on Ubuntu
Delete the WordPress document root only after you have copied any themes, uploads, or configuration you still need.
This deletion permanently removes WordPress files including themes, plugins, uploads, and configuration. Back up any data you want to keep before proceeding.
sudo rm -rf /var/www/html/wordpress/Remove MariaDB and the WordPress Database on Ubuntu
Export the WordPress database before you delete it if you might need to restore the site later. Use the database name from your own wp-config.php file if you changed the example:
sudo mariadb-dump wordpressdb > wordpressdb-backup.sqlAfter you have a verified backup, drop the WordPress database and user before removing MariaDB:
sudo mariadb -u root -e "DROP DATABASE IF EXISTS wordpressdb; DROP USER IF EXISTS 'wpuser'@'localhost';"If MariaDB only existed for this site, remove the packages next:
sudo apt remove mariadb-server mariadb-client -yPreview the dependency cleanup before removing anything else:
sudo apt autoremove --dry-runIf the dry-run only lists packages you intend to remove, run autoremove interactively:
sudo apt autoremoveRemove PHP and WordPress Modules on Ubuntu
Remove the PHP-FPM, CLI, and WordPress extensions only when no other site on this server still depends on them.
sudo apt remove php-cli php-fpm php-mbstring php-bcmath php-xml php-mysql php-gd php-curl php-zip php-imagick php-intl -yPreview the dependency cleanup before removing auto-installed PHP branch packages or libraries:
sudo apt autoremove --dry-runContinue only when the dry-run list belongs to this WordPress stack:
sudo apt autoremoveRemove Nginx from Ubuntu
Remove the WordPress server block first. Remove Nginx only if this machine no longer serves any other sites or reverse proxies.
sudo rm -f /etc/nginx/sites-enabled/example.com.conf
sudo rm -f /etc/nginx/sites-available/example.com.conf
sudo apt remove nginx -y
Preview the dependency cleanup before removing auto-installed web-server packages:
sudo apt autoremove --dry-runIf the dry-run list is limited to the unused web-server stack, finish the dependency cleanup:
sudo apt autoremoveRemove Let’s Encrypt Certificates on Ubuntu (Optional)
Delete the certificate only when the domain will not return to this server. List the certificate names first because Certbot may name the certificate after the apex domain, not the www host.
sudo certbot certificatesDelete only the certificate name that belongs to the domain you are retiring:
sudo certbot delete --cert-name example.comIf no other site on the server uses the Certbot Nginx plugin, remove that package as well:
sudo apt remove python3-certbot-nginx -yConclusion
WordPress is now running on Ubuntu behind Nginx with MariaDB, PHP-FPM, and HTTPS in place, so the remaining work is site maintenance rather than stack assembly. For better performance, set up Nginx FastCGI cache on Ubuntu, then continue hardening themes, plugins, backups, and user access.

Hi brother, how are you? I followed your tutorial, but strangely it doesn’t work; I get a 404 error.