A local music collection still feels better in a player that opens fast, handles FLAC and MP3 without extra codec hunting, and stays out of the way while you listen. That makes it easy to install DeaDBeeF on Linux Mint when you want a lightweight GTK audio player for local libraries, playlists, and plugin-driven tweaks instead of a streaming-first desktop app.
Linux Mint 22.x and 21.x do not package DeaDBeeF in the default repositories, and Flathub does not currently list a DeaDBeeF app ID. The practical choices are the stable PPA, the development PPA, or the upstream universal .deb, and the stable PPA is the easiest path when you want the plain deadbeef command plus APT-managed updates.
Install DeaDBeeF on Linux Mint
All three install paths work on Linux Mint 22.x and 21.x. Pick one method and stay with it, especially when choosing between the stable and development PPAs, so updates and launchers stay predictable.
| Method | Use It When | Updates | What To Know |
|---|---|---|---|
| Stable PPA | You want the normal deadbeef command and APT-managed updates. | APT | Community-maintained Launchpad PPA, not an official upstream repository. |
| Development PPA | You want newer snapshot builds and do not mind occasional breakage. | APT | Community-maintained snapshot PPA. Use it instead of the stable channel, not alongside it. |
Official upstream .deb | You want the current upstream static build without adding a PPA. | Manual reinstall | Installs to /opt/deadbeef and does not add a plain deadbeef command to PATH. |
The upstream download page also publishes portable archives and source code, but those paths are better treated as advanced manual installs. There is no official AppImage on the current DeaDBeeF download page, so the maintainable Linux Mint choices are the PPA packages and the upstream static .deb.
These methods cover Linux Mint 22.x and 21.x. The PPA follows Mint’s Ubuntu base automatically, while the upstream
.debuses the same amd64 package on both supported releases.
Update Linux Mint Before Installing DeaDBeeF
Refresh package metadata and install any pending upgrades before you add a new audio player. This keeps dependency resolution simple when you switch between the PPA and upstream package.
sudo apt update && sudo apt upgrade -yThese commands use
sudofor tasks that need root privileges. If your account is not in the sudoers file yet, set up sudo access with how to create and add users to sudoers on Linux Mint before you continue.
Install DeaDBeeF from the Stable PPA
The stable PPA is the cleanest Linux Mint install path when you want automatic updates through APT and a standard terminal launcher. It is a community-maintained Launchpad source rather than an official DeaDBeeF repository, and the -y flag accepts the repository prompt automatically.
sudo add-apt-repository -y ppa:spvkgn/deadbeefRefresh the package lists after adding the PPA. Mint writes the correct Ubuntu-base source, but the package candidate does not appear until APT reads the new source file.
sudo apt updateOn Linux Mint 22.x, the repository refresh should include lines like:
Get:8 https://ppa.launchpadcontent.net/spvkgn/deadbeef/ubuntu noble InRelease [17.8 kB]
Get:10 https://ppa.launchpadcontent.net/spvkgn/deadbeef/ubuntu noble/main amd64 Packages [1,848 B]
On Linux Mint 21.x, the same Launchpad source uses jammy instead of noble.
Once the PPA is enabled, install the player and its GTK interface package:
sudo apt install -y deadbeef deadbeef-gtk3Verify the installed package source and revision with:
apt-cache policy deadbeefExample output from Linux Mint 22.x:
deadbeef:
  Installed: 1.10.2-ppa1~ubuntu24.04.1
  Candidate: 1.10.2-ppa1~ubuntu24.04.1
  Version table:
 *** 1.10.2-ppa1~ubuntu24.04.1 500
        500 https://ppa.launchpadcontent.net/spvkgn/deadbeef/ubuntu noble/main amd64 Packages
        100 /var/lib/dpkg/status
Linux Mint 22.x uses the Ubuntu Noble source in this output. On Linux Mint 21.x, the same stable branch currently appears from the Ubuntu Jammy source with the matching
~ubuntu22.04.1suffix instead.
Install DeaDBeeF from the Development PPA
The development PPA tracks newer snapshots through the same community-maintained Launchpad publisher and is best kept separate from the stable channel. If you already enabled the stable PPA, remove it first so both sources do not compete for the same package name.
sudo add-apt-repository --remove -y ppa:spvkgn/deadbeefEnable the development PPA and refresh package metadata:
sudo add-apt-repository -y ppa:spvkgn/deadbeef-devel
sudo apt update
On Linux Mint 22.x, the repository refresh should include lines like:
Get:9 https://ppa.launchpadcontent.net/spvkgn/deadbeef-devel/ubuntu noble InRelease [17.8 kB]
Get:11 https://ppa.launchpadcontent.net/spvkgn/deadbeef-devel/ubuntu noble/main amd64 Packages [1,852 B]
On Linux Mint 21.x, the same Launchpad source uses jammy instead of noble.
Install both DeaDBeeF packages from the development PPA so the main player and GTK interface stay on the same snapshot channel:
sudo apt install -y deadbeef deadbeef-gtk3Verify the snapshot revision with:
apt-cache policy deadbeefExample output from Linux Mint 22.x:
deadbeef:
  Installed: 1.10.2+r6666.2c571ba29~ubuntu24.04.1
  Candidate: 1.10.2+r6666.2c571ba29~ubuntu24.04.1
  Version table:
 *** 1.10.2+r6666.2c571ba29~ubuntu24.04.1 500
        500 https://ppa.launchpadcontent.net/spvkgn/deadbeef-devel/ubuntu noble/main amd64 Packages
        100 /var/lib/dpkg/status
Linux Mint 22.x uses the Ubuntu Noble source in this output. On Linux Mint 21.x, the same development branch currently appears from the Ubuntu Jammy source with the matching
~ubuntu22.04.1suffix instead.
The development PPA currently provides packages for Linux Mint 22.x and 21.x, but it is still the risky channel. Use it only when you actually need newer commits or want to help test regressions.
Install the Official DeaDBeeF DEB Package
The upstream DeaDBeeF download page publishes a static amd64 .deb for Debian and Ubuntu-based systems. This path avoids a PPA, but updates stay manual unless you create the optional helper later, and the launcher lives at /opt/deadbeef/bin/deadbeef instead of the plain deadbeef command in your shell PATH.
Install the download helper first if your Mint system does not already have it:
sudo apt install -y curl ca-certificatesIf you do not use curl often, review the flags in curl command in Linux. Keep the same terminal open for the download and install commands so the variables carry over.
DEB_FILE=
DEB_URL=
DOWNLOAD_PAGE=$(curl -fsSL https://deadbeef.sourceforge.io/download.html)
DEB_FILE=$(printf '%s\n' "$DOWNLOAD_PAGE" | sed -nE 's/.*(deadbeef-static_[0-9.]+-[0-9]+_amd64\.deb).*/\1/p' | sed -n '1p')
if [ -n "$DEB_FILE" ]; then
  DEB_VERSION=$(printf '%s\n' "$DEB_FILE" | sed -E 's/^deadbeef-static_([0-9.]+)-[0-9]+_amd64\.deb$/\1/')
  DEB_URL="https://sourceforge.net/projects/deadbeef/files/Builds/${DEB_VERSION}/linux/${DEB_FILE}/download"
  printf '%s\n%s\n' "$DEB_FILE" "$DEB_URL"
else
  printf 'Could not resolve the current DeaDBeeF package name.\n' >&2
fi
The resolver prints the current package name and matching SourceForge URL. Download that file into your Downloads folder, then install it with APT so Mint records the package cleanly.
if [ -n "${DEB_FILE:-}" ] && [ -n "${DEB_URL:-}" ]; then
  curl -fL -o "$HOME/Downloads/$DEB_FILE" "$DEB_URL"
  sudo apt install -y "$HOME/Downloads/$DEB_FILE"
else
  printf 'Run the resolver commands first and confirm they print a package name and URL.\n' >&2
fi
Verify the installed package with:
dpkg-query -W deadbeef-staticdeadbeef-static 1.10.2-1
The package name stays
deadbeef-staticon Linux Mint 22.x and 21.x, but the version number changes whenever upstream publishes a newer static build. The desktop entry still points toExec=/opt/deadbeef/bin/deadbeef %F.
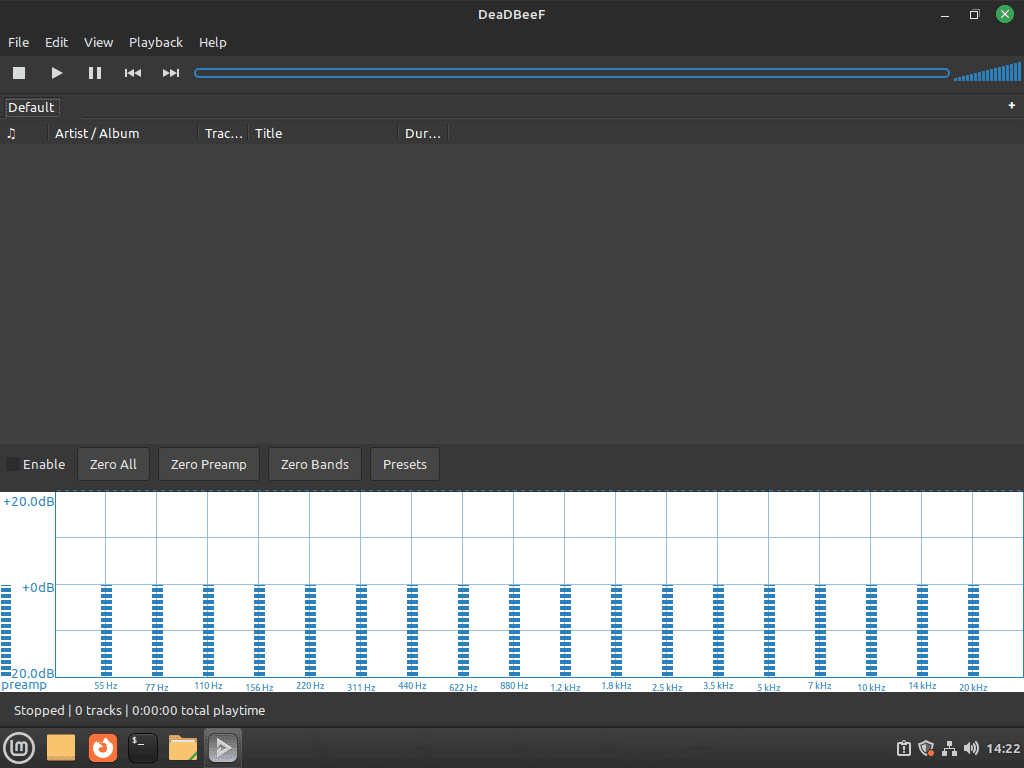
Launch DeaDBeeF on Linux Mint
Both the PPA build and the upstream .deb add a Linux Mint menu entry, so the graphical launcher is the simplest place to start. DeaDBeeF still needs an active graphical session because it is a GTK desktop player, and the terminal command depends on which install path you chose.
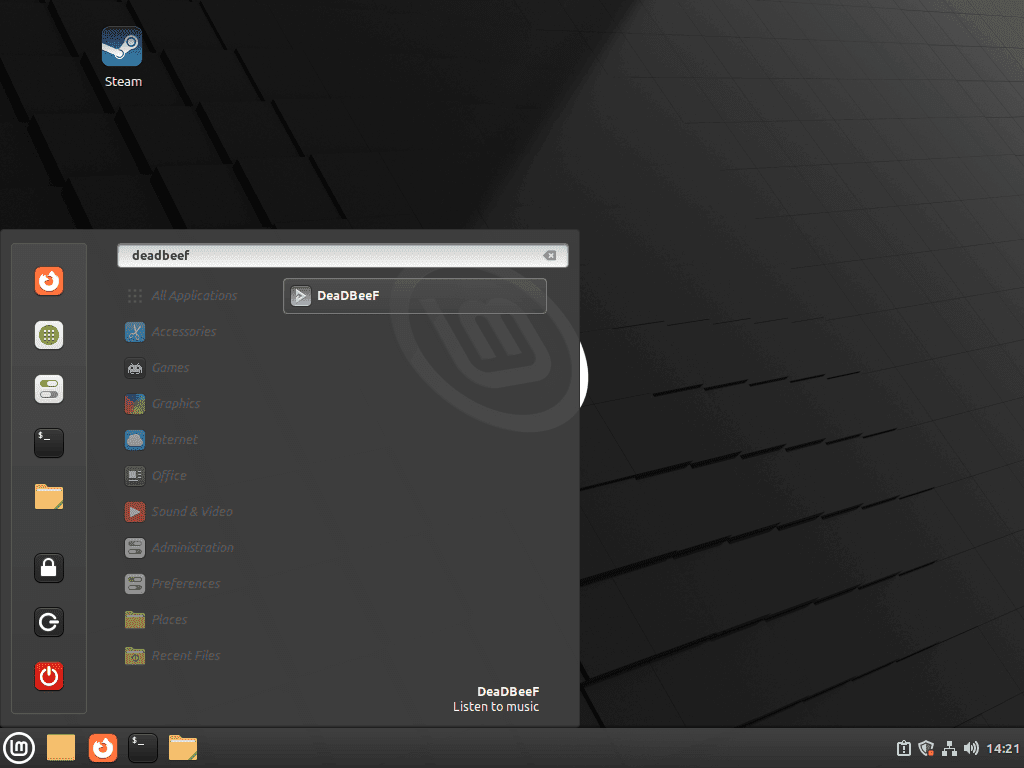
Launch DeaDBeeF from the Linux Mint Menu
Use the Linux Mint menu when you want the normal desktop experience:
- Open the main menu from your panel.
- Search for DeaDBeeF or browse to Sound & Video.
- Select the DeaDBeeF launcher to open the player.
The upstream static package uses the same menu path even though its executable lives under /opt/deadbeef.
Launch the PPA Build from a Terminal
The PPA packages place the launcher in your shell PATH, so the normal terminal command works right away:
deadbeefThis command applies to both the stable and development PPA builds.
Launch the Official DEB Build from a Terminal
The upstream static package keeps its launcher under /opt/deadbeef, so call that path directly if you want to start it from a shell:
/opt/deadbeef/bin/deadbeefThe desktop entry installed by the upstream package uses the same executable path.
Manage DeaDBeeF Plugins on Linux Mint
Plugin support is one reason DeaDBeeF keeps showing up in searches about lyrics, MPRIS controls, and lightweight local playback. Start with the built-in plugin panel before you look for third-party add-ons.
Enable Built-In DeaDBeeF Plugins
The packaged builds already ship a large plugin set, and the panel inside the player is where you turn modules on or off:
- Open DeaDBeeF and go to Edit > Preferences.
- Select the Plugins tab.
- Enable the modules you want, then restart the player if the plugin asks for it.
The upstream static package includes modules such as mpris.so and lyrics_gtk3.so, and the PPA builds expose the same plugin panel for toggling desktop integration and lyrics support.
If you install third-party plugins later, use builds that match the release you installed, especially when you run the development PPA.
Update DeaDBeeF on Linux Mint
Your update path depends on the install method you chose. PPA builds update through APT, while the upstream static package needs a fresh download from SourceForge.
Update the PPA Build
APT can update only the DeaDBeeF packages without touching unrelated software:
sudo apt update && sudo apt install --only-upgrade deadbeef deadbeef-gtk3 -yIf you installed the development PPA, the same command keeps you on that development track.
Update the Official DEB Build
The upstream static package is easiest to maintain with either a one-off refresh command or a small reusable helper command in /usr/local/bin. Keep the manual path for occasional updates, or install the optional helper if you plan to stay on the upstream .deb long term.
Run a One-Off DeaDBeeF DEB Update
Use this when you only need an occasional refresh. Resolve the current package name first so the later install command downloads the latest amd64 build from SourceForge.
CACHE_DIR="${XDG_CACHE_HOME:-$HOME/.cache}/deadbeef-updater"
DEB_FILE=
DEB_URL=
mkdir -p "$CACHE_DIR"
DOWNLOAD_PAGE=$(curl -fsSL https://deadbeef.sourceforge.io/download.html)
DEB_FILE=$(printf '%s\n' "$DOWNLOAD_PAGE" | sed -nE 's/.*(deadbeef-static_[0-9.]+-[0-9]+_amd64\.deb).*/\1/p' | sed -n '1p')
if [ -n "$DEB_FILE" ]; then
  UPSTREAM_VERSION=$(printf '%s\n' "$DEB_FILE" | sed -E 's/^deadbeef-static_([0-9.]+)-[0-9]+_amd64\.deb$/\1/')
  DEB_URL="https://sourceforge.net/projects/deadbeef/files/Builds/${UPSTREAM_VERSION}/linux/${DEB_FILE}/download"
  printf '%s\n%s\n' "$DEB_FILE" "$DEB_URL"
else
  printf 'Could not resolve the current DeaDBeeF package name.\n' >&2
fi
Use the same terminal for the download and install step so the variables stay available. This stores the package in your cache directory, reinstalls it if needed, and confirms the installed package state afterward.
if [ -n "${CACHE_DIR:-}" ] && [ -n "${DEB_FILE:-}" ] && [ -n "${DEB_URL:-}" ]; then
  curl -fL -o "$CACHE_DIR/$DEB_FILE" "$DEB_URL"
  sudo apt install -y "$CACHE_DIR/$DEB_FILE"
  dpkg-query -W deadbeef-static
else
  printf 'Run the resolver commands first and confirm they print a package name and URL.\n' >&2
fi
deadbeef-static 1.10.2-1
Create an Optional update-deadbeef Command
If you prefer a repeatable command, install a small helper under /usr/local/bin. This version checks that the upstream package is already installed, refuses to overwrite an unrelated existing helper, skips the download when you already have the latest build, and uses your cache directory instead of cluttering Downloads.
HELPER=/usr/local/bin/update-deadbeef
MARKER='LinuxCapable DeaDBeeF updater'
if sudo test -e "$HELPER" && ! sudo grep -q "$MARKER" "$HELPER"; then
  printf 'Refusing to replace %s because the expected updater marker was not found.\n' "$HELPER" >&2
  false
else
  sudo tee "$HELPER" >/dev/null <<'SCRIPT_EOF'
#!/bin/bash
# LinuxCapable DeaDBeeF updater
set -euo pipefail
for cmd in apt curl dpkg-query mkdir sed sudo; do
  if ! command -v "$cmd" >/dev/null 2>&1; then
    printf 'Required command not found: %s\n' "$cmd" >&2
    exit 1
  fi
done
CACHE_DIR="${XDG_CACHE_HOME:-$HOME/.cache}/deadbeef-updater"
mkdir -p "$CACHE_DIR"
DOWNLOAD_PAGE=$(curl -fsSL https://deadbeef.sourceforge.io/download.html)
DEB_FILE=$(printf '%s\n' "$DOWNLOAD_PAGE" | sed -nE 's/.*(deadbeef-static_[0-9.]+-[0-9]+_amd64\.deb).*/\1/p' | sed -n '1p')
if [[ -z "$DEB_FILE" ]]; then
  echo "Could not resolve the current DeaDBeeF package name." >&2
  exit 1
fi
PACKAGE_VERSION=$(printf '%s\n' "$DEB_FILE" | sed -E 's/^deadbeef-static_(([0-9.]+)-[0-9]+)_amd64\.deb$/\1/')
UPSTREAM_VERSION=$(printf '%s\n' "$DEB_FILE" | sed -E 's/^deadbeef-static_([0-9.]+)-[0-9]+_amd64\.deb$/\1/')
CURRENT_VERSION=$(dpkg-query -W -f='${Version}\n' deadbeef-static 2>/dev/null || true)
if [[ -z "$CURRENT_VERSION" ]]; then
  echo "deadbeef-static is not installed. Use the upstream DEB install method first." >&2
  exit 1
fi
if [[ "$CURRENT_VERSION" == "$PACKAGE_VERSION" ]]; then
  printf 'DeaDBeeF is already up to date: %s\n' "$CURRENT_VERSION"
  exit 0
fi
DEB_URL="https://sourceforge.net/projects/deadbeef/files/Builds/${UPSTREAM_VERSION}/linux/${DEB_FILE}/download"
printf 'Downloading %s...\n' "$DEB_FILE"
curl -fL -o "$CACHE_DIR/$DEB_FILE" "$DEB_URL"
printf 'Installing %s...\n' "$DEB_FILE"
sudo apt install -y "$CACHE_DIR/$DEB_FILE" >/dev/null
dpkg-query -W deadbeef-static
SCRIPT_EOF
  sudo chmod +x "$HELPER"
fi
Confirm your shell can find the helper:
hash -r
command -v update-deadbeef
/usr/local/bin/update-deadbeef
Since the command lives in /usr/local/bin, you can run update-deadbeef from any terminal directory:
update-deadbeefDeaDBeeF is already up to date: 1.10.2-1
When upstream publishes a newer static package, the helper downloads that file, installs it over the current build, and finishes by printing the refreshed deadbeef-static package line.
Remove DeaDBeeF from Linux Mint
Removal is different for the PPA packages and the upstream static package. Clean up the package first, then remove the repository source if you no longer want that update channel on the system.
Remove the PPA Build
Remove the installed package and its GTK front end with:
sudo apt remove -y deadbeef deadbeef-gtk3If APT offers no-longer-needed libraries afterward, preview the cleanup first:
sudo apt autoremove --dry-runWhen the preview contains only packages you no longer need, run the cleanup without the dry-run flag:
sudo apt autoremoveRemove the repository that matches the channel you used:
For the stable PPA:
sudo add-apt-repository --remove -y ppa:spvkgn/deadbeefFor the development PPA:
sudo add-apt-repository --remove -y ppa:spvkgn/deadbeef-develRefresh package metadata after removing the PPA so APT forgets that channel:
sudo apt updateVerify that DeaDBeeF is no longer installed and no repository candidate remains:
apt-cache policy deadbeefdeadbeef: Installed: (none) Candidate: (none) Version table:
Remove the Official DEB Build
The upstream static package removes cleanly with APT because it installs as deadbeef-static:
sudo apt remove -y deadbeef-staticVerify the package is gone with:
dpkg-query -W -f='${db:Status-Abbrev} ${binary:Package}\n' deadbeef-static 2>/dev/null | grep '^ii' || echo "deadbeef-static is not installed"deadbeef-static is not installed
If you created the optional updater command, remove it only when the expected marker is present:
HELPER=/usr/local/bin/update-deadbeef
MARKER='LinuxCapable DeaDBeeF updater'
if ! sudo test -e "$HELPER"; then
  printf '%s is already absent.\n' "$HELPER"
elif sudo grep -q "$MARKER" "$HELPER"; then
  sudo rm -f "$HELPER"
  hash -r
else
  printf 'Skipped %s because the expected updater marker was not found.\n' "$HELPER" >&2
  false
fi
Confirm the helper no longer resolves from your shell:
command -v update-deadbeef || echo "update-deadbeef is not installed"update-deadbeef is not installed
The optional helper may also leave a download cache. Remove it only if you no longer want to keep the last downloaded upstream package:
This deletes cached DeaDBeeF installer packages downloaded by the optional helper.
rm -rf "$HOME/.cache/deadbeef-updater"Find Leftover DeaDBeeF User Data
DeaDBeeF does not create extra per-user directories until you actually launch it or add your own plugins. Search your home directory first, then delete only the exact paths you recognize as old DeaDBeeF profile data.
find "$HOME" -maxdepth 3 -type d -iname '*deadbeef*' -printIf this command prints nothing, there is no DeaDBeeF user data to remove on that account.
Troubleshoot DeaDBeeF on Linux Mint
Most DeaDBeeF problems on Linux Mint come down to using the wrong launcher for the install method, stale PPA metadata, or an output device mismatch inside the player.
Fix DeaDBeeF Launch Failures on Linux Mint
Start the player from the path that matches the package you installed, then watch for immediate library or startup errors in the terminal.
# PPA builds
deadbeef

# Official upstream DEB
/opt/deadbeef/bin/deadbeef
If one method keeps failing, remove it completely before you switch to another one so Mint is not juggling multiple desktop launchers and package names.
Fix DeaDBeeF PPA Errors on Linux Mint
Repository errors usually clear up after you remove the old PPA entry and add back only the channel you actually want to track.
sudo add-apt-repository --remove -y ppa:spvkgn/deadbeef
sudo add-apt-repository -y ppa:spvkgn/deadbeef
sudo apt update
If you use the development channel instead, replace ppa:spvkgn/deadbeef with ppa:spvkgn/deadbeef-devel in both commands.
Fix DeaDBeeF Audio Output Problems on Linux Mint
When other applications still have sound but DeaDBeeF does not, open Edit > Preferences > Sound and switch the output plugin or device. That catches most playback issues after hardware changes, server changes, or desktop upgrades.
Conclusion
DeaDBeeF is ready on Linux Mint with the maintenance path that fits your setup, whether that means a community PPA with APT updates or the upstream static .deb under /opt/deadbeef. If you want a heavier library manager after that, install Strawberry Music Player on Linux Mint. Otherwise, DeaDBeeF’s plugin panel is the next place to tune lyrics support, MPRIS controls, and playback behavior.

Formatting tips for your comment
You can use basic HTML to format your comment. Useful tags currently allowed in published comments:
<code>command</code>command<strong>bold</strong><em>italic</em><a href="https://example.com">link</a><blockquote>quote</blockquote>