A Debian box makes a reliable Jellyfin server when the package source is clean, the service can read your media, and port 8096 is exposed only as much as your network design requires. Install Jellyfin Media Server on Debian from Jellyfin’s official APT repository when you want the server, web interface, and Jellyfin-tuned FFmpeg packages to update through normal APT maintenance instead of manual downloads.
The workflow uses the official Jellyfin repository for Debian 13 (Trixie), Debian 12 (Bookworm), and Debian 11 (Bullseye). It also covers first-run setup, media directory permissions, SSH tunnel access, UFW rules, optional Apache or Nginx reverse proxy examples, updates, removal, and the Debian-specific checks that usually explain missing packages or empty media libraries.
Install Jellyfin on Debian
Jellyfin publishes Debian packages for the server, browser-based web interface, and jellyfin-ffmpeg7. Debian’s default repositories are still useful for base tools such as curl, gpg, acl, UFW, Apache, Nginx, and Certbot, but the Jellyfin application packages come from Jellyfin’s own repository.
Check Debian Release and Architecture Support
The official Jellyfin Debian repository currently publishes packages for trixie, bookworm, and bullseye. Debian 13 packages are published for amd64 and arm64, while Debian 12 and Debian 11 also have armhf packages. The i386 architecture is not supported because modern Jellyfin builds depend on .NET support that is unavailable for 32-bit x86 Linux.
. /etc/os-release
printf 'Debian codename: %s\n' "$VERSION_CODENAME"
printf 'APT architecture: %s\n' "$(dpkg --print-architecture)"
If the codename is not trixie, bookworm, or bullseye, stop before adding the repository. Testing, unstable, derivative, and appliance images need their own support check because a successful source file does not prove that Jellyfin can install cleanly on that system.
Choose a Jellyfin Repository Method
Use one repository setup method on a system. Mixing the manual source, extrepo, and older one-line source examples can create duplicate APT entries with different Signed-By paths, which can make apt update fail.
| Method | Source | Update Behavior | Best For | Trade-offs |
|---|---|---|---|---|
| Manual DEB822 repository | Official Jellyfin APT repository | APT-managed updates from Jellyfin | Most Debian servers, scripted installs, and readers who want to see every file created | Requires writing the keyring and .sources file yourself |
| Debian extrepo | Debian-packaged extrepo metadata for the Jellyfin source | APT-managed updates after extrepo enables the repository | Users who already manage third-party Debian repositories with extrepo | Duplicates the same Jellyfin package source and should not be enabled beside the manual method |
The official Jellyfin project also provides an install script for Debian and Ubuntu systems. The manual DEB822 method is used here because it exposes the keyring path, source file, codename, architecture, update path, and cleanup path directly, which makes troubleshooting easier on long-lived Debian servers.
Keep the repository component set to main for normal Debian installs. Older examples sometimes used an unstable-only Jellyfin component for early builds, but that source does not currently provide a matching jellyfin-ffmpeg7 package, so apt install jellyfin can fail with unmet dependencies.
Prepare Debian for the Jellyfin Repository
Refresh APT metadata and install the tools needed for HTTPS downloads and repository signing-key conversion. Debian minimal, cloud, and container images often omit curl and gpg, so installing them before repository setup prevents confusing failures later.
sudo apt update
sudo apt install ca-certificates curl gpg
These commands use
sudofor package and repository changes. If your account cannot use sudo yet, sign in as root or add your account with the Debian sudoers setup guide before continuing.
Add the Official Jellyfin Repository Manually
Create the APT keyring directory and save Jellyfin’s signing key as a binary keyring. The --yes option lets the command update the file during reruns instead of stopping for an overwrite prompt.
sudo install -m 0755 -d /etc/apt/keyrings
curl -fsSL https://repo.jellyfin.org/jellyfin_team.gpg.key | sudo gpg --dearmor --yes -o /etc/apt/keyrings/jellyfin.gpg
The curl -fsSL flags make the download fail on HTTP errors, hide the progress meter, show useful error messages, and follow redirects. For more download patterns, see the curl command guide.
The current Jellyfin signing key fingerprint is 4918AABC486CA052358D778D49023CD01DE21A7B. Verify the saved key when you want an extra trust check before writing the source file:
gpg --show-keys --with-fingerprint /etc/apt/keyrings/jellyfin.gpgWrite a DEB822 source file that uses the Debian codename and architecture already reported by your system. The guard prevents unsupported codenames, unsupported architectures, and Debian 13 armhf systems from receiving a source file that cannot provide matching packages.
(
  . /etc/os-release
  architecture="$(dpkg --print-architecture)"

  case "$VERSION_CODENAME" in
    trixie|bookworm|bullseye) ;;
    *) printf 'Unsupported Debian codename for Jellyfin: %s\n' "$VERSION_CODENAME"; exit 1 ;;
  esac

  case "$architecture" in
    amd64|arm64|armhf) ;;
    *) printf 'Unsupported architecture for Jellyfin: %s\n' "$architecture"; exit 1 ;;
  esac

  if [ "$VERSION_CODENAME" = "trixie" ] && [ "$architecture" = "armhf" ]; then
    printf 'Jellyfin does not publish Debian 13 armhf packages.\n'
    exit 1
  fi

  printf '%s\n' \
    'Types: deb' \
    'URIs: https://repo.jellyfin.org/debian' \
    "Suites: $VERSION_CODENAME" \
    'Components: main' \
    "Architectures: $architecture" \
    'Signed-By: /etc/apt/keyrings/jellyfin.gpg' | sudo tee /etc/apt/sources.list.d/jellyfin.sources > /dev/null
)
Refresh APT and check that the Jellyfin repository contributes the package candidate. The policy output should include https://repo.jellyfin.org/debian for both jellyfin and jellyfin-ffmpeg7.
sudo apt update
apt-cache policy jellyfin jellyfin-ffmpeg7
Enable Jellyfin with extrepo on Debian
Use this path only when you prefer extrepo-managed third-party repository metadata. Skip it if you already created /etc/apt/sources.list.d/jellyfin.sources manually.
sudo apt install extrepo
sudo extrepo enable jellyfin
sudo apt update
apt-cache policy jellyfin
For broader extrepo maintenance, including listing enabled repositories and disabling third-party sources later, use the Debian extrepo management guide.
On current Debian releases, extrepo creates /etc/apt/sources.list.d/extrepo_jellyfin.sources and stores the Jellyfin key at /var/lib/extrepo/keys/jellyfin.asc. If APT later reports duplicate Jellyfin sources, keep either the extrepo source or the manual source, not both.
Install Jellyfin Server Packages
Install the jellyfin metapackage after one repository method is active. The metapackage pulls in jellyfin-server, jellyfin-web, and jellyfin-ffmpeg7, so the server, browser interface, and Jellyfin’s FFmpeg build stay aligned.
sudo apt install jellyfinConfirm that the package set is installed. The status abbreviation should begin with ii for each package.
dpkg-query -W -f='${db:Status-Abbrev} ${binary:Package} ${Version}\n' jellyfin jellyfin-server jellyfin-web jellyfin-ffmpeg7The package names matter when you diagnose updates or partial installs. The metapackage is convenient, but the real service and web files live in sibling packages.
| Package | Role on Debian | What to Check |
|---|---|---|
jellyfin | Metapackage that depends on the server, web UI, and Jellyfin FFmpeg package. | Use it for normal installs and version-aligned upgrades. |
jellyfin-server | Backend service, systemd unit, service user, application binaries, and default paths. | Check this package when jellyfin.service or /etc/jellyfin is missing. |
jellyfin-web | Browser interface served by the Jellyfin backend. | Check this package when the service runs but the web interface assets fail to load. |
jellyfin-ffmpeg7 | Jellyfin’s FFmpeg build for playback and transcoding workflows. | Check this package when transcoding fails or APT reports an FFmpeg package mismatch. |
If APT reports unable to locate package jellyfin-ffmpeg7, the Jellyfin repository is not active for your release or architecture. Recheck the Suites:, Architectures:, and Components: lines in /etc/apt/sources.list.d/jellyfin.sources, then run sudo apt update again.
Server Package vs Client Apps
This Debian workflow installs the Jellyfin server. It does not install Jellyfin Media Player, mobile apps, TV apps, or browser extensions on client devices. After the Debian server is reachable, client devices connect to the server URL through a browser or one of Jellyfin’s client apps.
Keep that distinction in mind when reading package names. The jellyfin-web package is the browser interface served by the Debian server, not a standalone desktop player. If you want Docker or Podman instead of APT packages, treat that as a separate deployment model with different volume, update, firewall, and hardware-acceleration handling.
Verify the Jellyfin Service and Web Listener
The Debian package creates a dedicated jellyfin system user, enables jellyfin.service, and starts the service unless autostart was disabled in the environment. Check the service state first:
systemctl is-active jellyfin
systemctl is-enabled jellyfin
Check the default HTTP listener on port 8096 and make a local HTTP request from the server. A response header from http://127.0.0.1:8096/ means the web interface is reachable locally even before firewall or reverse proxy work.
sudo ss -tlnp | grep ':8096'
curl -I http://127.0.0.1:8096/
Start and enable the service manually only if the checks show it is inactive or disabled:
sudo systemctl enable --now jellyfinComplete the Jellyfin Web Setup on Debian
The initial setup wizard creates the first administrator, media libraries, metadata preferences, and remote access defaults. Complete this step from a browser that can reach the server.
Open the Setup Wizard
Use http://127.0.0.1:8096 when the browser runs on the Debian server itself. From another device on the same LAN, use http://server-ip:8096 after replacing server-ip with the Debian server’s address.
An SSH tunnel is safer for first setup on a headless server because you can create the admin account before opening any firewall rule for Jellyfin:
ssh -L 8096:localhost:8096 username@server-ipKeep the SSH session open, then browse to http://localhost:8096 on your local workstation. For a full SSH setup on a minimal server, use the Debian SSH server guide.
Select the Display Language
The first wizard screen sets the interface language. Pick the language you want administrators and users to see in the web interface; media metadata language is handled in a later step.

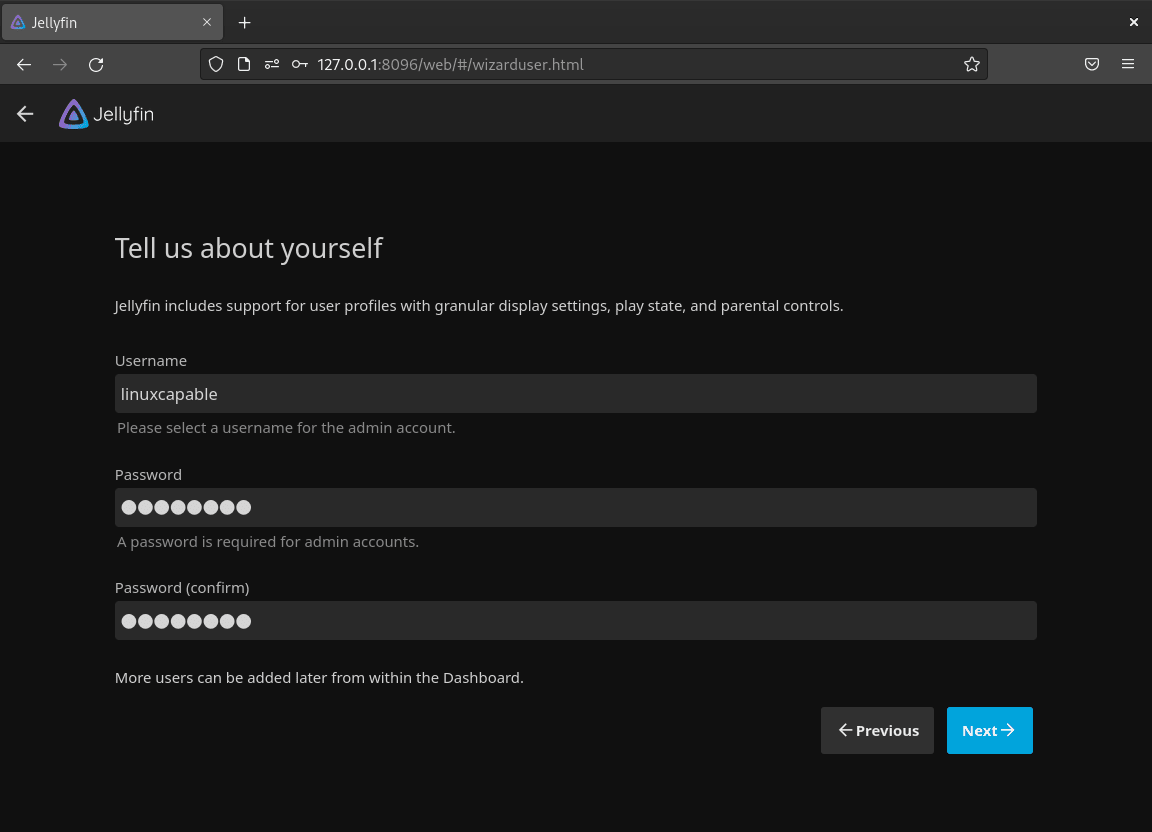
Create the First Administrator
Create a dedicated Jellyfin administrator account. Jellyfin does not create a default Debian admin username or password; the first setup wizard owns that step. Avoid reusing your Linux login password, especially if the server will later be reachable from a LAN, VPN, reverse proxy, or remote clients.
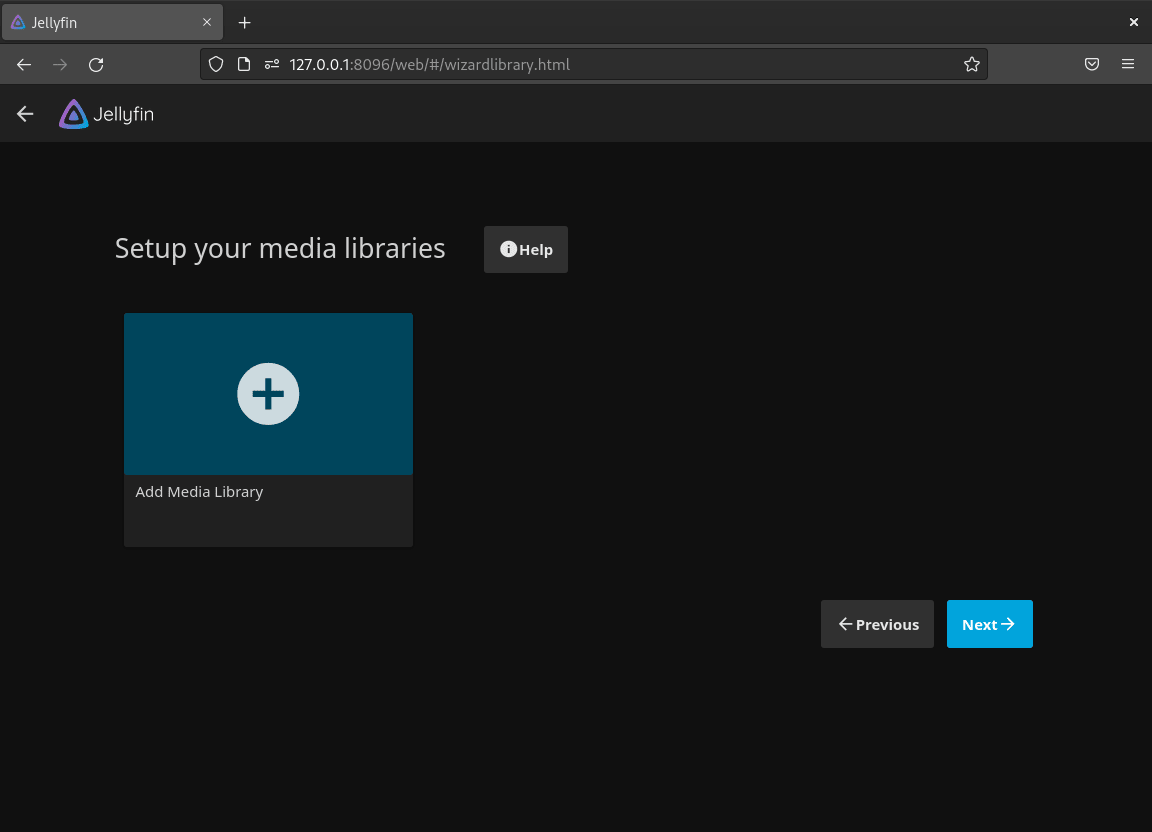
Add Media Libraries
Jellyfin organizes media through libraries. Create separate libraries for content types such as Movies, Shows, Music, Photos, and Home Videos so metadata providers and scan rules match the files they process.
When adding a library, choose the content type, assign a display name, and point Jellyfin to the directory that contains the media. Use paths that the jellyfin service user can traverse, such as /srv/media/movies or a mounted drive under /media.
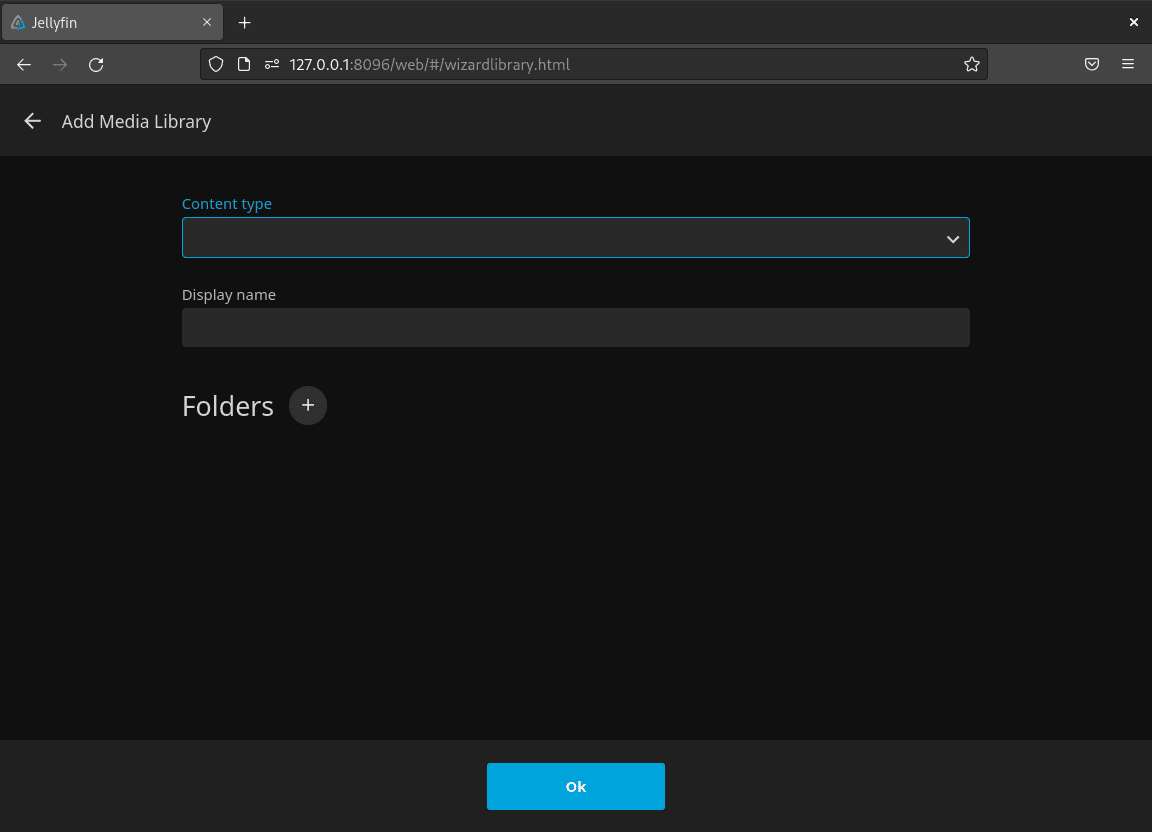
A predictable directory layout makes permissions, backups, and future drive migrations much easier. For a small home server, keep content grouped by library type instead of mixing every file under one large folder.
| Library Type | Example Path | Example Naming Pattern |
|---|---|---|
| Movies | /srv/media/movies | Movie Name (2026)/Movie Name (2026).mkv |
| TV Shows | /srv/media/tv | Show Name/Season 01/Show Name - S01E01.mkv |
| Music | /srv/media/music | Artist/Album/01 - Track.flac |
| Photos | /srv/media/photos | Year/Event/file.jpg |
Create the top-level directories before assigning permissions when you are building a new server from scratch:
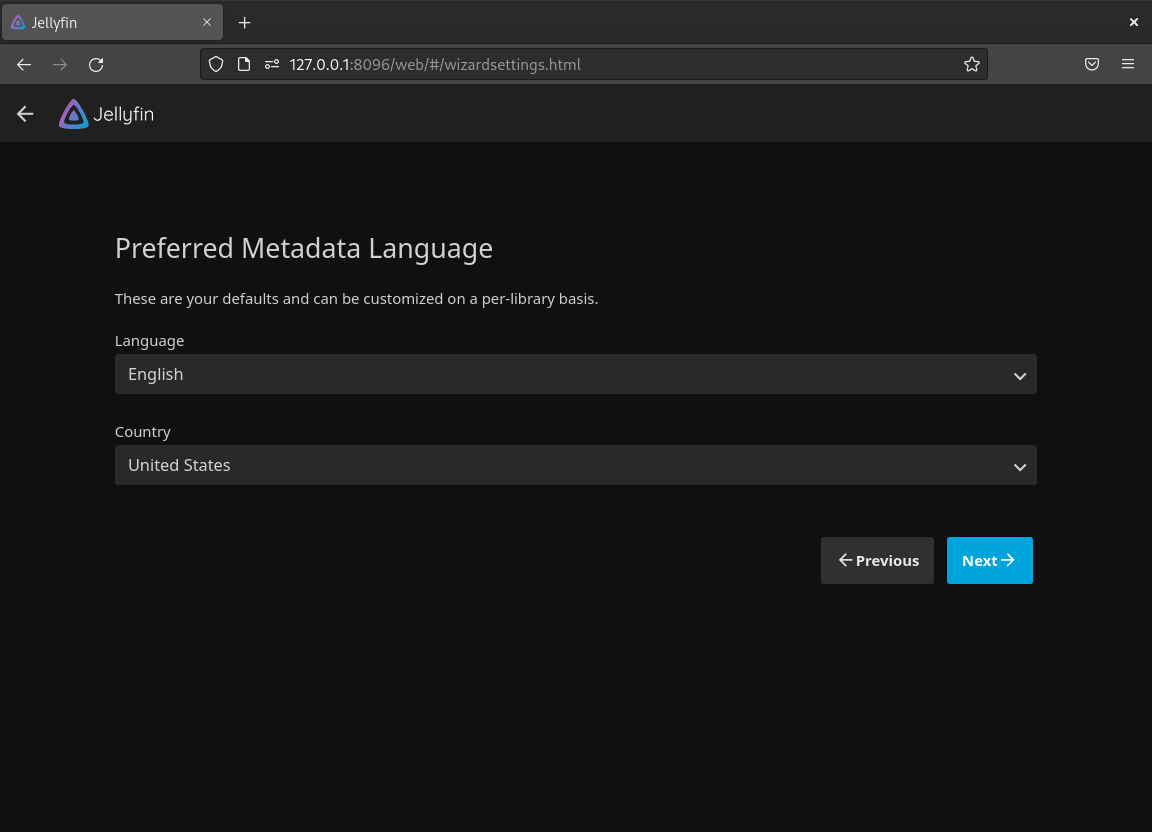
sudo install -d -m 0750 -o root -g jellyfin /srv/media/movies /srv/media/tv /srv/media/music /srv/media/photosSet Metadata Language
Metadata language and country settings affect titles, descriptions, artwork choices, and provider matches. Pick the language that best matches your library and users rather than assuming it must match the Debian system locale.
Choose Remote Access Settings
The remote access screen controls whether Jellyfin allows connections from other devices and whether it tries automatic port mapping through UPnP. Leave automatic port mapping disabled unless you deliberately want Jellyfin to ask the router to publish port 8096.
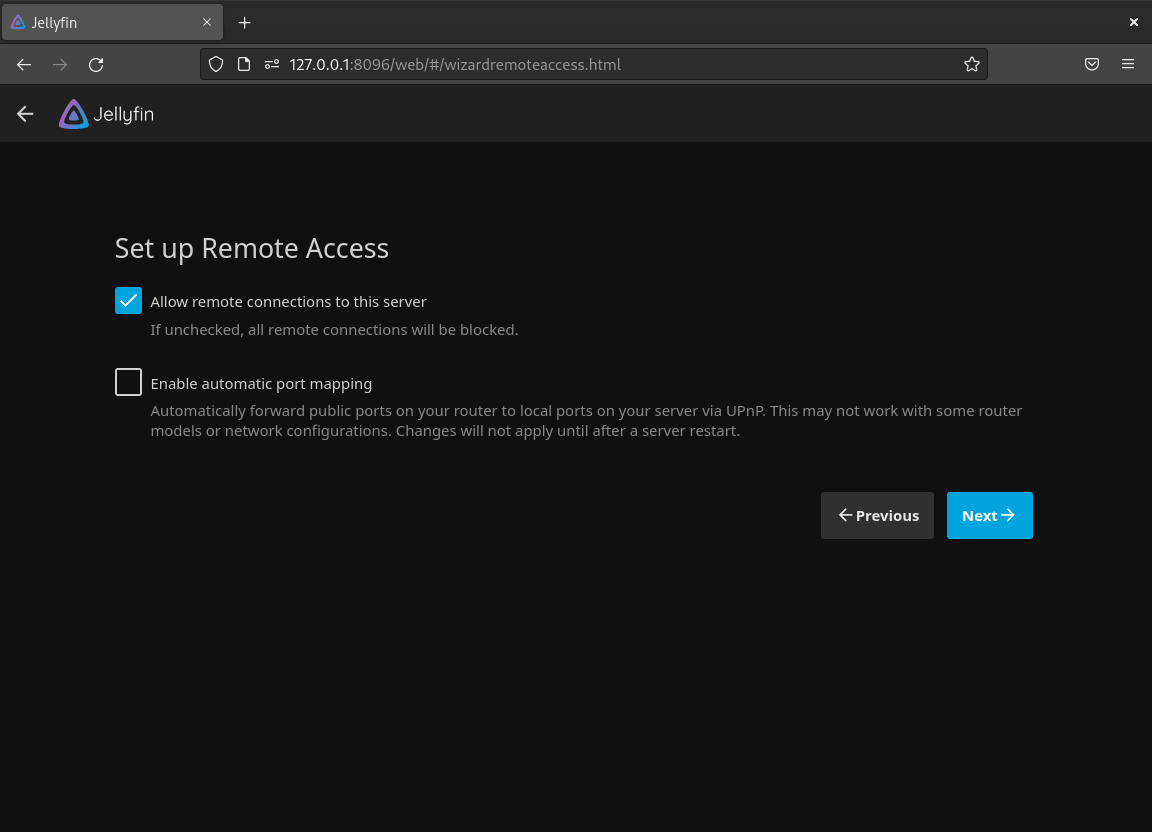
For internet access, prefer a VPN, tailnet, SSH tunnel, or HTTPS reverse proxy over exposing plain HTTP port
8096directly to the public internet.
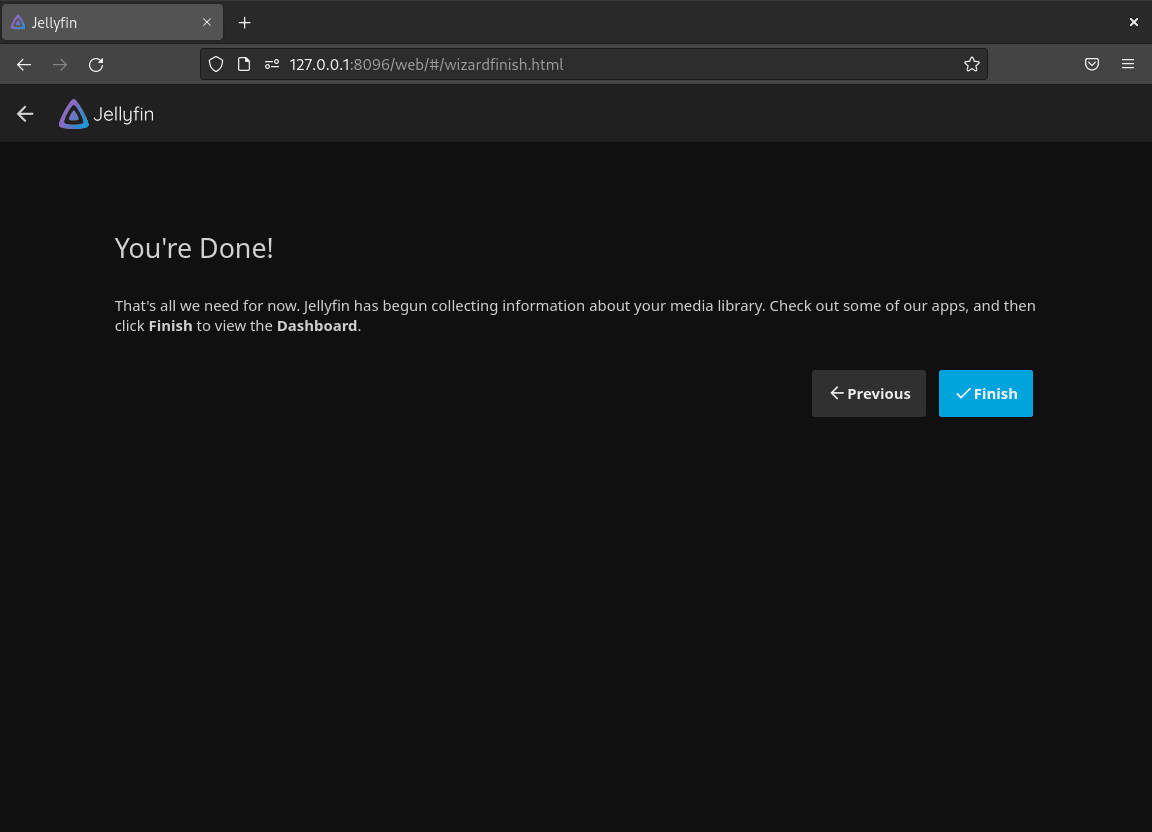
Finish Setup and Open the Dashboard
The final wizard screen starts the normal Jellyfin dashboard flow. Sign in with the administrator account you created, then use the dashboard to scan libraries, create additional users, install plugins, and adjust playback or transcoding settings.
For shared households, create normal user accounts after the first library scan instead of sharing the administrator account. Jellyfin lets you limit libraries per user, disable remote access per account, set playback limits, and keep watch history separate. Client devices such as smart TVs, phones, tablets, and desktop players can sign in with those normal accounts once the server URL is reachable.

Set Jellyfin Media Permissions on Debian
Jellyfin runs as the jellyfin system user, not as your login account. That separation is good for security, but it means a library path that works in your shell can still fail in Jellyfin if the service user cannot traverse the parent directories or read the files.
Install ACL Tools
ACLs let you grant Jellyfin read access without making media directories world-readable or changing ownership away from your normal media-management user.
sudo apt install aclGrant Jellyfin Read Access to Existing Media
Replace /srv/media with the directory that contains your media libraries. The recursive ACL grants the service user read and traversal permission on existing files and directories.
sudo setfacl -R -m u:jellyfin:rX /srv/mediaAdd a default ACL to directories so newly created folders and files under the same tree inherit Jellyfin read access:
sudo find /srv/media -type d -exec setfacl -m d:u:jellyfin:rx {} +Check access as the service user before rescanning the library. A printed success line means Jellyfin can read and traverse the top-level path.
sudo -u jellyfin sh -c 'test -r /srv/media && test -x /srv/media' && printf 'Jellyfin can read and traverse /srv/media\n'
getfacl /srv/media | grep 'user:jellyfin'
Plan Paths for External Drives
External drives mounted under /media/username can be awkward for services because desktop automount permissions often target the logged-in user. For a permanent media server, mount the drive with a stable entry under /mnt or /srv/media, then grant Jellyfin access to that path.
If you use Intel, AMD, or NVIDIA hardware transcoding, package installation already tries to add jellyfin to existing render and video groups. Check device access before changing dashboard transcoding settings:
ls -l /dev/dri 2>/dev/null
id jellyfin
If /dev/dri/renderD128 exists but the jellyfin user is not in the owning group, add the matching group and restart the service. Debian systems that need non-free GPU firmware or media drivers may also need the appropriate Debian components enabled; use the Debian contrib and non-free repository guide when hardware packages are missing from APT.
The -aG option appends the group membership instead of replacing the user’s existing supplemental groups.
sudo usermod -aG render jellyfin
sudo systemctl restart jellyfin
Remove Jellyfin Access from an Old Media Path
Remove Jellyfin-specific ACLs when a library path is retired, moved to another drive, or no longer belongs to this server. Replace the example path with the exact directory that previously received Jellyfin ACLs.
sudo setfacl -R -x u:jellyfin /srv/media/old-library
sudo find /srv/media/old-library -type d -exec setfacl -x d:u:jellyfin {} +
Configure Jellyfin Network Access on Debian
Jellyfin listens on HTTP port 8096 by default. Decide whether the server should remain local to the machine, be reachable on the LAN, be accessed through an SSH tunnel, or sit behind a reverse proxy with HTTPS.
Find Jellyfin Network Configuration Files
Debian packages start Jellyfin with configuration under /etc/jellyfin, application data under /var/lib/jellyfin, cache under /var/cache/jellyfin, and logs under /var/log/jellyfin. The network settings file appears at /etc/jellyfin/network.xml after Jellyfin has initialized its configuration.
| Path | Role |
|---|---|
/etc/default/jellyfin | Package environment file with data, cache, log, web, and FFmpeg options. |
/etc/jellyfin/system.xml | Main server configuration, including whether the setup wizard is complete. |
/etc/jellyfin/network.xml | Network and port settings, including HttpServerPortNumber. |
/var/lib/jellyfin | Application data such as database and library metadata. |
/var/log/jellyfin | Application logs written by the Jellyfin server. |
/usr/lib/jellyfin-ffmpeg/ffmpeg | Jellyfin’s packaged FFmpeg binary used for transcoding. |
sudo grep -n '<HttpServerPortNumber>' /etc/jellyfin/network.xmlChange the Jellyfin HTTP Port
Change the port only when another local service already uses 8096 or your reverse proxy layout requires a different backend port. Stop Jellyfin first so the service does not overwrite settings while you edit.
sudo systemctl stop jellyfin
sudo cp /etc/jellyfin/network.xml /etc/jellyfin/network.xml.bak
sudo nano /etc/jellyfin/network.xml
sudo systemctl start jellyfin
After changing HttpServerPortNumber, update any UFW rule, reverse proxy upstream, bookmark, or SSH tunnel that still points at the old port.
Allow Jellyfin Through UFW on Debian
Install UFW only if you use it as your firewall manager. The Debian UFW setup guide covers the full firewall workflow, including status checks and rule removal.
sudo apt install ufwAllow SSH before enabling UFW on a remote server. Enabling the firewall first can lock you out of the Debian host.
sudo ufw allow OpenSSH
sudo ufw enable
For LAN-only access, restrict port 8096 to your trusted subnet. Replace 192.168.1.0/24 with your actual LAN range.
sudo ufw allow from 192.168.1.0/24 to any port 8096 proto tcp
sudo ufw status numbered
Use a broad sudo ufw allow 8096/tcp rule only when every network attached to the server should reach Jellyfin directly. For internet access, keep the backend local and publish HTTPS through a reverse proxy or a private-access tool.
Set Up a Reverse Proxy for Jellyfin on Debian
A reverse proxy lets clients use a normal domain and HTTPS certificate while Jellyfin continues listening locally on port 8096. Configure the HTTP virtual host first, confirm http://jellyfin.example.com loads, then run Certbot for HTTPS.
After proxying Jellyfin, add the reverse proxy address to Jellyfin’s known proxy list in Dashboard > Networking. A same-host Nginx or Apache proxy usually uses 127.0.0.1. A separate proxy host should use that proxy server’s LAN address. Without this setting, Jellyfin can discard forwarded headers and treat every request as coming from the proxy itself.
Replace
jellyfin.example.comwith a real hostname that already points to your Debian server. Certbot cannot issue a certificate until public DNS and inbound HTTP access work.
Configure Nginx as a Jellyfin Reverse Proxy
Install Nginx from Debian’s repositories, then create a small server block for Jellyfin. For a broader server setup, use the Nginx on Debian guide.
sudo apt install nginx
sudo nano /etc/nginx/conf.d/jellyfin.conf
server {
listen 80;
server_name jellyfin.example.com;
client_max_body_size 20M;
location / {
proxy_pass http://127.0.0.1:8096;
proxy_http_version 1.1;
proxy_set_header Host $host;
proxy_set_header X-Real-IP $remote_addr;
proxy_set_header X-Forwarded-For $proxy_add_x_forwarded_for;
proxy_set_header X-Forwarded-Proto $scheme;
proxy_set_header X-Forwarded-Host $http_host;
proxy_buffering off;
}
location /socket {
proxy_pass http://127.0.0.1:8096/socket;
proxy_http_version 1.1;
proxy_set_header Upgrade $http_upgrade;
proxy_set_header Connection "upgrade";
proxy_set_header Host $host;
proxy_set_header X-Real-IP $remote_addr;
proxy_set_header X-Forwarded-For $proxy_add_x_forwarded_for;
proxy_set_header X-Forwarded-Proto $scheme;
proxy_set_header X-Forwarded-Host $http_host;
}
}Validate and reload Nginx:
sudo nginx -t
sudo systemctl reload nginx
Configure Apache as a Jellyfin Reverse Proxy
Apache works well when the server already hosts other Apache sites. Install Apache, enable the proxy modules Jellyfin needs, then create a dedicated virtual host. The Apache on Debian guide covers the base web server setup.
sudo apt install apache2
sudo a2enmod proxy proxy_http proxy_wstunnel headers
sudo nano /etc/apache2/sites-available/jellyfin.conf
<VirtualHost *:80>
ServerName jellyfin.example.com
ProxyPreserveHost On
RequestHeader set X-Forwarded-Proto expr=%{REQUEST_SCHEME}
ProxyPass "/socket" "ws://127.0.0.1:8096/socket"
ProxyPassReverse "/socket" "ws://127.0.0.1:8096/socket"
ProxyPass "/" "http://127.0.0.1:8096/"
ProxyPassReverse "/" "http://127.0.0.1:8096/"
ErrorLog /var/log/apache2/jellyfin-error.log
CustomLog /var/log/apache2/jellyfin-access.log combined
</VirtualHost>Enable the site, test Apache syntax, and reload the service:
sudo a2ensite jellyfin.conf
sudo apache2ctl configtest
sudo systemctl reload apache2
Test the HTTP Proxy Before HTTPS
Test the virtual host from the Debian server before requesting a certificate. The --resolve option sends the request to the local proxy while preserving the real hostname in the HTTP request.
curl -I --resolve jellyfin.example.com:80:127.0.0.1 http://jellyfin.example.com/Add HTTPS with Certbot
Install the Certbot plugin that matches your web server. Use the Nginx Let’s Encrypt guide or the Apache Let’s Encrypt guide when you need DNS, firewall, or renewal troubleshooting.
sudo apt install python3-certbot-nginxsudo apt install python3-certbot-apacheRequest a certificate for the chosen virtual host. Pick the command for the web server you configured.
sudo certbot --nginx -d jellyfin.example.com --redirectsudo certbot --apache -d jellyfin.example.com --redirectDebian’s Certbot packages install a systemd timer for renewals. Check the timer and run a renewal dry run after the certificate is issued:
systemctl list-timers 'certbot*'
sudo certbot renew --dry-run
Manage Jellyfin on Debian
The package-managed service uses normal systemd commands. Restart the service after changing package configuration, network settings, group membership, or reverse proxy assumptions.
| Task | Command |
|---|---|
| Show service status | systemctl status jellyfin |
| Start Jellyfin | sudo systemctl start jellyfin |
| Stop Jellyfin | sudo systemctl stop jellyfin |
| Restart Jellyfin | sudo systemctl restart jellyfin |
| Enable boot startup | sudo systemctl enable jellyfin |
| Disable boot startup | sudo systemctl disable jellyfin |
Inspect recent service logs through systemd first. The application log files under /var/log/jellyfin are useful when the service starts but a library scan, plugin, client connection, or transcoding task fails later.
journalctl -u jellyfin -n 80 --no-pager
sudo tail -n 80 /var/log/jellyfin/log_*.log
The tail command examples are useful when you need to follow Jellyfin logs while reproducing a scan, login, or playback issue.
Update or Remove Jellyfin on Debian
Back Up Jellyfin Before Major Changes
Back up Jellyfin’s data and configuration before major upgrades, repository changes, purge operations, disk moves, or recovery work. Stopping the service first keeps the database and metadata files quiet while the archives are created.
backup_dir="$HOME/jellyfin-backup-$(date +%F)"
mkdir -p "$backup_dir"
sudo systemctl stop jellyfin
sudo tar -C /var/lib -czf "$backup_dir/jellyfin-data.tar.gz" jellyfin
sudo tar -C /etc -czf "$backup_dir/jellyfin-config.tar.gz" jellyfin
sudo systemctl start jellyfin
sudo chown -R "$USER:$USER" "$backup_dir"
The data archive contains library metadata, users, watch state, plugins, and the Jellyfin database. The configuration archive contains files such as system.xml, network.xml, and logging configuration. Media files are not included, so back up your actual media directories separately.
Update Jellyfin Packages
Jellyfin updates arrive through APT as long as the repository method remains enabled. Update package metadata, then upgrade the installed Jellyfin package family.
The --only-upgrade option limits this operation to packages already installed on the system, which keeps the command from acting like a fresh install path on a host where Jellyfin was removed.
sudo apt update
sudo apt install --only-upgrade jellyfin jellyfin-server jellyfin-web jellyfin-ffmpeg7
Check the installed versions and service state after an update:
dpkg-query -W -f='${binary:Package} ${Version}\n' jellyfin jellyfin-server jellyfin-web jellyfin-ffmpeg7
systemctl status jellyfin --no-pager
Remove Jellyfin but Keep Server Data
Normal removal uninstalls the packages while leaving configuration and library data available for a later reinstall. Review the standalone autoremove transaction before accepting it because Debian may also list old dependencies from unrelated package work.
sudo apt remove jellyfin jellyfin-server jellyfin-web jellyfin-ffmpeg7
sudo apt autoremove
Purge Jellyfin Data and Configuration
Purging
jellyfin-serverremoves the default Jellyfin system user, configuration under/etc/jellyfin, application data under/var/lib/jellyfin, cache under/var/cache/jellyfin, and logs under/var/log/jellyfin. Back up metadata, watched state, users, and plugin data before using this cleanup path.
sudo apt purge jellyfin jellyfin-server jellyfin-web jellyfin-ffmpeg7
sudo apt autoremove
Confirm that no installed Jellyfin packages remain:
dpkg -l jellyfin jellyfin-server jellyfin-web jellyfin-ffmpeg7 2>/dev/null | grep '^ii' || printf 'Jellyfin packages are not installed\n'Remove the Jellyfin Repository
Manual repository installs can remove the source file and keyring after package removal. The keyring command checks the source directory for remaining Jellyfin key references before deleting the key.
sudo rm -f /etc/apt/sources.list.d/jellyfin.sources
if ! sudo grep -Rqs '/etc/apt/keyrings/jellyfin.gpg' /etc/apt/sources.list.d; then
  sudo rm -f /etc/apt/keyrings/jellyfin.gpg
fi
sudo apt update
For extrepo installs, disable the repository through extrepo instead:
sudo extrepo disable jellyfin
sudo apt update
Disabling the extrepo entry is enough to stop APT from using the Jellyfin repository. If you are retiring the extrepo entry entirely, remove the generated source file and key after disabling it:
sudo rm -f /etc/apt/sources.list.d/extrepo_jellyfin.sources
sudo rm -f /var/lib/extrepo/keys/jellyfin.asc
sudo apt update
Troubleshoot Jellyfin on Debian
Unable to Locate jellyfin or jellyfin-ffmpeg7
This error usually means APT never consumed the Jellyfin source, the source uses the wrong codename, the architecture is unsupported, or an older source file points to a stale location. Check the source file and package policy before changing package names.
cat /etc/apt/sources.list.d/jellyfin.sources
sudo apt update
apt-cache policy jellyfin jellyfin-ffmpeg7
The source should use URIs: https://repo.jellyfin.org/debian, the matching Debian codename in Suites:, Components: main, and a supported Architectures: value. Debian 13 armhf systems will not receive matching packages from the current repository. An unstable-only source can also produce this error because the matching jellyfin-ffmpeg7 package is not present in that component.
Jellyfin Web Interface Does Not Load
Start with local proof on the Debian server. If local access works but another device cannot connect, the problem is usually firewall, routing, DNS, or reverse proxy configuration rather than Jellyfin itself.
systemctl is-active jellyfin
sudo ss -tlnp | grep ':8096'
curl -I http://127.0.0.1:8096/
When port 8096 is already used by another service, change HttpServerPortNumber in /etc/jellyfin/network.xml, restart Jellyfin, and update every firewall or reverse proxy rule that forwards to the old port.
Jellyfin Cannot See Media Folders
Check access as the service user. A path can look correct in the dashboard while still failing because the jellyfin user cannot traverse a parent directory.
sudo -u jellyfin sh -c 'test -r /path/to/media && test -x /path/to/media' && printf 'Readable and traversable\n'
namei -l /path/to/media
Grant read and traversal access with ACLs, then rescan the library from the dashboard. Keep media filenames and folder structure consistent with Jellyfin’s naming expectations so metadata providers can match content reliably.
Jellyfin Service Fails to Start
Use systemd logs first, then the application log directory. Look for XML parsing errors, database errors, missing paths, permission failures, and FFmpeg path problems.
systemctl status jellyfin --no-pager
journalctl -u jellyfin -n 120 --no-pager
sudo tail -n 120 /var/log/jellyfin/log_*.log
If a configuration edit broke the setup wizard state, move the main config file aside instead of deleting it immediately. The backup gives you a path to compare or restore settings after Jellyfin regenerates defaults.
sudo systemctl stop jellyfin
sudo mv /etc/jellyfin/system.xml /etc/jellyfin/system.xml.bak
sudo systemctl start jellyfin
Hardware Transcoding Is Not Available
Jellyfin hardware transcoding depends on the GPU, kernel, firmware, media driver, device permissions, and dashboard settings. The Debian package provides jellyfin-ffmpeg7, but it cannot create missing GPU devices or install every vendor driver for you.
ls -l /dev/dri 2>/dev/null
id jellyfin
/usr/lib/jellyfin-ffmpeg/ffmpeg -version
If /dev/dri is missing, check BIOS settings, kernel support, firmware, and driver packages before changing Jellyfin. If the render device exists but the service user lacks group access, add the jellyfin user to the owning group and restart the service.
Moving from Plex or Emby to Jellyfin
Your media files do not need conversion when moving from Plex or Emby to Jellyfin. Watch history, playlists, ratings, and metadata are separate application data, so migrations usually rely on plugins, shared metadata files, or external services such as Trakt rather than a package-manager command. For a package-source comparison, see the Plex Media Server on Debian guide.
Jellyfin Resources for Debian Users
- Jellyfin Linux installation documentation covers the official helper script and repository setup options.
- Jellyfin manual installation documentation documents the manual repository, extrepo path, and direct package boundary.
- Jellyfin quick start documentation summarizes the install, wizard, and client setup sequence.
- Jellyfin hardware acceleration documentation covers GPU-specific transcoding setup after the base server works.
- Jellyfin client downloads help connect phones, TVs, desktops, and browser clients to the Debian server.
Conclusion
Jellyfin is running on Debian from the official APT repository, with the service, web UI, package updates, media permissions, and network exposure model defined. Keep the repository enabled for updates, back up /var/lib/jellyfin before destructive changes, and move remote access behind HTTPS or a private tunnel before depending on it away from home.

sudo apt install jellyfin jellyfin-ffmpeg7 jellyfin-server jellyfin-web
Thanks for catching that, Martial. You were absolutely right. The article referenced
jellyfin-ffmpeg5, which is outdated for Jellyfin 10.10.x. The guide now usesjellyfin-ffmpeg7.For reference, Jellyfin’s FFmpeg version requirements follow this pattern:
Thank you for the correction.