
This guide walks through how to install Jellyfin Media Server on Debian, giving you a fully self-hosted streaming platform with no subscriptions, no tracking, and no artificial limitations. By the end, you will have a working media server with automatic metadata fetching, multi-user profiles with parental controls, and optional reverse proxy configuration with SSL encryption.
Update Debian Before Installing Jellyfin
Before installing Jellyfin, update your Debian system to minimize compatibility issues:
sudo apt update && sudo apt upgrade -yThis guide uses
sudofor commands that need root privileges. If your user is not in the sudoers file yet, run the commands as root or follow the guide on how to add a user to sudoers on Debian.
Install Required Packages for Jellyfin on Debian
Install the prerequisite packages needed to securely add the Jellyfin repository:
sudo apt install ca-certificates curl gpg lsb-release -yThese packages provide SSL certificate validation (ca-certificates), file downloading (curl), GPG key conversion (gpg), and release detection (lsb-release) needed to configure the Jellyfin repository.
Choose Your Jellyfin Installation Method for Debian
Jellyfin can be installed on Debian using two methods. The comparison table below helps you choose the right approach:
| Method | Channel | Version | Updates | Best For |
|---|---|---|---|---|
| extrepo (Recommended) | Debian extrepo | Latest stable | Automatic via APT upgrades | Most users; automatic GPG and source configuration |
| Manual Repository | Jellyfin Repo | Latest stable | Automatic via APT upgrades | Custom configurations, scripted deployments, or learning APT internals |
For most users, the extrepo method is recommended because it uses Debian’s curated repository list to automatically handle GPG key downloads, source file creation, and version detection. This reduces configuration errors and simplifies future maintenance.
These steps support Debian 13 (Trixie), 12 (Bookworm), and 11 (Bullseye) while support remains active. Both installation methods work identically across all supported Debian releases.
Install Jellyfin on Debian via extrepo (Recommended)
The extrepo tool simplifies adding external repositories by automatically configuring GPG keys and source files, following Debian’s security best practices. For a complete overview of managing third-party repositories, see our guide on managing APT repos with extrepo on Debian.
Install extrepo
Install the extrepo package from Debian’s repositories:
sudo apt install extrepo -yEnable the Jellyfin Repository
Use extrepo to enable the official Jellyfin repository:
sudo extrepo enable jellyfinThis command automatically configures the GPG key and creates the repository source file in /etc/apt/sources.list.d/.
Update Package Index and Verify
Update your package cache to include packages from the newly added repository:
sudo apt updateVerify the repository was added correctly:
apt-cache policy jellyfinExpected output showing Jellyfin available from the repository:
jellyfin:
  Installed: (none)
  Candidate: 10.x.x
  Version table:
     10.x.x 500
        500 https://repo.jellyfin.org/debian [your-release]/main amd64 Packages
Debian 13 (Trixie) users: The Jellyfin repository supports
amd64andarm64architectures only. Debian 12 and 11 also supportarmhf.
Install Jellyfin on Debian via Manual Repository (Alternative)
If you prefer manual control over repository configuration or need custom settings, add the Jellyfin repository and GPG key manually. This method is also useful for scripted deployments or systems where extrepo is unavailable.
Import the Jellyfin GPG Key
Download and convert the Jellyfin GPG signing key to verify package authenticity:
curl -fsSL https://repo.jellyfin.org/jellyfin_team.gpg.key | sudo gpg --dearmor -o /usr/share/keyrings/jellyfin.gpgThe gpg --dearmor flag converts the ASCII-armored key into the binary format that APT requires for Signed-By verification. The key is stored in /usr/share/keyrings/ following Debian best practices.
Add the Jellyfin Repository
Add the Jellyfin repository using the DEB822 .sources format, which is supported on all current Debian versions:
Choose one repository configuration: Use either the stable or unstable component below, not both. Running both commands will overwrite the configuration file.
Stable Version (Recommended)
For production use, add the stable repository:
cat <<EOF | sudo tee /etc/apt/sources.list.d/jellyfin.sources
Types: deb
URIs: https://repo.jellyfin.org/debian
Suites: $(lsb_release -cs)
Components: main
Architectures: $(dpkg --print-architecture)
Signed-By: /usr/share/keyrings/jellyfin.gpg
EOF
Unstable Version (Optional)
If you want early access to new features that may not be fully tested, use the unstable component instead:
cat <<EOF | sudo tee /etc/apt/sources.list.d/jellyfin.sources
Types: deb
URIs: https://repo.jellyfin.org/debian
Suites: $(lsb_release -cs)
Components: unstable
Architectures: $(dpkg --print-architecture)
Signed-By: /usr/share/keyrings/jellyfin.gpg
EOF
Update and Verify the Repository
Refresh your package index to recognize the newly added Jellyfin repository:
sudo apt updateVerify the repository was added successfully:
apt-cache policy jellyfinExpected output showing Jellyfin available from the repository:
jellyfin:
  Installed: (none)
  Candidate: 10.x.x
  Version table:
     10.x.x 500
        500 https://repo.jellyfin.org/debian [your-release]/main amd64 Packages
The version numbers and release names are placeholders. Your output will show the actual version and your Debian release codename (bullseye, bookworm, or trixie).
Install the Jellyfin Media Server Packages on Debian
With the Jellyfin repository configured, install the Jellyfin Media Server packages on your Debian system.
Step 1: Install Jellyfin
Install Jellyfin using the metapackage, which automatically pulls in the server, web interface, and correct FFmpeg version:
sudo apt install jellyfinThe jellyfin metapackage installs:
jellyfin-server: The backend server processesjellyfin-web: The frontend web interfacejellyfin-ffmpeg7: Custom FFmpeg build optimized for media transcoding
Troubleshooting FFmpeg Version
The metapackage automatically selects the correct FFmpeg version. To check available versions:
apt search jellyfin-ffmpegThe search results display available FFmpeg packages for your Debian version, helping you verify the correct version was selected.
Step 2: Verify Installation
Check the status of the Jellyfin service:
systemctl status jellyfinExpected output showing the service is active:
● jellyfin.service - Jellyfin Media Server
     Loaded: loaded (/lib/systemd/system/jellyfin.service; enabled)
     Active: active (running)
   Main PID: 1234 (jellyfin)
Step 3: Enable Jellyfin on Boot
The Jellyfin installer typically enables the service automatically. However, verify and ensure it starts on boot:
sudo systemctl enable --now jellyfinThis command enables the service to start at boot (enable) and starts it immediately (--now) if not already running.
Configure the Jellyfin Media Server on Debian
After installing Jellyfin, configure the server through its web interface. Follow these steps to complete the initial setup.
Step 1: Access the Jellyfin Web Interface
Open a web browser and navigate to the following URL:
http://<server-ip>:8096
- Replace
<server-ip>with the IP address of your server. - If you’re accessing Jellyfin locally, use this URL instead:
http://127.0.0.1:8096
The default port for Jellyfin is 8096.
Step 2: Select Display Language
On the first setup screen, choose your preferred display language from the dropdown menu.
- Tip: Ideally, ensure the language matches your media metadata preferences for a unified experience.
Click Next to proceed.

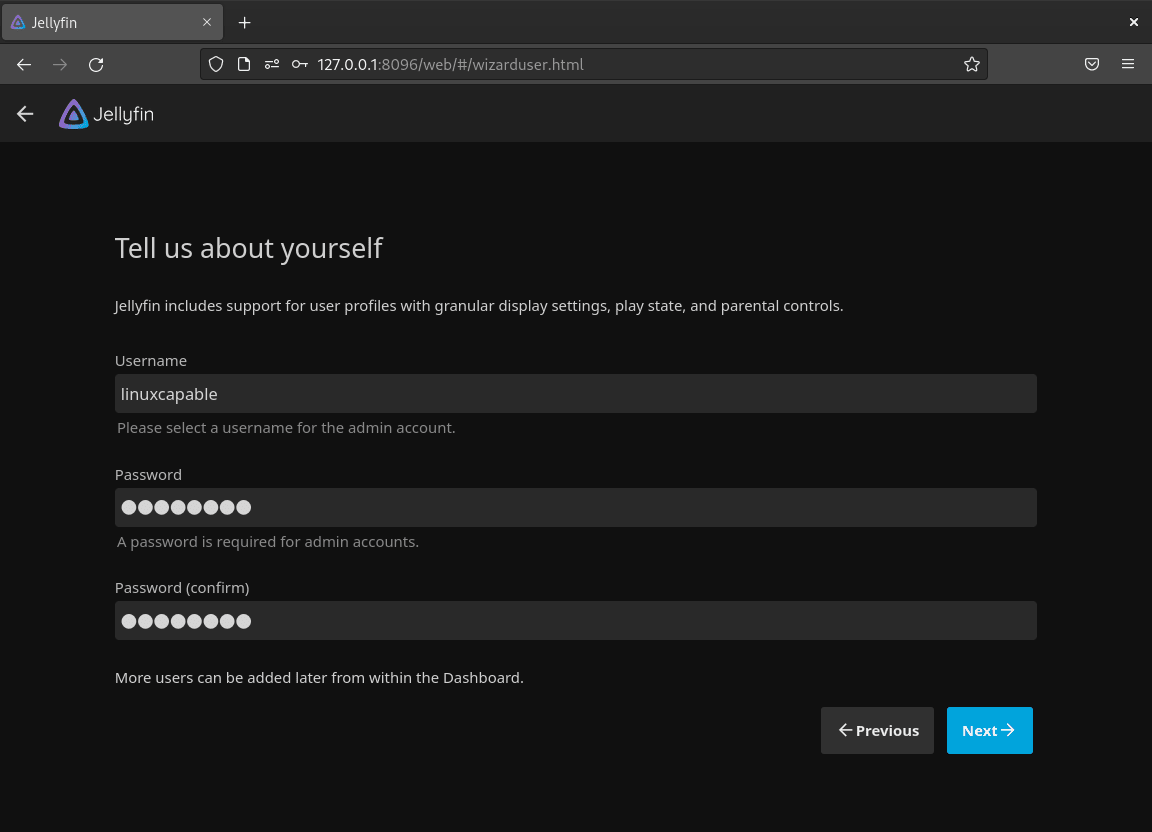
Step 3: Create an Administrator Account
Next, create your admin account, which has full control over the Jellyfin server.
- Enter a username for the admin account.
- Set a strong password combining uppercase, lowercase, numbers, and symbols.
- Confirm the password.
Security Tip: Use a unique password to protect your media server.
Click Next to proceed.
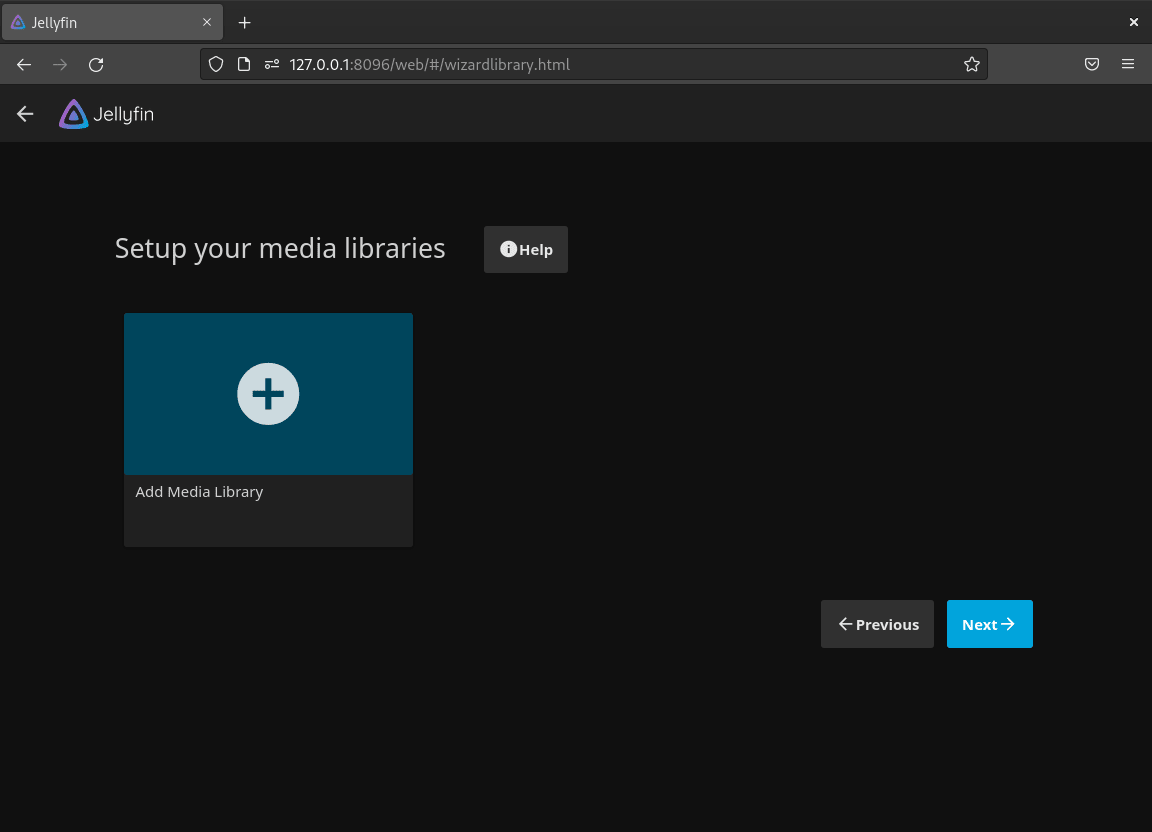
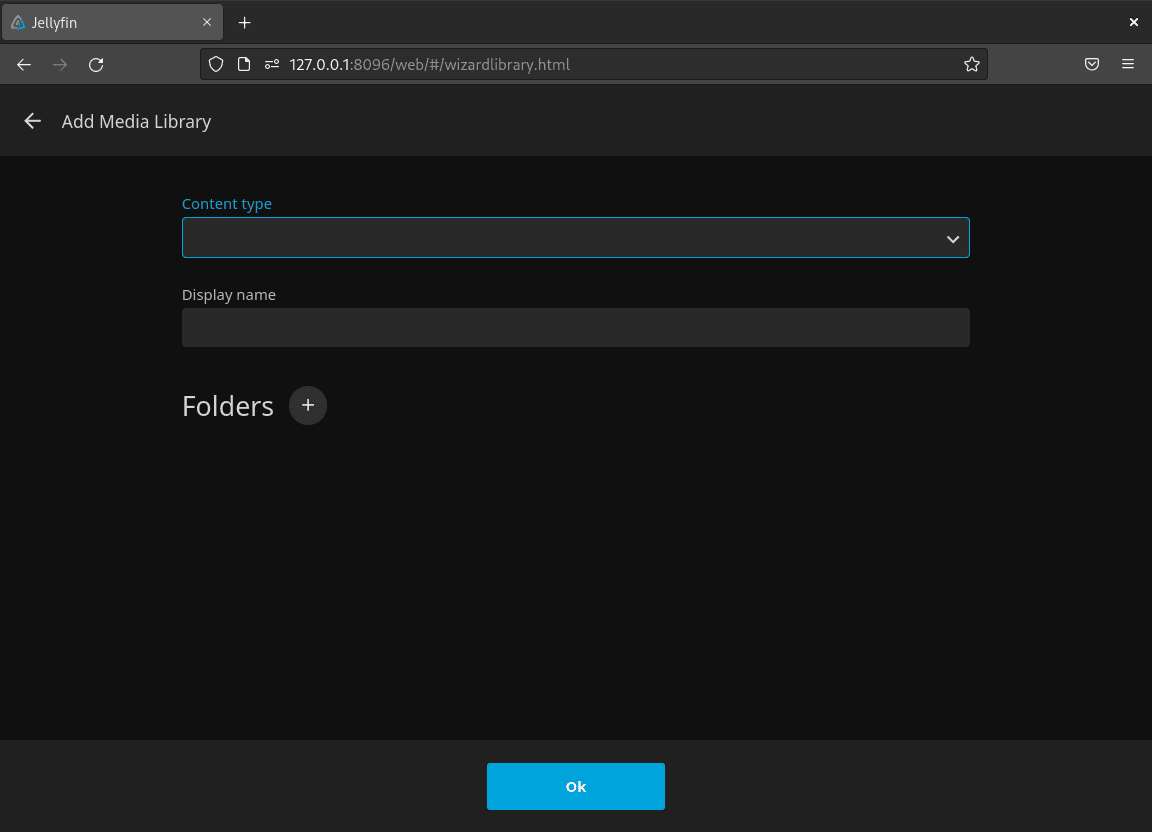
Step 4: Configure Media Libraries
Add your media files to Jellyfin:
- Click Add Media Library.
- Select the media type (e.g., Movies, TV Shows, or Music).
- Provide the directory path where your media files are stored (e.g.,
/media/movies). - Adjust additional settings, such as metadata language or folder scanning options.
Repeat these steps to add more media libraries.
Click Next once all libraries are configured.
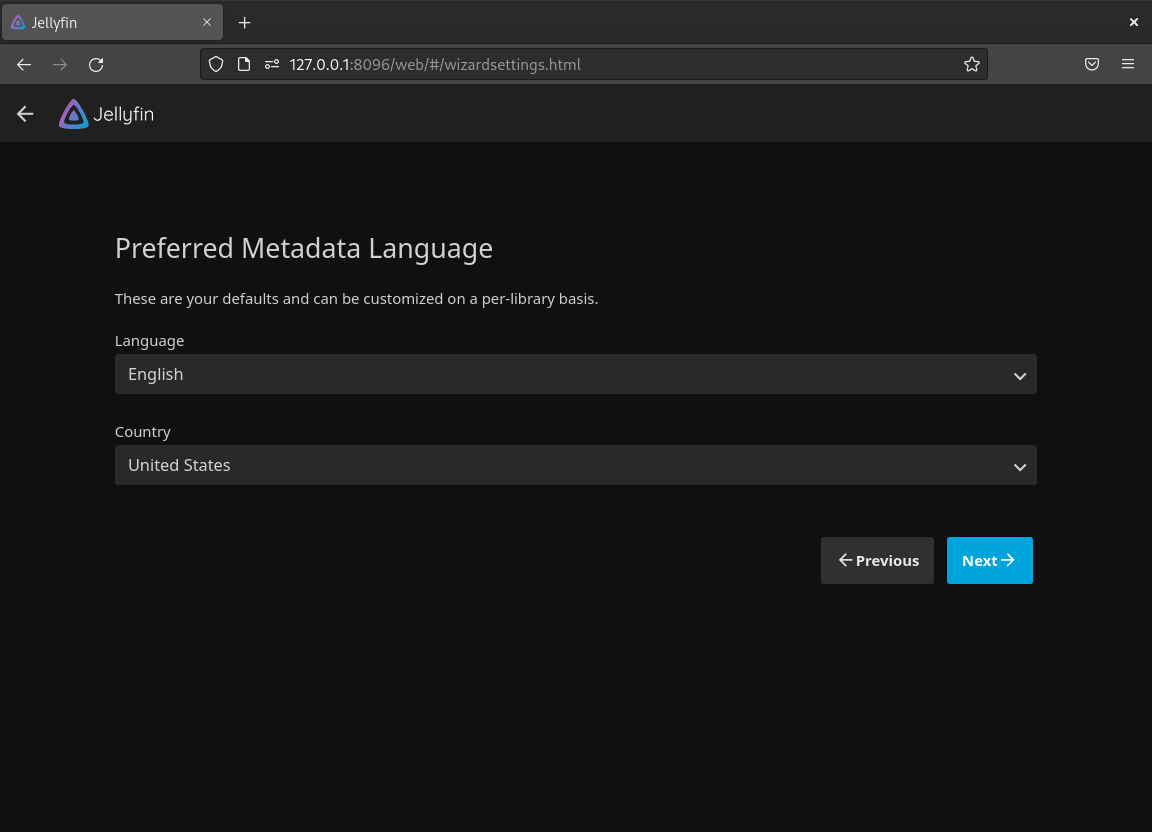
Step 5: Configure Metadata Language
Specify your preferred metadata language. Metadata provides rich details for your media files, such as cast information, album artwork, and descriptions.
- Select your desired metadata language from the dropdown.
- Review and confirm other metadata preferences.
Click Next to proceed.
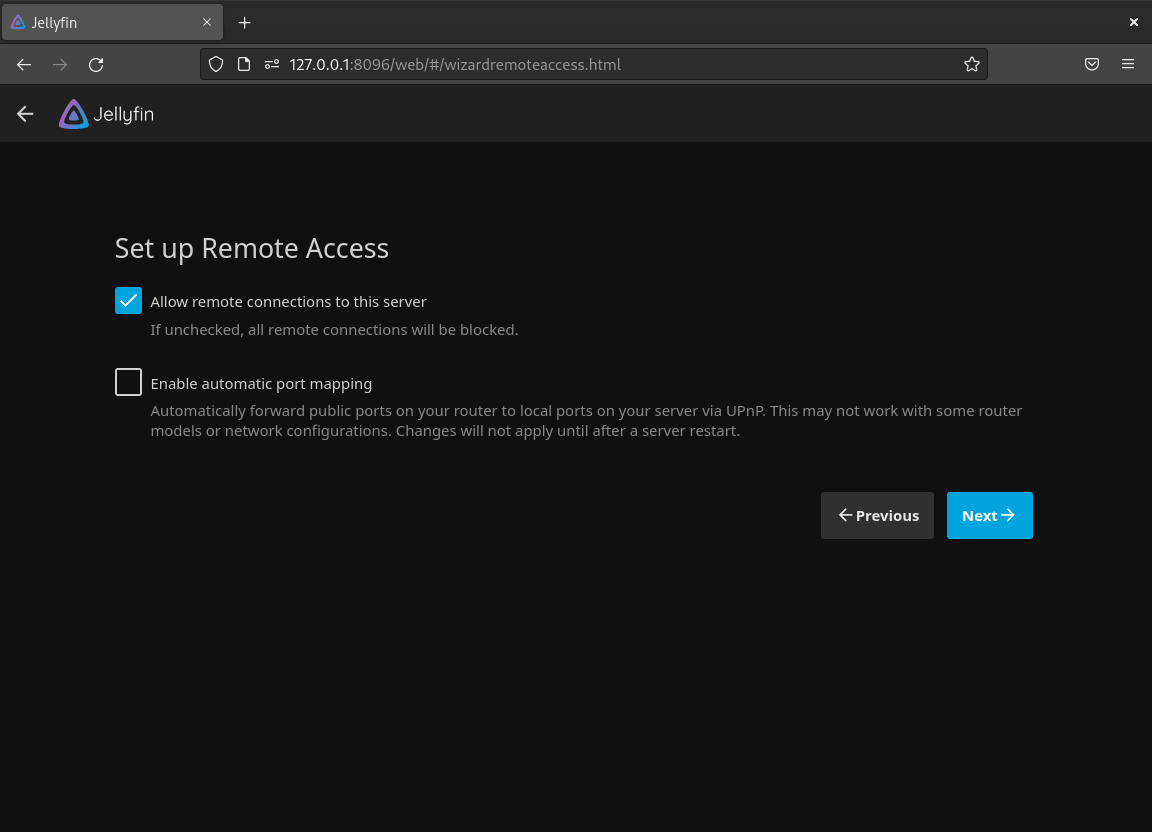
Step 6: Enable or Skip Remote Access
Decide whether to enable remote access to your Jellyfin server:
- Enable Remote Access: Allows you to stream media from anywhere with an internet connection.
- Turn on Automatic Port Mapping: Ensures external traffic routes correctly to your Jellyfin server.
Alternatively, if you don’t need remote access, leave these options disabled and click Next.
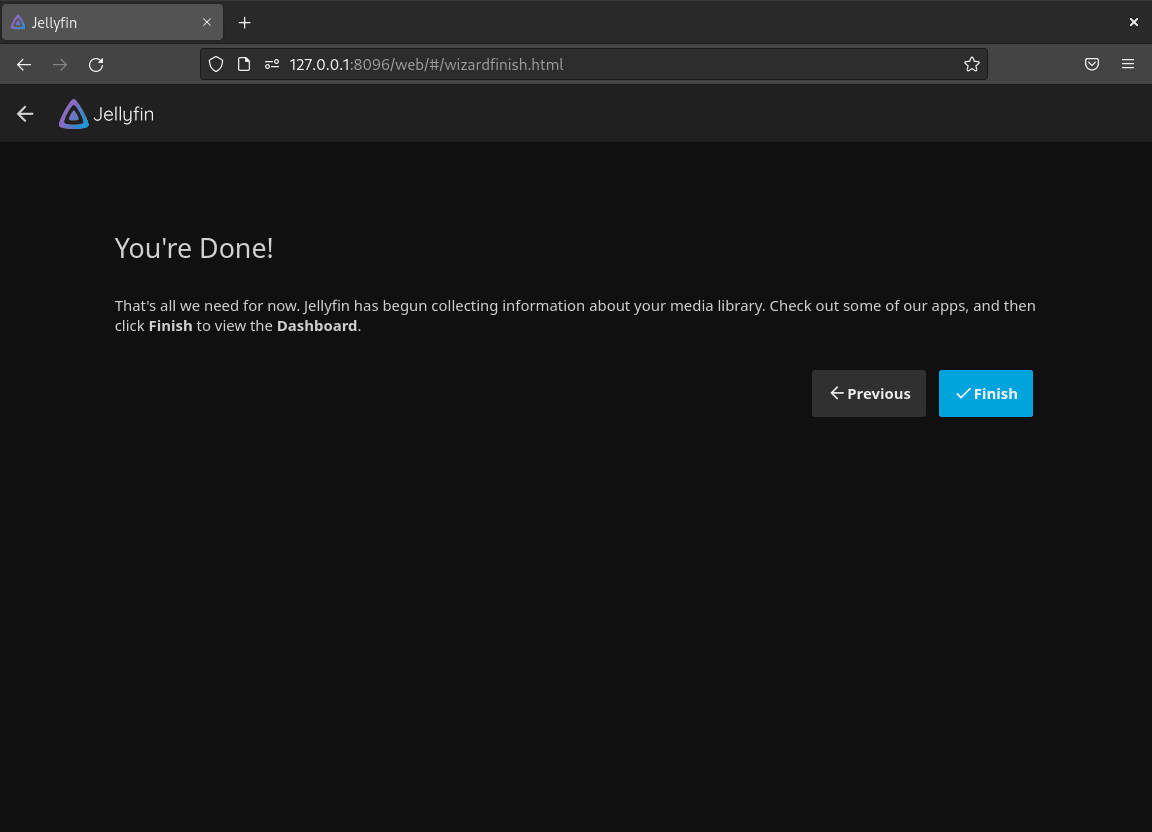
Step 7: Finalize Setup
Review the configuration summary on the final screen:
- Check that all settings, such as language, admin credentials, and media libraries, are correct.
- If everything looks good, click Finish to complete the setup.
The setup wizard redirects you to the Jellyfin login page.
Step 8: Log in to the Admin Dashboard
Log in to the Jellyfin server with your administrator credentials. The dashboard allows you to:
- Monitor server performance and activity.
- Manage media libraries and user accounts.
- Configure plugins and advanced settings.
Step 9: Sign In to the Jellyfin Server
Navigate to the Jellyfin Web UI and enter the username and password you configured during the initial setup. Click Sign in to access your media server.

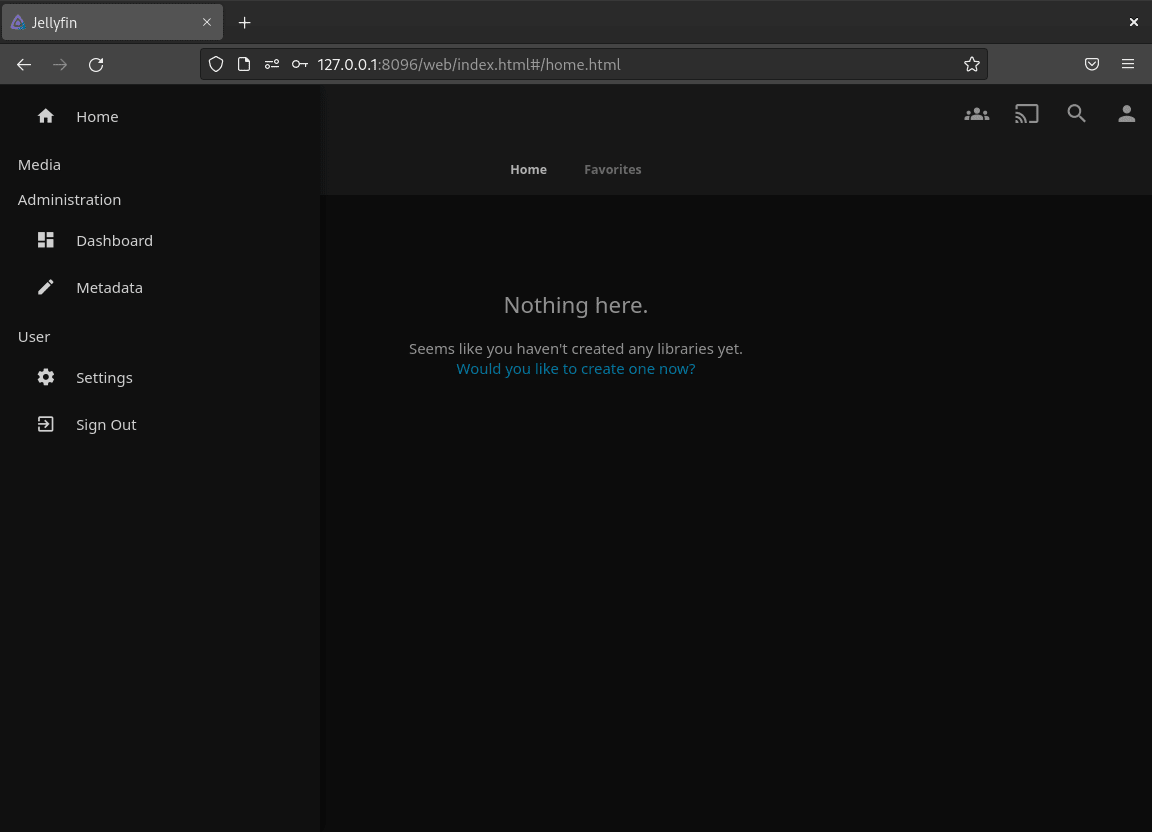
Step 10: Explore the Jellyfin Dashboard
The dashboard is your control center for managing the Jellyfin server. From here, you can:
- Add More Media Libraries: Enrich your media server by adding new libraries. Go to Libraries and click + Add Media Library.
- Manage User Accounts: Create new user accounts or modify existing ones under Users. Assign specific permissions or viewing restrictions for different profiles.
- Customize Settings: Tailor your Jellyfin experience by adjusting settings such as themes, metadata preferences, and server options. Access these settings from the Dashboard tab.
- Install Plugins: Enhance your server’s functionality with plugins. Navigate to Plugins in the settings menu to browse and install plugins for themes, live TV, or additional metadata sources.
Troubleshooting: Resetting Jellyfin Media Server Initial Setup
If you encounter issues during the initial setup or need to restart the configuration process, you can easily reset the Jellyfin Media Server’s setup wizard by modifying its configuration file.
Step 1: Open the Configuration File
Use the nano text editor to open the system.xml file located in the Jellyfin configuration directory:
sudo nano /etc/jellyfin/system.xmlStep 2: Modify the Setup Wizard Setting
Inside the file, locate the line controlling whether the setup wizard is marked as complete. Update the value as follows:
- Find line:
<IsStartupWizardCompleted>true</IsStartupWizardCompleted>- Change to:
<IsStartupWizardCompleted>false</IsStartupWizardCompleted>This change resets the wizard, signaling that the initial setup is incomplete.
Step 3: Save and Exit the File
To save your changes in nano:
- Press
CTRL + Oand thenENTERto write the changes. - Press
CTRL + Xto exit the editor.
Step 4: Restart the Jellyfin Service
Apply the changes by restarting the Jellyfin service:
sudo systemctl restart jellyfinStep 5: Access the Setup Wizard
Once the service restarts, open your web browser and navigate to:
http://<server-ip>:8096
The setup wizard reappears, allowing you to reconfigure the server from the beginning.
Set Jellyfin Media Directory Permissions on Debian
Jellyfin runs as its own system user and needs explicit permissions to access your media directories.
Step 1: Install the ACL Package
Jellyfin uses the Access Control List (ACL) system to set detailed file permissions. First, ensure the setfacl command is available by installing the ACL package:
sudo apt install acl -yStep 2: Grant Permissions to Jellyfin
Assign read and execute permissions to the Jellyfin service user for your media directory. Replace /media/mymediadrive with the actual path to your media files:
sudo setfacl -R -m u:jellyfin:rx /media/mymediadrive-R: Applies permissions recursively to all files and subdirectories.-m u:jellyfin:rx: Grants thejellyfinuser read (r) and execute (x) permissions.
Step 3: Verify Permissions (Optional)
Confirm the permissions were applied correctly:
getfacl /media/mymediadriveExpected output showing the jellyfin user with rx permissions:
# file: media/mymediadrive
# owner: root
# group: root
user::rwx
user:jellyfin:r-x
group::r-x
mask::r-x
other::r-x
Additional Permission Examples
Grant Access to Multiple Directories
If Jellyfin needs access to multiple media directories, list them all in a single command:
sudo setfacl -m u:jellyfin:rx /media/movies /media/music /media/tvshowsRemove Access from a Directory
To revoke Jellyfin’s access to a specific directory, use the -x flag:
sudo setfacl -x u:jellyfin /media/mymediadriveConfigure Remote Access and Firewall for Jellyfin
SSH provides secure remote management of your Jellyfin server. This section covers SSH tunnel configuration, direct access, and firewall rules.
Setting Up SSH for Remote Access
SSH (Secure Shell) allows you to securely manage your Jellyfin server remotely. For more details on comprehensive SSH setup and hardening, see our guide on installing and enabling SSH on Debian.
Install SSH Server for Jellyfin Access
Install the openssh-server package to enable remote access:
sudo apt install openssh-serverThe SSH server starts automatically after installation.
Connect to the Jellyfin Media Server via SSH
To remotely connect to your Jellyfin server and forward the web interface port, use port forwarding. Replace username with your server username and server-ip with your server’s IP address:
ssh username@server-ip -L 8096:localhost:8096ssh username@server-ip: Initiates a secure connection to the remote server.-L 8096:localhost:8096: Creates an SSH tunnel that forwards local port8096to the Jellyfin server, enabling secure access through your browser.
Access Jellyfin via SSH Tunnel
Once the SSH tunnel is established, open a web browser on your local machine and navigate to:
http://localhost:8096/web/index.html#/wizardstart.html
Direct Access to Jellyfin
After completing the initial setup, access Jellyfin directly from a browser. Replace {server-ip-address} with your server’s IP address:
http://{server-ip-address}:8096
Jellyfin uses HTTP on port 8096 by default. Use HTTPS only after configuring a reverse proxy with SSL certificates.
Configure the UFW Firewall for Jellyfin
UFW controls which ports are accessible on your server. Configure it to allow Jellyfin traffic while blocking unauthorized access.
If UFW is not already installed, install it first. For detailed firewall configuration, see our guide on installing and configuring UFW on Debian.
sudo apt install ufwCritical: If you are connected via SSH, allow SSH access before enabling UFW to prevent lockout.
Allow SSH connections if you manage the server remotely:
sudo ufw allow OpenSSHEnable the firewall and verify it is active:
sudo ufw enable
sudo ufw status
Status: active
Allow incoming connections on port 8096 for the Jellyfin web interface:
sudo ufw allow 8096If you plan to access Jellyfin remotely, also configure your router or NAT settings to forward port 8096 to your server. For additional server protection, consider adding brute-force prevention with Fail2Ban on Debian.
Set Up a Reverse Proxy for Jellyfin on Debian
A reverse proxy lets you access Jellyfin through a domain name and adds HTTPS encryption. Choose between Apache or Nginx below.
Setting Up Apache as a Reverse Proxy
Step 1: Install Apache Web Server
Install Apache:
sudo apt install apache2 -yFor comprehensive Apache configuration options, see our guide on installing Apache on Debian. If Apache does not start automatically after installation, start it manually:
sudo systemctl start apache2Step 2: Enable Required Apache Modules
Next, to handle reverse proxy traffic and WebSocket connections, enable the necessary Apache modules:
sudo a2enmod proxy proxy_http headers proxy_wstunnelStep 3: Create a Virtual Host Configuration File
Create a new configuration file for Jellyfin:
sudo nano /etc/apache2/sites-available/jellyfin.confStep 4: Configure the Virtual Host with a Subdomain
To configure Jellyfin with a subdomain, you’ll need a domain name. For example, providers like NameCheap or Cloudflare can help you purchase and manage domains.
Next, add the following HTTP configuration to the jellyfin.conf file, replacing jellyfin.example.com with your actual domain name. Start with HTTP only – SSL will be configured automatically by Certbot later:
<VirtualHost *:80>
    ServerName jellyfin.example.com

    ProxyPreserveHost On

    ProxyPass "/socket" "ws://localhost:8096/socket"
    ProxyPassReverse "/socket" "ws://localhost:8096/socket"

    ProxyPass "/" "http://localhost:8096/"
    ProxyPassReverse "/" "http://localhost:8096/"

    ErrorLog /var/log/apache2/jellyfin-error.log
    CustomLog /var/log/apache2/jellyfin-access.log combined
</VirtualHost>
Certbot will automatically add the HTTPS virtual host and redirect when you obtain SSL certificates. The manual HTTPS configuration shown in many guides references certificates that don’t exist yet, causing Apache startup failures.
Save and exit the editor:
- Press
CTRL + O, thenENTERto save the changes. - Press
CTRL + Xto exit.
Step 5: Enable SSL Module
Enable the SSL module for HTTPS support after Certbot configures certificates:
sudo a2enmod sslStep 6: Validate the Apache Configuration
Check for syntax errors in the configuration file:
sudo apache2ctl configtestExpected output for a valid configuration:
Syntax OK
Step 7: Enable the Virtual Host
Enable the Jellyfin virtual host:
sudo a2ensite jellyfin.confStep 8: Restart Apache
Restart Apache to apply the changes:
sudo systemctl restart apache2Jellyfin is now accessible via your configured subdomain. Navigate to http://jellyfin.example.com to test the setup before adding SSL.
Setting Up Nginx as a Reverse Proxy for Jellyfin
Alternatively, Nginx is a lightweight and high-performance web server that is widely used for reverse proxying. Configuring Nginx as a reverse proxy for Jellyfin allows you to serve your media server through a domain name and optionally secure it with HTTPS.
Step 1: Install Nginx
Install Nginx on your Debian system:
sudo apt install nginx -yFor detailed Nginx configuration, see our guide on installing Nginx on Debian.
Step 2: Start the Nginx Service
Ensure the Nginx service is running:
sudo systemctl start nginxStep 3: Enable Nginx to Start on Boot
Enable the Nginx service so it starts automatically after a reboot:
sudo systemctl enable nginxStep 4: Verify Nginx is Running
Check the status of Nginx to confirm it is active:
systemctl status nginxExpected output showing Nginx is active:
● nginx.service - A high performance web server and a reverse proxy server
     Loaded: loaded (/lib/systemd/system/nginx.service; enabled)
     Active: active (running)
Step 5: Configuring Nginx as a Reverse Proxy
Create a new server block configuration file for Jellyfin:
sudo nano /etc/nginx/conf.d/jellyfin.confThen, add the following HTTP configuration to the file, replacing jellyfin.example.com with your actual domain name. Start with HTTP only – Certbot will add HTTPS configuration automatically:
server {
    listen 80;
    server_name jellyfin.example.com;

    access_log /var/log/nginx/jellyfin.access;
    error_log /var/log/nginx/jellyfin.error;

    # Allow large file uploads for media management
    client_max_body_size 20M;

    # Security / XSS Mitigation Headers
    add_header X-Frame-Options "SAMEORIGIN";
    add_header X-XSS-Protection "1; mode=block";
    add_header X-Content-Type-Options "nosniff";

    location / {
        proxy_pass http://127.0.0.1:8096;
        proxy_set_header Host $host;
        proxy_set_header X-Real-IP $remote_addr;
        proxy_set_header X-Forwarded-For $proxy_add_x_forwarded_for;
        proxy_set_header X-Forwarded-Proto $scheme;
        proxy_set_header X-Forwarded-Protocol $scheme;
        proxy_set_header X-Forwarded-Host $http_host;

        # Disable buffering for smoother streaming
        proxy_buffering off;
    }

    location /socket {
        proxy_pass http://127.0.0.1:8096/socket;
        proxy_http_version 1.1;
        proxy_set_header Upgrade $http_upgrade;
        proxy_set_header Connection "upgrade";
        proxy_set_header Host $host;
        proxy_set_header X-Real-IP $remote_addr;
        proxy_set_header X-Forwarded-For $proxy_add_x_forwarded_for;
        proxy_set_header X-Forwarded-Proto $scheme;
        proxy_set_header X-Forwarded-Protocol $scheme;
        proxy_set_header X-Forwarded-Host $http_host;
    }
}
Certbot will automatically add the HTTPS server block when you obtain SSL certificates. The configuration uses
127.0.0.1:8096to directly proxy to Jellyfin without requiring DNS resolution.
Save the file:
- Press
CTRL + O, thenENTERto save the changes. - Press
CTRL + Xto exit.
Step 6: Verify the Nginx Configuration
Test the Nginx configuration for syntax errors:
sudo nginx -tExpected output for a valid configuration:
nginx: the configuration file /etc/nginx/nginx.conf syntax is ok
nginx: configuration file /etc/nginx/nginx.conf test is successful
Step 7: Reload Nginx to Apply Changes
Reload Nginx to activate the new configuration:
sudo systemctl reload nginxStep 8: Test the Proxy Configuration
Visit your Jellyfin server using the domain name you configured in the server block, such as:
http://jellyfin.example.com
First, ensure your DNS records point the domain to your server’s IP address. If everything is configured correctly, the Jellyfin web interface will load through your domain.
Securing Jellyfin with HTTPS Using Let’s Encrypt
Securing your Jellyfin server with HTTPS protects data exchanged between the server and clients. Let’s Encrypt provides free SSL certificates, and Certbot simplifies obtaining and managing them. For detailed SSL setup, see our guides on securing Nginx with Let’s Encrypt on Debian or securing Apache with Let’s Encrypt on Debian.
Installing Certbot and Web Server Plugins
Install Certbot with the appropriate plugin for your web server:
- For Apache:
sudo apt install python3-certbot-apache- For Nginx:
sudo apt install python3-certbot-nginxObtaining and Installing an SSL Certificate
Next, run Certbot to generate and configure an SSL certificate for your Jellyfin server:
- For Apache:
sudo certbot --apache --agree-tos --redirect --hsts --staple-ocsp --email you@example.com -d yourdomain.com- For Nginx:
sudo certbot --nginx --agree-tos --redirect --hsts --staple-ocsp --email you@example.com -d yourdomain.com- Replace
jellyfin.example.comwith your actual domain name. - Certbot will guide you through domain ownership verification and configure your web server for HTTPS automatically.
Once complete, your Jellyfin server will then be accessible securely via HTTPS.
Testing the SSL Configuration
Test your Jellyfin server by navigating to:
https://jellyfin.example.com
Look for the padlock icon in the browser’s address bar, indicating a secure connection. If issues arise, verify that your DNS records correctly point to your server’s IP address.
Automating SSL Certificate Renewal
Let’s Encrypt certificates are valid for 90 days. On Debian, Certbot installs a systemd timer that automatically handles renewal, so no manual cron job is needed.
Verify the renewal timer is active:
systemctl list-timers | grep certbotTest the renewal process with a dry run to confirm everything works:
sudo certbot renew --dry-runIf the dry run succeeds, Certbot will automatically renew certificates before expiry and reload your web server.
Update or Remove Jellyfin on Debian
Keeping Jellyfin updated ensures access to the latest features, bug fixes, and security patches. This section also covers complete removal.
Updating the Jellyfin Media Server
Since Jellyfin packages are updated regularly, check for updates frequently to benefit from improvements and critical security patches.
Update your package index and then upgrade Jellyfin:
sudo apt updateUpgrade only the Jellyfin package and its direct dependencies:
sudo apt install --only-upgrade jellyfinVerify the update by checking the installed version:
apt-cache policy jellyfinConfirm the service restarted successfully after the update:
systemctl status jellyfinThe Jellyfin package automatically restarts the service during upgrade. If the status shows inactive or the web interface is unresponsive, restart it manually:
sudo systemctl restart jellyfinRemoving Jellyfin Media Server
To remove Jellyfin while preserving configuration files for potential reinstallation:
sudo apt remove jellyfin
sudo apt autoremove
For a complete removal including all configuration files:
sudo apt purge jellyfin
sudo apt autoremove
Remove the Jellyfin repository and GPG signing key. If you installed via extrepo, use the extrepo removal path instead:
For extrepo installations:
sudo extrepo disable jellyfin
sudo apt update
For manual repository installations:
sudo rm /etc/apt/sources.list.d/jellyfin.sources
sudo rm /usr/share/keyrings/jellyfin.gpg
sudo apt update
Verify the repository removal:
apt-cache policy jellyfinExpected output confirming the package is no longer available from the Jellyfin repository:
jellyfin:
  Installed: (none)
  Candidate: (none)
Warning: The following commands permanently delete all Jellyfin data including media library metadata, user settings, watch history, cache, and logs. This action cannot be undone. Only proceed if you no longer need your library configuration.
To remove all Jellyfin data directories:
sudo rm -rf /var/lib/jellyfin /var/cache/jellyfin /var/log/jellyfinTroubleshooting Common Jellyfin Issues on Debian
This section covers common problems you may encounter when running Jellyfin on Debian and provides solutions to resolve them.
Port 8096 Already in Use
Symptom: Jellyfin fails to start, or the web interface is inaccessible on port 8096.
Diagnosis: Check if another service is using port 8096:
sudo ss -tlnp | grep 8096Solution: If another service is using the port, stop it or configure Jellyfin to use a different port by editing /etc/jellyfin/network.xml and changing the HttpServerPortNumber value. Then restart Jellyfin:
sudo systemctl restart jellyfinPermission Denied Accessing Media Files
Symptom: Jellyfin cannot detect or play media files despite the correct library path configuration.
Diagnosis: Check if the jellyfin user can access the media directory:
sudo -u jellyfin ls /path/to/mediaIf you receive “Permission denied,” the jellyfin user lacks the necessary access.
Solution: Grant read access using ACLs as described in the media permissions section:
sudo setfacl -R -m u:jellyfin:rx /path/to/mediaJellyfin Service Not Starting
Symptom: The Jellyfin service fails to start or stops immediately after starting.
Diagnosis: Check the service status and journal logs for error details:
systemctl status jellyfin
journalctl -xeu jellyfin | tail -50
Solution: Common causes include corrupted configuration files or missing dependencies. To reset the configuration:
sudo systemctl stop jellyfin
sudo rm /etc/jellyfin/system.xml
sudo systemctl start jellyfin
After restarting, the setup wizard will appear, allowing you to reconfigure Jellyfin.
Media Library Shows No Content
Symptom: The library displays no items even after adding media folders.
Solution: Manually trigger a library scan from the Jellyfin Dashboard under Libraries and click Scan All Libraries. Also verify that media files follow naming conventions Jellyfin recognizes (e.g., Movie Name (Year).mkv for movies).
Jellyfin Official Resources and Links
Official Jellyfin resources for configuration, troubleshooting, and community support:
- Jellyfin Official Website – Downloads, features, and project news
- Jellyfin Documentation – Official guides for configuration, plugins, and troubleshooting
- Jellyfin GitHub Repository – Source code, issue tracking, and development
- Jellyfin Community Forum – Community support and discussions
- Jellyfin Client Apps – Official apps for Android, iOS, Roku, Fire TV, and more
For comparison with other media servers, see our guide on installing Plex Media Server on Debian.
Frequently Asked Questions About Jellyfin on Debian
Jellyfin is fully open-source and free with no premium tiers, while Plex uses a freemium model where certain features (hardware transcoding, mobile sync, skip intros) require a Plex Pass subscription. Jellyfin gives you complete control over your data with no telemetry, whereas Plex routes some traffic through its servers. Both support multi-device streaming, but Jellyfin’s plugin ecosystem is community-driven and entirely free.
Yes. Jellyfin supports hardware-accelerated transcoding using Intel Quick Sync (VA-API), NVIDIA NVENC, and AMD AMF/VA-API on Debian. Enable it from the Jellyfin Dashboard under Playback > Transcoding. For Intel GPUs, install the intel-media-va-driver package and ensure the jellyfin user has access to the render group: sudo usermod -aG render jellyfin.
Configure a reverse proxy (Apache or Nginx) with a domain name and SSL certificate as covered in this guide, then point your domain’s DNS records to your server’s public IP. Alternatively, forward port 8096 on your router directly to the server, though a reverse proxy with HTTPS is strongly recommended for security.
Jellyfin supports importing watch history and library metadata from Emby since it was originally forked from that project. For Plex migrations, community plugins like Jellyfin Plugin Trakt can sync watch history through a shared Trakt account. Media files themselves do not need conversion since Jellyfin reads the same file formats.
Conclusion
You now have Jellyfin Media Server running on Debian with automatic library organization, hardware transcoding, multi-device streaming, and secure remote access through a reverse proxy with SSL. Keep your installation updated by running sudo apt update && sudo apt install --only-upgrade jellyfin regularly, and explore the plugin ecosystem for live TV, subtitle providers, and theme customization.

sudo apt install jellyfin jellyfin-ffmpeg7 jellyfin-server jellyfin-web
Thanks for catching that, Martial. You were absolutely right. The article referenced
jellyfin-ffmpeg5, which is outdated for Jellyfin 10.10.x. The guide now usesjellyfin-ffmpeg7.For reference, Jellyfin’s FFmpeg version requirements follow this pattern:
Thank you for the correction.