

Jellyfin Media Server offers a free, open-source platform for organizing and streaming your movies, music, and more. Unlike Plex Media Server or other proprietary alternatives, Jellyfin has no subscription fees, tracking, or data collection. The platform streams across devices (desktop, mobile, smart TVs), supports extensive media formats without constant transcoding, and extends functionality through plugins for metadata, subtitles, and more.
This guide walks through installing Jellyfin Media Server on Ubuntu using the official repository, configuring file permissions with ACL for media access, and optionally securing remote access through Apache or Nginx reverse proxies with SSL certificates. By the end, you’ll have a production-ready streaming server accessible from any device on your network or remotely via HTTPS.
Choose Your Jellyfin Installation Method
Jellyfin offers multiple installation paths on Ubuntu. The official repository provides the most straightforward approach with automatic updates, while Docker suits users who prefer containerized deployments.
| Method | Channel | Stability | Updates | Best For |
|---|---|---|---|---|
| Official Repository | Jellyfin APT repo | Stable | Automatic via APT | Most users who want native installation with automatic updates |
This guide covers Ubuntu 22.04 LTS (Jammy) and 24.04 LTS (Noble). The Jellyfin repository does not yet provide packages for Ubuntu 26.04 LTS (Resolute). If you are running Ubuntu 26.04, consider using Docker (see the official Jellyfin Docker image) or Flatpak (available on Flathub) until official repository support is available. This guide will be updated when Jellyfin adds Ubuntu 26.04 packages.
Import Jellyfin APT Repository on Ubuntu
Update Ubuntu System Packages
Before installing Jellyfin, update your system packages to prevent compatibility issues. Open a terminal from your applications menu and run:
sudo apt update && sudo apt upgrade -yThis updates the package list and upgrades all installed packages to their latest versions.
Install Required Packages
Next, install the packages required for downloading and verifying the Jellyfin GPG key. The curl command fetches the signing key, while gpg converts it to the binary format APT expects:
sudo apt install ca-certificates curl gpg -yImport Jellyfin APT Repository
The default Ubuntu repository doesn’t include Jellyfin. Therefore, you must import the Jellyfin GPG key and repository to install the software. This confirms the package’s authenticity and verifies no one has tampered with it.
Jellyfin provides an official installation script that automates the entire setup process. If you prefer a single-command approach, run:
curl https://repo.jellyfin.org/install-debuntu.sh | sudo bash. The manual steps below give you more control over the installation.
Import Jellyfin GPG Key
First, create the dedicated keyring directory (if needed) and import the GPG key with limited trust scope:
sudo install -m 0755 -d /etc/apt/keyrings
curl -fsSL https://repo.jellyfin.org/jellyfin_team.gpg.key | sudo gpg --dearmor -o /etc/apt/keyrings/jellyfin.gpg
sudo chmod 644 /etc/apt/keyrings/jellyfin.gpg
These commands download the Jellyfin signing key, store it in /etc/apt/keyrings/, and restrict its permissions. Ubuntu will reference this key only for the Jellyfin repository, preventing it from inadvertently trusting unrelated sources.
Import Jellyfin Repository
Next, add the Jellyfin repository using the modern DEB822 format. Choose between the stable and unstable channels; stick with one to avoid conflicts. The stable channel is best for production servers, while the unstable channel delivers the latest development builds for testing new features.
To import Jellyfin stable (recommended) for everyday use:
cat <<EOF | sudo tee /etc/apt/sources.list.d/jellyfin.sources
Types: deb
URIs: https://repo.jellyfin.org/ubuntu
Suites: $(lsb_release -cs)
Components: main
Architectures: $(dpkg --print-architecture)
Signed-By: /etc/apt/keyrings/jellyfin.gpg
EOF
Alternatively, import Jellyfin unstable (development) if you need preview builds:
cat <<EOF | sudo tee /etc/apt/sources.list.d/jellyfin-unstable.sources
Types: deb
URIs: https://repo.jellyfin.org/ubuntu
Suites: $(lsb_release -cs)
Components: unstable
Architectures: $(dpkg --print-architecture)
Signed-By: /etc/apt/keyrings/jellyfin.gpg
EOF
Following repository import, update your system’s repository listing to recognize the new additions:
sudo apt updateLook for the Jellyfin repository in the output to confirm the import succeeded:
Hit:1 http://archive.ubuntu.com/ubuntu noble InRelease
Get:2 https://repo.jellyfin.org/ubuntu noble InRelease
Get:3 https://repo.jellyfin.org/ubuntu noble/main amd64 Packages
Verify that APT recognizes the Jellyfin repository by checking the package policy:
apt-cache policy jellyfinjellyfin:
Installed: (none)
Candidate: 10.11.6+ubu2404
Version table:
10.11.6+ubu2404 500
500 https://repo.jellyfin.org/ubuntu noble/main amd64 Packages
The output confirms that Jellyfin packages are available from the official repository. If you see “N: Unable to locate package jellyfin,” the repository import failed. Re-run the GPG key and repository commands above.
Install Jellyfin Media Server
Now that you’ve imported the Jellyfin repository and GPG key, you can install Jellyfin Media Server on Ubuntu using the following command:
sudo apt install jellyfinOnce installation completes, Jellyfin automatically starts. Next, verify the service is running correctly with this status check:
systemctl status jellyfin● jellyfin.service - Jellyfin Media Server
Loaded: loaded (/lib/systemd/system/jellyfin.service; enabled; preset: enabled)
Active: active (running)
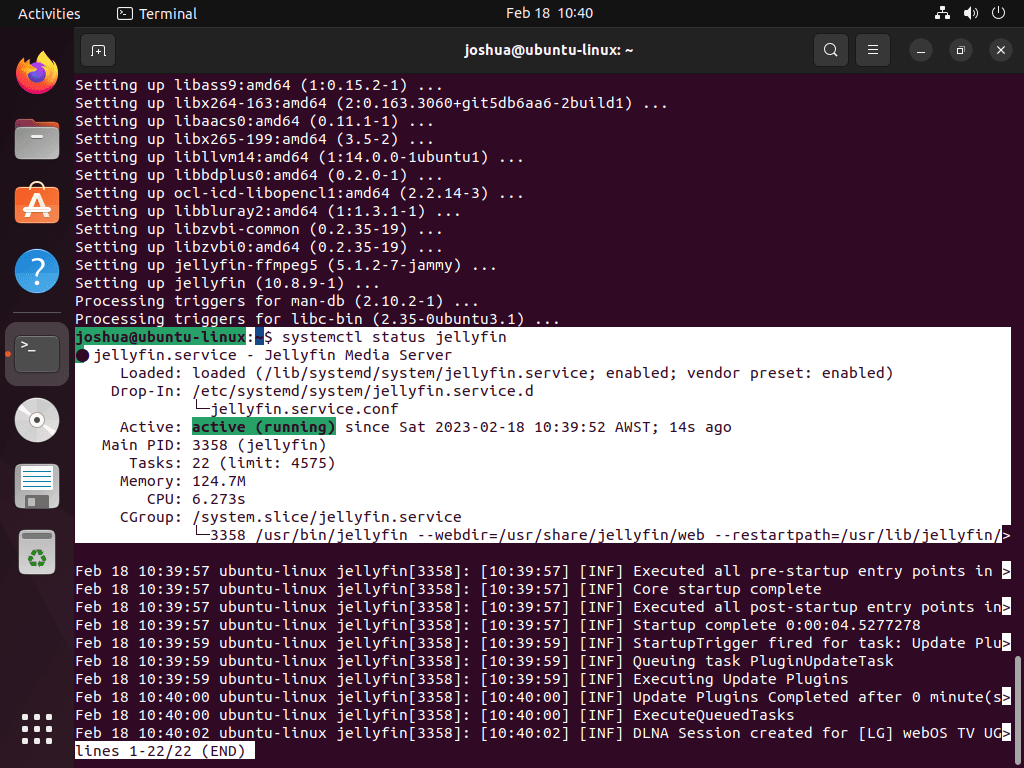
If the Jellyfin service hasn’t started, manually start it with this command:
sudo systemctl start jellyfinAdditionally, enable the service to start automatically during system boot:
sudo systemctl enable jellyfinSynchronizing state of jellyfin.service with SysV service script with /usr/lib/systemd/systemd-sysv-install. Executing: /usr/lib/systemd/systemd-sysv-install enable jellyfin
These commands ensure Jellyfin runs now and launches automatically on every system boot. Your server remains accessible even after restarts.
Complete the Jellyfin Setup Wizard
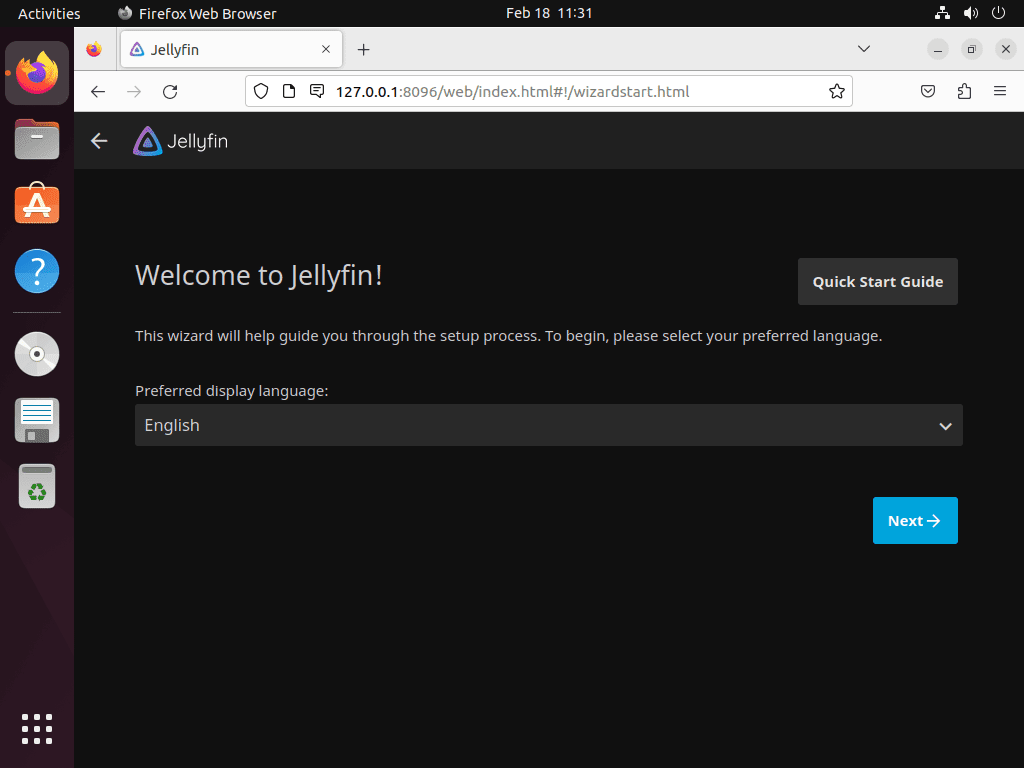
With Jellyfin installed and running, access the web interface by opening your browser and navigating to http://127.0.0.1:8096 (or replace 127.0.0.1 with your server’s IP address if accessing remotely). The welcome screen for initial server setup appears.
Select Your Preferred Language and Region
During your first-time setup, follow these steps to configure your Jellyfin server:
- Choose Display Language: Select your preferred display language, then click the “Next ->” button to continue.
- Create User Account: Set a username and password for administrative access. Choose a strong, unique password with uppercase and lowercase letters, numbers, and symbols. Click “Next ->” after setting up.
- Add Media Libraries: Click the “+” or “Add Media Library” button to select media folders for movies, TV shows, or music. Click “Next ->” once added.
- Set Metadata Language: Choose the language for media metadata to enrich your collection with details like cast and plot summaries. Proceed by clicking “Next ->”.
- Configure Remote Access: Allow remote connections and enable automatic port mapping to access your media from outside your local network. Click “Next ->” to continue.
- Finish Setup: Confirm setup completion and click “Finish” to reach the login screen. Sign in with your created credentials.
Create Your Administrator Account
Following language selection, create your username and password, then click the “Next ->” button. Notably, you can add more users after completing the initial setup.

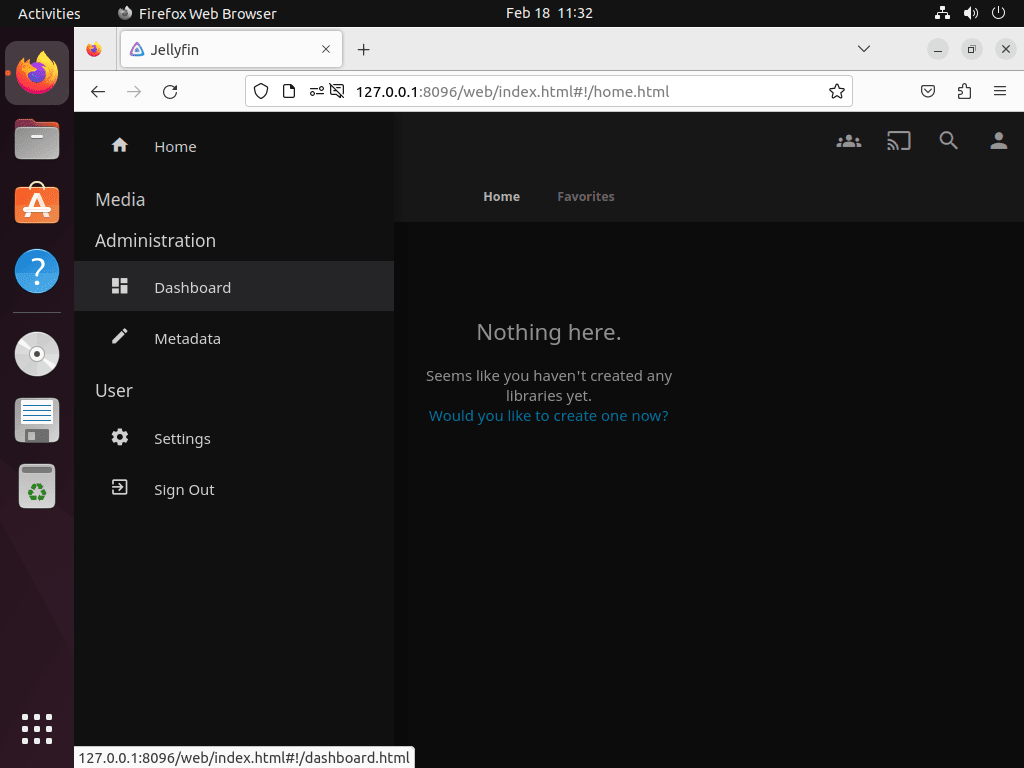
Setting up your media libraries is a key part of the process when you install Jellyfin Media Server on Ubuntu. Jellyfin uses these libraries to organize and display your media. To get the most out of your installation, create separate libraries for movies, TV shows, and music.
Add Your Media Libraries
Following user creation, add media content to Jellyfin by clicking the “+” or “Add Media Library” button on the Jellyfin dashboard. This click brings you to the Media Library setup screen, where you can select your media folder.
Once you’ve added your media libraries, click the “Next ->” button. You’ll land on the Metadata Language screen, where you can pick the language for your media content’s metadata, enriching your collection with details like cast, plot summaries, and reviews.
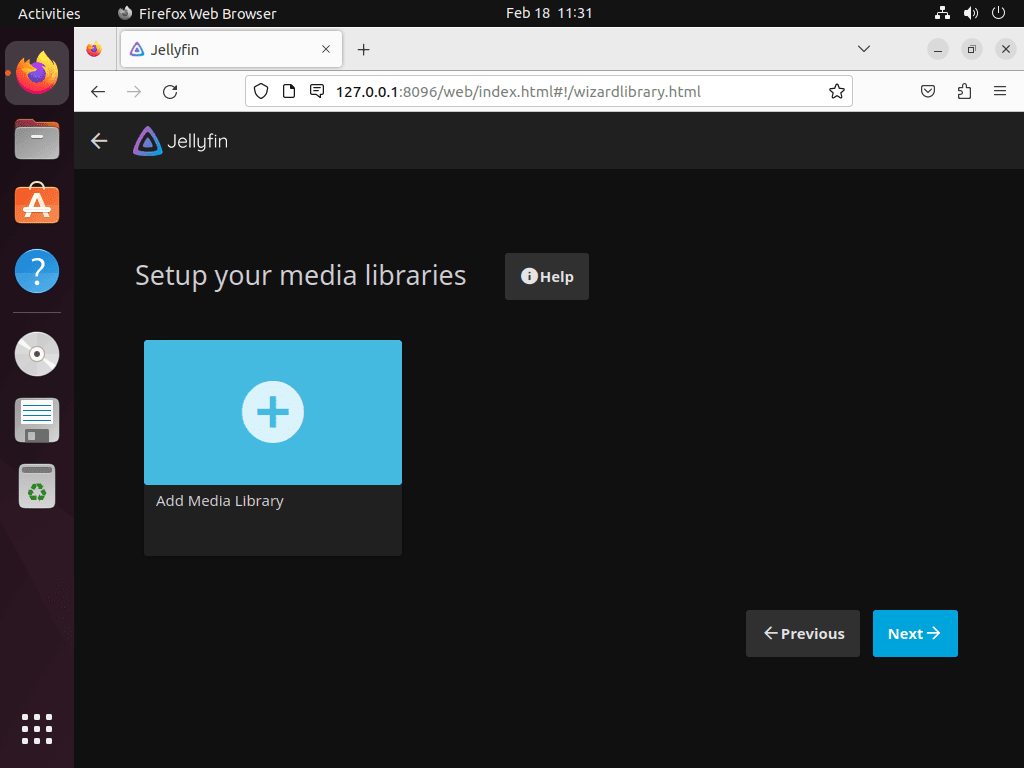
If you have used Plex before, the library setup process works similarly. Click Add Media Library, select the content type (Movies, Shows, Music, etc.), then browse to the folder containing your media files.
Once you’ve set up your media libraries and chosen your metadata language, proceed to configuring remote access. Remote access lets you stream media from anywhere outside your local network.
Enable Remote Access to Your Server
To enable remote access, allow remote connections and turn on automatic port mapping. This opens the required ports for incoming traffic to your Jellyfin server.
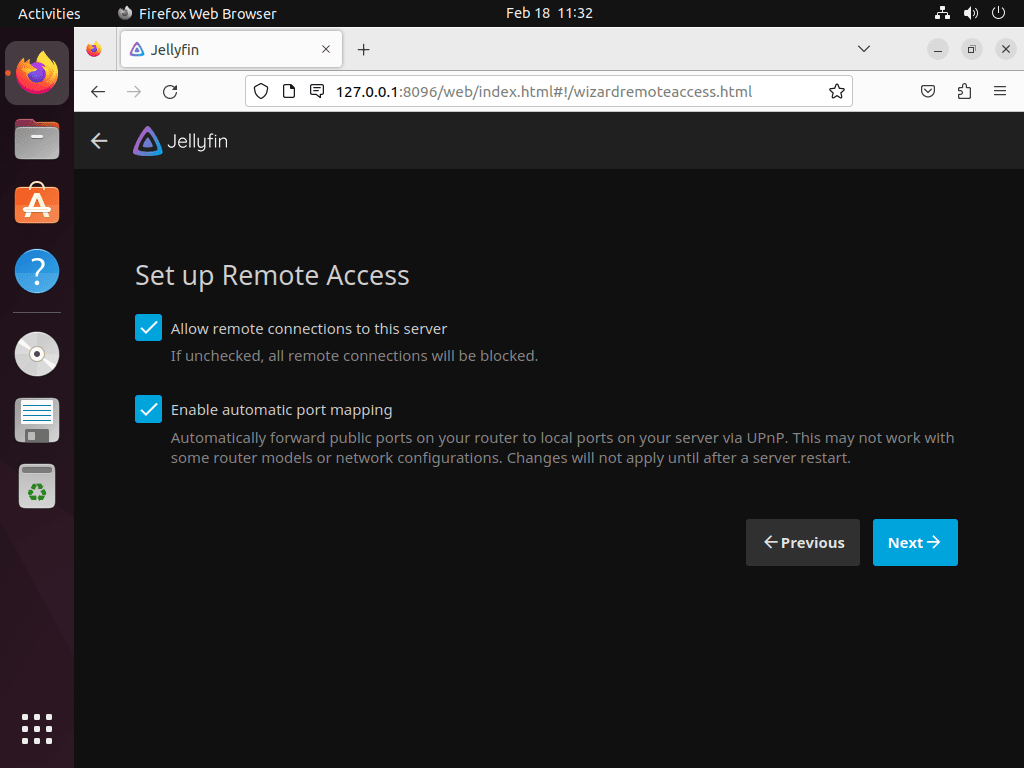
After enabling remote access, you can proceed to the next step. The next screen confirms that you have finished the installation and that your Jellyfin media server is ready.
Complete Initial Configuration
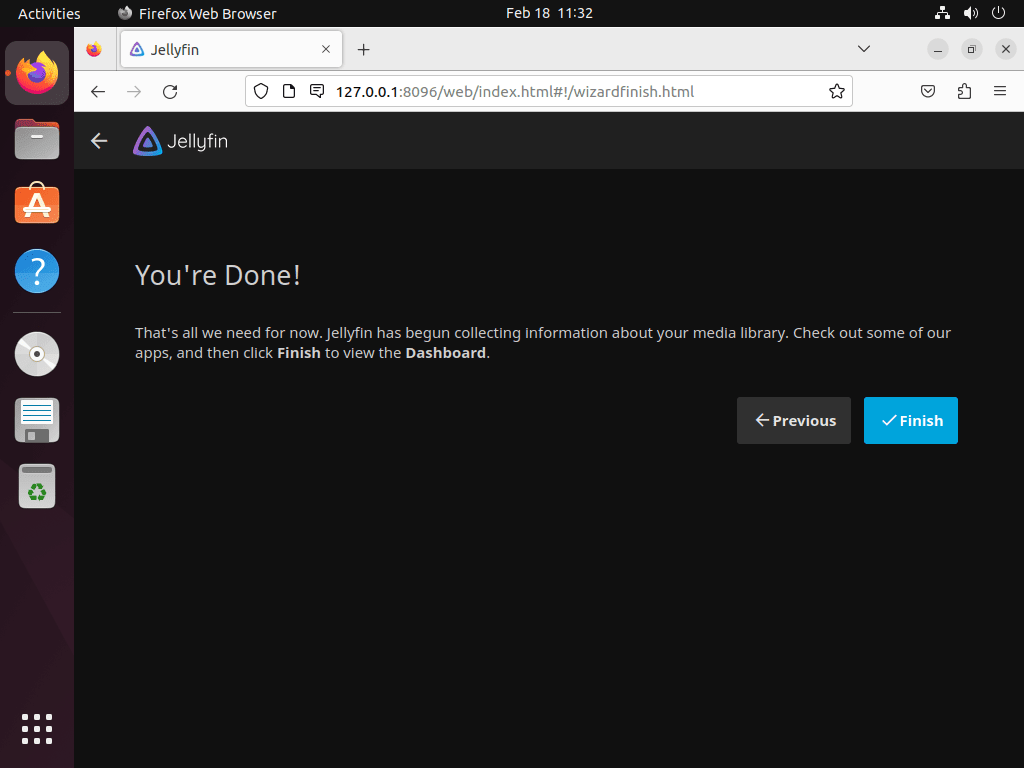
Once you confirm that you have finished the installation process, click the “Finish” button to complete the setup. This action will take you to the login screen, where you can then sign in with the user account and password you created during the initial setup.
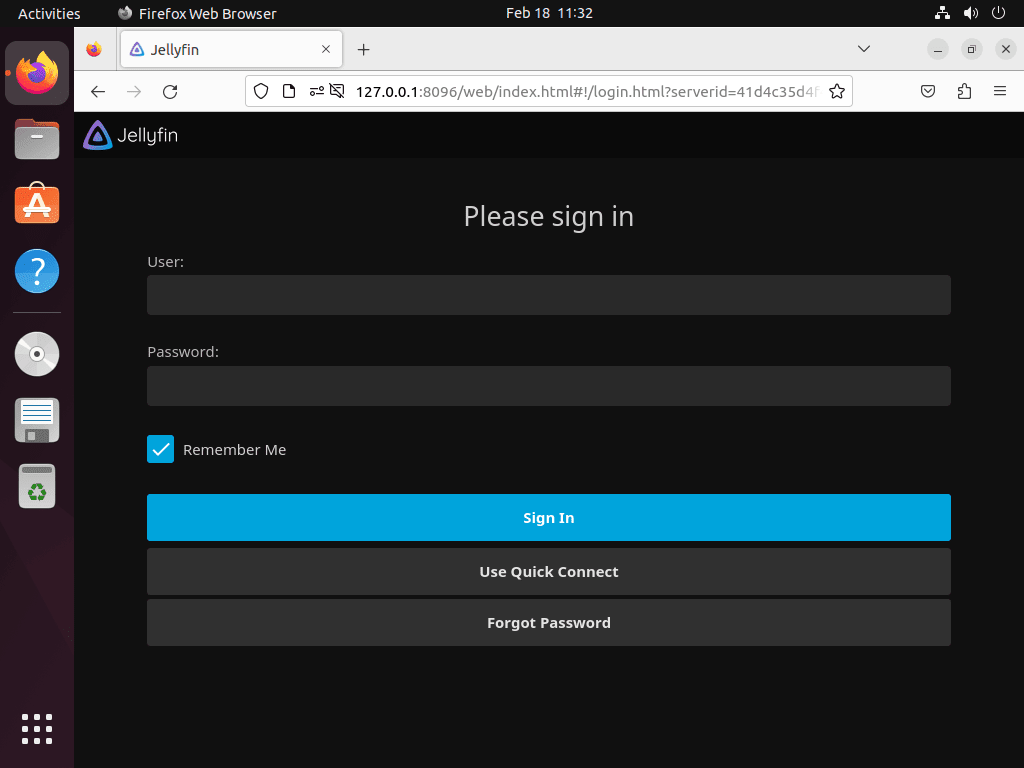
Access the Jellyfin Dashboard
To access the dashboard, enter your username and password to sign in to your Jellyfin media server, then click the “Sign in” button.
Troubleshoot: Reset the Initial Setup
This section can be skipped unless you have issues or need to reset the installation process. If you encounter problems during setup, follow the steps below.
During your Jellyfin media server’s initial setup, you can reset the setup process if you make an error. Modify the IsStartupWizardCompleted value in the system.xml file and restart the Jellyfin server.
First, open the system.xml file with a text editor:
sudo nano /etc/jellyfin/system.xmlNext, locate and modify the “IsStartupWizardCompleted” value to reset the wizard:
<IsStartupWizardCompleted>false</IsStartupWizardCompleted>Following the modification, save the file (CTRL+O) and exit (CTRL+X). This change resets the initial setup process, allowing you to start again from the beginning.
Then, restart the Jellyfin server to apply the changes:
sudo systemctl restart jellyfinOnce the server restarts, visit http://127.0.0.1:8096 to restart the setup wizard.
Grant Jellyfin Access to Media Directories
Following installation, Jellyfin requires read and execute permissions for your media directories. Access Control Lists (ACLs) provide fine-grained permission management beyond traditional Unix file permissions, letting you grant specific users access without changing ownership or group membership.
First, install the ACL package if it’s not already present:
sudo apt install acl -yFollowing ACL installation, grant Jellyfin access to your media directory and all subdirectories using the recursive flag. For example, replace /path/to/your/media with your actual media directory path:
sudo setfacl -R -m u:jellyfin:rx /path/to/your/mediaAlternatively, for individual files or directories, specify the exact path:
sudo setfacl -m u:jellyfin:rx /path/to/your/media/specific-file-or-folderAfter setting permissions, verify they were applied correctly by checking the ACL entries. This confirmation ensures Jellyfin can access your media:
getfacl /path/to/your/mediagetfacl: Removing leading '/' from absolute path names # file: path/to/your/media # owner: username # group: username user::rwx user:jellyfin:r-x group::r-x mask::r-x other::r-x
The output should show user:jellyfin:r-x in the ACL entries, confirming Jellyfin has read and execute access to the specified path. With these permissions configured, Jellyfin can now access your media files.
Configure Remote Access and Security
Configure SSH Tunnel for Remote Access
When you want to securely access your Jellyfin Media Server remotely without exposing it directly to the internet, set up an SSH tunnel on Ubuntu. This approach is useful when you don’t have a domain name or reverse proxy configured, as SSH provides encrypted access through a secure tunnel.
First, ensure SSH is installed on your Ubuntu server. If you haven’t installed OpenSSH server yet, install it with the following command:
sudo apt install openssh-server -yFollowing installation, verify the SSH service is running:
systemctl status ssh● ssh.service - OpenBSD Secure Shell server
Loaded: loaded (/lib/systemd/system/ssh.service; enabled; preset: enabled)
Active: active (running)
From your local computer, establish an SSH tunnel to forward port 8096. Make sure to replace username with your Ubuntu username and server-ip-address with your server’s actual IP address:
ssh -L 8096:localhost:8096 username@server-ip-addressThis command creates a secure tunnel that forwards port 8096 on your local machine to port 8096 on the remote server. As long as the SSH session remains active, access Jellyfin at http://localhost:8096 in your web browser.
The SSH tunnel directs your browser’s HTTP request through the encrypted connection to the remote server’s Jellyfin instance. Keep the SSH terminal window open while using Jellyfin; closing it terminates the tunnel and disconnects your access.
Configure UFW Firewall Rules
The UFW firewall on Ubuntu manages firewall rules. By default, Ubuntu leaves the firewall disabled, so you need to install it (if necessary), open required ports, and then enable protection without locking yourself out of SSH.
If UFW isn’t installed, add it with this command:
sudo apt install ufw -yBefore enabling the firewall, allow SSH plus the ports Jellyfin and your reverse proxy require. Adding the rules first prevents accidental disconnections on remote servers:
sudo ufw allow OpenSSH
sudo ufw allow 80/tcp
sudo ufw allow 443/tcp
sudo ufw allow 8096/tcp
Once the allow rules exist, enable UFW:
sudo ufw enableFirewall is active and enabled on system startup
These commands keep the Jellyfin web UI available on port 8096, let reverse proxies serve traffic over HTTP/HTTPS, ensure certbot can complete HTTP-01 challenges, and maintain SSH access for remote administration.
Set Up a Reverse Proxy with Apache or Nginx
You can set up a reverse proxy to access Jellyfin from a remote computer or network. Additionally, this method provides secure HTTPS access and simplifies domain-based routing.
Configure Apache as Reverse Proxy
First, set up Apache as a reverse proxy by installing the Apache web server:
sudo apt install apache2Apache should be enabled by default. However, if it’s not running, start it with this command:
sudo systemctl start apache2Enable Apache to start automatically on boot:
sudo systemctl enable apache2Next, enable the necessary Apache modules for reverse proxy functionality. These modules handle proxy requests and WebSocket connections:
sudo a2enmod proxy proxy_http headers proxy_wstunnelAfter enabling modules, create a new virtual host configuration file for Jellyfin using the following command. This file will define how Apache routes traffic to Jellyfin:
sudo nano /etc/apache2/sites-available/jellyfin.confBefore continuing, make sure your domain has an A (or AAAA) record such as jellyfin.example.com pointing to your server’s public IP address so Apache can serve requests for the hostname you define below.
Once you’ve created your subdomain, add the following HTTP-only virtual host. It proxies traffic to Jellyfin immediately, and Certbot will layer HTTPS on top of this configuration after you request the certificate:
    ServerName jellyfin.example.com

    ProxyPreserveHost On
    ProxyTimeout 3600
    TimeOut 3600

    # WebSocket proxy
    ProxyPass "/socket" "ws://127.0.0.1:8096/socket"
    ProxyPassReverse "/socket" "ws://127.0.0.1:8096/socket"

    # Main Jellyfin proxy
    ProxyPass "/" "http://127.0.0.1:8096/"
    ProxyPassReverse "/" "http://127.0.0.1:8096/"

    ErrorLog /var/log/apache2/jellyfin-error.log
    CustomLog /var/log/apache2/jellyfin-access.log combined
Save the file (CTRL+O), then exit (CTRL+X).
Before enabling the virtual host, you can check whether there are any errors in the Apache configuration or virtual host file by performing a “dry run” using the following command:
sudo apache2ctl configtestSyntax OK
A successful test returns “Syntax OK,” confirming the configuration has no errors. This validation step prevents Apache crashes during the reload process.
If the test passes, enable the virtual host:
sudo a2ensite jellyfin.confEnabling site jellyfin. To activate the new configuration, you need to run: systemctl reload apache2
Enabling the site creates a symbolic link between sites-available and sites-enabled directories. Restart Apache to apply the changes:
sudo systemctl restart apache2Apache reloads with the new virtual host settings, making your Jellyfin reverse proxy active over HTTP. Continue to the Let’s Encrypt section below to secure the site with HTTPS.
Configure Nginx as Reverse Proxy
Nginx, a popular, lightweight, high-performance web server, is an excellent reverse proxy for accessing your Jellyfin media server from remote computers or networks.
To install Nginx, use this command:
sudo apt install nginxNginx should be enabled by default. However, if it’s not running, start it with this command:
sudo systemctl start nginxEnable Nginx to start automatically on boot:
sudo systemctl enable nginxVerify Nginx is running correctly. This check confirms the service started successfully:
sudo systemctl status nginx● nginx.service - A high performance web server and a reverse proxy server
Loaded: loaded (/lib/systemd/system/nginx.service; enabled; preset: enabled)
Active: active (running)
After confirming Nginx is active, create a new server block file for Jellyfin:
sudo nano /etc/nginx/conf.d/jellyfin.confConfigure the server block with the following directives. Each directive controls a specific aspect of how Nginx handles requests:
- listen: Specifies the port and address for Nginx (port 80 in this example)
- server_name: Your domain name (replace jellyfin.example.com)
- access_log and error_log: Locations for log files
- location: Handles different URL paths and request types
- proxy_pass: Forwards requests to Jellyfin on port 8096
Here is an example server block configuration. Initially, this configuration only uses HTTP (port 80). After you create an SSL certificate with certbot, it will automatically add the HTTPS (port 443) configuration and redirect all HTTP traffic to HTTPS:
server {
    listen 80;
    server_name jellyfin.example.com;

    access_log /var/log/nginx/jellyfin.access.log;
    error_log /var/log/nginx/jellyfin.error.log;

    # Security / XSS Mitigation Headers
    add_header X-Frame-Options "SAMEORIGIN";
    add_header X-XSS-Protection "1; mode=block";
    add_header X-Content-Type-Options "nosniff";

    location / {
        proxy_pass http://127.0.0.1:8096;
        proxy_set_header Host $host;
        proxy_set_header X-Real-IP $remote_addr;
        proxy_set_header X-Forwarded-For $proxy_add_x_forwarded_for;
        proxy_set_header X-Forwarded-Proto $scheme;
        proxy_set_header X-Forwarded-Protocol $scheme;
        proxy_set_header X-Forwarded-Host $http_host;
        proxy_buffering off;
        proxy_connect_timeout 60s;
        proxy_send_timeout 60s;
        proxy_read_timeout 60s;
    }

    location = /web/ {
        proxy_pass http://127.0.0.1:8096/web/index.html;
        proxy_set_header Host $host;
        proxy_set_header X-Real-IP $remote_addr;
        proxy_set_header X-Forwarded-For $proxy_add_x_forwarded_for;
        proxy_set_header X-Forwarded-Proto $scheme;
        proxy_set_header X-Forwarded-Protocol $scheme;
        proxy_set_header X-Forwarded-Host $http_host;
    }

    location /socket {
        proxy_pass http://127.0.0.1:8096/socket;
        proxy_http_version 1.1;
        proxy_set_header Upgrade $http_upgrade;
        proxy_set_header Connection "upgrade";
        proxy_set_header Host $host;
        proxy_set_header X-Real-IP $remote_addr;
        proxy_set_header X-Forwarded-For $proxy_add_x_forwarded_for;
        proxy_set_header X-Forwarded-Proto $scheme;
        proxy_set_header X-Forwarded-Protocol $scheme;
        proxy_set_header X-Forwarded-Host $http_host;
        proxy_connect_timeout 60s;
        proxy_send_timeout 60s;
        proxy_read_timeout 60s;
    }
}
Save the file (CTRL+O), then exit (CTRL+X).
Test the Nginx configuration for syntax errors before applying it:
sudo nginx -tnginx: the configuration file /etc/nginx/nginx.conf syntax is ok nginx: configuration file /etc/nginx/nginx.conf test is successful
A successful test displays confirmation that the configuration file syntax is valid. Then, reload Nginx to activate the new configuration:
sudo systemctl reload nginxWith your domain and DNS records pointing to your server IP, you can now access Jellyfin at jellyfin.example.com. Nginx forwards requests to Jellyfin’s web interface, enabling remote access through your domain.
Secure Jellyfin with Let’s Encrypt SSL
Securing your reverse proxy with an SSL certificate enables HTTPS connections, encrypting traffic between users and your Jellyfin server. In addition, Let’s Encrypt provides free SSL certificates that renew automatically.
Install the appropriate certbot package for your reverse proxy. For Apache:
sudo apt install python3-certbot-apacheFor Nginx:
sudo apt install python3-certbot-nginxCreate an SSL certificate with certbot. The command includes options for automatic HTTPS redirects (–redirect), HTTP Strict Transport Security (–hsts), and OCSP Stapling (–staple-ocsp) for enhanced security. Make sure to replace YOUR-EMAIL@example.com and jellyfin.example.com with your actual email and domain:
For Apache:
sudo certbot --apache --agree-tos --redirect --hsts --staple-ocsp --email YOUR-EMAIL@example.com -d jellyfin.example.comFor Nginx:
sudo certbot --nginx --agree-tos --redirect --hsts --staple-ocsp --email YOUR-EMAIL@example.com -d jellyfin.example.comAfter certificate creation, your Jellyfin URL changes to https://jellyfin.example.com. Furthermore, Certbot automatically configures your web server to redirect HTTP requests to HTTPS.
Test the automatic renewal process with a dry run:
sudo certbot renew --dry-runSaving debug log to /var/log/letsencrypt/letsencrypt.log - - - - - - - - - - - - - - - - - - - - - - - - - - - - - - - - - - - - - - - - Processing /etc/letsencrypt/renewal/jellyfin.example.com.conf - - - - - - - - - - - - - - - - - - - - - - - - - - - - - - - - - - - - - - - - Cert not due for renewal, but simulating renewal for dry run ... Congratulations, all renewals succeeded.
If the dry run succeeds, certbot has already configured a systemd timer for automatic renewal. Verify the timer is active:
systemctl status certbot.timer● certbot.timer - Run certbot twice daily
Loaded: loaded (/lib/systemd/system/certbot.timer; enabled; preset: enabled)
Active: active (waiting)
The systemd timer handles automatic certificate renewal, checking twice daily and renewing certificates within 30 days of expiration. Your SSL certificate stays valid without manual intervention.
Update Jellyfin Media Server
Jellyfin updates arrive through the same APT repository you configured during installation. Regular system updates will include Jellyfin when new versions are available. To check for and apply updates, refresh the package list and upgrade:
sudo apt update && sudo apt upgradeIf you want to update only Jellyfin without upgrading other packages, use the --only-upgrade flag. This is useful when you want to apply a Jellyfin security fix without affecting other software:
sudo apt install --only-upgrade jellyfinAfter updating, Jellyfin restarts automatically. Verify the new version is running by checking the version in the Jellyfin dashboard under Dashboard > Server > General, or by checking the package version:
apt-cache policy jellyfin | grep InstalledRemove Jellyfin Media Server
If you no longer need Jellyfin, remove the package and its configuration files with the --purge flag:
sudo apt remove jellyfin --purgeNext, remove any automatically installed dependencies that are no longer needed:
sudo apt autoremoveRemove the Jellyfin repository and GPG key from your system. The following commands safely clean up all possible repository files:
sudo rm -f /etc/apt/sources.list.d/jellyfin.sources
sudo rm -f /etc/apt/sources.list.d/jellyfin-unstable.sources
sudo rm -f /etc/apt/sources.list.d/jellyfin.list
sudo rm -f /etc/apt/sources.list.d/jellyfin-unstable.list
sudo rm -f /etc/apt/keyrings/jellyfin.gpg
The following command permanently deletes all Jellyfin data, including your library metadata, user accounts, watch history, and server configuration. If you want to preserve this data for a future reinstallation, back up the directories first:
sudo cp -r /var/lib/jellyfin ~/jellyfin-backup
To completely remove all Jellyfin data directories (optional):
sudo rm -rf /var/lib/jellyfin
sudo rm -rf /etc/jellyfin
sudo rm -rf /var/log/jellyfin
sudo rm -rf /var/cache/jellyfin
Finally, refresh the package list to confirm the repository has been removed:
sudo apt updateTroubleshoot Common Jellyfin Issues
Nginx Fails to Start After Configuration
If Nginx fails to start after creating the Jellyfin server block, the error typically stems from a configuration syntax issue or port conflict. First, check the detailed error message:
sudo journalctl -xeu nginx.service --no-pagerTest the Nginx configuration to identify syntax errors:
sudo nginx -tCommon causes and fixes include:
Port 80 already in use: Another service (often Apache) may be using port 80. Check which process is using the port:
sudo ss -tlnp | grep :80If Apache is running, stop and disable it before using Nginx:
sudo systemctl stop apache2
sudo systemctl disable apache2
Configuration syntax error: If nginx -t reports an error, the output will indicate the file and line number. Open the file and correct the issue. Common mistakes include missing semicolons, mismatched braces, or typos in directive names.
Default site conflict: The default Nginx site may conflict with your Jellyfin configuration. Disable it:
sudo rm /etc/nginx/sites-enabled/defaultAfter resolving the issue, test the configuration again and start Nginx:
sudo nginx -t && sudo systemctl start nginxnginx: the configuration file /etc/nginx/nginx.conf syntax is ok nginx: configuration file /etc/nginx/nginx.conf test is successful
Jellyfin Service Fails to Start
If Jellyfin fails to start after installation, check the service logs for error details:
sudo journalctl -u jellyfin -n 50 --no-pagerCommon causes include port conflicts (another service using port 8096) or permission issues with the data directory. To check if port 8096 is in use:
sudo ss -tlnp | grep 8096If another process is using the port, either stop that service or configure Jellyfin to use a different port in /etc/jellyfin/network.xml.
Media Files Not Appearing in Library
If Jellyfin cannot see your media files, the issue is typically file permissions. Verify Jellyfin has access:
sudo -u jellyfin ls /path/to/your/mediaIf this command returns “Permission denied,” apply ACL permissions as described in the permissions section above. After setting permissions, trigger a library scan from the Jellyfin dashboard under Dashboard > Libraries > Scan All Libraries.
Repository Import Errors
If apt update fails after adding the Jellyfin repository, verify the GPG key was imported correctly:
file /etc/apt/keyrings/jellyfin.gpg/etc/apt/keyrings/jellyfin.gpg: OpenPGP Public Key Version 4
If the file is missing or shows an error, re-run the GPG key import commands from the installation section. Next, verify your Ubuntu codename matches a supported release:
lsb_release -csnoble
The Jellyfin repository currently supports jammy (22.04) and noble (24.04). If your system returns resolute (26.04) or another codename not listed, the repository does not yet have packages for your Ubuntu version. In this case, you have three alternatives:
- Use Docker: Install Docker on Ubuntu, then run Jellyfin in a container using the official Docker image. This works on any Ubuntu version.
- Use Flatpak: Install Flatpak on Ubuntu, then install Jellyfin from Flathub using
flatpak install flathub org.jellyfin.JellyfinServer. - Wait for repository support: Check the Jellyfin downloads page periodically for updates on new Ubuntu version support.
Jellyfin Frequently Asked Questions
Jellyfin runs as the system user jellyfin, which initially lacks access to your personal files. Use the setfacl command to grant read and execute permissions to the jellyfin user on your media directories without changing the owner.
Yes, Jellyfin supports hardware acceleration via VA-API (AMD/Intel) and NVENC (NVIDIA). You must install the necessary drivers (like mesa-va-drivers) and explicitly enable the specific accelerator in the Jellyfin Dashboard under Playback > Transcoding.
Yes, but avoid relying on auto-mounting. Instead, configure a permanent mount point in /etc/fstab to ensure the drive mounts to the same path with the correct permissions every time the server boots.
Linux limits the number of files a user can watch for changes. If Real-time Monitoring fails, increase this limit by adding fs.inotify.max_user_watches=524288 to your sysctl configuration and reloading the system settings.
For supported Ubuntu LTS releases like 22.04 and 24.04, the APT repository is recommended for native performance. Use Docker if you are on a newer release (like 26.04) not yet supported by the repo, or if you prefer containerized isolation.
Jellyfin Resources and Community Support
Use the following official resources to deepen your Jellyfin knowledge and troubleshoot advanced scenarios:
- Jellyfin Official Website: Visit the official Jellyfin website for information about the media server, its features, and download options.
- Jellyfin Documentation: Access comprehensive documentation for detailed guides on installing, configuring, and using Jellyfin.
- Jellyfin Forum: Join the Jellyfin community forum to discuss issues, share solutions, and get support from other users.
- Jellyfin Demo: Explore the live demo of Jellyfin to see the interface and features in action.
Conclusion
Your Ubuntu server now runs Jellyfin Media Server with the official repository configured for automatic updates. The ACL permissions grant Jellyfin read access to your media directories without changing file ownership, keeping your existing permission structure intact. For remote access, you configured either Apache or Nginx as a reverse proxy with Let’s Encrypt SSL certificates for encrypted connections.
From here, explore Jellyfin’s plugin system for metadata providers, subtitle downloaders, and hardware transcoding acceleration. Configure user accounts with parental controls if sharing the server with family, and consider setting up additional firewall rules if exposing your server to the internet.

I came to a complete dead end at the reverse proxy setup. Cannot get past this:
eric@[xxxxx]:~$ sudo systemctl start nginx
Job for nginx.service failed because the control process exited with error code.
See “systemctl status nginx.service” and “journalctl -xeu nginx.service” for details.
Thanks for reporting this, EP. This error typically means a port conflict or configuration syntax issue. Run these commands to diagnose:
The first command shows syntax errors with the exact file and line number. The second checks if Apache or another service is using port 80. If Apache is running, stop it with
sudo systemctl stop apache2. I added a troubleshooting section to the article covering these scenarios.