

Jupyter Notebook is an open-source web application for creating and sharing documents that combine live code, equations, visualizations, and narrative text. Whether you’re analyzing datasets, training machine learning models, or documenting research workflows, Jupyter provides an interactive environment where you can write and execute code in real time while embedding rich text, plots, and charts directly in your documents. By the end of this guide, you will have a working Jupyter installation with JupyterLab (the modern interface) running in a Python virtual environment, ready for data science workflows.
Additionally, the modern jupyter package installs both the classic Notebook interface and JupyterLab 4.x, giving you access to either interface from a single installation. This guide walks through installing Jupyter via pip within a virtual environment, configuring it as a systemd service for automatic startup, and setting up secure SSH tunneling for remote access.
Update Ubuntu and Install Python Prerequisites
Refresh Package Repositories
First, refresh your package repositories to ensure you install the latest available versions. Open a terminal and run:
sudo apt update
sudo apt upgrade
Specifically, the apt update command refreshes the package index, while apt upgrade installs available updates for your existing packages.
Install Python 3 and Development Packages
Next, install Python 3 along with the development headers and virtual environment support. For detailed information about pip, see our Python pip installation guide for Ubuntu:
sudo apt install python3 python3-dev python3-venv python3-pipAs a result, this command installs Python 3 along with three essential components: python3-dev (development headers for compiling Python extensions), python3-venv (virtual environment support), and python3-pip (the Python package installer).
Note that Ubuntu includes different Python versions across LTS releases: Python 3.10 on Ubuntu 22.04, Python 3.12 on Ubuntu 24.04, and Python 3.13 on Ubuntu 26.04. However, the installation steps work identically across all supported LTS releases.
Create a Virtual Environment
Python virtual environments isolate project dependencies, preventing conflicts between different projects. For a comprehensive guide to virtual environments, see our Python virtual environment guide for Ubuntu. To create a virtual environment for Jupyter:
python3 -m venv myenvYou can replace myenv with any name that describes your project, such as jupyter-env or data-science. This command creates a self-contained Python installation in the specified directory.
Install Jupyter Notebook via PIP
Activate the Virtual Environment
Before installing Jupyter, activate the virtual environment to ensure all packages install within it rather than system-wide:
source myenv/bin/activateOnce activated, your terminal prompt changes to show the environment name (e.g., (myenv)). Remember to replace myenv with your chosen environment name if different.
Upgrade pip
Next, upgrade pip to the latest version to avoid compatibility issues during package installation:
pip install --upgrade pipInstall Jupyter with pip
With pip updated, now install the Jupyter package. This command installs both Jupyter Notebook and JupyterLab:
pip install jupyterDuring installation, pip downloads Jupyter and all its dependencies. Once complete, verify the installation by checking the version:
jupyter --versionThe expected output confirms a successful installation:
Selected Jupyter core packages...
IPython          : 9.x.x
ipykernel        : 7.x.x
ipywidgets       : 8.x.x
jupyter_client   : 8.x.x
jupyter_core     : 5.x.x
jupyter_server   : 2.x.x
jupyterlab       : 4.x.x
nbclient         : 0.x.x
nbconvert        : 7.x.x
nbformat         : 5.x.x
notebook         : 7.x.x
traitlets        : 5.x.x
Launch Jupyter Notebook
Now, start Jupyter Notebook with:
jupyter notebookBy default, this command opens the Jupyter interface in your default web browser. However, for server installations without a graphical environment, use the --no-browser flag and access Jupyter via SSH tunneling (covered later in this guide):
jupyter notebook --no-browserConfigure Jupyter as a Systemd Service
For servers or systems where Jupyter should start automatically on boot, you can configure it as a systemd service. Additionally, this approach is especially useful for remote development servers where you want Jupyter always available.
Auto-Activate Virtual Environment (Optional)
Edit .bashrc File
To begin, open the .bashrc file in your home directory using a text editor like nano:
nano ~/.bashrcAdd Activation Script
Then, at the end of the .bashrc file, add this line to activate the virtual environment automatically. Remember to replace the path with your actual environment location:
# Example for a virtual environment in your home directory:
source ~/jupyter-env/bin/activate
Save and Apply Changes
After adding the activation line, save the file and exit the editor. To apply the changes immediately without opening a new terminal, reload the file:
source ~/.bashrcAlternatively, open a new terminal window for the changes to take effect. From now on, every new terminal session will automatically activate the virtual environment.
Create the Systemd Service File
Next, create a new systemd service file for Jupyter:
sudo nano /etc/systemd/system/jupyter.serviceThen, add the following configuration. This example assumes a user named datauser with a virtual environment in /home/datauser/jupyter-env:
[Unit]
Description=Jupyter Notebook Server
After=network.target

[Service]
Type=simple
User=datauser
Group=datauser
WorkingDirectory=/home/datauser/notebooks
ExecStart=/home/datauser/jupyter-env/bin/jupyter notebook --no-browser --ip=127.0.0.1
Restart=on-failure
RestartSec=10

[Install]
WantedBy=multi-user.target
Be sure to replace datauser with your actual username, and adjust the paths to match your virtual environment location. The --no-browser and --ip=127.0.0.1 flags ensure Jupyter only listens locally for security.
For production deployments, run
jupyter notebook --generate-configto create a configuration file, then set a password withjupyter notebook password. Token-based authentication is suitable for personal use, but password authentication provides additional security for shared servers.
Reload Systemd Daemon
Once you’ve configured the Jupyter service file, you need to reload the systemd daemon to apply the changes:
sudo systemctl daemon-reloadAs a result, this command informs the systemd that a new service file has been added or an existing one has been modified.
Enable and Start the Service
Following the daemon-reload, proceed to enable and start the Jupyter service:
sudo systemctl enable jupyter.service
sudo systemctl start jupyter.service
Next, verify the service is running:
sudo systemctl status jupyter.serviceIf successful, the expected output shows the service as active and running:
● jupyter.service - Jupyter Notebook Server
     Loaded: loaded (/etc/systemd/system/jupyter.service; enabled)
     Active: active (running) since ...
Access Jupyter Remotely via SSH Tunneling
SSH tunneling securely forwards network traffic over an encrypted connection, allowing you to access Jupyter Notebook on a remote server from your local machine. This method keeps Jupyter bound to localhost on the server while providing secure remote access. For SSH setup and configuration, see our SSH installation guide for Ubuntu.
Create an SSH Tunnel
To create the tunnel, open a terminal on your local machine and run a command that forwards port 8888:
ssh -L 8888:localhost:8888 your_server_username@your_server_ipBreaking Down the Command
ssh: Initiates an SSH connection.-L 8888:localhost:8888: Specifies local port forwarding. Here, the local port 8888 is tunneled to the same port on the remote server.your_server_username: Replace this with your actual username on the remote server.your_server_ip: Replace this with your server’s IP address.
For example, if your username is joshua and the server’s IP is 203.0.113.0, the command would be:
ssh -L 8888:localhost:8888 joshua@203.0.113.0Handling Port Conflicts
However, if port 8888 is already in use on your local machine, simply replace 8888 with any available port.
Initializing Jupyter Notebook
After establishing the SSH tunnel without any errors, you can start Jupyter Notebook on the remote server. Run the following command on the server:
jupyter notebookAccessing Jupyter Notebook
Once Jupyter Notebook starts, it will provide a URL in the terminal output. Specifically, this URL, typically starting with http://localhost:8888, includes a security token. Then, open your preferred web browser on your local machine and navigate to this URL.
Note: If prompted, simply enter the token number provided in the Jupyter Notebook’s output. This token authenticates your session.
Explore the Jupyter Web Interface
Navigate the File Browser
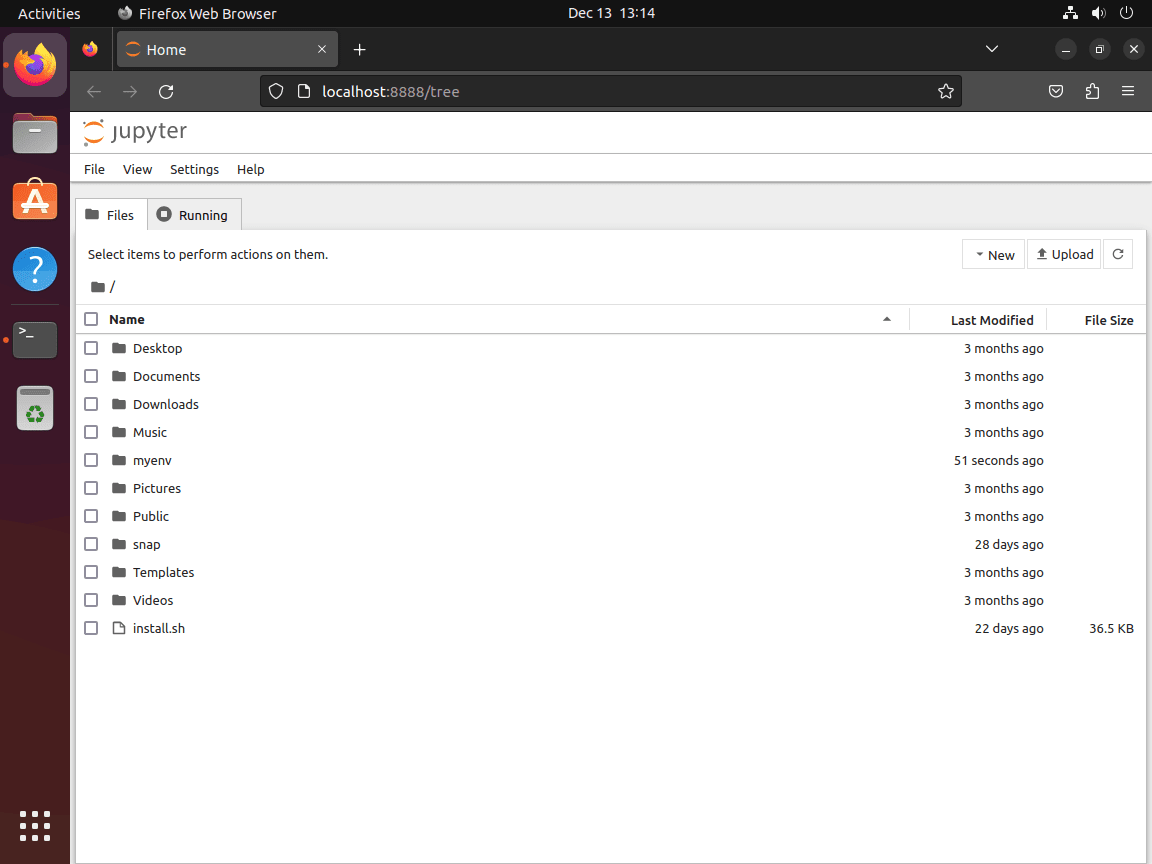
When you access Jupyter through your browser, you’ll immediately see the file browser showing all files and folders in the working directory. For an organized workflow, start Jupyter in your project directory so all related files are immediately accessible. From here, you can create new notebooks, upload files, or open existing documents.
Run Python Code in Cells
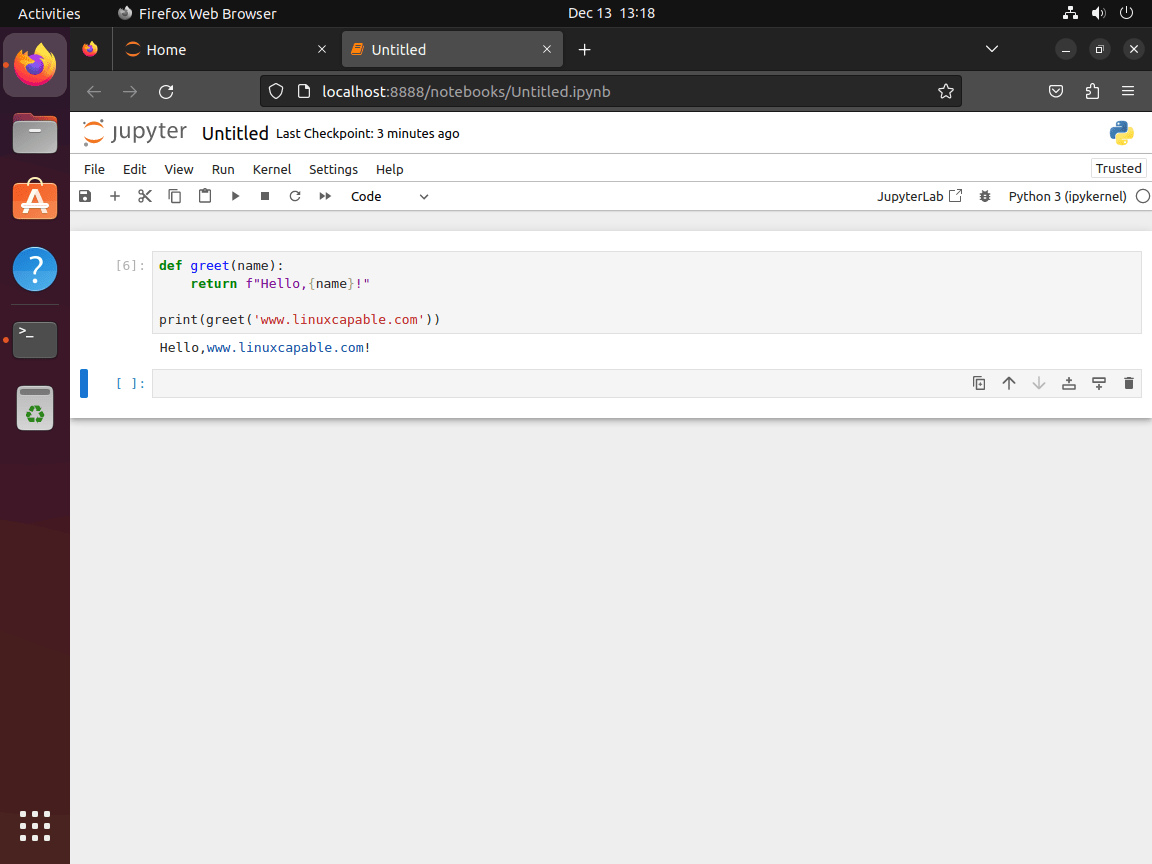
Essentially, Jupyter notebooks consist of cells that can contain either Python code or Markdown text. To execute a code cell, select it and run it using the Run button or toolbar. Here’s a simple example to test your installation:
# Defining a simple greeting function
def greet(name):
    return f"Hello, {name}!"

# Let's greet 'John'
print(greet('John'))
In this example, we define a greet function that accepts a name and returns a personalized greeting. As a result, when we pass ‘John’ as an argument to the greet function, it returns “Hello, John!” and prints the greeting.
Troubleshoot Common Jupyter Notebook Issues
Fix Port Already in Use Error
If you see the error “Port 8888 is already in use,” this means another process is using that port. To resolve this, either stop the existing process or specify a different port:
jupyter notebook --port=8889To find which process is using port 8888:
lsof -i :8888As a result, the output displays the process ID (PID). Then, use that PID to stop the process:
kill -9 12345Remember to replace 12345 with the actual PID from the lsof output.
Fix Kernel Connection Failures
If notebooks fail to connect to the kernel, this usually means the ipykernel package may be missing or corrupted. To fix this, reinstall it within your virtual environment:
pip install --force-reinstall ipykernel
python -m ipykernel install --user
Fix Memory-Related Crashes
Sometimes, large datasets or complex operations can exhaust system memory. In such cases, monitor resource usage and consider increasing swap space or limiting notebook memory usage. Alternatively, you can restart the kernel to free memory without losing saved work.
Remove Jupyter Notebook
If you decide to completely remove Jupyter Notebook, follow these steps.
Uninstall Jupyter from the Virtual Environment
First, activate the virtual environment and remove Jupyter:
source myenv/bin/activate
pip uninstall jupyter jupyter-core jupyter-client jupyterlab notebook -y
Remove the Virtual Environment
Next, if you no longer need the virtual environment, delete its directory:
deactivate
rm -rf myenv
Remove the Systemd Service (If Configured)
If you created a systemd service, stop and remove it:
sudo systemctl stop jupyter.service
sudo systemctl disable jupyter.service
sudo rm /etc/systemd/system/jupyter.service
sudo systemctl daemon-reload
Clean Up .bashrc (If Modified)
Finally, if you added the virtual environment activation to .bashrc, edit the file and remove the line containing source /path/to/myenv/bin/activate.
Conclusion
This guide covered installing Jupyter Notebook in a Python virtual environment on Ubuntu, configuring it as a systemd service, and setting up SSH tunneling for remote access. The pip install jupyter command installs both the classic Notebook interface and JupyterLab, providing flexibility in how you work with interactive notebooks. As you continue working with Jupyter, explore additional features like keyboard shortcuts, magic commands, and extensions to enhance your data science workflows.

Formatting tips for your comment
You can use basic HTML to format your comment. Useful tags currently allowed in published comments:
<code>command</code>command<strong>bold</strong><em>italic</em><blockquote>quote</blockquote>