
Linux Mint no longer ships a dedicated KDE edition, but KDE Plasma remains a practical replacement when Cinnamon feels too rigid or you want stronger multi-monitor tools, deeper theming, and a more configurable workspace. You can install KDE Plasma on Linux Mint from the default repositories instead of hunting for a Mint KDE ISO or replacing the distribution.
Mint 22.x receives Plasma 5.27.x and Mint 21.x receives Plasma 5.24.x from the Ubuntu base. Use the supported repository packages instead of Plasma 6 workarounds or LMDE steps. You can add a lean Plasma desktop, expand it with KDE applications, keep your existing Mint desktop as a fallback, and adjust SDDM or LightDM afterward.
Understand KDE Plasma Availability on Linux Mint
Linux Mint uses Ubuntu as its package base, which determines which Plasma version you receive from the default repositories. Before installing, confirm your Mint version so you know what to expect:
| Linux Mint Version | Ubuntu Base | Plasma Version (Default Repos) | Support Until |
|---|---|---|---|
| Linux Mint 22.x (Wilma, Xia, Zara, Zena) | Ubuntu 24.04 LTS (noble) | Plasma 5.27.x | April 2029 |
| Linux Mint 21.x (Vanessa, Vera, Victoria, Virginia) | Ubuntu 22.04 LTS (jammy) | Plasma 5.24.x | April 2027 |
Plasma 5.27 on Mint 22.x is the newer branch, while Mint 21.x stays on the older 5.24 LTS branch. Both provide a complete Plasma 5 desktop, but neither Mint series receives Plasma 6 from the normal Ubuntu-base repositories.
Linux Mint 22.x and 21.x support KDE Plasma from the default repositories. LMDE uses Debian packages instead, so it needs a Debian-focused workflow rather than the Ubuntu-based Mint package path.
Install KDE Plasma from Default Repositories
Installing from Linux Mint’s default repositories gives you a supported KDE Plasma setup without adding third-party package sources. Mint pulls these packages from the Ubuntu universe component that is already enabled on standard Linux Mint desktop installs, so the same path also keeps updates inside the normal Mint update flow.
Update Linux Mint Before Installing KDE Plasma
Refresh APT metadata first, then apply pending upgrades before adding another desktop environment. Review the upgrade list before confirming because this can update packages outside the KDE install itself.
sudo apt update
sudo apt upgrade
These commands use
sudofor system changes. If your account is not in the sudoers file yet, follow the guide on how to create and add users to sudoers on Linux Mint or run the commands from an administrator account.
Check for Existing KDE Plasma Packages
Before proceeding, verify that the KDE meta packages are not already installed on your system. This exact package check avoids matching unrelated KDE libraries that another application may already use.
dpkg -l kde-plasma-desktop kde-standard kde-full 2>/dev/null | grep '^ii'If the command returns any results showing installed packages, Plasma is already on your system and you can skip to the SDDM configuration section. An empty output means no KDE meta packages are installed.
Compare KDE Plasma Package Profiles on Linux Mint
These KDE meta packages cover the usual Linux Mint setups, from a lean Plasma shell to a large KDE application stack. Choose one profile rather than installing every row.
| Package | Best For | What You Get | Trade-off |
|---|---|---|---|
kde-plasma-desktop | Most Mint users who want Plasma without many duplicate apps | Plasma shell, KWin, System Settings, core workspace packages, and SDDM as a recommended display manager. | You may still use Mint apps such as Nemo and add KDE applications later. |
kde-standard | Users who want a broader KDE-native desktop from the start | Adds standard KDE applications and add-ons such as Ark, Gwenview, Kate, Okular, KMail, KOrganizer, Akregator, and extra Plasma widgets. | Installs many more applications, including KDE PIM components that some Mint users may not need. |
kde-full | Users who deliberately want the widest KDE application collection | Adds KDE administration, education, games, graphics, multimedia, network, PIM, and utility groups on top of kde-standard; APT’s default recommendations can add more KDE groups. | Largest install and the most duplicate applications beside Cinnamon, Xfce, or MATE tools. |
kubuntu-desktop | Not recommended for a normal Mint desktop switch | Ubuntu’s Kubuntu desktop task, including Kubuntu settings packages. | Can add Kubuntu-specific defaults and may propose package removals; unnecessary when the KDE meta packages already provide Plasma. |
Start with kde-plasma-desktop if you want Plasma while keeping the rest of your Mint application set lean. Choose kde-standard when you want KDE-native applications installed immediately, and reserve kde-full for systems where the extra KDE groups are intentional.
Preview the profile before installing so you can see package count, disk usage, and whether APT proposes removals:
apt -s install kde-plasma-desktopSubstitute kde-standard or kde-full to preview those options instead. The simulation is read-only, so it is the safest place to catch an unexpectedly large install before changing your desktop stack.
Install the Recommended Plasma Profile on Linux Mint
The recommended profile is the leanest starting point when you want the Plasma desktop without a large KDE application bundle.
sudo apt install kde-plasma-desktopThis command installs the Plasma shell, KWin, System Settings, workspace components, and recommended login pieces such as SDDM. If the package installer asks which display manager to use, choose SDDM for the most KDE-native login screen. If no prompt appears or LightDM remains active after reboot, switch to SDDM later with sudo dpkg-reconfigure sddm.
Install the KDE Standard Profile on Linux Mint
Use the standard profile when you want the KDE application set installed with Plasma rather than adding applications later.
sudo apt install kde-standardThis command installs the recommended Plasma profile plus standard KDE applications and add-ons such as Ark, Gwenview, Kate, Okular, KMail, KOrganizer, and Akregator. Review the APT transaction before confirming because this profile pulls in many more packages than the lean Plasma shell.
Install the Full KDE Profile on Linux Mint
Use the full profile only when you want the broad KDE software collection, including application groups you may not need on a mixed Mint desktop.
sudo apt install kde-fullThis adds KDE PIM, education packages, games, graphics tools, multimedia tools, networking tools, and extra utilities on top of the standard profile. APT’s default recommended-package behavior can also bring in additional KDE groups, so choose this option only if you want the full KDE ecosystem and have enough disk space for the larger dependency set.
Install KDE Plasma Using Software Manager
Software Manager is useful when you prefer a graphical install. Use it for the recommended kde-plasma-desktop package; the terminal path remains clearer when you want to compare kde-standard and kde-full before installing.
- Open Software Manager from the application menu.
- Search for “KDE Plasma Desktop”.
- Select the KDE Plasma Desktop package from the results.
- Click Install and enter your password when prompted.
- Choose SDDM or LightDM if the display-manager prompt appears.
When Software Manager finishes, log out or reboot, then select Plasma from the session chooser at the login screen. If you want the broader kde-standard or kde-full package set, use the terminal commands instead.
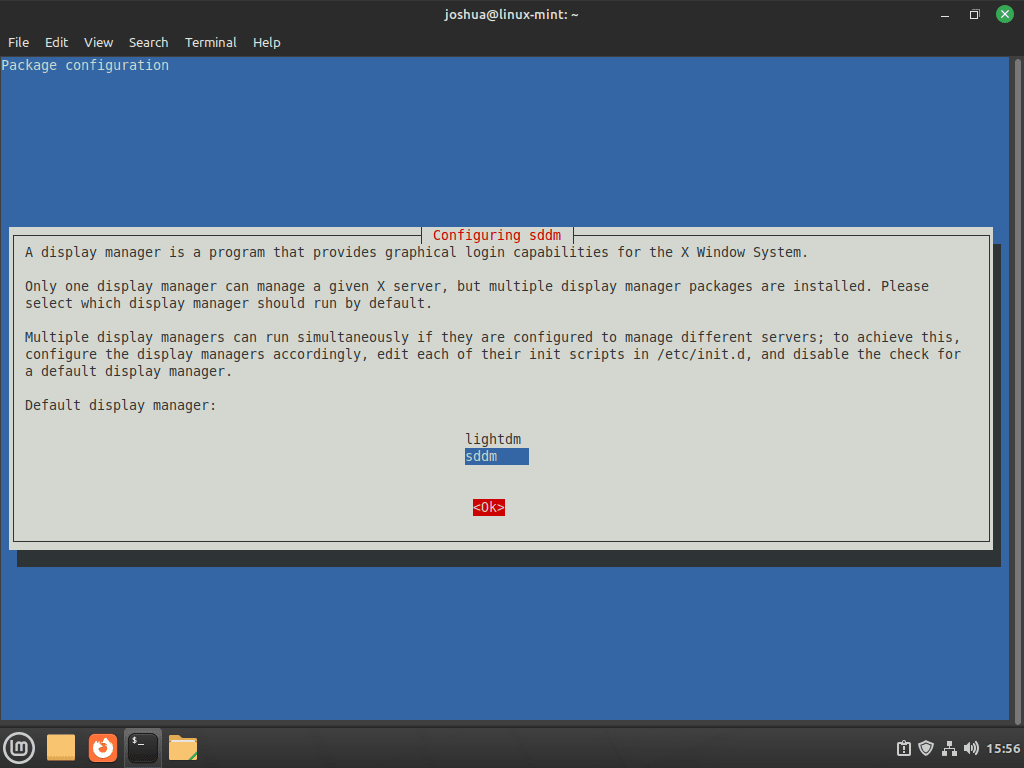
Configure SDDM for KDE Plasma on Linux Mint
If the installer asks which display manager to use, that choice controls which login screen handles your KDE Plasma sessions. Linux Mint users usually narrow the decision to these two options:
| Display Manager | Best For | Advantages | Considerations |
|---|---|---|---|
| SDDM | Dedicated KDE Plasma users | Native KDE integration, better theme support, modern features | Additional package to maintain, designed specifically for KDE |
| LightDM | Multi-desktop setups | Linux Mint default, lighter resource usage, works with all desktops | Less polished with KDE themes, fewer Plasma-specific features |
For most Linux Mint systems, SDDM is the better match because it integrates cleanly with Plasma’s theming and session handling. Keep LightDM if you switch between Cinnamon and Plasma often or you prefer Mint’s default login screen.
To proceed with SDDM in the terminal dialog, press the TAB key to highlight <Ok>, then press ENTER.
Fix the KDE Plasma Virtual Keyboard Bug in Linux Mint VMs
In some virtual environments, especially after you install VirtualBox on Linux Mint or run Mint under VMware or QEMU, a bug can cause the SDDM login screen to display only a large on-screen keyboard after rebooting, making it impossible to log in normally. To prevent this issue, create an SDDM drop-in configuration before rebooting:
sudo mkdir -p /etc/sddm.conf.d
printf '%s\n' '[General]' 'InputMethod=' | sudo tee /etc/sddm.conf.d/virtualkbd.conf > /dev/null
The first command creates the configuration directory if it does not exist. The second command writes a drop-in file that sets InputMethod= to empty, which disables the virtual keyboard; sudo tee is used because plain > redirection would still try to write the file as your regular user. SDDM automatically loads configuration files from /etc/sddm.conf.d/ even when the main /etc/sddm.conf file does not exist, so this approach works without generating the base configuration manually.
This preventive fix mainly applies to virtual machines or systems that already show the SDDM virtual-keyboard issue. Most physical installs can skip this step.
Reboot Linux Mint and Verify KDE Plasma
Once the installation completes, reboot your system to apply the desktop environment and display manager changes:
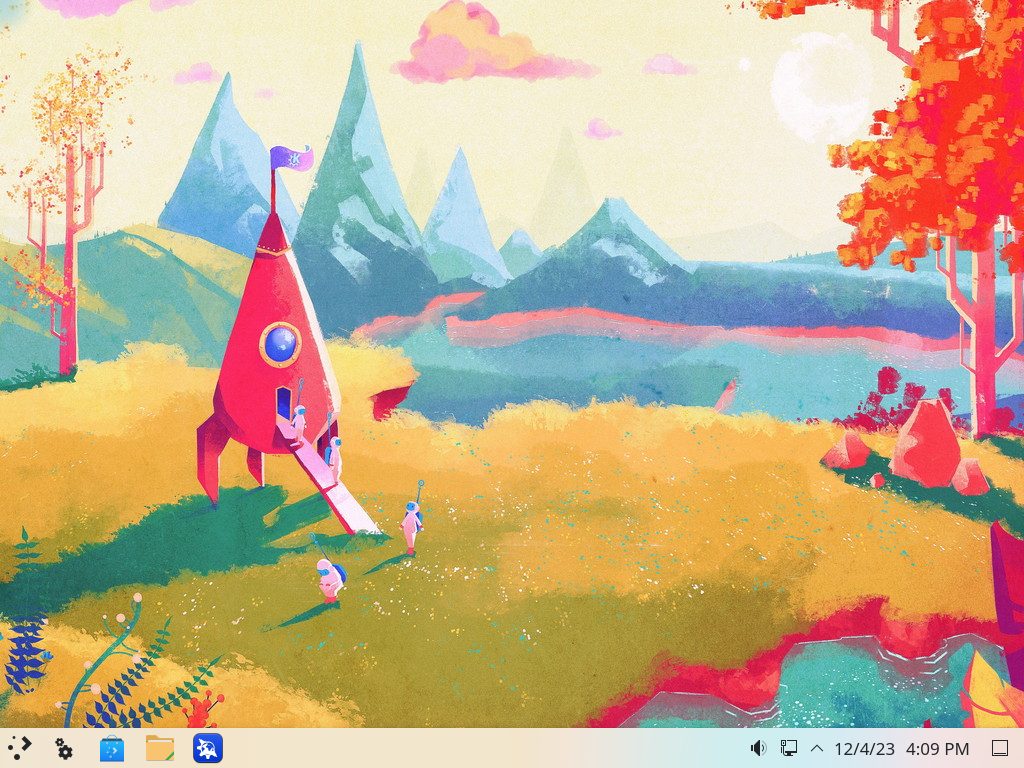
sudo rebootAfter restarting, you will arrive at the login screen. If you selected SDDM, you should see the KDE-themed login interface. If LightDM remained the default, Plasma still appears in the session chooser.
Select the KDE Plasma Session on Linux Mint
Before entering your credentials, ensure KDE Plasma is selected as your desktop session:
- Click the session selector (gear icon or dropdown menu) typically located in the bottom-left corner of the SDDM login screen or top-right corner on LightDM.
- Select “Plasma” or “Plasma (X11)” from the list. The default Mint 22.x and 21.x package path uses the X11 Plasma session; a Wayland entry appears only if the separate Wayland session packages are installed.
- Enter your username and password to log in.
Your selection is remembered for future logins, so you only need to choose the session once unless you want to switch between desktops.
Verify KDE Plasma Installation on Linux Mint
After rebooting, confirm that the Plasma package and session file are present before you start customizing the desktop:
dpkg-query -W -f='${Version}\n' plasma-desktop
test -f /usr/share/xsessions/plasma.desktop && echo "Plasma session file is installed"
The first line confirms which Plasma package version Mint installed. On Linux Mint 22.x, the version should start with 4:5.27; on Linux Mint 21.x, it should start with 4:5.24. The session-file message confirms the login manager can offer a Plasma session. If you are already inside a local Plasma session, open Konsole and run plasmashell --version as an extra check.
Switch Between SDDM and LightDM on Linux Mint
If you need to switch back to LightDM for Cinnamon or reselect SDDM for Plasma later, you can reconfigure the default display manager at any time.
Reconfigure the Default Linux Mint Display Manager
Open a terminal and run the reconfigure command:
sudo dpkg-reconfigure sddmA dialog appears listing all installed display managers. Use the arrow keys to select your preferred option and press ENTER. After making your selection, reboot to apply the change:
sudo rebootOnce restarted, your system uses the newly selected display manager.
Update KDE Plasma on Linux Mint
KDE Plasma updates through the same APT and Update Manager flow as the rest of the Linux Mint base packages. This keeps Plasma 5.27 on Mint 22.x and Plasma 5.24 on Mint 21.x updated with repository fixes, but it does not move either series to Plasma 6.
sudo apt update
sudo apt upgrade
After updates finish, confirm the installed branch when you need to check whether a package revision changed:
dpkg-query -W -f='${Version}\n' plasma-desktopTroubleshoot KDE Plasma on Linux Mint
Most post-install problems come from the display manager, missing session files, or a damaged Plasma profile, so start with those checks before reinstalling the whole desktop.
Fix a KDE Plasma Login Screen That Shows Only the Virtual Keyboard
If the SDDM login screen displays only a large on-screen keyboard with no normal password field, the virtual keyboard input method is likely covering the login prompt. This usually appears in virtual machines or unusual display setups.
To fix this, switch to a text console by pressing Ctrl+Alt+F3, log in with your username and password, then run:
sudo mkdir -p /etc/sddm.conf.d
printf '%s\n' '[General]' 'InputMethod=' | sudo tee /etc/sddm.conf.d/virtualkbd.conf > /dev/null
sudo reboot
After rebooting, the login screen should display the normal password field.
Fix a Missing KDE Plasma Session at Linux Mint Login
If “Plasma” does not appear in the session selector at the login screen, the session file may be missing. Check for the exact file first:
test -f /usr/share/xsessions/plasma.desktop && echo "Plasma session file is installed" || echo "Missing Plasma session file"A working install returns:
Plasma session file is installed
If the file is missing, reinstall the workspace packages that provide the Plasma session and desktop shell:
sudo apt install --reinstall plasma-workspace plasma-desktop
test -f /usr/share/xsessions/plasma.desktop && echo "Plasma session file is installed"
Fix KDE Plasma Crashes After Linux Mint Login
If Plasma crashes immediately after login or you see a black screen, a corrupted user-level Plasma or KWin configuration file may be the cause. Switch to a text console with Ctrl+Alt+F3, log in, and move the most common per-user files into a backup directory:
mkdir -p "$HOME/plasma-config-backup"
mv "$HOME/.config/plasma-org.kde.plasma.desktop-appletsrc" "$HOME/plasma-config-backup/" 2>/dev/null || true
mv "$HOME/.config/kwinrc" "$HOME/plasma-config-backup/" 2>/dev/null || true
Then switch back to the graphical login with Ctrl+Alt+F1 or Ctrl+Alt+F7, depending on your session, and try logging in again. If the crashes happen on AMD or Intel graphics, it is also worth checking whether you need to upgrade Mesa drivers on Linux Mint before rebuilding the Plasma profile.
Remove KDE Plasma from Linux Mint
If you decide to remove KDE Plasma and return to your previous Mint desktop, switch the login manager back first, then remove the package profile you installed. Keep the cleanup steps reviewable because KDE profiles install many shared Qt and desktop packages.
Switch Back to LightDM Before Removing KDE Plasma
Before purging KDE components, return the system to Mint’s default display manager, LightDM, so the login screen still works after Plasma is removed. The install command is harmless when LightDM is already present and protects systems where it was removed earlier.
sudo apt install lightdm
sudo dpkg-reconfigure lightdm
After selecting LightDM in the dialog, verify the change took effect:
cat /etc/X11/default-display-managerExpected output:
/usr/sbin/lightdm
Only proceed with removal once this file shows the correct display manager.
Uninstall KDE Plasma Packages on Linux Mint
Remove the KDE meta packages and core Plasma components. Review the package list before confirming, especially if you installed extra KDE applications separately.
sudo apt purge kde-standard kde-plasma-desktop kde-full plasma-desktop plasma-workspace sddmAfter the meta packages are removed, preview and clean up orphaned dependencies. Do not confirm the autoremove transaction if it lists unrelated packages you still need.
sudo apt autoremove --purgeRemove Leftover KDE Applications from Linux Mint
The autoremove step may still leave standalone KDE applications behind. Check for the most common packages before deciding whether you want to purge them too:
dpkg -l konsole dolphin okular gwenview kate ark kwrite kmail korganizer akregator 2>/dev/null | grep '^ii'If the command shows installed KDE applications and you do not want to keep them, remove them individually:
sudo apt purge konsole dolphin okular gwenview kate ark kwrite kmail korganizer akregator
sudo apt autoremove --purge
Remove KDE Plasma Configuration Files on Linux Mint
The following commands permanently delete KDE Plasma configuration files, including customized panel layouts, widget settings, and application preferences. If you might reinstall Plasma later and want to keep your settings, skip this step.
Preview matching user-level KDE configuration paths first:
find "$HOME/.config" "$HOME/.local/share" -maxdepth 1 \( -name 'kde*' -o -name 'plasma*' -o -name 'kwin*' -o -name 'kded5' \) -print 2>/dev/nullRun the deletion only after the preview shows paths you no longer need:
find "$HOME/.config" "$HOME/.local/share" -maxdepth 1 \( -name 'kde*' -o -name 'plasma*' -o -name 'kwin*' -o -name 'kded5' \) -exec rm -rf -- {} + 2>/dev/nullVerify KDE Plasma Removal on Linux Mint
Confirm the main KDE Plasma packages are no longer installed:
dpkg -l plasma-desktop plasma-workspace kde-plasma-desktop kde-standard kde-full sddm 2>/dev/null | grep '^ii'No output means the main desktop and display manager packages from the removal command are no longer installed. Reboot to complete the change:
sudo rebootAfter restarting, your system should return to your previous Mint desktop with LightDM as the login screen.
Official KDE Resources
Use the official KDE pages for upstream Plasma release notes, customization help, and community documentation. Linux Mint still receives its Plasma packages from the Ubuntu base described earlier.
- KDE Plasma Desktop – Official Plasma homepage with feature highlights and the latest release information.
- KDE Community Wiki – Documentation, development resources, and community discussions.
- KDE UserBase Plasma Documentation – User-focused guides for configuring and customizing Plasma.
Conclusion
KDE Plasma is installed on Linux Mint with the package profile and display manager you chose, while your original Mint desktop remains available from the session chooser. If NVIDIA-specific graphics issues appear after the switch, review how to install NVIDIA drivers on Linux Mint before rebuilding your Plasma profile.

I added the KDE skill to Linux Mint 22.3.
Now I get this message when starting Linux Mint with the KDE configuration.
The current theme cannot be loaded due to the errors below, please select another theme.
file:///usr/share/sddm/themes/SilentSDDM-1.4.2/Main.qml: Library import requires a version
file:///usr/share/sddm/themes/SilentSDDM-1.4.2/Main.qml: Library import requires a version
file:///usr/share/sddm/themes/SilentSDDM-1.4.2/Main.qml: Library import requires a version
file:///usr/share/sddm/themes/SilentSDDM-1.4.2/Main.qml: Library import requires a version
What does this mean and what should I do about it?
Thank you for the awesome easy to follow guide.
The thing I did not anticipate (or know about) prior to switching, both Vivaldi & Signal immediately threw up flags because my “OS encryption keyring backend has changed from gnome_libsecret to kwallet5”. They both have good documentation for how to deal with it, but it might be good to give a heads up about this consequence.
If you’re trying to apply the bug fix but getting “no such file or directory”, you can simply create the file.
“sudo touch /etc/sddm.conf”
Then run the sed command.
Obviously, this won’t actually fix the bug if SDDM is looking for it’s config file in another location, but assuming it’s still looking there in /etc, you should be fine.
Thanks for the suggestion! I actually updated the article to use a drop-in config approach instead, since Debian-based SDDM packages don’t include the main
/etc/sddm.conffile by default. The new method creates/etc/sddm.conf.d/virtualkbd.confwhich works reliably without needing to generate the base config file manually.it’s actually really cool the you can just do this on linux. Imagine if this was possible on windows too.
Btw, for those having the “no such file or directory” error (I had it too), you have to create a file “/etc/sddm.conf.d/kde_settings.conf” and write at the end this:
[General]
InputMethod=
Thanks for sharing that! The article already covers creating a drop-in config file in
/etc/sddm.conf.d/(I usedvirtualkbd.confas the filename, but any name works). The key is that SDDM loads all files from that directory automatically. Your approach withkde_settings.confdoes the exact same thing. Appreciate you confirming it works!I expected this to be a very hard thing to do, I´m lucky I found your AWESOME tutorial!
you can fix this error simply with adding “autologin” after installation 🙂
Thanks for the tip! Autologin is a great feature for convenience, but it doesn’t actually fix the virtual keyboard bug that some users see in VMs. The article’s drop-in config approach directly addresses that issue by setting
InputMethod=in SDDM. If you want to enable autologin too, you can add it to the same config file under a new section. Appreciate you sharing!I am also getting this same error.
Hi Bob, see my reply to Scott.
I get a no such file or directory message when trying to apply bug fix. Any ideas?
Hi Scott, thanks for the comment! That “no such file or directory” error when trying to apply the SDDM bug fix (the
sedcommand for/etc/sddm.conf) usually means thesddm.conffile isn’t where the command expects it, or it hasn’t been created yet.A few things to check:
1. Did the KDE installation (e.g.,
sudo apt install kde-standardor whichever version you chose) complete successfully before you ran thesedcommand? SDDM and its configuration file are typically set up during that main KDE installation.2. Could you double-check the path in the command? It should be exactly:
sudo sed -i '/\[General\]/a InputMethod=' /etc/sddm.conf. Sometimes a small typo can creep in and cause this.3. You can quickly check if the configuration file exists by running this command in your terminal:
ls /etc/sddm.conf. If the output says something like “cannot access ‘/etc/sddm.conf’: No such file or directory”, then the file indeed isn’t there, and the issue likely stems from the KDE/SDDM installation step.Let me know if checking these points helps, or if you spot anything else!
Hello, had same issue as Scott. Pretty sure I’ve made no typos and installation went smoothly. Fixed it by creating sddm.conf manually and typing in InputMethod=
Hope it helps someone
Hey Josh, it seems that there is a bug with the repository not providing the sddm.conf file upon installation. I was able to fix this by using the command “sddm --example-config“, and then copying the text that generates to make sddm.conf file. Then I went ahead and applied your fix and then it worked.
I found the info for the conf file here: https://forums.debian.net/viewtopic.php?t=149885
Thanks John for the detailed breakdown and the Debian forums link! You’re spot on about the repository bug, SDDM packages in Debian-based distros don’t include the main
/etc/sddm.conffile by default. I’ve updated the article to use a drop-in config approach instead, which creates/etc/sddm.conf.d/virtualkbd.confand works without needing the base file. Yoursddm --example-configworkaround is a solid alternative for anyone still using the old method. Appreciate you sharing that! 👍