

Running a self-hosted forum is easier when the stack stays predictable, and phpBB still fits that job well with Nginx, MariaDB, and PHP-FPM. That makes it practical to install phpBB with Nginx on Debian 13 (trixie), Debian 12 (bookworm), or Debian 11 (bullseye), as long as the PHP branch matches phpBB 3.3.x support.
phpBB 3.3.x works cleanly on Debian 12 and Debian 11 with Debian’s default PHP packages. On Debian 13, install PHP 8.3 on Debian first because phpBB 3.3.15 still documents PHP 8.3 as its newest supported branch, while Debian 13 defaults to PHP 8.4. If you want to stay on Debian 13’s default PHP 8.4 stack, move to phpBB’s newer 4.x branch instead.
Install phpBB on Debian
Supported releases for this phpBB 3.3.x path are Debian 12 (bookworm) and Debian 11 (bullseye) with Debian’s default PHP packages, plus Debian 13 (trixie) after you install PHP 8.3. If you want to stay on Debian 13’s default PHP 8.4 packages, use phpBB’s newer 4.x branch instead of 3.3.x.
Install the Nginx, MariaDB, and Utility Packages on Debian
Start by refreshing the package lists and applying pending upgrades so the web stack installs against current Debian packages.
sudo apt update && sudo apt upgrade -yThese commands use
sudofor system changes. If your account does not have sudo access yet, follow this guide on how to add a user to sudoers on Debian.
Install the shared stack pieces first. Nginx, MariaDB, curl, wget, and unzip are common to every supported Debian release. The PHP packages come in the next section because Debian 13 needs PHP 8.3 instead of its default PHP 8.4 for phpBB 3.3.x.
sudo apt install nginx mariadb-server curl wget unzip -yIf you want standalone stack guides, see Install Nginx on Debian, Install MariaDB on Debian, and Install PHP on Debian.
Verify Nginx and MariaDB on Debian
Confirm that both services started correctly before you move on to phpBB itself.
systemctl status nginx --no-pager --lines=6● nginx.service - A high performance web server and a reverse proxy server
Loaded: loaded (/lib/systemd/system/nginx.service; enabled; preset: enabled)
Active: active (running) since Fri 2026-03-13 13:43:33 AWST
Docs: man:nginx(8)
Main PID: 674 (nginx)
Tasks: 7
systemctl status mariadb --no-pager --lines=6● mariadb.service - MariaDB 10.11.14 database server
Loaded: loaded (/lib/systemd/system/mariadb.service; enabled; preset: enabled)
Active: active (running) since Fri 2026-03-13 14:22:14 AWST
Docs: man:mariadbd(8)
https://mariadb.com/kb/en/library/systemd/
Main PID: 11901 (mariadbd)
If either service is inactive, start it now with sudo systemctl enable --now nginx mariadb and rerun the same status checks.
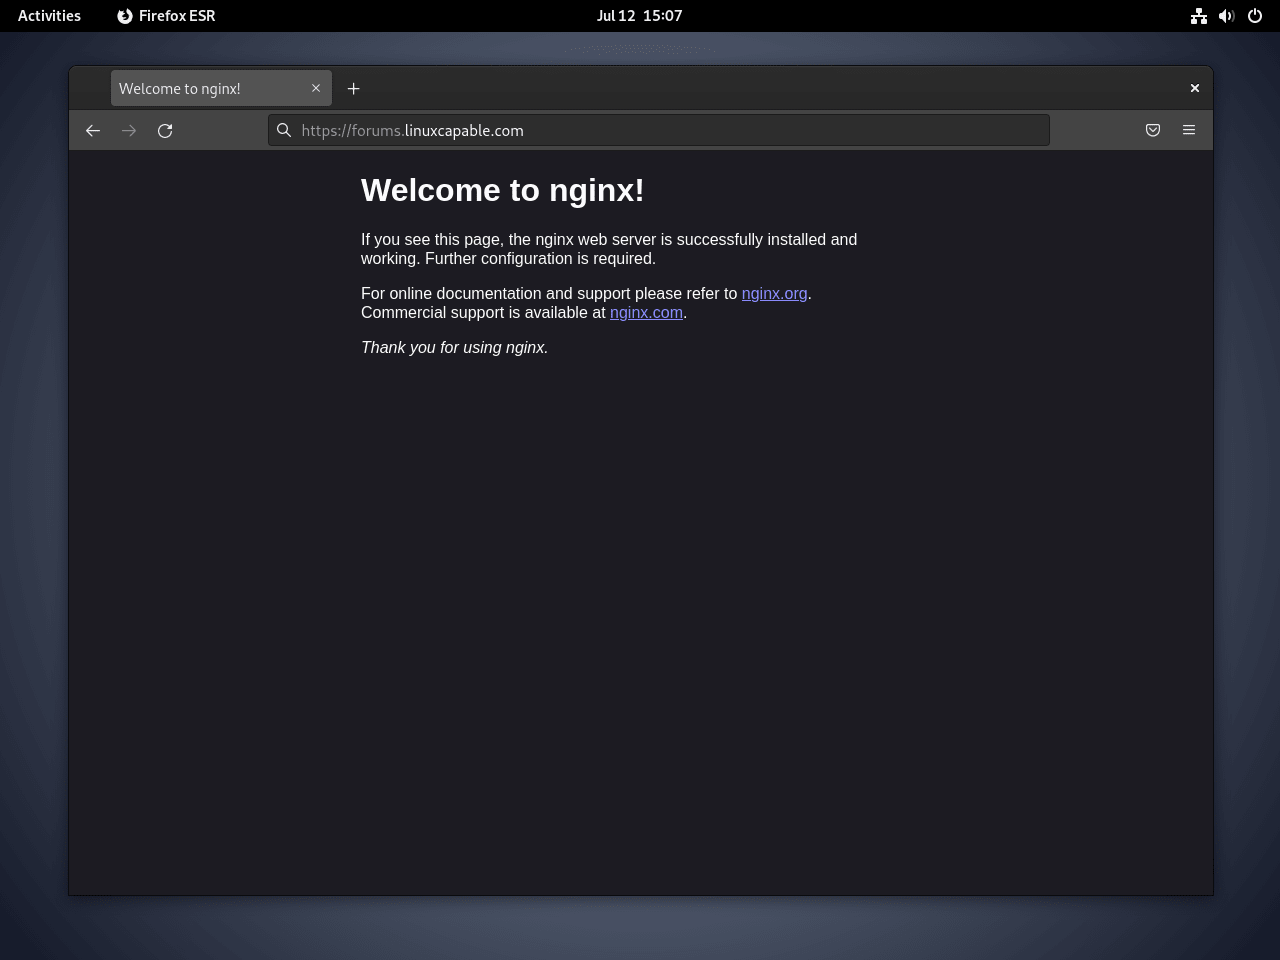
Once Nginx is up, opening http://your-server-ip in a browser should show the default welcome page.
Install the Correct PHP Branch for phpBB 3.3.x on Debian
phpBB 3.3.15 still caps official PHP support at 8.3, so Debian 13 needs a different PHP path than Debian 12 or Debian 11. Set the PHP branch first, then keep using the same PHP_VERSION variable through the remaining commands.
Debian 13: Install PHP 8.3 Before Continuing
Debian 13 defaults to PHP 8.4, which falls outside phpBB 3.3.x’s documented PHP range. Complete this guide to Install PHP 8.3 on Debian, then return here and set the version variable to 8.3.
export PHP_VERSION=8.3Debian 12 and Debian 11: Use the Default PHP Packages
Debian 12 and Debian 11 stay inside phpBB 3.3.x’s documented PHP range with the default APT packages, so install the PHP stack directly and export the matching version number for later commands.
sudo apt install php-fpm php-cli php-mysql php-mbstring php-xml -y

# Debian 12
export PHP_VERSION=8.2

# Debian 11
export PHP_VERSION=7.4
Run only the
export PHP_VERSION=...line that matches your release. On Debian 13, do not keep the defaultphpCLI set to 8.4 and expect phpBB 3.3.x to use PHP 8.3 automatically.
Verify the Selected PHP-FPM Service and phpBB Modules
Debian uses versioned PHP-FPM service units such as php8.3-fpm, php8.2-fpm, and php7.4-fpm. Verify the branch you selected before moving on.
php$PHP_VERSION --version | head -n 1
systemctl status php$PHP_VERSION-fpm --no-pager --lines=6
PHP 8.3.30 (cli) (built: Feb 13 2026 15:52:05) (NTS)
● php8.3-fpm.service - The PHP 8.3 FastCGI Process Manager
Loaded: loaded (/usr/lib/systemd/system/php8.3-fpm.service; enabled; preset: enabled)
Active: active (running)
Nginx can keep using the stable generic socket path even though the service unit stays versioned. Confirm that the symlink points at the PHP branch you selected.
readlink -f /run/php/php-fpm.sock/run/php/php8.3-fpm.sock
Check the PHP modules phpBB expects before you configure the board.
php$PHP_VERSION -m | grep -E 'json|mbstring|xml|mysqli'json libxml mbstring mysqli xml xmlreader xmlwriter
Download phpBB on Debian
Resolve the current stable phpBB 3.3.x release first, then download that exact archive in the same terminal session. If you want more download flag examples, see wget command examples and curl command usage in Linux.
PHPBB_TAG="$(curl -fsSL https://api.github.com/repos/phpbb/phpbb/tags?per_page=20 | grep -oE '"name": "release-3\.3\.[0-9]+"' | head -n 1 | cut -d '"' -f4)"
PHPBB_VERSION="${PHPBB_TAG#release-}"
printf '%s\n' "$PHPBB_VERSION"
3.3.15
Download the archive, extract it, and move phpBB into the web root.
cd /tmp
wget https://download.phpbb.com/pub/release/3.3/$PHPBB_VERSION/phpBB-$PHPBB_VERSION.zip
unzip phpBB-$PHPBB_VERSION.zip
sudo mv phpBB3 /var/www/html/phpbb
Set ownership first, then apply safer default file permissions before you expose the installer.
sudo chown -R www-data:www-data /var/www/html/phpbb
sudo find /var/www/html/phpbb -type d -exec chmod 755 {} \;
sudo find /var/www/html/phpbb -type f -exec chmod 644 {} \;
sudo chmod 777 /var/www/html/phpbb/cache /var/www/html/phpbb/files /var/www/html/phpbb/store /var/www/html/phpbb/images/avatars/upload
Those writable-directory permissions match phpBB’s own install docs for
cache,files,store, andimages/avatars/upload. If you later tighten them, confirm the ACP and attachment uploads still work before leaving the server unattended.
Confirm the extracted files and CLI entrypoint are in place.
ls -ld /var/www/html/phpbb
ls -l /var/www/html/phpbb/bin/phpbbcli.php
drwxr-xr-x 20 www-data www-data 4096 /var/www/html/phpbb -rw-r--r-- 1 www-data www-data ... /var/www/html/phpbb/bin/phpbbcli.php
Create the phpBB Database and User
Debian’s MariaDB packages default to local socket authentication for the administrative account, so open the database shell with sudo mariadb instead of forcing a root password workflow first.
sudo mariadbCreate the phpBB database and a dedicated local user from the MariaDB prompt.
CREATE DATABASE phpbb CHARACTER SET utf8mb4 COLLATE utf8mb4_unicode_ci;
CREATE USER 'phpbbuser'@'localhost' IDENTIFIED BY 'replace_with_a_strong_password';
GRANT ALL PRIVILEGES ON phpbb.* TO 'phpbbuser'@'localhost';
FLUSH PRIVILEGES;
EXIT;
Replace
replace_with_a_strong_passwordwith a unique password you can store safely. You will need the database name, username, and password during the web installer.
Verify that the database exists and the user entry was created.
sudo mariadb -e "SHOW DATABASES LIKE 'phpbb'; SELECT user, host FROM mysql.user WHERE user = 'phpbbuser';"Database (phpbb) phpbb User Host phpbbuser localhost
Adjust PHP Settings for phpBB
phpBB runs with Debian’s defaults, but a few PHP-FPM limits are worth raising before you import extensions, upload attachments, or work with larger boards.
sudo nano /etc/php/$PHP_VERSION/fpm/php.iniUpdate these values in the file:
max_execution_time = 180
max_input_time = 180
memory_limit = 256M
upload_max_filesize = 64M
post_max_size = 64M
Restart the matching PHP-FPM service after saving the file.
sudo systemctl restart php$PHP_VERSION-fpmConfigure Nginx for phpBB on Debian
The server block below stays close to phpBB’s shipped Nginx sample, but it uses Debian’s generic /run/php/php-fpm.sock socket so you do not need to rewrite the config for every PHP package update.
sudo nano /etc/nginx/sites-available/phpbb.confPaste in the server block and replace the sample domain with your own forum hostname.
server {
    listen 80;
    listen [::]:80;
    server_name forums.example.com;

    root /var/www/html/phpbb;
    index index.php index.html index.htm;

    access_log /var/log/nginx/phpbb.access.log;
    error_log /var/log/nginx/phpbb.error.log;

    location / {
        try_files $uri $uri/ @rewriteapp;
    }

    location @rewriteapp {
        rewrite ^(.*)$ /app.php/$1 last;
    }

    location /install/ {
        try_files $uri $uri/ @rewrite_installapp =404;
    }

    location @rewrite_installapp {
        rewrite ^(.*)$ /install/app.php/$1 last;
    }

    location ~ \.php(/|$) {
        include fastcgi.conf;
        fastcgi_split_path_info ^(.+\.php)(/.*)$;
        fastcgi_param PATH_INFO $fastcgi_path_info;
        fastcgi_param SCRIPT_FILENAME $realpath_root$fastcgi_script_name;
        fastcgi_param DOCUMENT_ROOT $realpath_root;
        fastcgi_pass unix:/run/php/php-fpm.sock;
    }

    location ~ /(config|common\.php|cache|files|images/avatars/upload|includes|(?<!ext/)phpbb(?!\w+)|store|vendor) {
        deny all;
        internal;
    }

    location ~ /\.svn|/\.git {
        deny all;
        internal;
    }
}
Enable the site, test the syntax, and reload Nginx only after the configuration passes.
sudo ln -s /etc/nginx/sites-available/phpbb.conf /etc/nginx/sites-enabled/
sudo nginx -t
sudo systemctl reload nginx
nginx: the configuration file /etc/nginx/nginx.conf syntax is ok nginx: configuration file /etc/nginx/nginx.conf test is successful
Add HTTPS with Let’s Encrypt on Debian (Optional)
If your DNS already points at the server and port 80 is reachable, Certbot can add the HTTPS server block and redirect for you.
sudo apt install python3-certbot-nginx -y
sudo certbot --nginx --agree-tos --redirect --hsts --staple-ocsp --email you@example.com -d forums.example.com
Use your real email address and forum hostname in that command. For renewal checks and extra hardening, see Secure Nginx with Let’s Encrypt on Debian.
Allow Web Traffic with UFW on Debian (Optional)
Only open firewall ports if UFW is already part of your server setup. If you still need to install it, follow Install UFW on Debian first.
If you are connected over SSH, allow SSH traffic before enabling or tightening UFW rules so you do not lock yourself out of the server.
sudo ufw allow ssh
sudo ufw allow 80/tcp
sudo ufw allow 443/tcp
sudo ufw status
Status: active To Action From -- ------ ---- 22/tcp ALLOW Anywhere 80/tcp ALLOW Anywhere 443/tcp ALLOW Anywhere 22/tcp (v6) ALLOW Anywhere (v6) 80/tcp (v6) ALLOW Anywhere (v6) 443/tcp (v6) ALLOW Anywhere (v6)
Complete the phpBB Web Installer on Debian
Once the backend stack is ready, open http://forums.example.com/install/app.php or https://forums.example.com/install/app.php if you already enabled HTTPS. The installer also responds from /install/, but the explicit app.php path makes it clear which entrypoint Nginx is serving.
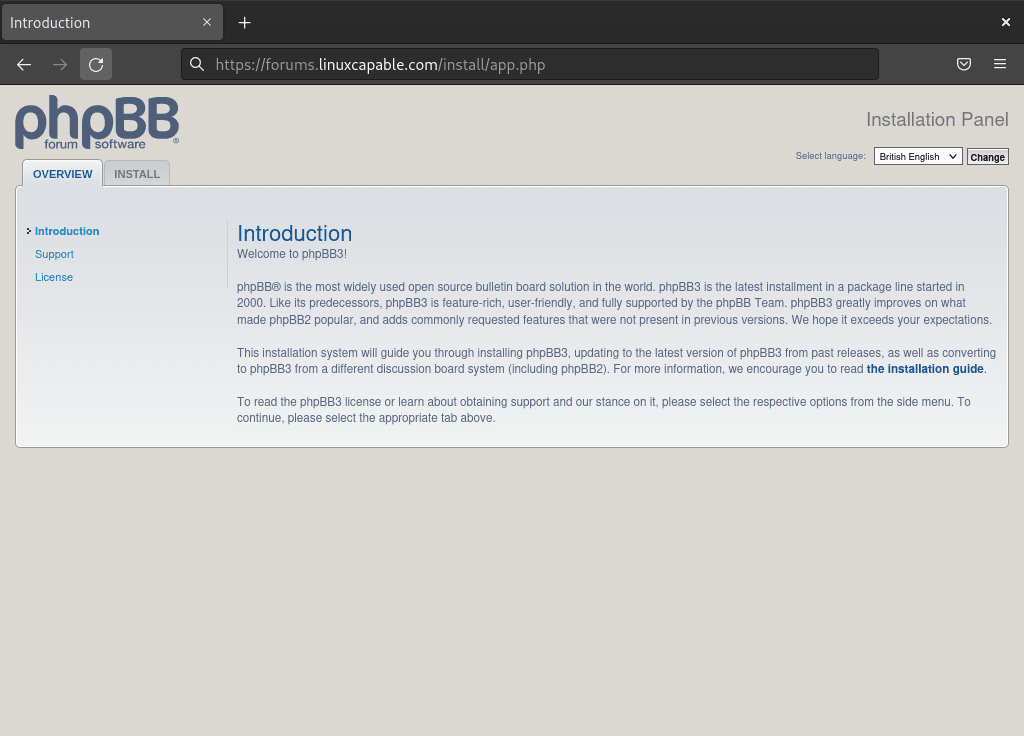
Start the phpBB Installer
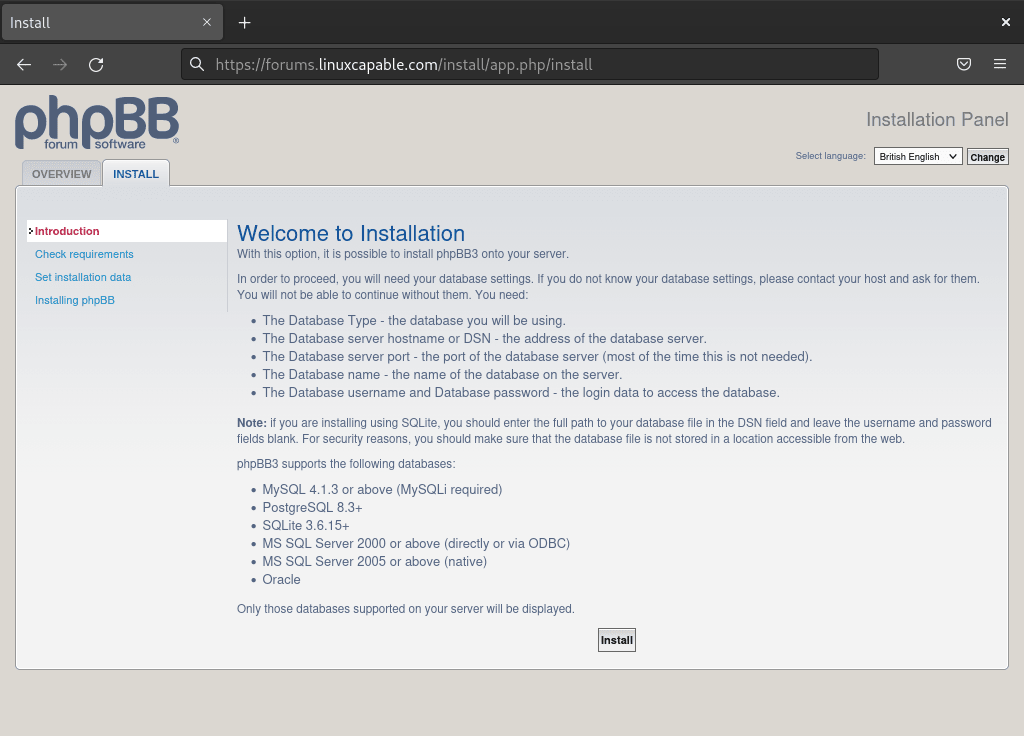
The first screen confirms that the installer is reachable. Click Install to move into the requirements check.
The requirements page should show the PHP modules and directory checks you prepared earlier. If everything passes, continue with the installer.
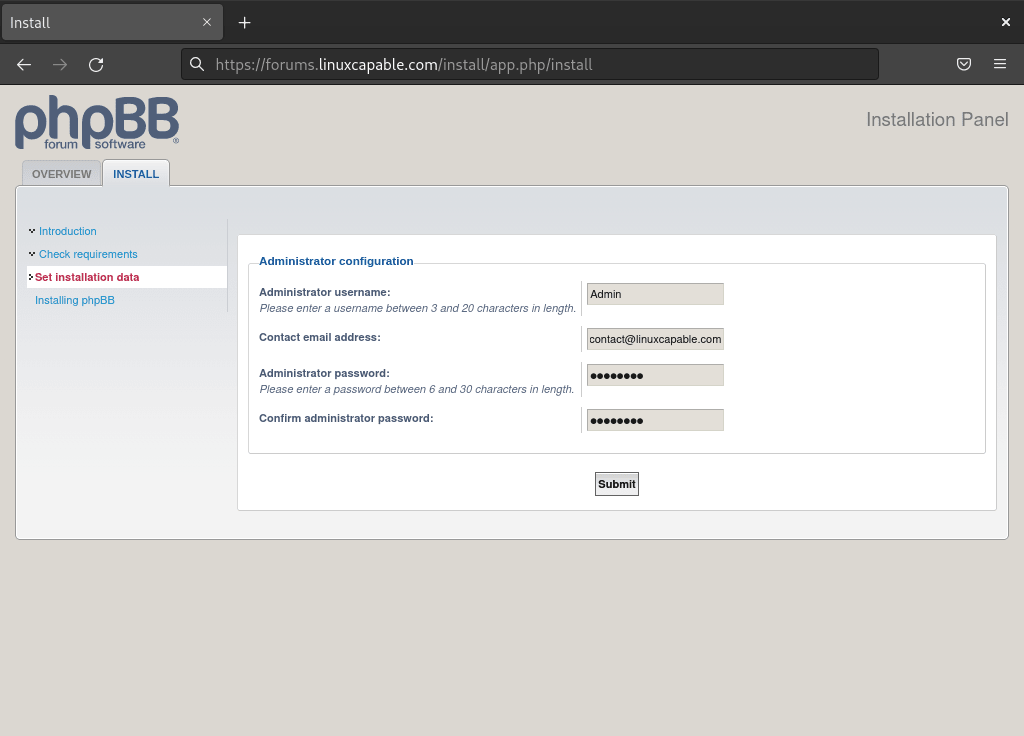
Create the phpBB Administrator Account
Set a strong administrator username, password, and email address here. This account controls the ACP, so treat it like any other privileged production credential.
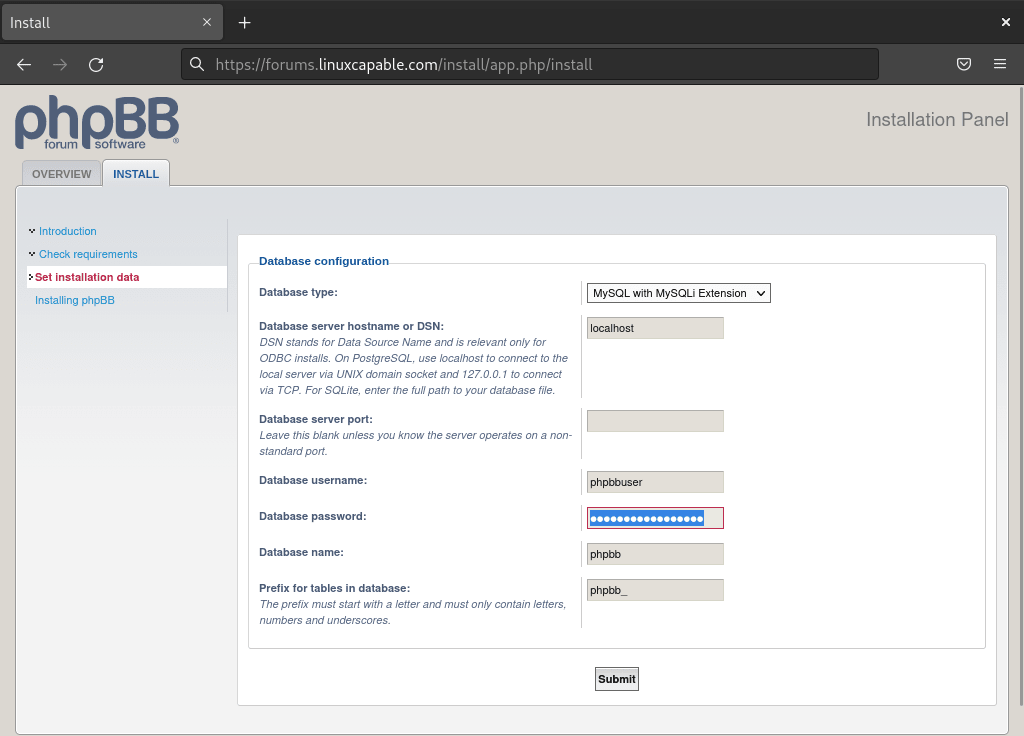
Enter the phpBB Database Details
Choose MySQL with MySQLi Extension, keep localhost for a local MariaDB server, and enter the database credentials you created earlier. The default table prefix phpbb_ is fine unless you plan to host multiple boards in the same database.
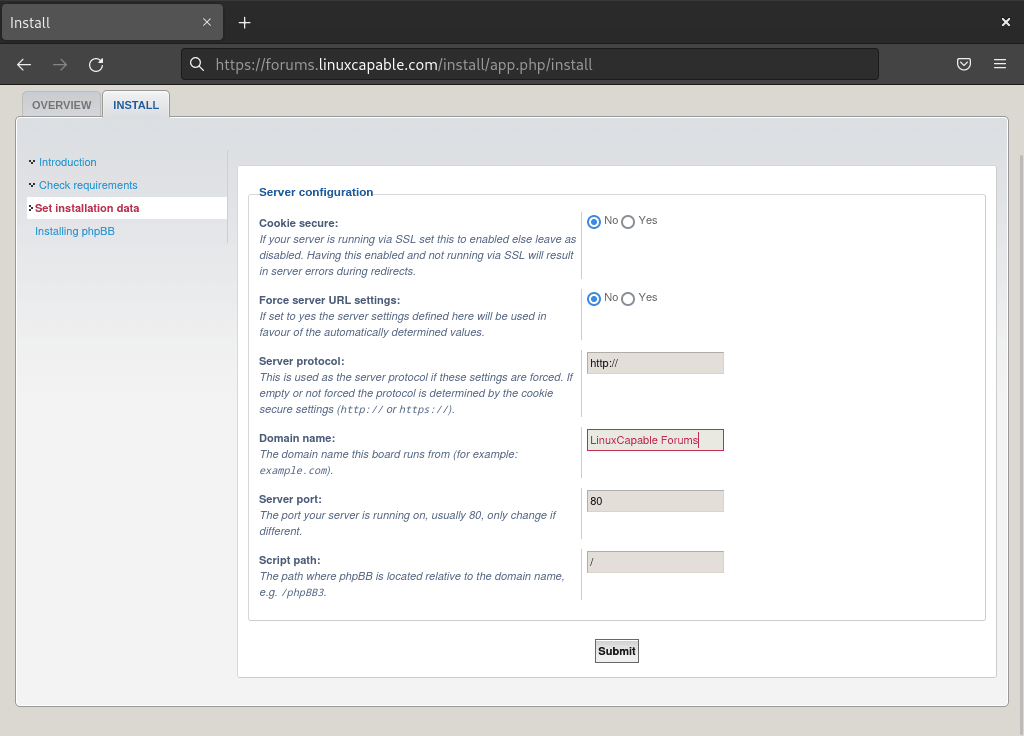
Finish the Server and Board Setup
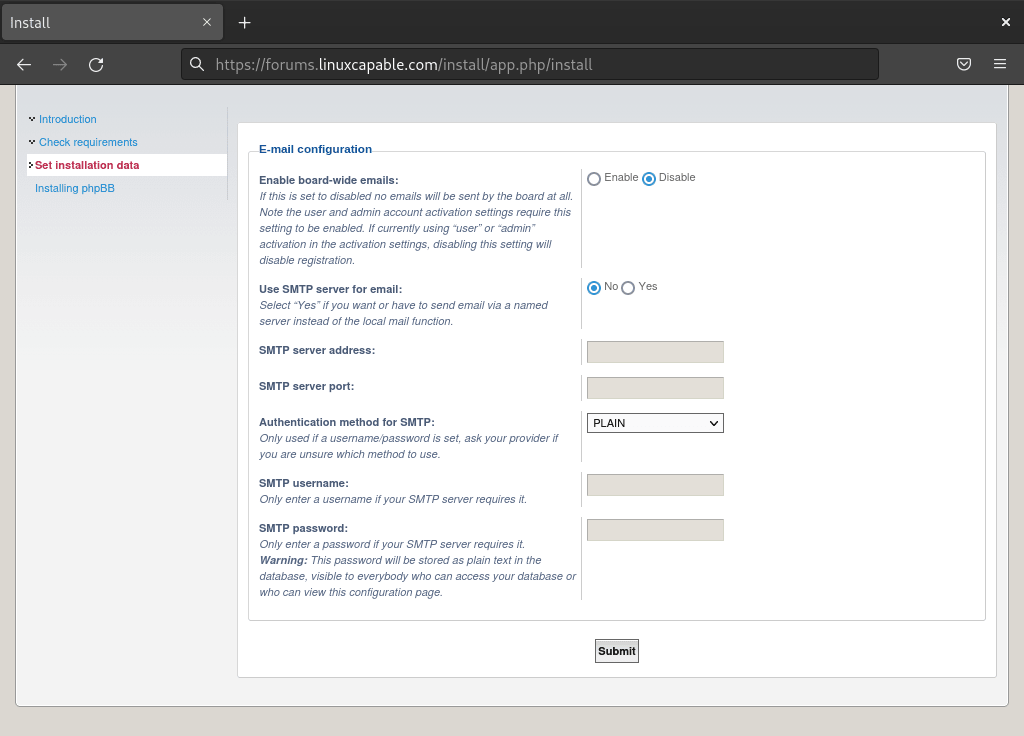
Review the server URL settings, skip SMTP for now unless you already have mail relay details, and finish by naming the board and choosing the default language.
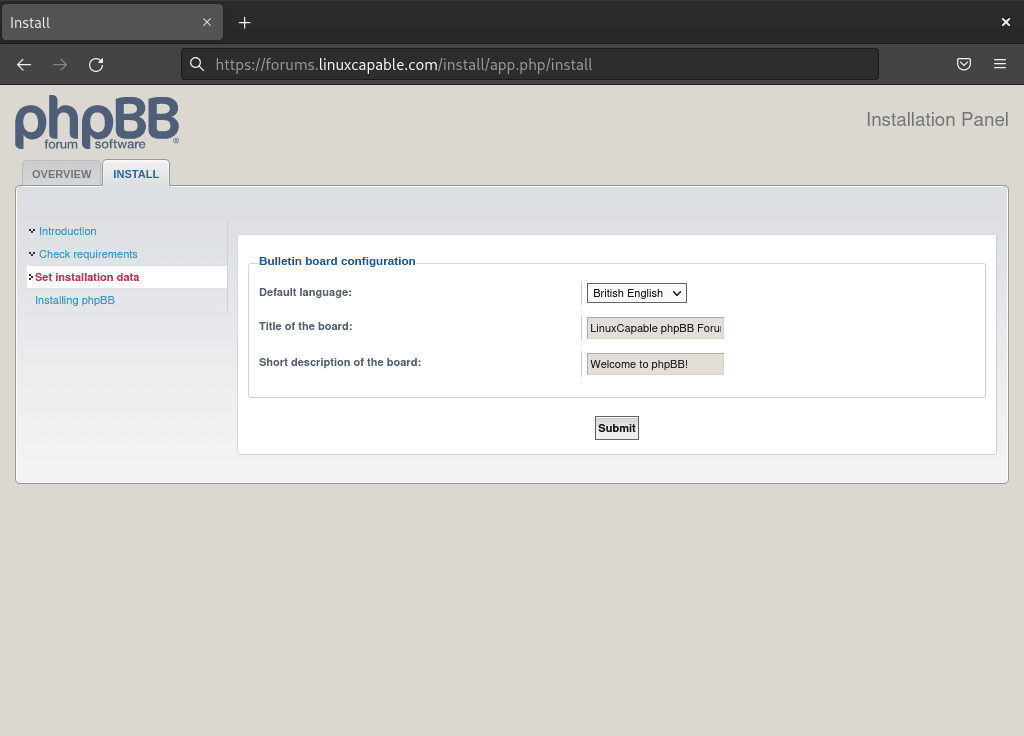
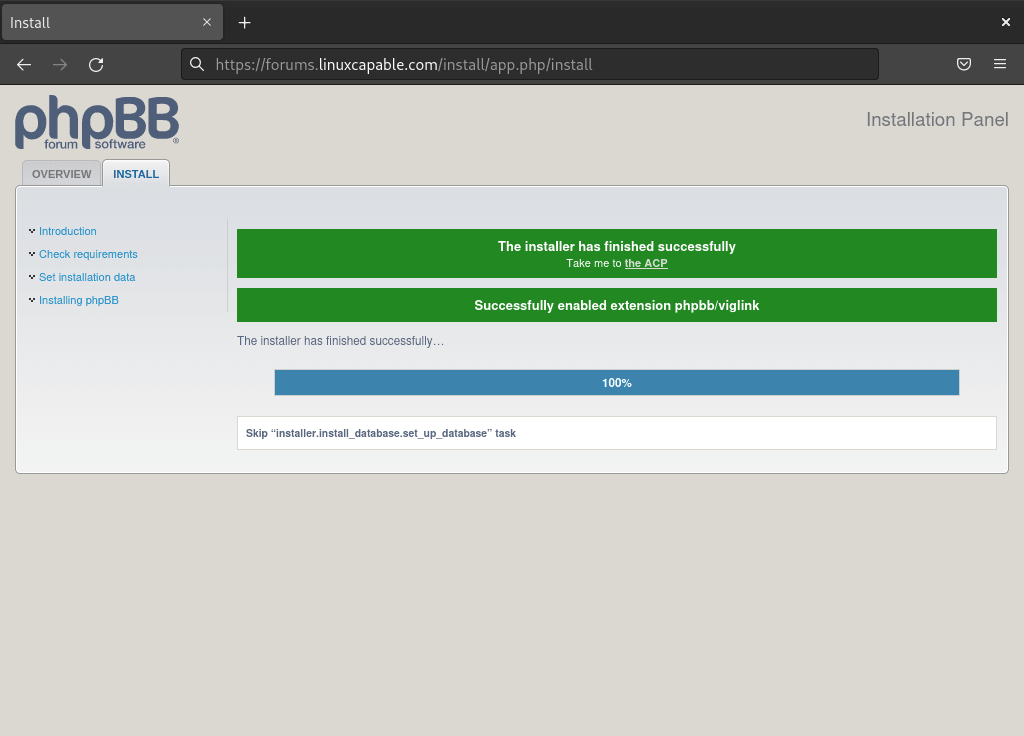
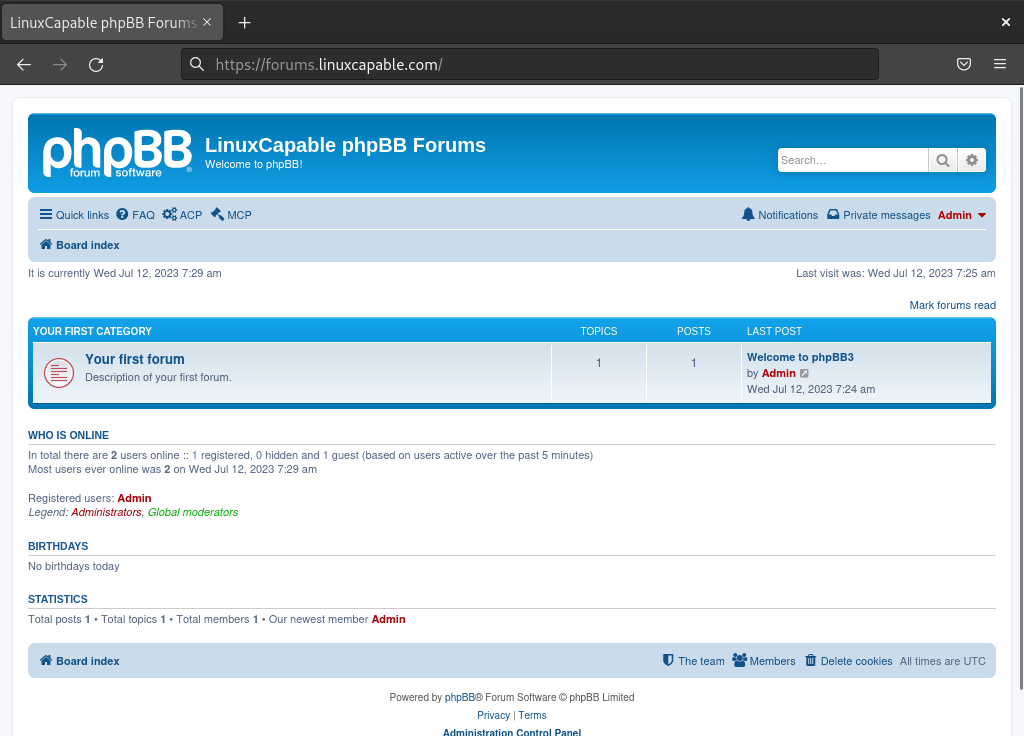
A successful run ends with the installer confirmation and a link into the ACP.
Secure and Maintain phpBB on Debian
Remove the Installer Directory
phpBB keeps the board locked down until you remove the installer directory, so do this as soon as the web setup is finished.
Your board remains inaccessible while
/install/is still present. phpBB treats that directory as a serious post-installation risk because it could let someone reopen the setup process.
sudo rm -rf /var/www/html/phpbb/install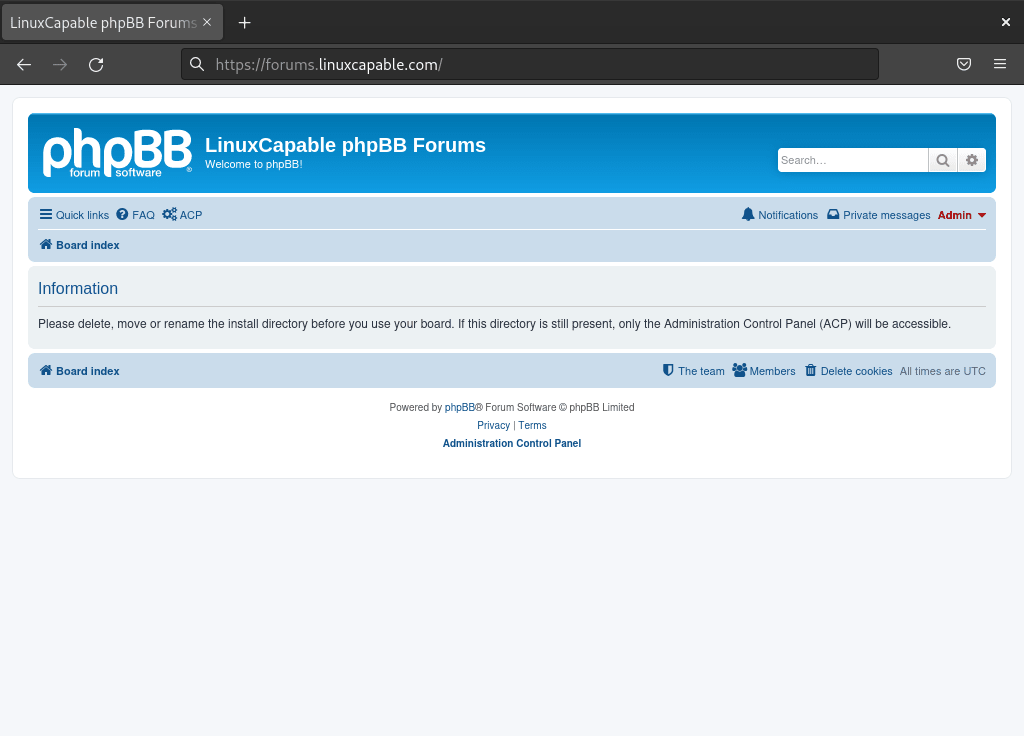
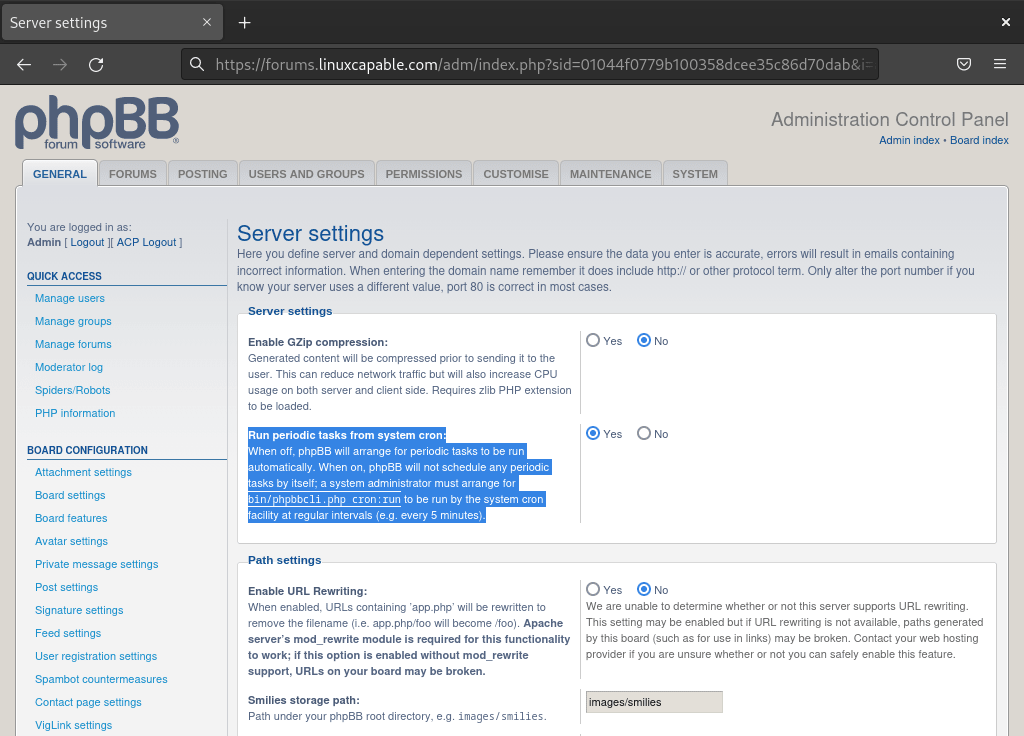
Run phpBB Cron Jobs from the System Scheduler
phpBB can trigger maintenance tasks from visitor traffic, but a small system cron file is more predictable on a low-traffic board. Running the CLI command as www-data keeps cache and attachment ownership aligned with the web server.
printf '%s\n' '*/5 * * * * www-data /usr/bin/php /var/www/html/phpbb/bin/phpbbcli.php cron:run >/dev/null 2>&1' | sudo tee /etc/cron.d/phpbb > /dev/null
sudo chmod 644 /etc/cron.d/phpbb
Verify the cron file contents before you enable phpBB’s system cron option in the ACP.
sudo cat /etc/cron.d/phpbb*/5 * * * * www-data /usr/bin/php /var/www/html/phpbb/bin/phpbbcli.php cron:run >/dev/null 2>&1
After that, switch phpBB to system cron inside the ACP so the board stops relying on web requests to process queued work.
At this point the board should be live, the installer should be gone, and background maintenance should no longer depend on page views.
Troubleshoot phpBB on Debian
Most setup failures on Debian come down to versioned PHP-FPM units, mismatched socket paths, MariaDB credentials, or writable-directory problems. These checks cover the common failure points.
PHP-FPM Unit or Socket Errors on Debian
If you copied a generic PHP-FPM service name from another guide, Debian will usually respond with a missing-unit error even though PHP-FPM is installed.
Unit php-fpm.service could not be found.
Confirm the installed PHP branch, then query the matching service and the generic socket symlink.
PHP_VERSION="$(php -r 'echo PHP_MAJOR_VERSION . "." . PHP_MINOR_VERSION;')"
systemctl status php$PHP_VERSION-fpm --no-pager --lines=6
readlink -f /run/php/php-fpm.sock
● php8.2-fpm.service - The PHP 8.2 FastCGI Process Manager
Loaded: loaded (/lib/systemd/system/php8.2-fpm.service; enabled; preset: enabled)
Active: active (running) since Fri 2026-03-13 14:22:19 AWST
/run/php/php8.2-fpm.sock
If your Nginx file still points at a hardcoded socket that does not exist, replace it with unix:/run/php/php-fpm.sock, then run sudo nginx -t and sudo systemctl reload nginx.
MariaDB Login or Privilege Errors for phpBB
If the installer rejects the database credentials, check that the database exists and that phpbbuser is limited to localhost with privileges on the phpbb database.
sudo mariadb -e "SHOW DATABASES LIKE 'phpbb'; SELECT user, host FROM mysql.user WHERE user = 'phpbbuser';"Database (phpbb) phpbb User Host phpbbuser localhost
If either entry is missing, recreate the database and user with the SQL block from the install section, then retry the web installer.
File Write Errors for Cache, Store, or Avatars
Attachment uploads, cache writes, and avatar storage fail when the writable directories drift away from the permissions phpBB expects.
ls -ld /var/www/html/phpbb/cache /var/www/html/phpbb/files /var/www/html/phpbb/store /var/www/html/phpbb/images/avatars/uploaddrwxrwxrwx root root ... /var/www/html/phpbb/cache drwxrwxrwx root root ... /var/www/html/phpbb/files drwxrwxrwx root root ... /var/www/html/phpbb/store drwxrwxrwx root root ... /var/www/html/phpbb/images/avatars/upload
If those paths are not writable, reapply ownership and the documented writable-directory permissions.
sudo chown -R www-data:www-data /var/www/html/phpbb
sudo chmod 777 /var/www/html/phpbb/cache /var/www/html/phpbb/files /var/www/html/phpbb/store /var/www/html/phpbb/images/avatars/upload
Check Let’s Encrypt Renewal on Debian
If HTTPS works today but renewal later fails, verify the system timer and run a dry-run renewal before the certificate gets close to expiry.
systemctl status certbot.timer --no-pager --lines=4
sudo certbot renew --dry-run
● certbot.timer - Run certbot twice daily
Loaded: loaded (/lib/systemd/system/certbot.timer; enabled)
Active: active (waiting)
Congratulations, all simulated renewals succeeded.
Remove phpBB from Debian
If you no longer need the board, remove phpBB first, then decide whether the underlying Nginx, MariaDB, and PHP packages should stay for other sites or applications.
Remove the phpBB Files and Database
The next commands permanently delete the board files, uploaded attachments, cached data, and database contents. Export anything you want to keep before you continue.
sudo rm -rf /var/www/html/phpbb
sudo mariadb -e "DROP DATABASE IF EXISTS phpbb; DROP USER IF EXISTS 'phpbbuser'@'localhost'; FLUSH PRIVILEGES;"
Confirm that the database is gone.
sudo mariadb -e "SHOW DATABASES LIKE 'phpbb';"Database (phpbb)
Remove the Nginx Configuration and Optional Certificate
Delete the site definition, reload Nginx, and remove the certificate only if it was dedicated to this board.
sudo rm -f /etc/nginx/sites-enabled/phpbb.conf
sudo rm -f /etc/nginx/sites-available/phpbb.conf
sudo nginx -t
sudo systemctl reload nginx
sudo certbot delete --cert-name forums.example.comReplace forums.example.com with the real certificate name if you created one for the board.
Remove the phpBB Cron File
Delete the cron drop-in if you created one for phpBB.
sudo rm -f /etc/cron.d/phpbbRemove the LEMP Packages from Debian (Optional)
Skip this step if any other site, API, or local tool still depends on Nginx, MariaDB, or PHP-FPM. Removing the stack affects every workload sharing those services, and Debian 13 readers using PHP 8.3 from Sury need the versioned PHP removal path below instead of only the default metapackages.
sudo apt remove --purge nginx nginx-common mariadb-server mariadb-client php-fpm php-cli php-mysql php-mbstring php-xml -y
sudo apt autoremove -y
If you installed PHP 8.3 on Debian 13 from the Sury repository, also remove the versioned PHP 8.3 packages and then follow Install PHP 8.3 on Debian for the repository cleanup.
sudo apt remove --purge php8.3* -y
sudo apt autoremove -y
Check that those packages are no longer installed before you delete MariaDB’s data directory.
dpkg -l nginx nginx-common mariadb-server mariadb-client php-fpm php-cli php-mysql php-mbstring php-xml | grep '^ii'# No output means the packages are no longer installed.
The MariaDB data directory contains every database on the host. Only remove it if you are sure nothing else on the server needs that data.
sudo rm -rf /var/lib/mysqlphpBB on Debian FAQ
Yes, but not with Debian 13’s default PHP 8.4 packages. Install PHP 8.3 on Debian first if you want to stay on phpBB 3.3.x. If you want to keep Debian 13 on PHP 8.4, move to phpBB’s newer 4.x branch instead.
phpBB requires JSON, mbstring, and XML support, plus the database driver for the backend you choose. In this Debian setup that means either Debian’s default PHP packages on Debian 12 and Debian 11, or the PHP 8.3 package set on Debian 13.
Debian packages PHP-FPM as versioned services such as php8.3-fpm, php8.2-fpm, or php7.4-fpm, so the generic php-fpm.service unit is not available. Use the PHP_VERSION value that matches your release, but keep Nginx on the generic socket path /run/php/php-fpm.sock.
Yes. The version lookup command queries phpBB’s GitHub tags and extracts the newest stable release-3.3.x tag before downloading the matching zip archive from phpBB’s official download server.
Conclusion
phpBB is now ready on Debian with Nginx, MariaDB, and PHP-FPM aligned to phpBB 3.3.x’s supported PHP range. If you want to harden the web stack further, review Secure Nginx with Let’s Encrypt on Debian and Install UFW on Debian so the board stays easier to maintain once real traffic starts hitting it.

Formatting tips for your comment
You can use basic HTML to format your comment. Useful tags currently allowed in published comments:
<code>command</code>command<strong>bold</strong><em>italic</em><blockquote>quote</blockquote>