
A small CentOS Stream server can start serving a real site as soon as Apache HTTP Server is installed, allowed through firewalld, and pointed at a document root. To install Apache on CentOS Stream, use the Red Hat-family package and service name, httpd, not the Debian or Ubuntu package name apache2.
The same workflow applies to CentOS Stream 10 and 9, with version-specific package notes called out where they matter.
Update CentOS Stream Packages
Refresh package metadata and apply pending system updates before installing a network service. Review the transaction summary before confirming the upgrade:
sudo dnf upgrade --refreshInstall Apache HTTPD
CentOS Stream packages Apache as httpd. Older tutorials may use yum install httpd, but current CentOS Stream systems should use DNF directly. Commands such as dnf install apache2 or systemctl start apache2 are for Debian-family systems and do not match CentOS Stream package names.
sudo dnf install httpdCheck the installed Apache version:
httpd -vExample output from CentOS Stream 10:
Server version: Apache/2.4.63 (CentOS Stream)
Server built:   Feb 12 2026 00:00:00
CentOS Stream 10 and 9 can report different Apache 2.4.x builds as packages move forward. Treat the exact build date as informational; the configuration layout and service name remain the same.
Start and Enable Apache HTTPD
Start Apache immediately and enable it for future boots with one systemd command:
sudo systemctl enable --now httpdConfirm that the service is running and enabled:
systemctl is-active httpd
systemctl is-enabled httpd
active enabled
For a fuller text status check without the noisy timestamped lines from systemctl status, query the stable service properties:
systemctl show httpd --property=ActiveState --property=SubState --property=UnitFileState --no-pagerActiveState=active SubState=running UnitFileState=enabled
Allow HTTP and HTTPS Through firewalld
CentOS Stream uses firewalld for local firewall management. If firewall-cmd is missing on a minimal install, install and enable firewalld first, or follow the separate guide to install firewalld on CentOS Stream.
sudo dnf install firewalld
sudo systemctl enable --now firewalld
Allow standard web traffic and reload the active firewall configuration:
sudo firewall-cmd --permanent --add-service=http
sudo firewall-cmd --permanent --add-service=https
sudo firewall-cmd --reload
Use direct service queries for a clean yes or no check:
sudo firewall-cmd --query-service=http
sudo firewall-cmd --query-service=https
yes yes
firewalld controls the local host firewall. Cloud security groups, provider firewalls, routers, and load balancers can still block ports 80 and 443 even when the local firewalld rules are correct.
Check the Default Apache Response
Check the local listener from the server with curl:
curl -sI http://localhost | head -n 1HTTP/1.1 403 Forbidden
A clean package install can return the CentOS Stream welcome page with a 403 status until you add site content. That still proves Apache is listening; the virtual host test later verifies a normal page response.

Create an Apache Virtual Host
A virtual host lets Apache serve a domain from its own document root, logs, and configuration file. Replace example.com with your real domain in every command and configuration block.
Create the Document Root
Create a document root for the site:
sudo mkdir -p /var/www/example.comAdd a simple test page:
sudo tee /var/www/example.com/index.html > /dev/null <<'EOF'
<!doctype html>
<html>
  <head>
    <title>Example Domain</title>
  </head>
  <body>
    <h1>CentOS Stream Apache test page</h1>
  </body>
</html>
EOF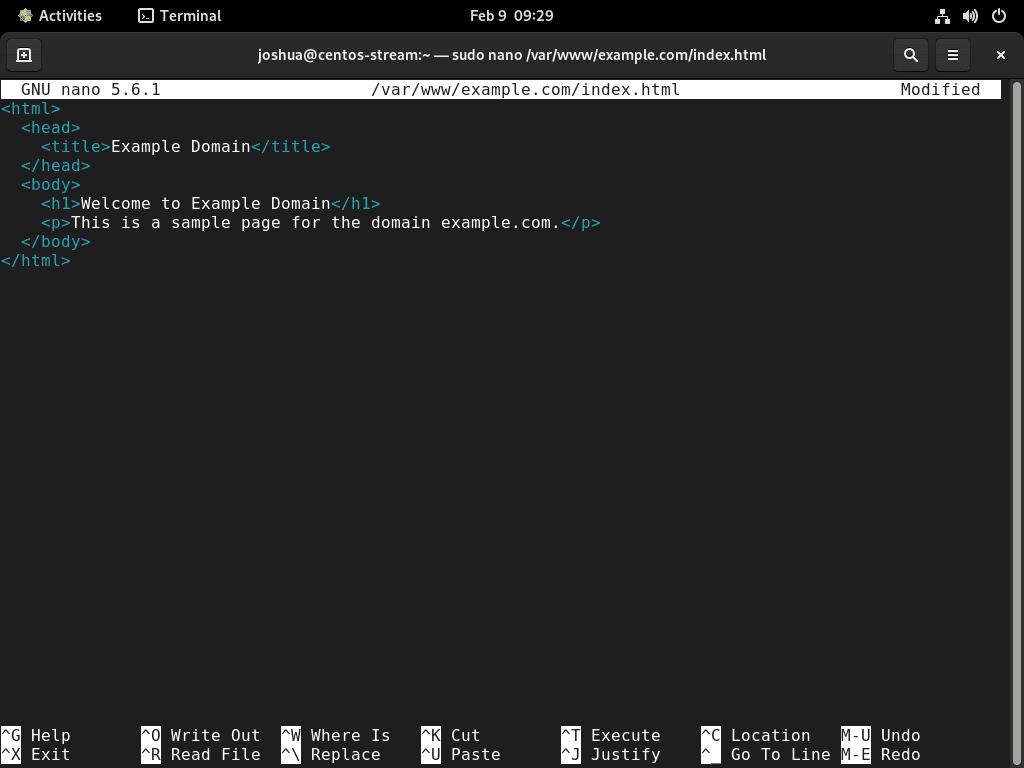
Keep the site files readable by Apache without making the whole tree writable by the service account:
sudo find /var/www/example.com -type d -exec chmod 755 "{}" \;
sudo find /var/www/example.com -type f -exec chmod 644 "{}" \;
For a deeper look at the permission and search commands used here, see the chmod command guide and the find -exec command guide.
Restore the default SELinux labels for content under /var/www:
sudo restorecon -Rv /var/www/example.comKeep static site files owned by
root:rootunless your application needs Apache to write into a specific upload, cache, or runtime directory. In that case, grant write access only to the directory that needs it.
Add the Virtual Host File
Create a dedicated configuration file under /etc/httpd/conf.d/:
sudo tee /etc/httpd/conf.d/example.com.conf > /dev/null <<'EOF'
<VirtualHost *:80>
    ServerName example.com
    ServerAlias www.example.com
    DocumentRoot /var/www/example.com

    ErrorLog /var/log/httpd/example.com-error.log
    CustomLog /var/log/httpd/example.com-access.log combined

    <Directory /var/www/example.com>
        Options -Indexes +FollowSymLinks
        AllowOverride None
        Require all granted
    </Directory>
</VirtualHost>
EOF
AllowOverride None keeps per-directory .htaccess overrides disabled for this static example. Change it only when an application specifically requires .htaccess support.
Test the Apache configuration before reloading the service:
sudo apachectl configtestSyntax OK
If
apachectl configtestprints anAH00558message about the server’s fully qualified domain name, check the finalSyntax OKline. The warning can be cleaned up later with a globalServerName, but it does not block this virtual host from loading.
Restart Apache so it reads the new virtual host file:
sudo systemctl restart httpdTest the virtual host from the server with a Host header:
curl -s -H "Host: example.com" http://127.0.0.1/ | grep -o '<h1>CentOS Stream Apache test page</h1>'<h1>CentOS Stream Apache test page</h1>

Configure SELinux for Apache
CentOS Stream normally runs SELinux in enforcing mode. Keep it enabled and adjust Apache policy for the exact behavior you need: default content under /var/www, custom document roots, backend connections, or custom web ports.
Check SELinux Mode and Tools
Check the current SELinux mode:
getenforceEnforcing
Install the SELinux management tools if semanage is missing:
sudo dnf install policycoreutils-python-utilsConfirm Apache Content Labels
The default Apache web root is already mapped to the readable Apache content type:
sudo semanage fcontext -l | grep '^/var/www'Relevant output includes:
/var/www(/.*)? all files system_u:object_r:httpd_sys_content_t:s0
If you used the earlier /var/www/example.com document root, verify that the restored label is present:
ls -Zd /var/www/example.com | grep -o 'httpd_sys_content_t'httpd_sys_content_t
Label a Custom Document Root
If you move the site outside /var/www, add a persistent file-context rule and relabel the path. This example uses /srv/example.com:
sudo mkdir -p /srv/example.com
sudo semanage fcontext -a -t httpd_sys_content_t "/srv/example.com(/.*)?"
sudo restorecon -Rv /srv/example.com
Confirm the final label before blaming Apache permissions:
ls -Zd /srv/example.com | grep -o 'httpd_sys_content_t'httpd_sys_content_t
Allow Apache Backend Connections
Static sites do not need outbound network access from Apache. Reverse proxies and application stacks that connect from Apache to a backend service over TCP often do:
getsebool httpd_can_network_connecthttpd_can_network_connect --> off
Enable the boolean only when Apache must connect to a backend such as PHP-FPM over TCP, Node.js, Gunicorn, or another upstream listener:
sudo setsebool -P httpd_can_network_connect on
getsebool httpd_can_network_connect
httpd_can_network_connect --> on
Allow a Custom Apache Port
Apache can bind only to ports that SELinux allows for HTTP traffic. Check the current http_port_t port list before adding anything:
sudo semanage port -l | grep '^http_port_t'Relevant output includes the standard web ports:
http_port_t tcp 80, 81, 443, 488, 8008, 8009, 8443, 9000
If Apache must listen on a port that is not listed, add a local SELinux port rule. This example uses TCP port 9448 because it is not assigned in the default CentOS Stream 10 or 9 policy:
sudo semanage port -a -t http_port_t -p tcp 9448Verify the port rule:
sudo semanage port -l | grep '^http_port_t' | grep 9448http_port_t tcp 9448, 80, 81, 443, 488, 8008, 8009, 8443, 9000
If you later stop using the custom port, remove the local SELinux rule:
sudo semanage port -d -t http_port_t -p tcp 9448Secure Apache with Let’s Encrypt Certificates
Certbot can request and install Let’s Encrypt certificates for Apache when the domain already resolves to this server and ports 80 and 443 are reachable from the internet. Replace the example domain before running Certbot; Let’s Encrypt cannot issue a certificate for the reserved example.com domain.
Enable CRB and EPEL for Certbot
Certbot packages come from EPEL. Enable CRB first because many EPEL packages depend on packages from that repository; the separate guide to install EPEL on CentOS Stream covers the repository workflow in more depth.
sudo dnf install dnf-plugins-core
sudo dnf config-manager --set-enabled crb
Confirm that CRB is enabled:
dnf repolist --enabled | grep -E '^crb[[:space:]]'Install EPEL with the current Fedora project release-package permalink:
sudo dnf install https://dl.fedoraproject.org/pub/epel/epel-release-latest-$(rpm -E %rhel).noarch.rpmVerify the enabled EPEL repository with a whitespace-aware repo ID check:
dnf repolist --enabled | grep -E '^epel([[:space:]]|-next[[:space:]])'Stream 9 can use EPEL Next for packages that need it, but the Apache Certbot workflow only needs the standard EPEL repository. Do not add EPEL Next on Stream 10 unless current EPEL documentation publishes a Stream 10 Next branch.
Install the Apache SSL module, Certbot, and the Apache plugin:
sudo dnf install mod_ssl certbot python3-certbot-apacheCheck the installed Certbot version:
certbot --versioncertbot 4.2.0
CentOS Stream 9 may report an older Certbot branch from EPEL than Stream 10. The package name and Apache plugin workflow are the same.
Request an Apache Certificate
Run a dry run first with your real email address and domain names:
sudo certbot --apache --dry-run --agree-tos --redirect --email admin@your-domain.com -d your-domain.com -d www.your-domain.comIf the dry run succeeds, request the live certificate:
sudo certbot --apache --agree-tos --redirect --email admin@your-domain.com -d your-domain.com -d www.your-domain.comCertbot writes the Apache SSL configuration under /etc/httpd/conf.d/ and stores certificate material under /etc/letsencrypt/. Leave /etc/httpd/conf.d/ssl.conf alone unless you are deliberately managing TLS outside Certbot.
Enable Certbot Renewals
The EPEL Certbot package installs a systemd timer, but the timer may not be active immediately after installation. Start it and keep it enabled:
sudo systemctl enable --now certbot-renew.timerVerify the timer state:
systemctl is-enabled certbot-renew.timer
systemctl is-active certbot-renew.timer
enabled active
After a real certificate exists, test the renewal path:
sudo certbot renew --dry-runManage Apache HTTPD
View Apache Logs
CentOS Stream stores default Apache logs in /var/log/httpd/. The packaged default filenames are access_log and error_log, and tail command examples are useful when you need to watch new entries while testing a request:
sudo tail -n 50 /var/log/httpd/error_log
sudo tail -n 50 /var/log/httpd/access_log
Virtual hosts can use their own log names, such as the example.com-error.log and example.com-access.log paths used earlier. When logs get noisy, use the grep command guide to filter for a status code, client IP, module name, or error string.
Common Apache Service Commands
Use these systemd commands for routine Apache service management:
sudo systemctl stop httpd
sudo systemctl start httpd
sudo systemctl restart httpd
sudo systemctl reload httpd
sudo systemctl disable httpd
sudo systemctl enable httpd
Use reload after small configuration changes that pass apachectl configtest. Use restart after module changes, package updates, or failures where Apache needs a clean process start.
Update Apache HTTPD
Apache updates arrive through the normal CentOS Stream repositories. Refresh metadata and apply updates with the same system upgrade command used earlier:
sudo dnf upgrade --refreshFor production servers, take a configuration backup or system snapshot before broad upgrades, especially when the server hosts multiple virtual hosts or TLS certificates.
Remove Apache HTTPD
Back up Apache configuration before removing packages if you may need the virtual host files later:
sudo cp -a /etc/httpd ~/httpd-backup-$(date +%F)Stop Apache and remove the main package when the server no longer needs it:
sudo systemctl disable --now httpd
sudo dnf remove httpd
If you also installed Certbot for Apache and no other service uses those certificates or plugins, stop Apache, replace the certificate name with your real domain, and remove the SSL packages in one sequence:
sudo systemctl disable --now httpd
sudo certbot delete --cert-name your-domain.com
sudo dnf remove httpd mod_ssl certbot python3-certbot-apache
Verify the main Apache package is gone:
rpm -q httpdpackage httpd is not installed
The next commands permanently delete Apache configuration files and the example document root used in this article. Back up anything you want to keep before removing those paths.
sudo rm -rf /etc/httpd
sudo rm -rf /var/www/example.com
Do not delete /etc/letsencrypt as a general Apache cleanup step. DNF normally removes unused dependencies that belong to the removed packages, but run sudo dnf autoremove only after reviewing the transaction list because reused servers may have unrelated packages marked as removable.
Troubleshoot Apache HTTPD
Apache Configuration Syntax Errors
Check the configuration parser before restarting Apache:
sudo apachectl configtestSyntax OK
If the command prints an error, fix the named file and line number before restarting the service.
httpd.service or apache2.service Not Found
CentOS Stream uses httpd.service. If apache2.service is not found, switch to the CentOS Stream service name and confirm the package is installed:
rpm -q httpd
systemctl status httpd --no-pager
If rpm -q httpd reports that the package is not installed, install it with DNF:
sudo dnf install httpdPort 80 or 443 Already in Use
If Apache fails with an address-in-use error, check which process is listening on the web ports:
sudo ss -tlnp | grep -E ':(80|443)[[:space:]]'LISTEN 0 511 *:80 *:* users:(("httpd",pid=[varies],fd=4))
Stop the conflicting service, change its listener, or move Apache to a different port. If SELinux is enforcing and you choose a custom Apache port, verify whether the port already belongs to http_port_t before adding a new SELinux port rule.
firewall-cmd Command Not Found
Minimal installations may not include firewalld tools. Install and start firewalld, then rerun the HTTP and HTTPS service rules:
sudo dnf install firewalld
sudo systemctl enable --now firewalld
The dedicated CentOS Stream firewalld setup guide covers service state checks and firewall management in more detail.
SELinux Denials
CentOS Stream writes SELinux denials to the audit log. Check recent Apache AVC entries when file permissions look correct but Apache still cannot read content, connect to a backend, or bind to a port:
sudo ausearch -m AVC,USER_AVC -ts recent | grep httpdMatch the denial to the earlier SELinux configuration type: relabel custom content paths, enable httpd_can_network_connect only for backend connections, or add a verified http_port_t rule for a custom Apache port. After the fix, reload Apache and retest the page:
sudo apachectl configtest
sudo systemctl reload httpd
curl -s -H "Host: example.com" http://127.0.0.1/ | grep -o '<h1>CentOS Stream Apache test page</h1>'
<h1>CentOS Stream Apache test page</h1>
Permission Denied on the Document Root
Apache needs execute permission on each directory in the path and read permission on the files it serves. Inspect the path one component at a time:
sudo namei -l /var/www/example.comf: /var/www/example.com drwxr-xr-x root root / drwxr-xr-x root root var drwxr-xr-x root root www drwxr-xr-x root root example.com
Every directory should include the execute bit for the users Apache must traverse. For a static site under /var/www, directories commonly use 755 and files use 644.
Conclusion
Apache HTTPD is running on CentOS Stream with firewalld allowing web traffic and a virtual host ready for your domain. From here, add PHP for dynamic sites with the guide to install PHP on CentOS Stream, keep Certbot renewals active if you enabled HTTPS, and use the log and SELinux checks when content does not load as expected.

Formatting tips for your comment
You can use basic HTML to format your comment. Useful tags currently allowed in published comments:
<code>command</code>command<strong>bold</strong><em>italic</em><a href="https://example.com">link</a><blockquote>quote</blockquote>