
Proton has made Linux Mint a practical gaming desktop for native Linux releases and a large share of Windows-only titles. On supported 64-bit Linux Mint 22.x and 21.x systems, you can install Steam from the default Ubuntu-base package sources, Valve’s APT repository, or Flathub; standard Mint desktop installs do not include Steam. The workflow is similar across Cinnamon, MATE, and Xfce, but 32-bit library support still matters for game compatibility. Check game compatibility ratings on ProtonDB before purchasing.
Install Steam on Linux Mint
Pick the install path based on how you want Steam to update. The default package sources are the simplest starting point, Valve’s repository provides the upstream launcher package, and Flatpak is useful when you prefer Flathub app/runtime management or need per-directory permissions for an external game library.
| Method | Channel | Version | Updates | Best For |
|---|---|---|---|---|
| Default Package Sources | Mint’s Ubuntu-base repositories | Stable | Via normal APT updates | Users who want the lowest-maintenance APT path |
| Valve APT Repository | Official upstream | Latest stable launcher | Via APT plus Steam self-updates | Users who want Valve’s maintained Linux package source |
| Flatpak | Flathub | Latest stable launcher | Via Flatpak plus Steam self-updates | Users who prefer Flatpak permissions and runtimes |
Choose Valve’s APT repository when you want Valve’s official package source for the launcher. The Steam client and Proton compatibility layers still update inside Steam after launch, so the package source mainly controls the launcher, repository trust path, and system dependency handling. Flatpak is a practical choice for Flathub-managed runtimes and external-library permissions, while the default package sources remain the lowest-maintenance APT choice.
Linux Mint 22.x pulls steam-installer 1:1.0.0.79~ds-2 from the noble base, while Linux Mint 21.x pulls 1.0.0.74-1ubuntu2 from the jammy base. Valve’s stable repository provides steam-launcher 1:1.0.0.85, and Flathub reports Steam 1.0.0.85.
Prepare Linux Mint for Steam
Steam works best once your graphics stack, package metadata, and multiarch support are ready. These checks keep the install steps short and reduce the most common Linux Mint gaming issues later.
Prepare Graphics Drivers for Steam
Graphics drivers matter more to Steam performance than the package source you choose. Make sure your GPU stack is in good shape before installing the client.
NVIDIA users: Install the proprietary NVIDIA drivers for full Vulkan support and optimal performance. See how to install NVIDIA drivers on Linux Mint for detailed instructions.
AMD and Intel users: The open-source Mesa drivers are pre-installed and work well out of the box. However, for the latest driver improvements and better game compatibility, consider upgrading Mesa drivers on Linux Mint.
Update Linux Mint Before Installing Steam
Refresh your package lists and apply pending updates before you install Steam. Open a terminal from the applications menu and run:
sudo apt update && sudo apt upgrade -yThese commands use
sudofor tasks that need root privileges. If your account is not in the sudoers file yet, run them as root or follow the guide on how to create and add users to sudoers on Linux Mint.
Install Steam Repository Prerequisites
Install the curl command in Linux if you plan to add Valve’s repository. It downloads Valve’s signing key before the key is installed into the system keyring:
sudo apt install curl -yEnable 32-bit Architecture Support for Steam
Steam on supported Linux Mint releases targets 64-bit Intel/AMD systems, but many games still need 32-bit runtime libraries. Enable i386 multiarch support so APT can install those libraries alongside the normal 64-bit packages:
sudo dpkg --add-architecture i386Refresh APT after adding the architecture so it downloads the 32-bit package indexes as well:
sudo apt updateThen, verify that 32-bit architecture is enabled:
dpkg --print-foreign-architecturesi386
This output confirms that your system can now install and run 32-bit packages alongside native 64-bit software.
Install Steam Client
Option 1: Install Steam from Default Package Sources
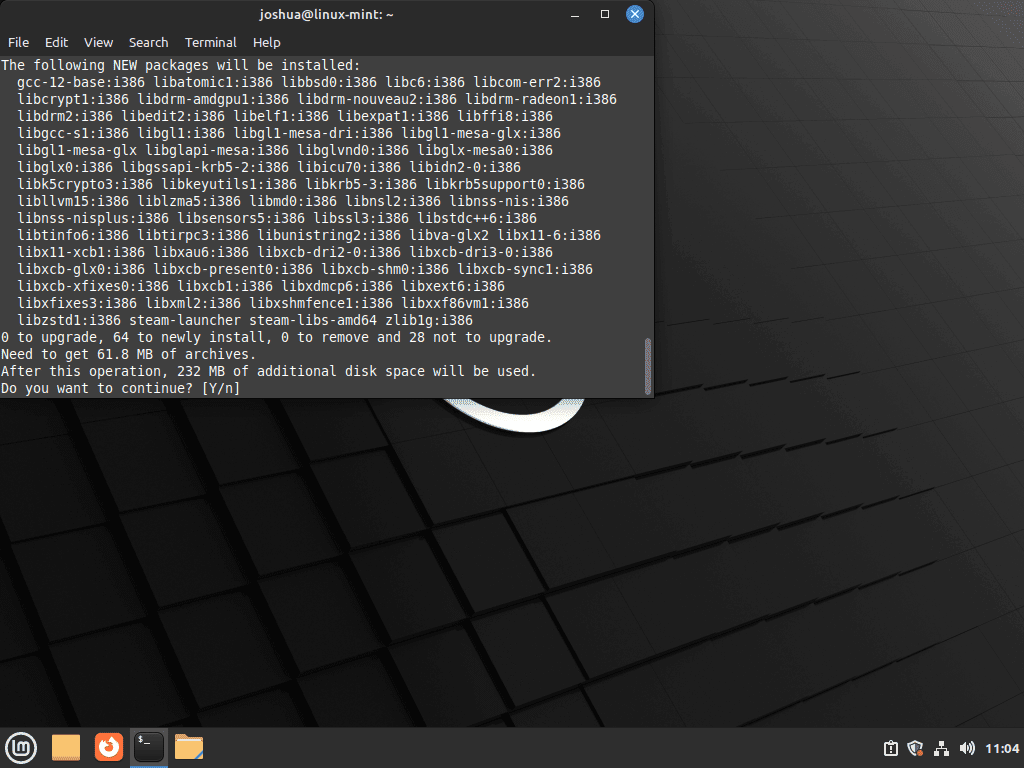
Install Steam on Linux Mint from the default package sources when you want the least manual setup. This package stays integrated with normal system updates, but it trails Valve’s own repository on older Mint releases:
sudo apt install steam-installer -yVerify the installation:
apt-cache policy steam-installersteam-installer:
Installed: 1:1.0.0.79~ds-2
Candidate: 1:1.0.0.79~ds-2
Version table:
*** 1:1.0.0.79~ds-2 500
500 http://archive.ubuntu.com/ubuntu noble/multiverse amd64 Packages
100 /var/lib/dpkg/status
Linux Mint 21.x still shows the older 1.0.0.74-1ubuntu2 package from jammy/multiverse, so the default method is best when convenience matters more than getting the newest Steam launcher. After installation, Steam downloads additional components on first launch. Launch Steam once the package install finishes.
Option 2: Install Steam from Valve’s APT Repository
Install Steam from Valve’s repository when you want Valve’s upstream launcher package and repository-managed package updates. This path provides steam-launcher 1:1.0.0.85 from Valve’s stable repository on both Mint 22.x and 21.x.
First, download Valve’s binary GPG key and install it into the system keyring path:
curl -fsSLo steam.gpg https://repo.steampowered.com/steam/archive/stable/steam.gpg
sudo install -m 0644 steam.gpg /usr/share/keyrings/steam.gpg
rm -f steam.gpg
The Steam key is already distributed in binary format, so install it directly without running gpg --dearmor.
Next, add Valve’s repository in DEB822 format:
printf '%s\n' 'Types: deb' 'URIs: https://repo.steampowered.com/steam/' 'Suites: stable' 'Components: steam' 'Architectures: amd64 i386' 'Signed-By: /usr/share/keyrings/steam.gpg' | sudo tee /etc/apt/sources.list.d/steam.sources > /dev/nullThis writes the source file directly as root, which is more copy-paste friendly than a heredoc for a short DEB822 stanza. Then update your package metadata so APT picks up the new source:
sudo apt updateRelevant output includes:
Get:1 https://repo.steampowered.com/steam stable InRelease [3,622 B]
Get:5 https://repo.steampowered.com/steam stable/steam amd64 Packages [1,204 B]
Get:6 https://repo.steampowered.com/steam stable/steam i386 Packages [913 B]
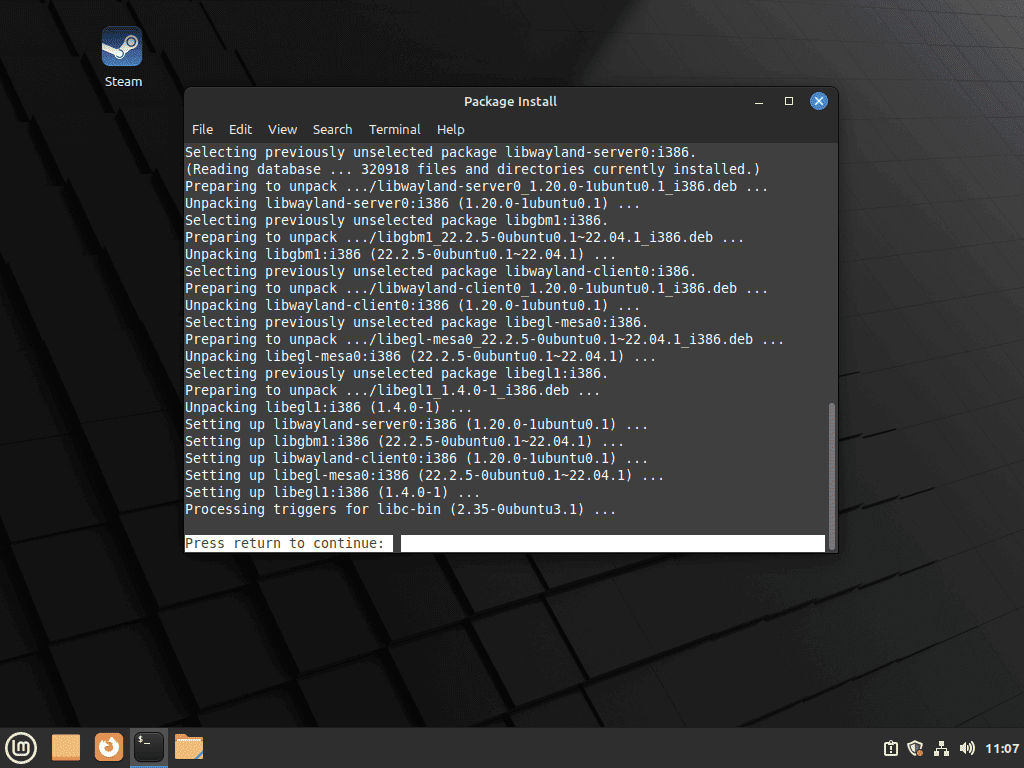
Finally, install Steam along with the required OpenGL and Vulkan libraries for both 64-bit and 32-bit game support:
sudo apt install -y steam-launcher \
  libgl1-mesa-dri:amd64 libgl1-mesa-dri:i386 \
  libgl1:amd64 libgl1:i386 \
  libglx-mesa0:amd64 libglx-mesa0:i386 \
  mesa-vulkan-drivers mesa-vulkan-drivers:i386
This command installs the Steam launcher along with Mesa OpenGL and Vulkan drivers for both 64-bit and 32-bit architectures. The libgl1 and libglx-mesa0 packages provide OpenGL support; these are the actual packages that libgl1-mesa-glx depends on (it has been a transitional package since Ubuntu 18.04). Using these packages directly ensures compatibility across all supported Linux Mint versions. Vulkan support is essential for running modern games and Windows titles through Proton.
Handle Steam Legacy Repository Files
Steam packages can still add legacy source files beside your DEB822 entry. Older prompts may reference steam.list, while Valve’s package commonly creates steam-stable.list and steam-beta.list.
Keep the DEB822 configuration and remove the legacy
.listfiles afterward. That avoids duplicate repository warnings and stale key errors during later updates.
If Steam adds legacy source files alongside your .sources file, remove them with:
sudo rm -f /etc/apt/sources.list.d/steam.list /etc/apt/sources.list.d/steam-stable.list /etc/apt/sources.list.d/steam-beta.list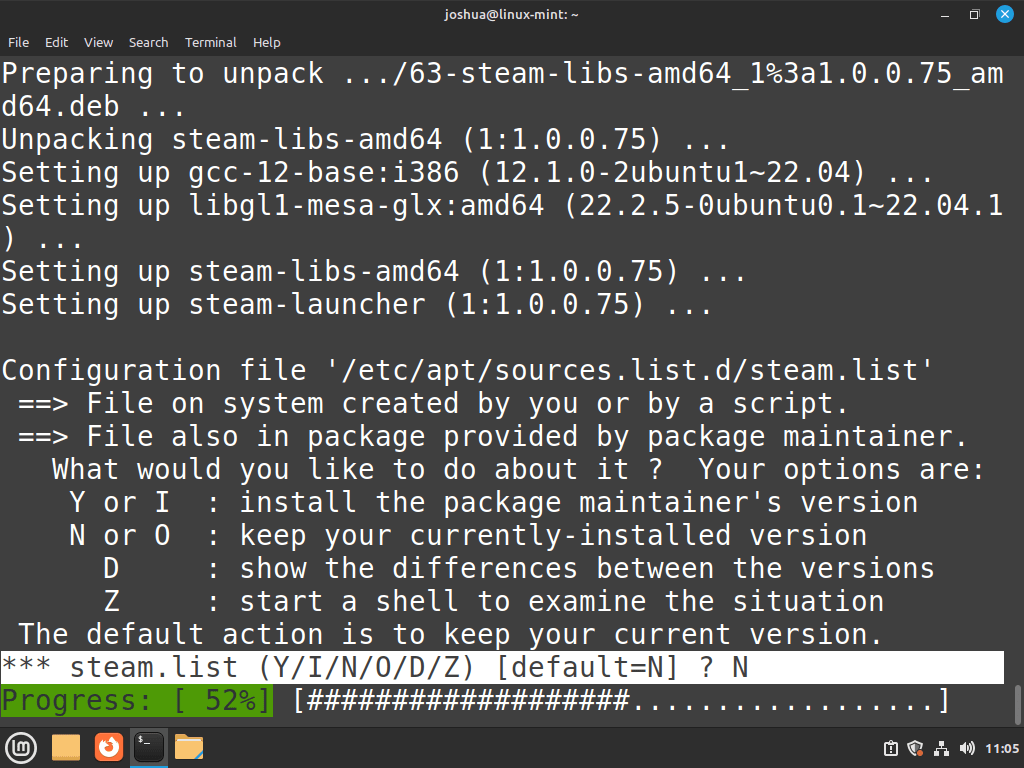
Afterward, verify that Steam was installed from the Valve repository:
apt-cache policy steam-launchersteam-launcher:
Installed: 1:1.0.0.85
Candidate: 1:1.0.0.85
Version table:
*** 1:1.0.0.85 500
500 https://repo.steampowered.com/steam stable/steam amd64 Packages
100 /var/lib/dpkg/status
The repository line should show repo.steampowered.com, confirming that the installed package comes from Valve’s stable repository rather than the default package sources. Mint 21.x resolves to the same 1:1.0.0.85 package from Valve’s stable repository.
Option 3: Install Steam via Flatpak
Flatpak runs Steam with Flathub’s runtime and permission model, which is useful when you prefer Flatpak-managed desktop apps or need to grant a specific external game-library path. Standard Linux Mint desktop installs already include Flatpak with the flathub system remote enabled, so no extra setup is usually required.
Install Steam from Flathub:
sudo flatpak install flathub com.valvesoftware.Steam -yVerify the installation with:
flatpak info com.valvesoftware.SteamRelevant output includes:
Steam - Launcher for the Steam software distribution service

          ID: com.valvesoftware.Steam
         Ref: app/com.valvesoftware.Steam/x86_64/stable
        Arch: x86_64
      Branch: stable
     Version: 1.0.0.85
The Steam Flatpak is not verified as Valve-published on Flathub. Day-to-day client behavior is similar to the APT version, but the packaging, permissions, runtimes, and support path come through Flathub rather than Valve’s APT repository.
Adding game libraries on external drives: Flatpak permissions restrict file system access by default. To store games on a secondary drive, grant Steam access to that location:
flatpak override --user --filesystem=/path/to/your/Steam/Library com.valvesoftware.SteamReplace /path/to/your/Steam/Library with the actual mount point of your external drive (for example, /media/username/ExternalDrive/SteamLibrary). The --user flag is intentional here: it grants the extra filesystem access only for your account while leaving the system-wide Flatpak install unchanged. Grant only the exact library directory instead of broad home or host access. After running this command, add the external location as a Steam Library folder under Settings > Storage inside the Steam client. Use a native Linux filesystem such as ext4 or Btrfs for that library path. NTFS does not preserve the Linux permissions Proton needs, so Windows-formatted game libraries remain unreliable on Linux Mint.
Launch the Flatpak version of Steam:
flatpak run com.valvesoftware.SteamSteam also appears in your applications menu under the Games category after installation.
Launch Steam on Linux Mint
After installation, launch Steam using the command that matches your install method or use the applications menu.
Default package sources or Valve repository: Run steam in your terminal to start the package-managed launcher. This method is useful for seeing diagnostic output if issues occur.
steamFlatpak: Use the Flatpak app ID when you installed Steam from Flathub:
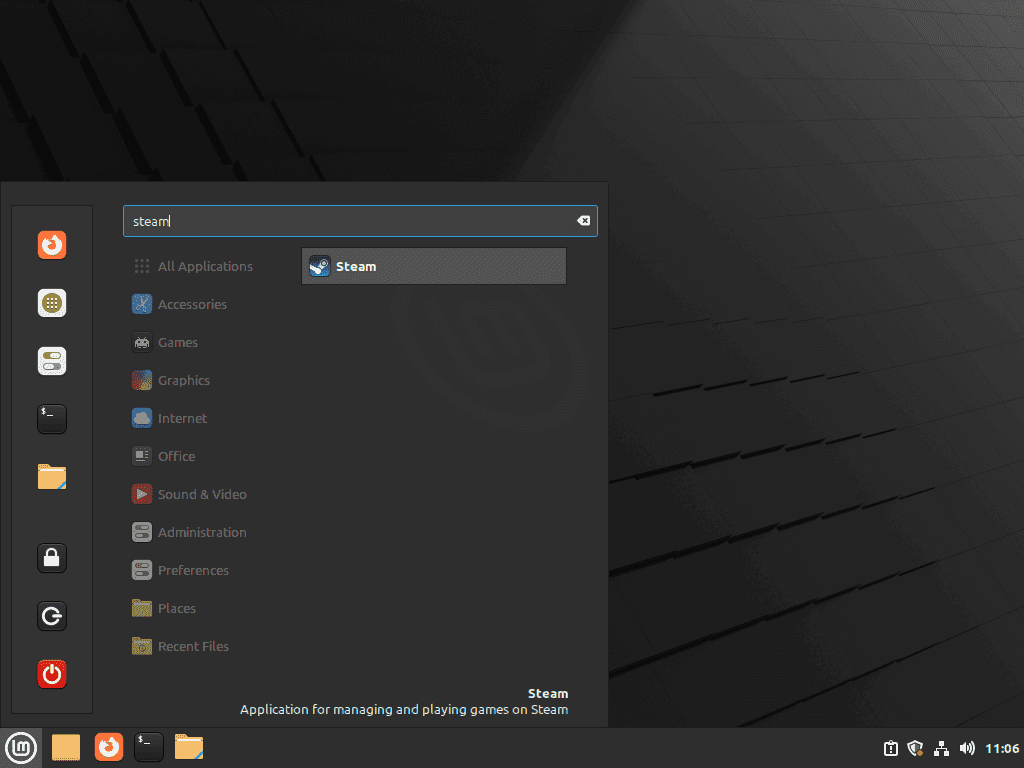
flatpak run com.valvesoftware.SteamFrom Applications Menu: Open the applications menu, navigate to the Games category, and click the Steam icon. The exact menu location may vary slightly depending on your Linux Mint edition (Cinnamon, MATE, or Xfce), but Steam appears in the Games category on all editions.
Complete First-Time Steam Setup
For APT-based installs, the first launch may open a terminal prompt for additional Steam runtime packages. Flatpak installs use the Flathub runtime path instead, so this terminal dependency prompt may not appear.
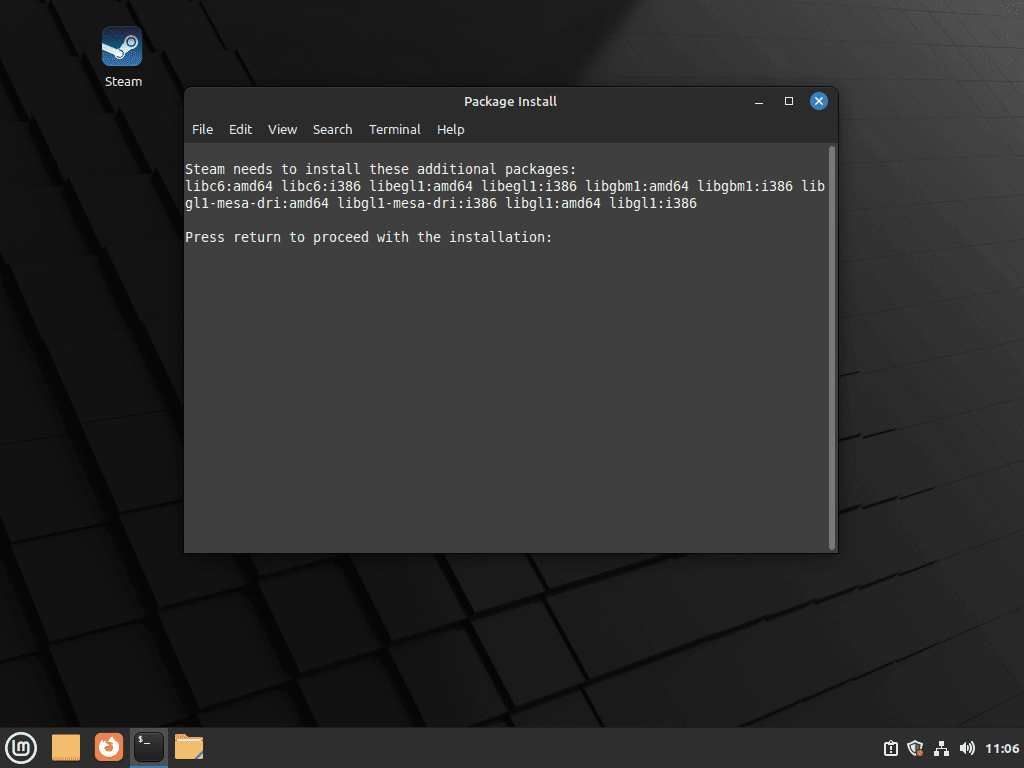
Press Enter to initiate the installation and enter your password when prompted. A secondary terminal window may appear requesting confirmation; press Enter again to complete the package installation.
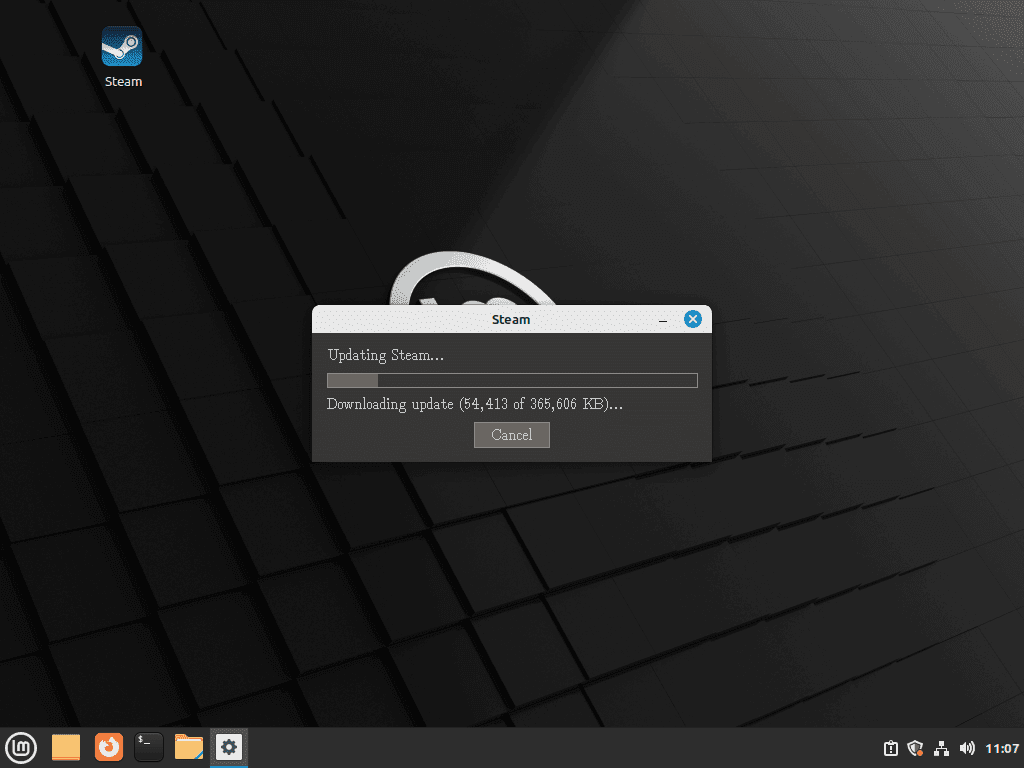
After the package installation, Steam automatically downloads and updates its components. This usually takes a few minutes depending on your internet connection.
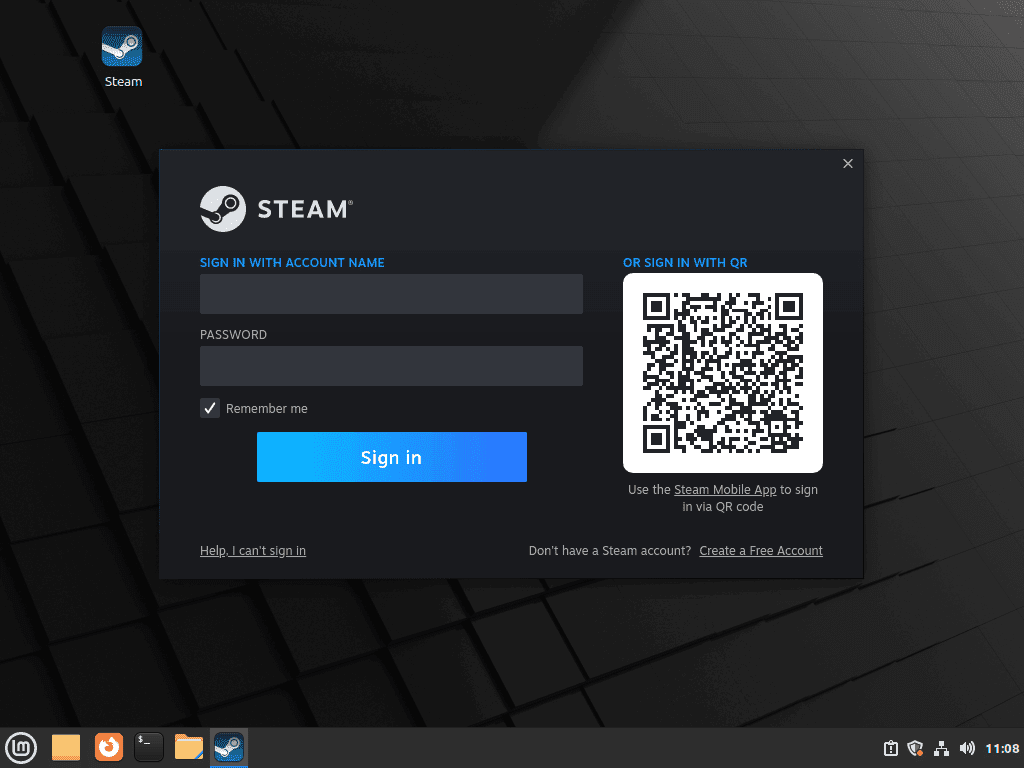
Sign In to Your Steam Account
Once the updates complete, the Steam login window appears. From here, sign in with an existing account or create a new one to access your game library.
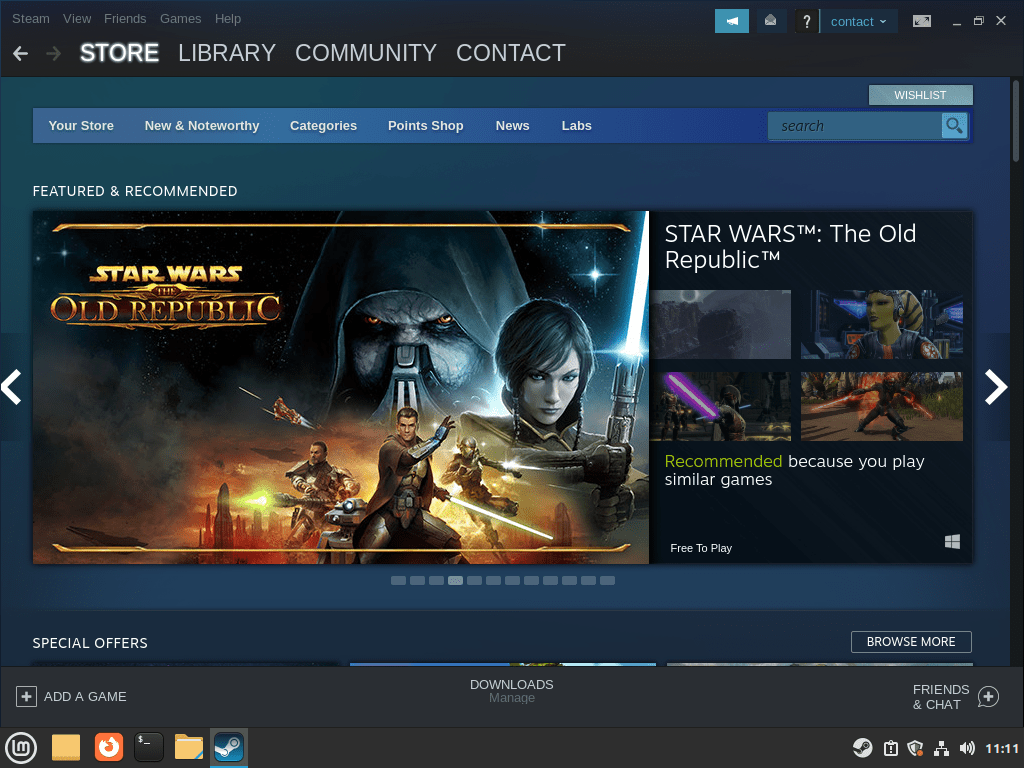
After signing in, Steam displays your library where you can browse, purchase, and download games. Native Linux games install and run directly, while Windows games automatically use Proton for compatibility.
Enable Steam Proton for Unsupported Games
Steam can run many unsupported Windows games on Linux Mint by enabling Steam Play for all titles. Open Settings > Compatibility, enable Enable Steam Play for all other titles, then choose a Proton build from the dropdown. Proton Experimental is a good starting point when you want the newest fixes. Check ProtonDB for game-specific reports before installing a title that is not officially rated for Steam Deck or Linux.
Manage Steam Installation
Use these commands to keep Steam updated or remove it cleanly after testing different install methods.
Update Steam with APT on Linux Mint
Steam updates itself automatically when launched, downloading new client versions and Proton improvements in the background. However, periodic APT upgrades keep the system-level Steam package updated:
sudo apt update && sudo apt upgrade -yThe apt upgrade command updates all installed packages, including the Steam package if a newer package is available. For updating only the default package-source install, use:
sudo apt install --only-upgrade steam-installer -yIf you installed Steam from Valve’s repository, update only Valve’s launcher package instead:
sudo apt install --only-upgrade steam-launcher -yUpdate Steam Flatpak on Linux Mint
If you installed Steam via Flatpak, update it alongside other Flatpak applications:
sudo flatpak update com.valvesoftware.Steam -yTo update all Flatpak applications at once:
sudo flatpak update -yIf Flatpak app and runtime maintenance is part of your normal desktop routine, see how to upgrade Flatpak on Linux Mint for the broader workflow.
Remove Steam on Linux Mint
If you no longer need Steam on your Linux Mint system, choose the matching removal commands for the method you used:
Remove Steam Software
If you installed the default repository package, remove steam-installer and unused dependencies:
sudo apt remove steam-installer --autoremove -yIf you installed Steam from Valve’s repository, remove steam-launcher instead:
sudo apt remove steam-launcher --autoremove -yRemove Steam Repository
If you installed Steam using the Valve APT repository, remove the repository files (both DEB822 and any legacy formats that may exist):
sudo rm -f /etc/apt/sources.list.d/steam.sources /etc/apt/sources.list.d/steam.list /etc/apt/sources.list.d/steam-stable.list /etc/apt/sources.list.d/steam-beta.listRemove Steam GPG Key
To complete the removal, delete the imported GPG key:
sudo rm -f /usr/share/keyrings/steam.gpgFinally, update the package database after removing the repository:
sudo apt updateRemove Steam Flatpak
If you installed Steam via Flatpak:
sudo flatpak uninstall com.valvesoftware.Steam -yRemove unused Flatpak runtimes after uninstalling Steam:
sudo flatpak uninstall --unused -yRemove Steam User Data
The following commands permanently delete your Steam configuration, game saves stored locally, and downloaded games. Cloud-synced saves remain on Steam’s servers and will sync when you reinstall. Export any local-only saves before proceeding.
Remove Steam’s configuration and local data directories (applies to both APT and Flatpak installations):
rm -rf ~/.steam ~/.local/share/Steam
rm -rf ~/.var/app/com.valvesoftware.Steam
rm -rf ~/.local/share/applications/steam*.desktop
Troubleshoot Common Steam Issues
Most Steam problems on Linux Mint come from runtime files, graphics libraries, or leftover repository entries rather than the launcher itself. These fixes cover the issues most likely to break game launches after the initial install.
Fix steam-libs-i386 Dependency Errors
If the default package method fails with an unmet dependency, APT may be missing either the i386 package index or one of Mint’s default Ubuntu-base package components. A common error looks like this:
steam-installer : Depends: steam-libs-i386 (= 1:1.0.0.79~ds-2) but it is not installable
Check whether i386 is enabled and whether APT can see the Steam dependency packages for your Mint base:
dpkg --print-foreign-architectures
apt-cache policy steam-installer steam steam-libs steam-libs-i386:i386
If the first command does not print i386, enable it and refresh the package lists:
sudo dpkg --add-architecture i386
sudo apt update
On Mint 22.x, steam-installer should have a candidate from multiverse, while steam-libs and steam-libs-i386:i386 should have candidates from universe. On Mint 21.x, steam-installer depends on the older steam:i386 package from multiverse instead. If the expected candidates for your Mint series are missing, open Linux Mint’s Software Sources tool and re-enable the official Ubuntu-base components that provide default packages. Run sudo apt update after restoring sources or enabling i386 before judging the package policy again.
Retry the default package-source install after the candidates appear:
sudo apt install steam-installer -yFix Steam When It Fails to Start
If Steam crashes immediately or shows errors like the following, the runtime libraries may be corrupted:
Running Steam on linuxmint 22 64-bit
STEAM_RUNTIME has been set by the user to: /home/user/.steam/steam/ubuntu12_32/steam-runtime
Error: Steam client runtime not found
To resolve this, remove the runtime directories and let Steam redownload them:
rm -rf ~/.steam/steam/ubuntu12_32/ ~/.steam/steam/ubuntu12_64/Then, launch Steam again:
steamSteam automatically downloads fresh runtime files and should start normally. You will see the Steam update window appear, confirming the runtime is being restored.
Fix Steam Games With No Sound
If games launch but produce no audio while your system sound works normally, Steam’s bundled ALSA libraries likely conflict with your system. In particular, this commonly occurs after system updates.
Remove the conflicting audio libraries:
rm -rf ~/.steam/steam/ubuntu12_32/steam-runtime/i386/usr/lib/i386-linux-gnu/alsa-lib
rm -rf ~/.steam/steam/ubuntu12_32/steam-runtime/amd64/usr/lib/x86_64-linux-gnu/alsa-lib
Restart Steam and launch a game to verify audio works. Test with a game that previously had no sound; you should now hear game audio through your system’s default output device.
Fix Steam OpenGL and Driver Errors
If games crash with OpenGL errors or you see messages like these in the terminal:
libGL error: unable to load driver: radeonsi_dri.so
libGL error: failed to load driver: radeonsi
Failed to load libGL: undefined symbol: xcb_send_fd
In this case, Steam’s runtime libraries conflict with your Mesa drivers. Remove the problematic libraries:
find ~/.steam/steam/ \( -name "libgcc_s.so*" -o -name "libstdc++.so*" -o -name "libxcb.so*" \) -print -deleteRestart Steam and launch the problematic game. If the fix worked, games should start without libGL errors in the terminal output.
Steam may reinstall these libraries after updates. If issues return after a Steam update, repeat the removal command.
Fix Duplicate Steam Repository Warnings
Valve’s package scripts can leave steam-stable.list, steam-beta.list, or an older steam.list beside your DEB822 file. When both formats exist, APT reports duplicate repository targets:
W: Target Packages (steam/binary-amd64/Packages) is configured multiple times in /etc/apt/sources.list.d/steam-stable.list:1 and /etc/apt/sources.list.d/steam.sources:1
W: Target Packages (steam/binary-i386/Packages) is configured multiple times in /etc/apt/sources.list.d/steam-stable.list:1 and /etc/apt/sources.list.d/steam.sources:1
Remove the legacy files that conflict with your DEB822 configuration:
sudo rm -f /etc/apt/sources.list.d/steam.list /etc/apt/sources.list.d/steam-stable.list /etc/apt/sources.list.d/steam-beta.listVerify the fix by updating your package cache:
sudo apt updateThe duplicate repository warnings should no longer appear. If the legacy files reappear after a Steam package update or reinstall, remove them again with the same command.
Fix Steam Libraries Stored Under /usr/
If you store your Steam library under a path containing /usr (such as /usr/games/steam/), games will fail to launch without clear error messages. Check ~/.local/share/Steam/logs/console-linux.txt for entries like:
pressure-vessel-wrap: W: Not sharing path STEAM_COMPAT_DATA_PATH="/usr/games/steam/steamapps/compatdata/..." with container because "/usr" is reserved by the container framework
Steam’s pressure-vessel container framework reserves the /usr hierarchy for its own runtime libraries. Any Steam library path containing /usr will silently fail because pressure-vessel cannot share those directories with the container.
To fix this, move your Steam library to a directory outside /usr:
- In Steam, go to Settings > Storage
- Add a new library folder under your home directory (for example,
/home/username/SteamLibrary) - Move your games to the new library by right-clicking them in your library and selecting Properties > Local Files > Move Install Folder
After moving games to a non-reserved path, they should launch normally.
Conclusion
Steam is ready on Linux Mint with the install path that best matches how you manage updates and game libraries. For better compatibility and frame pacing, keep your graphics stack up to date with install NVIDIA drivers on Linux Mint or upgrade Mesa drivers on Linux Mint, and consider installing the Xanmod kernel on Linux Mint if you want a lower-latency gaming setup.

Hello ! I migrated to Linux Mint from Windows 10. When I launch Silksong and start to play, the screen freezes at the middle (some graphic lines as on old TV) when I move or jump. I never had this trouble with Windows 10. Do you know why this happens ?
Thanks and have a great day !