TeamViewer is a popular remote access and control software that allows you to connect to devices remotely for support, collaboration, or access to files and applications from anywhere. Its features include secure connections, cross-platform compatibility, and a user-friendly interface, making it an essential tool for IT support and remote work.
This guide will demonstrate how to install TeamViewer on Debian 12, 11, and 10 using the command-line terminal. The installation method involves using TeamViewer’s official APT repository to ensure you get the latest version with all the newest features and security updates.
Update Debian Packages Before TeamViewer Installation
Before you start the installation process, updating your Debian system is advisable. This ensures that all existing packages are in their latest versions, leading to a smooth installation process. You can accomplish this by executing the following command:
sudo apt update
sudo apt upgrade
Executing the command updates the package list and subsequently upgrades all installed packages to their latest versions. It’s standard practice to start any installation process with an up-to-date system.
Install Initial Required Packages
Next, you must install a few dependencies required for TeamViewer to function optimally. While most of these packages might already be present in your system, running the command below will confirm their installation:
sudo apt install curl apt-transport-httpsThe listed packages are pivotal for adding external repositories and facilitating secure data transfers over HTTPS. If you encounter any issues during the TeamViewer installation process, it’s recommended that you revisit this step and execute the command to verify the installation of all required packages.
Import TeamViewer APT Repository
With your system updated and the necessary packages installed, you can proceed with the TeamViewer installation process.
First, to ensure the authenticity of the packages you’re about to install, you must import the GPG key to your keychain. This can be achieved by running the following command:
curl -fSsL https://download.teamviewer.com/download/linux/signature/TeamViewer2017.asc | sudo gpg --dearmor | sudo tee /usr/share/keyrings/teamview.gpg > /dev/nullThis command fetches the public GPG key used by TeamViewer to sign their packages and adds it to your keychain. This step is critical for verifying the integrity of the downloaded packages.
Next, you need to import the TeamViewer repository. This lets your APT package manager fetch the necessary packages directly from the official source. You can add the repository using the following command:
echo "deb [arch=amd64 signed-by=/usr/share/keyrings/teamview.gpg] http://linux.teamviewer.com/deb stable main" | sudo tee /etc/apt/sources.list.d/teamviewer.listFollowing the importation of the TeamViewer repository, update your APT package list to reflect the changes. You can achieve this by running the following command:
sudo apt updateFinalize TeamViewer Installation via APT Command
Finally, you can install TeamViewer by running:
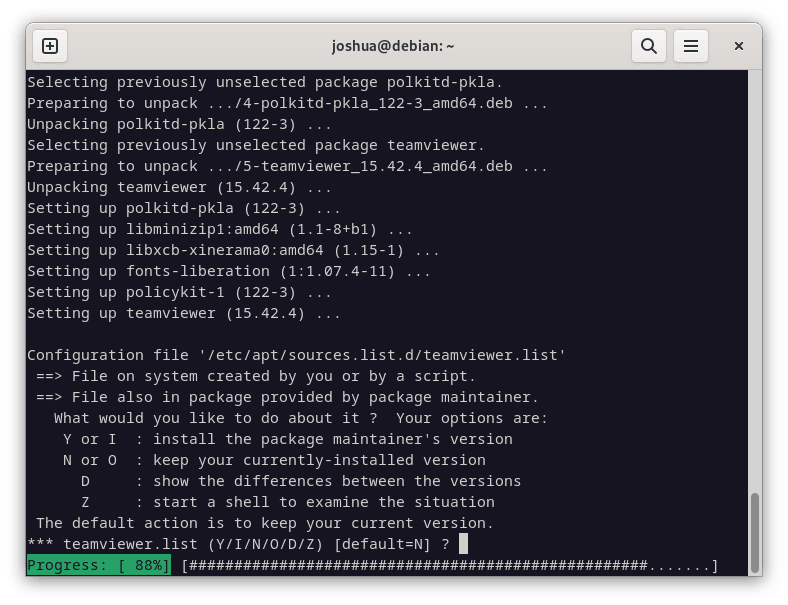
sudo apt install teamviewerDuring installation, you may be prompted to keep the source or import the maintainer. It is recommended that you select the option to compare changes and maintain the original if no alterations are made.
You can select this option by typing “N” when prompted.
Launching TeamViewer
With the successful installation of TeamViewer on your Debian system, you are now ready to launch the application. The launching of TeamViewer can be performed in two primary ways, catering to both command-line enthusiasts and those who prefer a graphical user interface.
Firstly, you can execute the following command to start TeamViewer from your command terminal:
teamviewerTeamViewer can be accessed easily through the applications menu if you prefer the graphical user interface. This method is generally favored by desktop users who prefer interacting with icons over typing commands.
To open TeamViewer, navigate the following path:
Activities > Show Applications > TeamViewer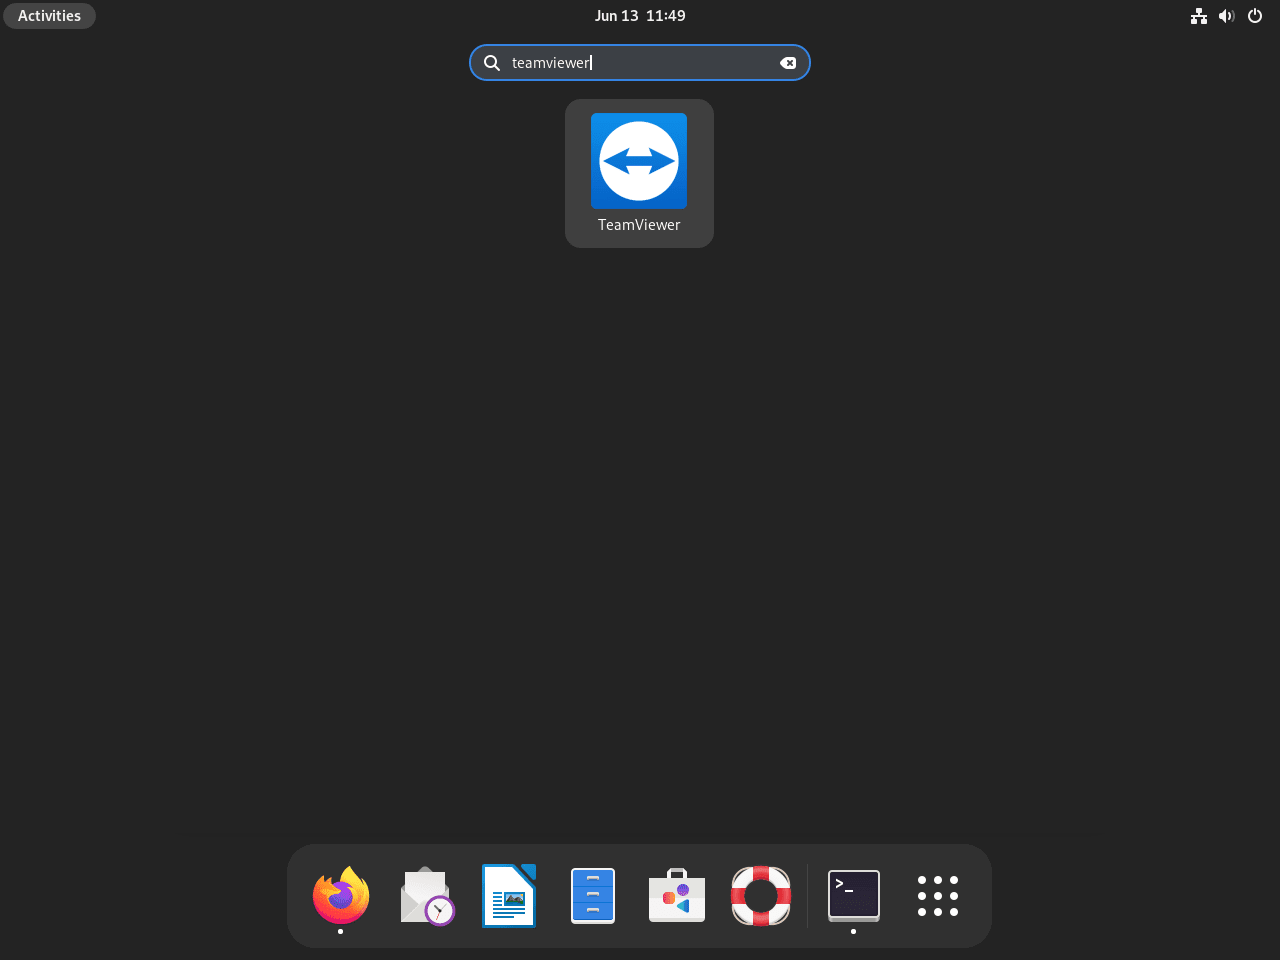
A Note on Wayland Compatibility on Debian
If your system uses Wayland, you may encounter compatibility issues when using Debian. Due to its inherent limitations, TeamViewer currently does not support Wayland.
Step 1: Understanding the Limitation
You may see an error message stating that TeamViewer does not support Wayland. Integrating TeamViewer with Wayland is a complex process and is still in the planning stages. Full-fledged support for Wayland has been a topic of discussion for a few years, and it’s predicted to materialize in the next decade.
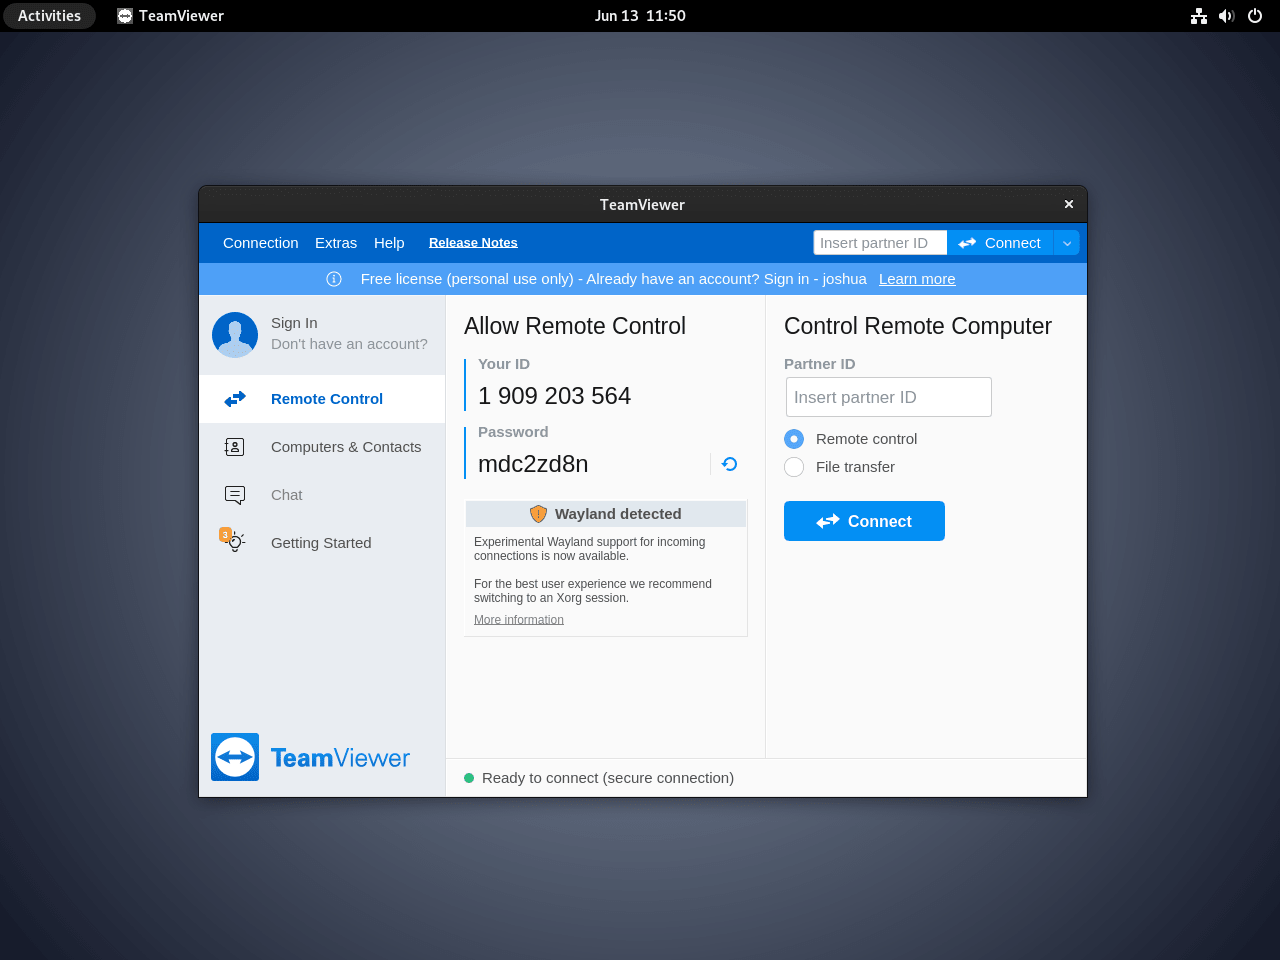
In the interim, to get TeamViewer running smoothly, you must log out and back in using GNOME on Xorg, a different display server protocol.
Step 2: Logging in with GNOME on Xorg
To use GNOME on Xorg, navigate to the login screen and click on the gear icon in the bottom right corner. From the options that appear, select “GNOME on Xorg.” After making this selection, proceed to log in as usual.
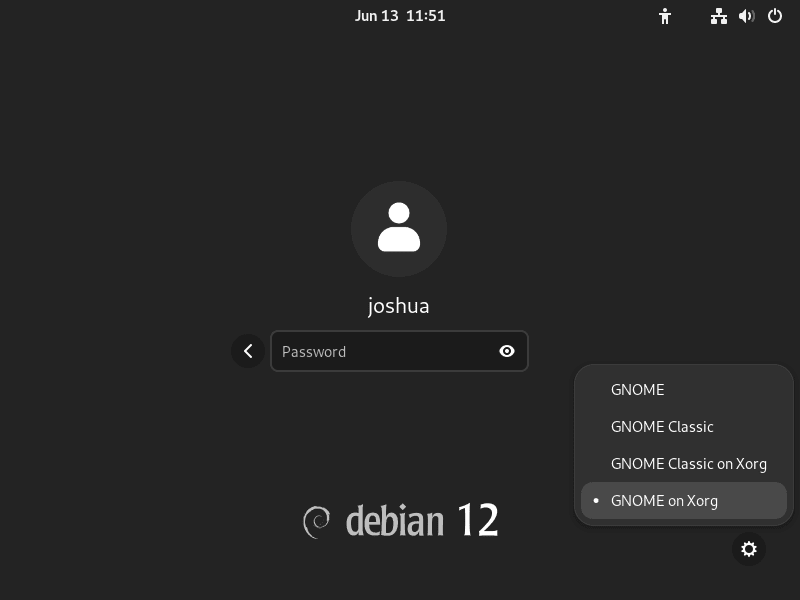
After logging in with GNOME on Xorg, you can launch TeamViewer without encountering the Wayland compatibility issue.
Step 3: Using TeamViewer
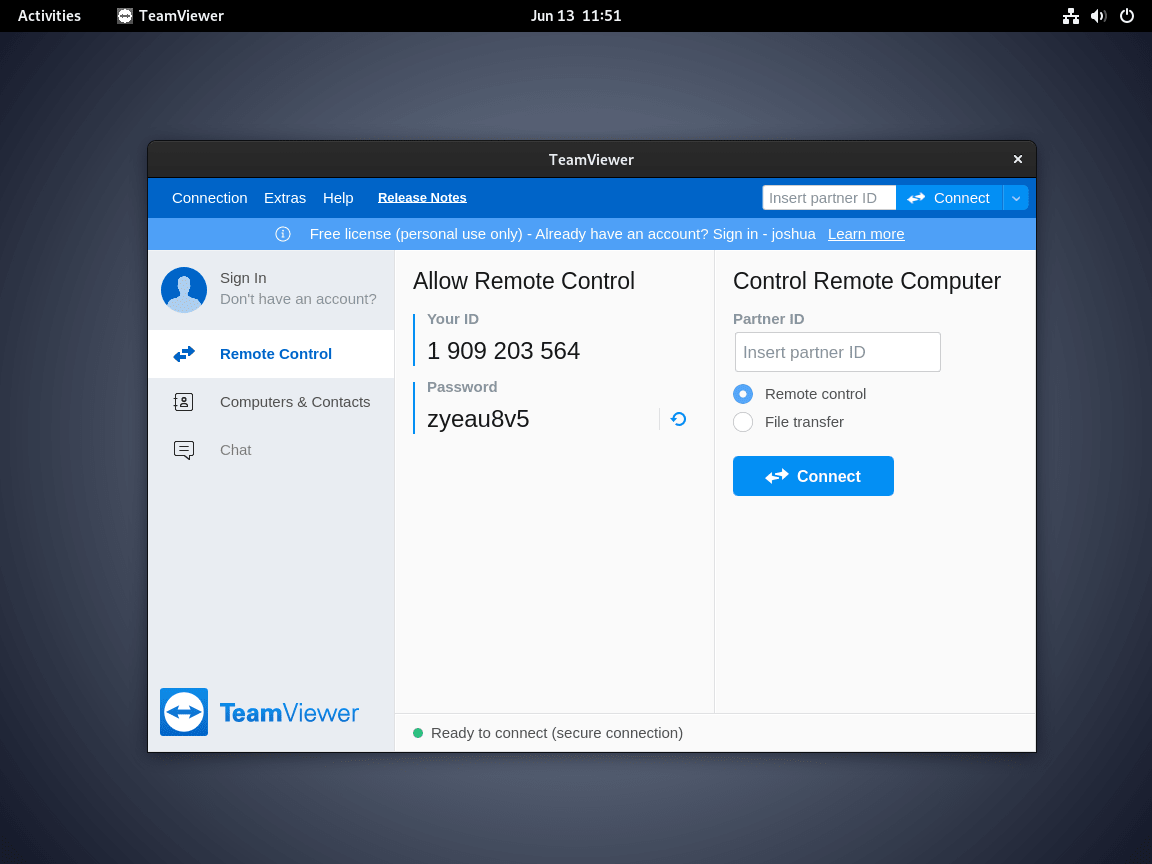
With TeamViewer launched successfully, you can now utilize its functionality to establish a remote connection to another PC. You can do this by either obtaining the other computer’s TeamViewer address or by providing your TeamViewer address to another user.
Additional Tips: TeamViewer Terminal Command
Mastering the TeamViewer terminal commands allows you to efficiently control remote devices on your Debian system. Below, we’ll explore a series of essential commands that can enrich your experience with TeamViewer.
Utilizing Terminal Commands for Remote Connection
Initiate Connection to a Remote Device
To connect to a remote device using TeamViewer through the terminal, we need the ID and password of that device. Here’s how you can execute this:
teamviewer -i [remote ID] -p [remote password]In the above command, replace [remote ID] with the ID of the remote device and [remote password] with the password provided by the device’s owner. Executing this command will establish a connection with the specified remote device.
Launch a Remote Session
Initiating a remote session via the terminal is relatively straightforward. Enter the following command:
teamviewer -i [remote ID] -p [remote password] -lThis command will start a remote session with the chosen device and open a new window for the session.
Advanced TeamViewer Commands
Activating Fullscreen Mode
To make the most of your screen real estate during a remote session, use the command below to enable fullscreen mode:
teamviewer -i [remote ID] -p [remote password] --FullscreenThis command will maximize the remote session window, offering a better view of the remote device’s screen.
Enabling Remote Control
To gain control of the remote device as if you were right in front of it, enable the remote control feature with this command:
teamviewer -i [remote ID] -p [remote password] --RemoteControlThis command activates the remote control feature, giving you complete control over the remote device.
Adjusting Remote Session Quality
You can customize the quality of your remote session based on your requirements or network conditions. Use the following command to set the desired quality:
teamviewer -i [remote ID] -p [remote password] --quality [quality level]Here, replace [quality level] with a value between 0 and 9 — 9 representing the highest quality.
Transferring Files
To move files between your local machine and the remote device, use the file transfer command:
teamviewer -i [remote ID] -p [remote password] --FileTransferThis command opens the file transfer window, allowing you to browse and move files between devices
Recording a Remote Session
To record your remote session for later reference, execute the command below:
teamviewer -i [remote ID] -p [remote password] --recordThis command begins recording the remote session, saving the output to your local machine.
Ending the Remote Session
When you’re ready to close your remote session, use the following command:
teamviewer -i [remote ID] -p [remote password] --killThis command will terminate the active remote session and close the TeamViewer window.
Maintaining TeamViewer
Update TeamViewer on Debian
TeamViewer should automatically stay updated with your system packages if you use the APT package manager. However, you can manually check for updates with the following command:
sudo apt update && sudo apt upgradeThis command will update all system packages, including TeamViewer if a newer version is available.
Remove TeamViewer
If you decide that you no longer require TeamViewer on your Debian system, you can remove it using the following command:
sudo apt remove teamviewerThis command will uninstall TeamViewer from your Debian system, removing all its configuration files.
Remove TeamViewer APT Repository
If you’re sure about not reinstalling TeamViewer in the future, you can choose to remove the repository list file associated with the software:
sudo rm /etc/apt/sources.list.d/teamviewer.listThis command will delete the repository list file, preventing your Debian system from checking for or downloading TeamViewer updates.
Remove TeamViewer GPG Key
After removing the repository list file, removing the GPG key that TeamViewer used is a good practice. You can do this by running the following command:
sudo rm /usr/share/keyrings/teamviewer.gpgThis action will delete the GPG key associated with TeamViewer, ensuring a clean software removal from your system.
Conclusion
In this guide, we’ve covered the essential steps for installing and managing TeamViewer on a Debian-based Linux system. We discussed the installation process, handling Wayland display server incompatibility, using various TeamViewer commands, and uninstalling the software. This guide equips you with the knowledge to effectively use TeamViewer in a Debian environment, whether for personal or professional remote support.

