
Locked containers and encrypted volumes are still one of the simplest ways to keep sensitive files unreadable after a lost laptop or USB drive. To install VeraCrypt on Linux Mint, the practical paths are the official upstream package download that matches your Mint base, the community-maintained Unit 193 PPA, or a source build when you want a self-managed binary.
If you are coming from older TrueCrypt tutorials, VeraCrypt is the maintained fork still available for Linux. Linux Mint 22.x maps to Ubuntu 24.04 packages, Linux Mint 21.x maps to Ubuntu 22.04 packages, and the same Downloads page also publishes veracrypt-console when you only need terminal-driven mounts on a headless system.
Install VeraCrypt on Linux Mint
Match Linux Mint 22.x or 21.x to the VeraCrypt source you want before running commands. The official VeraCrypt Downloads page is the most direct package source, the Unit 193 PPA keeps updates inside APT, and the source build stays available for custom or repository-free installs.
| Method | Linux Mint 22.x | Linux Mint 21.x | Package Architectures | Updates | Best Fit |
|---|---|---|---|---|---|
| Official package download | Latest official Ubuntu 24.04 GUI .deb | Latest official Ubuntu 22.04 GUI .deb | amd64, arm64 | Manual reinstall from the latest download | Upstream package without adding a repository |
| Unit 193 PPA | Latest stable via APT | Latest stable via APT | amd64, arm64, armhf | Automatic through APT | Readers who want normal package-managed upgrades |
| Source build | Latest stable tag | Latest stable tag | Depends on local build dependencies | Manual helper script | Self-managed builds and custom compile options |
Choose the official download when you want VeraCrypt from the project itself without adding a repository. Use the PPA when you prefer APT-managed upgrades, and keep the source build for situations where you want to inspect or rebuild the tagged release locally.
On most Linux Mint desktop PCs, dpkg --print-architecture returns amd64. The official resolver below also accepts arm64; use the PPA instead for armhf. The official downloads and PPA indexes used here do not provide an i386 VeraCrypt package for Linux Mint 22.x or 21.x.
Update Linux Mint before installing VeraCrypt
Refresh the package index first so dependency resolution happens against current metadata. The same update step works on desktop installs, minimal images, and SSH-managed systems, even though the VeraCrypt GUI itself still needs an active graphical session later.
sudo apt update && sudo apt upgrade -yThese commands use
sudofor tasks that need root privileges. If your account is not in the sudoers file yet, run them as root or follow the guide on how to create and add users to sudoers on Linux Mint.
Download and install the official VeraCrypt package on Linux Mint
This method uses the official VeraCrypt download page and the Ubuntu base that Linux Mint already tracks. Linux Mint 22.x needs the Ubuntu 24.04 GUI package, while Linux Mint 21.x needs the Ubuntu 22.04 GUI package.
Install the downloader first. Desktop installs often already have curl, but minimal images frequently do not. The resolver also uses python3 to read GitHub’s release data cleanly. The curl command in Linux guide explains the download options used below in more detail.
sudo apt install ca-certificates curl python3 -yThe resolver below reads Mint’s UBUNTU_CODENAME, converts it to the matching Ubuntu release string VeraCrypt publishes, checks the local architecture, and prints the exact filename before the download starts. Run the resolver, download, and install commands in the same terminal session so the package URL variables remain available.
resolve_veracrypt_package() {
  UBUNTU_CODENAME="$(. /etc/os-release && echo "${UBUNTU_CODENAME:-}")"

  case "$UBUNTU_CODENAME" in
    noble) UBUNTU_RELEASE=24.04 ;;
    jammy) UBUNTU_RELEASE=22.04 ;;
    *)
      printf 'This VeraCrypt package workflow is written for Linux Mint 22.x and 21.x.\n' >&2
      return 1
      ;;
  esac

  ARCH="$(dpkg --print-architecture)"
  case "$ARCH" in
    amd64|arm64) ;;
    *)
      printf 'The official Ubuntu 24.04 and 22.04 VeraCrypt packages support amd64 and arm64, not %s.\n' "$ARCH" >&2
      return 1
      ;;
  esac

  LATEST_JSON="$(curl -fsSL https://api.github.com/repos/veracrypt/VeraCrypt/releases/latest)"
  LATEST_TAG="$(printf '%s\n' "$LATEST_JSON" | python3 -c 'import json, sys; print(json.load(sys.stdin)["tag_name"])')"
  if [ -z "$LATEST_TAG" ]; then
    printf 'Could not resolve the latest VeraCrypt release tag.\n' >&2
    return 1
  fi

  LATEST_VERSION="${LATEST_TAG#VeraCrypt_}"
  PACKAGE_URL="https://launchpad.net/veracrypt/trunk/${LATEST_VERSION}/+download/veracrypt-${LATEST_VERSION}-Ubuntu-${UBUNTU_RELEASE}-${ARCH}.deb"

  if ! curl -fsIL "$PACKAGE_URL" >/dev/null; then
    printf 'No matching VeraCrypt package was found for Linux Mint (%s / Ubuntu %s) on %s.\n' "$UBUNTU_CODENAME" "$UBUNTU_RELEASE" "$ARCH" >&2
    return 1
  fi

  PACKAGE_FILE="${PACKAGE_URL##*/}"
  printf '%s\n' "$PACKAGE_FILE"
}

resolve_veracrypt_package
Relevant output includes:
veracrypt-1.26.24-Ubuntu-24.04-amd64.deb
Download the package next, then install it with apt so Linux Mint resolves the required runtime libraries automatically.
curl -fL --progress-bar -o "$PACKAGE_FILE" "$PACKAGE_URL"Relevant output includes:
######################################################################## 100.0%
The same Downloads page also publishes veracrypt-console packages when you only need text-mode operations on a headless or SSH-only Mint system. For the desktop GUI package, install the downloaded file with apt:
sudo apt install -y "./$PACKAGE_FILE"Relevant output includes:
Setting up veracrypt (1.26.24-1~ubuntu24.04-1) ...
Verify that Linux Mint registered the package and exposed the normal veracrypt command. Linux Mint 21.x uses the same command name and the package suffix 1.26.24-1~ubuntu22.04-1.
dpkg-query -W veracrypt
veracrypt --version
veracrypt 1.26.24-1~ubuntu24.04-1 VeraCrypt 1.26.24
Install VeraCrypt from the Unit 193 PPA on Linux Mint
The Unit 193 PPA is a community-maintained APT source, not an upstream VeraCrypt repository. On Linux Mint, add-apt-repository handles the Ubuntu base automatically, so this method does not need a manual codename-mapping step.
Minimal Mint installs may not include the repository helper yet. Install Mint’s source-management package only when add-apt-repository is missing.
command -v add-apt-repository >/dev/null 2>&1 || sudo apt install mintsources -yAdd the PPA next. The -y flag accepts the repository prompt automatically.
sudo add-apt-repository -y ppa:unit193/encryptionRefresh APT and inspect the candidate before you install anything. Keeping these checks separate makes it easier to spot a missing Mint base mapping or a stale PPA entry.
sudo apt update
apt-cache policy veracrypt
Relevant output includes:
Get:1 https://ppa.launchpadcontent.net/unit193/encryption/ubuntu noble InRelease [24.3 kB]
Get:2 https://ppa.launchpadcontent.net/unit193/encryption/ubuntu noble/main amd64 Packages [620 B]

veracrypt:
  Installed: (none)
  Candidate: 1.26.24-0vanir1~bpo24.04
Linux Mint 21.x shows the same pattern with the jammy suite and the suffix 1.26.24-0vanir1~bpo22.04.
Install VeraCrypt from the PPA once the candidate looks correct.
sudo apt install veracrypt -yCheck the installed package after APT finishes configuring it. The PPA build can require a logged-in desktop session for GUI-safe command probes, so package state is the safer verification step from SSH or a headless terminal.
dpkg-query -W -f='${db:Status-Abbrev} ${binary:Package} ${Version}\n' veracrypt
command -v veracrypt
ii veracrypt 1.26.24-0vanir1~bpo24.04 /usr/bin/veracrypt
Build VeraCrypt from source on Linux Mint
This path is for readers who want a self-managed build or custom compile options. The toolchain comes from the packages covered in how to install GCC on Linux Mint, and the checkout itself uses install Git on Linux Mint.
Install the build dependencies for your Mint release first. Linux Mint 22.x uses the wxWidgets 3.2 development package, while Linux Mint 21.x still uses the 3.0 package name.
Linux Mint 21.x:
sudo apt install build-essential yasm pkg-config libwxgtk3.0-gtk3-dev libfuse-dev libpcsclite-dev git curl python3 -yLinux Mint 22.x:
sudo apt install build-essential yasm pkg-config libwxgtk3.2-dev libfuse-dev libpcsclite-dev git curl python3 -yUsing the wrong wxWidgets package is the most common Linux Mint build failure. Linux Mint 21.x still needs
libwxgtk3.0-gtk3-dev, while Linux Mint 22.x builds againstlibwxgtk3.2-dev.
Resolve the latest stable tag first and print it for a quick sanity check. Run the clone command in the same terminal session so LATEST_TAG remains available.
LATEST_JSON="$(curl -fsSL https://api.github.com/repos/veracrypt/VeraCrypt/releases/latest)"
LATEST_TAG="$(printf '%s\n' "$LATEST_JSON" | python3 -c 'import json, sys; print(json.load(sys.stdin)["tag_name"])')"
printf '%s\n' "$LATEST_TAG"
VeraCrypt_1.26.24
Clone that exact tag next. The --depth 1 flag keeps the checkout smaller by downloading only the selected tag history instead of the whole repository.
git clone --branch "$LATEST_TAG" --depth 1 https://github.com/veracrypt/VeraCrypt.git ~/VeraCrypt
test -f "$HOME/VeraCrypt/src/Makefile" && echo "source tree ready"
Build VeraCrypt with the CPU cores available on your system.
make -C "$HOME/VeraCrypt/src" -j"$(nproc)"Relevant output includes:
Compiling Main.cpp
Compiling GraphicUserInterface.cpp
Linking veracrypt
Install the compiled binary into /usr/local/bin. The install command copies the file and sets executable permissions in one step. On this source-build path, it gives you the veracrypt command but not an applications-menu launcher.
sudo install -m 0755 "$HOME/VeraCrypt/src/Main/veracrypt" /usr/local/bin/veracryptConfirm that the source build added the command.
command -v veracrypt
veracrypt --version
/usr/local/bin/veracrypt VeraCrypt 1.26.24
Launch VeraCrypt on Linux Mint
You can install VeraCrypt from any terminal session, but the GUI itself still needs an active desktop session to open. Package-based methods add the applications-menu launcher, while the source build gives you the GUI through the veracrypt command only.
Launch VeraCrypt from the terminal on Linux Mint
Start the graphical interface from a logged-in desktop session with the normal command.
veracryptIf you prefer a terminal-only workflow later, the same Downloads page also offers veracrypt-console packages for Linux Mint’s Ubuntu 24.04 and 22.04 bases.
Launch VeraCrypt from the applications menu on Linux Mint
If you installed VeraCrypt from the official package or the PPA, Linux Mint also adds the desktop launcher.
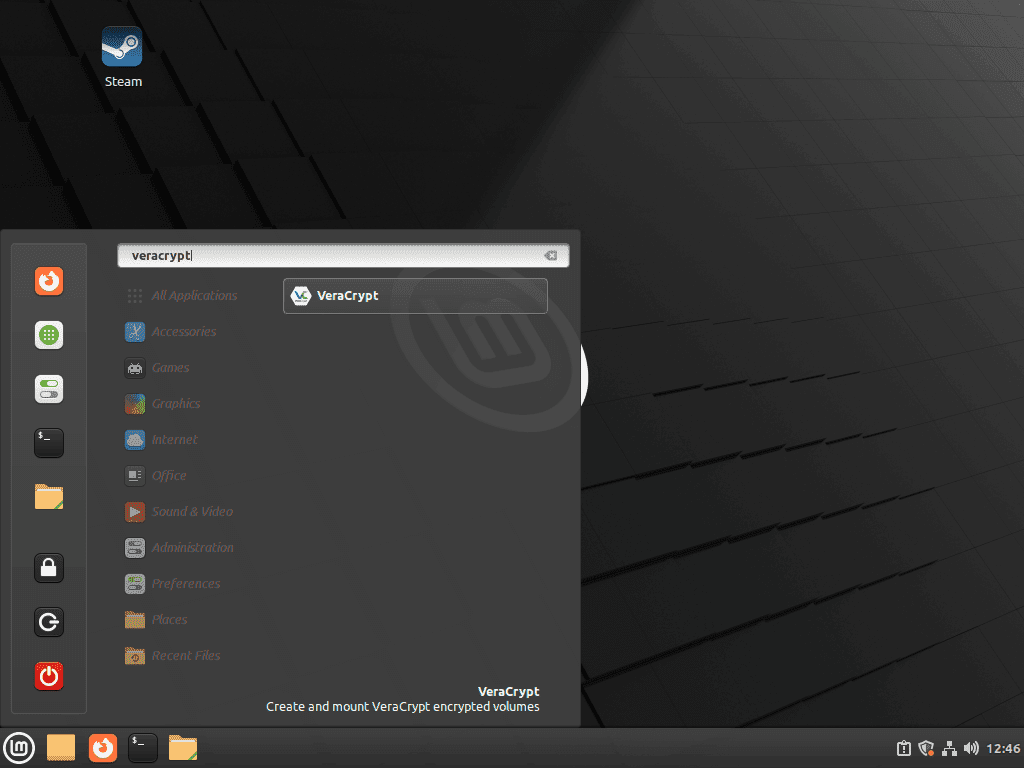
- Open the applications menu for Cinnamon, MATE, or Xfce.
- Search for VeraCrypt.
- Select the VeraCrypt launcher to open the main window.
Create your first VeraCrypt volume on Linux Mint
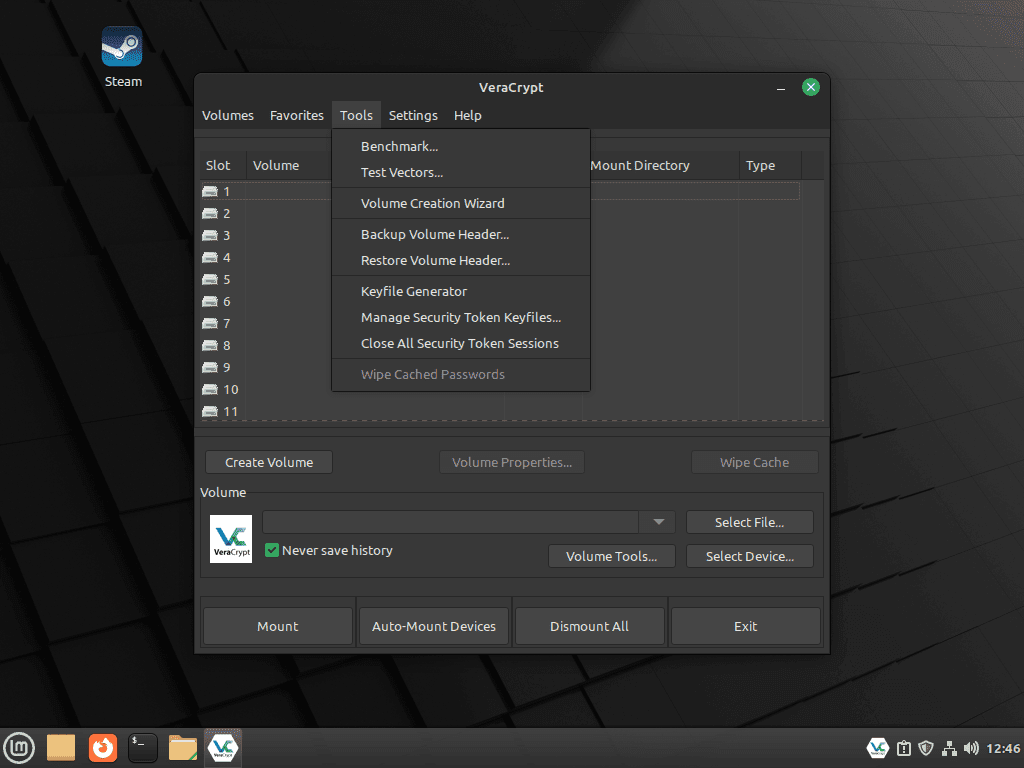
Once the window is open, create a small encrypted container first so you can test the workflow before moving sensitive files into a larger volume.
- Click Create Volume in the VeraCrypt window.
- Select Create an encrypted file container, then click Next.
- Choose Standard VeraCrypt volume unless you specifically need a hidden-volume layout.
- Click Select File and choose the folder and filename for the new container, for example
~/encrypted-container. - Keep the default AES setting unless you have a specific reason to choose another algorithm.
- Set the size you want for the container and create a strong password.
- Move the mouse inside the window until VeraCrypt has enough entropy, then click Format.
- Select an empty slot later, click Select File, choose the container, and then click Mount to open it like another drive.
The official VeraCrypt documentation goes deeper into hidden volumes, keyfiles, and full-disk encryption once the basic container flow feels comfortable.
Update or Remove VeraCrypt on Linux Mint
VeraCrypt updates depend on how you installed it. Package-based methods stay simple, while the source build benefits from a small helper script if you want a repeatable rebuild path.
Update the official VeraCrypt package on Linux Mint
The upstream .deb does not add a repository, so updating it means repeating the release-detection step and reinstalling the latest matching package. This keeps the package pinned to the right Ubuntu base for Linux Mint 22.x or 21.x.
resolve_veracrypt_package() {
  UBUNTU_CODENAME="$(. /etc/os-release && echo "${UBUNTU_CODENAME:-}")"

  case "$UBUNTU_CODENAME" in
    noble) UBUNTU_RELEASE=24.04 ;;
    jammy) UBUNTU_RELEASE=22.04 ;;
    *)
      printf 'This VeraCrypt package workflow is written for Linux Mint 22.x and 21.x.\n' >&2
      return 1
      ;;
  esac

  ARCH="$(dpkg --print-architecture)"
  case "$ARCH" in
    amd64|arm64) ;;
    *)
      printf 'The official Ubuntu 24.04 and 22.04 VeraCrypt packages support amd64 and arm64, not %s.\n' "$ARCH" >&2
      return 1
      ;;
  esac

  LATEST_JSON="$(curl -fsSL https://api.github.com/repos/veracrypt/VeraCrypt/releases/latest)"
  LATEST_TAG="$(printf '%s\n' "$LATEST_JSON" | python3 -c 'import json, sys; print(json.load(sys.stdin)["tag_name"])')"
  if [ -z "$LATEST_TAG" ]; then
    printf 'Could not resolve the latest VeraCrypt release tag.\n' >&2
    return 1
  fi

  LATEST_VERSION="${LATEST_TAG#VeraCrypt_}"
  PACKAGE_URL="https://launchpad.net/veracrypt/trunk/${LATEST_VERSION}/+download/veracrypt-${LATEST_VERSION}-Ubuntu-${UBUNTU_RELEASE}-${ARCH}.deb"

  if ! curl -fsIL "$PACKAGE_URL" >/dev/null; then
    printf 'No matching VeraCrypt package was found for Linux Mint (%s / Ubuntu %s) on %s.\n' "$UBUNTU_CODENAME" "$UBUNTU_RELEASE" "$ARCH" >&2
    return 1
  fi

  PACKAGE_FILE="${PACKAGE_URL##*/}"
  printf '%s\n' "$PACKAGE_FILE"
}

resolve_veracrypt_package
Download and install the replacement package once the filename looks correct, then remove the downloaded file so it does not linger in your working directory.
curl -fL --progress-bar -o "$PACKAGE_FILE" "$PACKAGE_URL"
sudo apt install -y "./$PACKAGE_FILE"
rm -f "$PACKAGE_FILE"
Check the installed version after the replacement package finishes configuring.
veracrypt --versionVeraCrypt 1.26.24
Update VeraCrypt from the Unit 193 PPA on Linux Mint
The PPA path stays inside APT, so a targeted package upgrade is enough.
sudo apt update && sudo apt install --only-upgrade veracryptCheck the installed package state after the package update finishes.
dpkg-query -W -f='${db:Status-Abbrev} ${binary:Package} ${Version}\n' veracryptii veracrypt 1.26.24-0vanir1~bpo24.04
Update the VeraCrypt source build on Linux Mint
This helper expects the source tree to stay in ~/VeraCrypt and the installed binary to stay in /usr/local/bin/veracrypt. It fetches the latest release tag, rebuilds only when the checkout is behind, and reinstalls the binary in place.
install_veracrypt_source_updater() {
  if [ -e /usr/local/bin/update-veracrypt-source ] && ! grep -q 'LinuxCapable VeraCrypt source updater' /usr/local/bin/update-veracrypt-source 2>/dev/null; then
    echo "Refusing to replace an existing update-veracrypt-source file." >&2
    return 1
  fi

  sudo tee /usr/local/bin/update-veracrypt-source >/dev/null <<'EOF'
#!/usr/bin/env bash
# LinuxCapable VeraCrypt source updater
set -euo pipefail

SOURCE_DIR="$HOME/VeraCrypt"
LATEST_JSON="$(curl -fsSL https://api.github.com/repos/veracrypt/VeraCrypt/releases/latest)"
LATEST_TAG="$(printf '%s\n' "$LATEST_JSON" | python3 -c 'import json, sys; print(json.load(sys.stdin)["tag_name"])')"

if [ ! -d "$SOURCE_DIR/.git" ]; then
  echo "Clone VeraCrypt to $SOURCE_DIR before using this updater."
  exit 1
fi

CURRENT_TAG="$(git -C "$SOURCE_DIR" describe --tags --exact-match 2>/dev/null || true)"
if [ "$CURRENT_TAG" = "$LATEST_TAG" ]; then
  echo "VeraCrypt is already on $LATEST_TAG."
  exit 0
fi

git -C "$SOURCE_DIR" fetch --tags
git -C "$SOURCE_DIR" checkout "$LATEST_TAG"

make -C "$SOURCE_DIR/src" -j"$(nproc)"
sudo install -m 0755 "$SOURCE_DIR/src/Main/veracrypt" /usr/local/bin/veracrypt
veracrypt --version
EOF
  sudo chmod 0755 /usr/local/bin/update-veracrypt-source
}

install_veracrypt_source_updater
Plain shell redirection would not inherit sudo, so tee writes the root-owned updater to /usr/local/bin. The setup function refuses to overwrite an unrelated file, marks the helper for safe cleanup later, and makes it executable. Confirm the helper is in your PATH, and then run it. If you want a deeper explanation of the permission bits, see the chmod command in Linux with examples.
command -v update-veracrypt-source
update-veracrypt-source
Example output when the source tree is already current:
/usr/local/bin/update-veracrypt-source
VeraCrypt is already on VeraCrypt_1.26.24.
Run this helper manually when you want a new release. Do not automate VeraCrypt rebuilds with cron or unattended timers, because encryption software is worth reviewing before you replace a working binary.
Remove VeraCrypt from Linux Mint
Removing VeraCrypt does not delete encrypted containers or partitions you created elsewhere. Treat those volume files as your data, not as disposable application leftovers.
For the official package download, remove the installed package and confirm that Linux Mint no longer tracks it.
sudo apt purge veracrypt -yConfirm that the package is gone before you move on.
dpkg-query -W -f='${db:Status-Abbrev} ${binary:Package}\n' veracrypt 2>/dev/null || echo "no veracrypt package record"no veracrypt package record
For the PPA method, remove the package, remove the Launchpad source, refresh APT, and then check both states separately.
sudo apt purge veracrypt -y
sudo add-apt-repository --remove -y ppa:unit193/encryption
sudo apt update
Confirm that the package is gone and the PPA file itself was removed.
dpkg-query -W -f='${db:Status-Abbrev} ${binary:Package}\n' veracrypt 2>/dev/null || echo "no veracrypt package record"

if find /etc/apt/sources.list.d -maxdepth 1 -iname '*unit193*' -print -quit | grep -q .; then
  echo "PPA source still present"
else
  echo "PPA source removed"
fi
no veracrypt package record PPA source removed
For the source build, remove the installed binary, the updater helper if you created it, and the local source tree only if you kept it at ~/VeraCrypt.
sudo rm -f /usr/local/bin/veracrypt
if grep -q 'LinuxCapable VeraCrypt source updater' /usr/local/bin/update-veracrypt-source 2>/dev/null; then
  sudo rm -f /usr/local/bin/update-veracrypt-source
fi
hash -r 2>/dev/null || true
if cd "$HOME"; then
  rm -rf "$HOME/VeraCrypt"
fi
Confirm that the command has disappeared from your PATH.
hash -r 2>/dev/null || true
command -v veracrypt || echo veracrypt not installed
veracrypt not installed
Troubleshoot VeraCrypt on Linux Mint
Most Linux Mint issues here come down to choosing the wrong upstream package family, missing PPA metadata, locale-sensitive launch errors, container-file permissions, or using the wrong wxWidgets development package for a source build.
Fix official VeraCrypt download detection on Linux Mint
If the download resolver stops with No matching VeraCrypt package was found, check the Ubuntu base codename and CPU architecture first. Linux Mint 22.x should print noble, and Linux Mint 21.x should print jammy.
grep '^UBUNTU_CODENAME=' /etc/os-release
dpkg --print-architecture
Relevant output includes:
UBUNTU_CODENAME=noble
amd64
If your architecture is arm64, rerun the resolver instead of reusing an amd64 filename. If your architecture is armhf, use the Unit 193 PPA because the official Ubuntu 24.04 and 22.04 package downloads do not publish an armhf GUI package. If your architecture is i386, neither active Mint package path in this article provides a usable package.
Fix missing VeraCrypt package candidates after adding the PPA on Linux Mint
If apt install veracrypt still fails after you add the PPA, refresh APT and check whether Launchpad is exposing a real candidate for your Mint base.
sudo apt update
apt-cache policy veracrypt
Relevant output on Linux Mint 21.x includes:
Get:8 https://ppa.launchpadcontent.net/unit193/encryption/ubuntu jammy InRelease [24.6 kB]
Get:9 https://ppa.launchpadcontent.net/unit193/encryption/ubuntu jammy/main amd64 Packages [620 B]

veracrypt:
  Installed: (none)
  Candidate: 1.26.24-0vanir1~bpo22.04
Reset the PPA if the policy output still shows Candidate: (none).
command -v add-apt-repository >/dev/null 2>&1 || sudo apt install mintsources -y
sudo add-apt-repository --remove -y ppa:unit193/encryption
sudo add-apt-repository -y ppa:unit193/encryption
sudo apt update
Fix ParameterIncorrect XML parser errors on Linux Mint
If VeraCrypt exits with a message such as ParameterIncorrect at VeraCrypt::XmlParser::GetNodes on a non-English desktop, test the launch with a neutral UTF-8 locale first. This changes only the environment for that command.
LC_ALL=C.UTF-8 veracryptIf the locale override fixes the launch and you installed VeraCrypt from the official package or PPA, create a user-local copy of the desktop launcher instead of editing the package-owned file in /usr/share/applications.
mkdir -p "$HOME/.local/share/applications"
cp /usr/share/applications/veracrypt.desktop "$HOME/.local/share/applications/veracrypt.desktop"
sed -i 's|^Exec=/usr/bin/veracrypt|Exec=env LC_ALL=C.UTF-8 /usr/bin/veracrypt|' "$HOME/.local/share/applications/veracrypt.desktop"
update-desktop-database "$HOME/.local/share/applications" 2>/dev/null || true
Fix permission denied errors when opening a VeraCrypt container
If VeraCrypt opens but reports Permission denied when you select an existing container, check the container file and the filesystem that holds it before changing VeraCrypt itself. Current Linux Mint releases do not normally use a separate fuse group for this workflow.
CONTAINER="/path/to/your/container"
test -r "$CONTAINER" && echo "container file is readable" || echo "check container file permissions"
namei -l "$CONTAINER"
findmnt -T "$CONTAINER" -o TARGET,FSTYPE,OPTIONS
If the file belongs to another user and you know it should belong to your account, fix the file owner and mode. Replace the path first; do not run ownership changes against an encrypted partition or external drive until you are sure the selected path is the container file.
sudo chown "$USER:$USER" "/path/to/your/container"
chmod u+rw "/path/to/your/container"
Fix VeraCrypt source builds that fail on wxWidgets on Linux Mint
Build failures that mention missing wxWidgets headers almost always mean Linux Mint has the wrong development package installed for that release.
apt-cache search libwxgtk | grep devRelevant output includes:
libwxgtk3.2-dev - wxWidgets Cross-platform C++ GUI toolkit (GTK 3 development)
Linux Mint 21.x should show libwxgtk3.0-gtk3-dev instead. Install the package that matches your release, then rerun make -C "$HOME/VeraCrypt/src" -j"$(nproc)".
Fix a missing VeraCrypt launcher after a source build on Linux Mint
If VeraCrypt opens normally from a desktop terminal but never appears in the applications menu, you are usually looking at the expected source-build behavior rather than a failed GUI build. The source install here places only the binary in /usr/local/bin and does not create the desktop launcher for you.
ls /usr/share/applications/*veracrypt* 2>/dev/null || echo no desktop launcherno desktop launcher
Launch the source build with veracrypt from a desktop terminal, or switch to the official .deb or PPA method if you want the menu entry to be installed for you.
Conclusion
VeraCrypt is running on Linux Mint with a clean path for direct upstream downloads, APT-managed updates, or a self-managed source build. Start with a small encrypted container, confirm you can mount and unmount it cleanly, and move on to hidden volumes or larger encrypted partitions once the workflow feels routine.

Tried this, but am getting the following:
chris@chris-HP-Pavilion-Laptop-14-bf1xx:~$ sudo add-apt-repository ppa:unit193/encryption -y
You are about to add the following PPA:
https://www.veracrypt.fr/
VeraCrypt – Open source disk encryption with strong security for the Paranoid, based on TrueCrypt.
Debian and Rasbian builds: https://build.opensuse.org/project/show/home:unit193:veracrypt
More info: https://launchpad.net/~unit193/+archive/ubuntu/encryption
gpg: directory ‘/root/.gnupg’ created
gpg: keybox ‘/root/.gnupg/pubring.kbx’ created
gpg: /root/.gnupg/trustdb.gpg: trustdb created
gpg: keybox ‘/etc/apt/keyrings/A2464CAD19240F2C59FC031F9B9FBDD5426B515F.keyring’ created
gpg: key 9B9FBDD5426B515F: public key “Launchpad PPA for Unit 193” imported
gpg: Total number processed: 1
gpg: imported: 1
chris@chris-HP-Pavilion-Laptop-14-bf1xx:~$ sudo apt install veracrypt
Reading package lists… Done
Building dependency tree… Done
Reading state information… Done
E: Unable to locate package veracrypt
chris@chris-HP-Pavilion-Laptop-14-bf1xx:~$
Any suggestions what’s going wrong? Thanks!
Chris, thanks for reporting this. The article had a gap. It claimed the
-yflag would automatically refresh the package lists, but that does not always happen reliably. Runningsudo apt updateafter adding the PPA should fix it:The guide has been updated to include an explicit
apt updatestep after adding the PPA, along with a troubleshooting section for this exact issue. Your comment helped catch something that would have tripped up other readers. Appreciate you taking the time to report it.Best and most awesome answer on how to install this program. You are a major asset in the march towards Linux (in this case Mint) and the fleeing from MS Windows.
Thank you, so much. Appreciate how easy you made this for a nubie like me.
I installed Veracrypt according to the instructions, but when I try to open an existing Veracrypt container, it says, “Permission denied.”
I also installed the Debian and Ubuntu versions from the Veracrypt website with the same result.
What am I doing wrong?
Thanks for reporting this, Charlie. On current Linux Mint installs, this usually points to the container file or the external drive mount, not a missing
fusegroup. First, check whether your user can read the container and how the filesystem is mounted:If the file belongs to another account and you know it should belong to yours, fix the file ownership and mode after replacing the path:
The article now includes this troubleshooting path. If the container is on an external drive, the
findmntoutput is especially useful because read-only, ownership, or permission-related mount options can block VeraCrypt before it opens the file.Linux Mint 22.1 Cinnamon 2025.05.28
I tried installing the VeraCrypt program using several methods, but after a successful installation, I receive the following error message upon launching it:
ParameterIncorrect at VeraCrypt::XmlParser::GetNodes:82
Thanks for reporting this, Attila. That
ParameterIncorrect at XmlParser::GetNodeslaunch error usually points to a locale parsing problem on non-English desktops. First, test VeraCrypt with a neutral UTF-8 locale:If that works, make a user-local launcher override instead of editing the package-owned desktop file:
The article now includes this as a troubleshooting step. If the error persists, rename
~/.config/VeraCrypt/Configuration.xmlso VeraCrypt can regenerate a clean configuration file.