

Yandex Browser makes the most sense on Ubuntu when you want a Chromium-based browser with built-in translation, Yandex service integration, and page compression for slower connections. You can install Yandex Browser on Ubuntu from Yandex’s official APT repository, which keeps updates in your normal package workflow instead of leaving a standalone browser package to track manually.
Yandex still publishes a direct Linux .deb on the official Yandex Browser download page, but the repository method is easier to maintain on Ubuntu 26.04, 24.04, and 22.04 because updates stay in APT. The workflow here imports the signed repository, installs the stable package, and fixes the duplicate .list file that Yandex recreates during installs and reinstalls.
Yandex Browser ships Linux packages only for 64-bit
amd64systems. The official repository does not publish 32-bit or ARM builds.
LinuxCapable documents the repository method for Ubuntu 26.04, 24.04, and 22.04. Yandex’s current Linux requirements list Ubuntu 18.04 or later, but the examples here stay within the Ubuntu LTS releases we actively validate.
Install Yandex Browser on Ubuntu
Prepare Ubuntu for Yandex Browser
Start by refreshing package metadata and upgrading any pending packages. Most desktop Ubuntu installs already include curl, but minimal images often do not, so install it before you fetch the Yandex signing key.
sudo apt update && sudo apt upgrade -y
sudo apt install curl -y
These commands use
sudofor tasks that need root privileges. If your account does not have sudo access yet, follow the guide on how to add a new user to sudoers on Ubuntu before continuing.
If you use download commands often, the curl command in Linux guide explains the same flags used in the repository setup here.
Import the Yandex Browser Signing Key on Ubuntu
Import the Yandex signing key into a dedicated system keyring so APT can verify packages from this repository. The --yes flag makes the command safe to rerun later if you need to replace the keyring file.
curl -fsSL https://repo.yandex.ru/yandex-browser/YANDEX-BROWSER-KEY.GPG | sudo gpg --dearmor --yes -o /usr/share/keyrings/yandex-browser.gpgConfirm the imported key fingerprint before you add the repository.
gpg --show-keys --fingerprint /usr/share/keyrings/yandex-browser.gpgRelevant output includes:
pub   rsa4096 2018-02-03 [SC]
  2249 74DB 7FED 6DEC B7D8 55EF 60B9 CD3A 083A 7A9A
uid                      Yandex <browser@yandex-team.ru>
Add the Yandex Browser Repository on Ubuntu
Write the repository file in DEB822 format so the key stays scoped to this source. The file lives under /etc/apt/sources.list.d/, so tee writes it with root permissions; a plain > redirect would not inherit sudo.
printf '%s\n' \
'Types: deb' \
'URIs: https://repo.yandex.ru/yandex-browser/deb' \
'Suites: stable' \
'Components: main' \
'Architectures: amd64' \
'Signed-By: /usr/share/keyrings/yandex-browser.gpg' | sudo tee /etc/apt/sources.list.d/yandex-browser-stable.sources > /dev/null
Print the file once so you can confirm the repository entry before APT reads it.
cat /etc/apt/sources.list.d/yandex-browser-stable.sourcesRelevant output includes:
Types: deb
URIs: https://repo.yandex.ru/yandex-browser/deb
Suites: stable
Components: main
Architectures: amd64
Signed-By: /usr/share/keyrings/yandex-browser.gpg
Refresh APT so Ubuntu picks up the new source.
sudo apt updateRelevant output includes:
Hit:4 https://repo.yandex.ru/yandex-browser/deb stable InRelease
Install Yandex Browser on Ubuntu
Install the stable package from the repository you just added. The package name is yandex-browser-stable, while the desktop launcher and terminal command use the same stable branding.
sudo apt install yandex-browser-stable -yVerify the installed version with APT instead of trying to open the GUI from a headless shell.
apt-cache policy yandex-browser-stableRelevant output includes:
yandex-browser-stable:
  Installed: 26.3.1.961-1
  Candidate: 26.3.1.961-1
  Version table:
 *** 26.3.1.961-1 500
    500 https://repo.yandex.ru/yandex-browser/deb stable/main amd64 Packages
    100 /var/lib/dpkg/status
If Yandex publishes a newer build, the version number in your output will change, but the installed and candidate values should still match after a clean install.
On Ubuntu 24.04 and 26.04, the package also installs its own AppArmor handling for the browser, so you normally do not need a separate Chromium sandbox workaround.
Prevent Duplicate Yandex Browser Repository Warnings on Ubuntu
The package creates its own legacy yandex-browser.list file during the first install, which duplicates the DEB822 source you already configured. Once you remove that extra file, normal apt update and package upgrades leave it alone.
sudo rm -f /etc/apt/sources.list.d/yandex-browser.listVerify that only your DEB822 source file remains in place before you refresh APT.
ls -1 /etc/apt/sources.list.d/yandex-browser*Relevant output includes:
/etc/apt/sources.list.d/yandex-browser-stable.sources
If you later purge the package and install it fresh again, Yandex can create the legacy .list file again, so the same one-line cleanup still applies.
APT should now refresh without the duplicate-target warning that references both yandex-browser.list and yandex-browser-stable.sources.
Launch Yandex Browser on Ubuntu
The package installs cleanly from a terminal on desktop, server, and minimal Ubuntu systems, but Yandex Browser still needs an active graphical session to open a window.
Launch Yandex Browser from the Applications Menu on Ubuntu
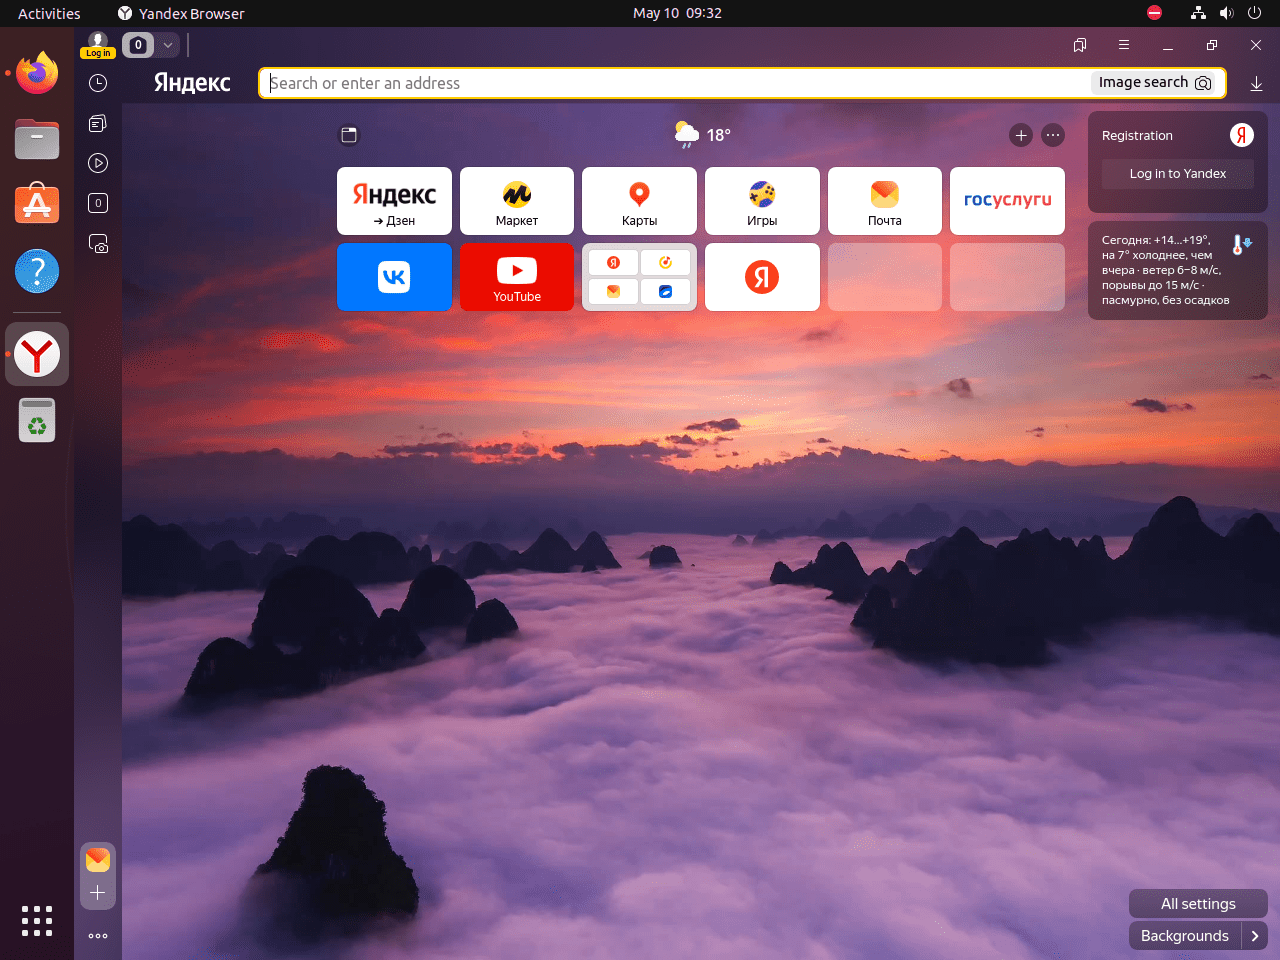
Open the Activities overview, search for Yandex Browser, and launch it like any other desktop application. On first start, you can sign in, import bookmarks, and decide whether to make it your default browser.
Launch Yandex Browser from the Terminal on Ubuntu
If you are already inside a graphical session, you can start the browser from a terminal with the stable launcher command.
yandex-browser-stable &Manage Yandex Browser on Ubuntu
Update Yandex Browser on Ubuntu
Because the browser comes from an APT repository, you can update it with a targeted package upgrade instead of a full distribution upgrade.
sudo apt update
sudo apt install --only-upgrade yandex-browser-stable -y
When you are already on the newest build, relevant output includes:
yandex-browser-stable is already the newest version (26.3.1.961-1).
0 upgraded, 0 newly installed, 0 to remove and 0 not upgraded.
Remove Yandex Browser on Ubuntu
Purge the browser package when you want to remove both the application and its package-managed configuration files. This step removes the browser itself, but it does not remove the repository yet.
sudo apt purge --autoremove yandex-browser-stable -yCheck package state before you remove the repository so you can confirm the browser is gone while the source still exists.
apt-cache policy yandex-browser-stableRelevant output includes:
yandex-browser-stable:
  Installed: (none)
  Candidate: 26.3.1.961-1
  Version table:
     26.3.1.961-1 500
        500 https://repo.yandex.ru/yandex-browser/deb stable/main amd64 Packages
Remove the Yandex Browser Repository from Ubuntu
Delete the repository file, any leftover legacy .list file, and the imported key when you no longer want APT to offer Yandex Browser.
sudo rm -f /etc/apt/sources.list.d/yandex-browser-stable.sources
sudo rm -f /etc/apt/sources.list.d/yandex-browser.list
sudo rm -f /usr/share/keyrings/yandex-browser.gpg
sudo apt update
Run one final policy check to confirm the package no longer has an available repository candidate.
apt-cache policy yandex-browser-stableRelevant output includes:
yandex-browser-stable:
  Installed: (none)
  Candidate: (none)
  Version table:
Remove Yandex Browser Profile Data on Ubuntu
Delete profile data only after you export anything you want to keep. Bookmarks, saved passwords, browsing history, and extensions stored only on this machine will be removed permanently.
Profile directories are created after the browser runs for a user account, so check which Yandex paths actually exist before you delete anything.
find "$HOME/.config" "$HOME/.cache" "$HOME/.local/share" -maxdepth 2 -iname '*yandex-browser*' -print 2>/dev/nullIf the browser has already been launched, the command may print paths such as:
/home/your-user/.config/yandex-browser
/home/your-user/.cache/yandex-browser
/home/your-user/.local/share/applications/yandex-browser-stable.desktop
Delete only the paths that the previous command printed for your account.
find "$HOME/.config" "$HOME/.cache" "$HOME/.local/share" -maxdepth 2 -iname '*yandex-browser*' -exec rm -rf {} + 2>/dev/nullTroubleshoot Yandex Browser on Ubuntu
Most install failures come from a missing signing key, the duplicate repository file Yandex writes during installation, or an APT source file that was not saved correctly.
Fix Yandex Browser GPG Key Errors on Ubuntu
If APT cannot verify the repository, it usually reports the missing Yandex key ID during apt update.
The following signatures couldn't be verified because the public key is not available: NO_PUBKEY 60B9CD3A083A7A9A
Remove the broken keyring file and import the key again, then confirm the fingerprint.
sudo rm -f /usr/share/keyrings/yandex-browser.gpg
curl -fsSL https://repo.yandex.ru/yandex-browser/YANDEX-BROWSER-KEY.GPG | sudo gpg --dearmor --yes -o /usr/share/keyrings/yandex-browser.gpg
gpg --show-keys --fingerprint /usr/share/keyrings/yandex-browser.gpg
Relevant output includes the same fingerprint shown in the install section.
Fix Duplicate Yandex Browser Source Warnings on Ubuntu
If APT warns that a target is configured multiple times, Yandex has recreated its legacy .list file again.
W: Target Packages (main/binary-amd64/Packages) is configured multiple times in /etc/apt/sources.list.d/yandex-browser.list and /etc/apt/sources.list.d/yandex-browser-stable.sources
Remove the extra .list file again and confirm that only the DEB822 source remains before you refresh APT.
sudo rm -f /etc/apt/sources.list.d/yandex-browser.list
ls -1 /etc/apt/sources.list.d/yandex-browser*
Relevant output includes:
/etc/apt/sources.list.d/yandex-browser-stable.sources
Fix "Unable to Locate Package yandex-browser-stable" on Ubuntu
When APT cannot find the package, check whether the repository is active before you retry the install.
apt-cache policy yandex-browser-stable
cat /etc/apt/sources.list.d/yandex-browser-stable.sources
sudo apt update
If the source file is correct and the repository is healthy, relevant output includes:
Hit:4 https://repo.yandex.ru/yandex-browser/deb stable InRelease
yandex-browser-stable:
  Installed: (none)
  Candidate: 26.3.1.961-1
Yandex Browser on Ubuntu FAQ
Yes. Yandex still publishes a Linux .deb on its official download page. The APT repository is still the cleaner Ubuntu workflow because updates stay in your normal package manager and you avoid manually tracking new browser builds.
The package creates /etc/apt/sources.list.d/yandex-browser.list during the first install. If you already added a DEB822 yandex-browser-stable.sources file, APT sees both entries as the same repository and warns about duplicate targets. Removing the extra .list file fixes the warning, and normal updates leave it gone.
Yes. The repository installs cleanly on Ubuntu 26.04, 24.04, and 22.04, and Yandex’s current Linux requirements list Ubuntu 18.04 or later. LinuxCapable keeps the published examples scoped to the supported Ubuntu LTS releases we validate directly.
No. Yandex’s official Linux repository publishes amd64 packages only, so there is no supported 32-bit Ubuntu or ARM package in this workflow.
Conclusion
Yandex Browser is installed on Ubuntu with APT handling future updates, so it stays in the same maintenance path as the rest of your packaged software. If you want a different Chromium-based setup later, install Brave Browser on Ubuntu for stronger privacy defaults, install Chromium Browser on Ubuntu for a fully open-source base, or install Microsoft Edge on Ubuntu for tighter Microsoft 365 integration.

Is there a 32-bit version of Yandex for Debian?
Thanks for asking, Emmanuel. Unfortunately, Yandex Browser is only available for 64-bit (amd64) systems. The official Yandex repository does not provide packages for 32-bit or ARM architectures, and this applies to both Debian and Ubuntu. If you need a lightweight browser for a 32-bit system, consider Firefox ESR or Chromium from your distribution’s repositories.
please replace “browser-*” to “browser*”:
sudo rm /etc/apt/sources.list.d/yandex-browser-*.list
->
sudo rm /etc/apt/sources.list.d/yandex-browser*.list
thanks for the feedback, fixed.