
Fedora opens Office documents with Liberation, Carlito, and Caladea font substitutes by default, which keeps layouts close but not always exact when a file expects Arial, Times New Roman, Calibri, Consolas, or Aptos. To install Microsoft fonts on Fedora 44 or Fedora 43, use the mscorefonts2 msttcore-fonts-installer RPM as a verified source archive, then extract the fonts into a user-local or /usr/local font directory so Fedora release upgrades do not have to run the old RPM scriptlet offline.
The legacy system-wide RPM install remains available for controlled mutable Fedora systems, but a system-wide extraction under /usr/local/share/fonts gives every local user the same fonts without registering the old package. Optional sections add Microsoft Aptos from the official Download Center and PowerPoint Viewer fonts for Cambria Regular, Cambria Math, and Meiryo when those document fonts matter.
Install Microsoft Fonts on Fedora
Choose a Microsoft Fonts Method on Fedora
| Method | Source | What It Adds | Best Fit |
|---|---|---|---|
| User-local msttcore extraction | mscorefonts2 on SourceForge, extracted without installing the RPM | Classic Core Fonts plus most ClearType fonts under ~/.local/share/fonts/microsoft-core/ | Most Fedora desktops, single-user systems, Atomic desktops, and machines that use dnf system-upgrade |
| System-wide msttcore extraction | Same SourceForge RPM, extracted without installing the RPM | The same font set under /usr/local/share/fonts/microsoft-core/ | Mutable Fedora systems where every local user needs the fonts without a registered legacy RPM |
| Legacy system-wide msttcore RPM | Same SourceForge RPM, installed with rpm | The same font set under /usr/share/fonts/msttcore/ | Controlled mutable Fedora systems where an admin accepts the release-upgrade scriptlet risk |
| Aptos official ZIP | Microsoft Aptos Fonts from the Download Center | Aptos, Aptos Display, Aptos Mono, Aptos Narrow, and Aptos Serif under ~/.local/share/fonts/microsoft-aptos/ | Office documents that use Microsoft’s newer default font family |
| PowerPoint Viewer extraction | Archived Microsoft PowerPoint Viewer | Cambria Regular, Cambria Math, Meiryo, and newer ClearType font files | Documents that need the full Cambria family or Japanese Meiryo fonts |
Fedora Atomic desktops such as Silverblue, Kinoite, and many Bazzite images do not use direct rpm -ivh installs against the live /usr tree. Fedora documents package layering on Fedora Atomic Desktops, but the user-local msttcore extraction method avoids registering this old local RPM as a system package.
The package is not available from Fedora’s default repositories under names such as msttcore-fonts-installer, msttcorefonts, or ttf-mscorefonts-installer. Current Fedora uses dnf rather than legacy yum, but repository install commands for those package names do not apply here; use the verified SourceForge RPM as an extraction source instead.
Update Fedora before Installing Microsoft Fonts
Refresh Fedora’s package metadata and apply pending updates before installing the helper tools. Open a terminal from Activities, then run:
sudo dnf upgrade --refreshYour user account needs sudo privileges for system package installs. If Fedora returns a sudo permission error, follow the Fedora sudoers workflow in how to add a user to sudoers on Fedora.
Install Microsoft Font Installer Dependencies
Install the tools that download, extract, index, and verify the font files. Fedora Workstation already includes some of these packages, while Server, minimal, container, or custom desktop installs may need the full list:
sudo dnf install curl cabextract xorg-x11-font-utils mkfontscale fontconfig cpio unzipcurl downloads the RPM, ZIP, and Microsoft cabinet files, cabextract unpacks the cabinet archives, fontconfig registers fonts for desktop applications, and mkfontscale supplies the legacy mkfontscale and mkfontdir commands. The old RPM also declares xorg-x11-font-utils as a dependency, cpio is needed for msttcore RPM extraction, and the unzip command extracts the Aptos ZIP.
On Fedora Atomic desktops, do not use dnf on the host for this dependency step. Make these helper tools available in a Fedora toolbox or Distrobox environment, or layer only the helper packages with rpm-ostree if you want them on the host. The user-local font install still writes only to your home directory.
Download and Verify msttcore-fonts-installer
Download the mscorefonts2 RPM used by this workflow from SourceForge:
curl -fLO https://downloads.sourceforge.net/project/mscorefonts2/rpms/msttcore-fonts-installer-2.6-1.noarch.rpmThe RPM is not signed and lacks the digest metadata DNF5 expects. Before using it as an extraction source or for the optional system-wide install, verify this 2.6 RPM against its known SHA256 hash:
printf '%s msttcore-fonts-installer-2.6-1.noarch.rpm\n' '55d7f3a86533225634ff3ea2384b4356d9665a29cc7eeacff16602a1714afbb4' | sha256sum -c -A matching download returns:
msttcore-fonts-installer-2.6-1.noarch.rpm: OK
If the checksum fails, delete the RPM and download it again from the SourceForge project page.
Install Microsoft Fonts for One Fedora User
Use this method when you want the same core fonts without registering the old RPM in the system package database. From the directory that contains the verified RPM, extract the installer script, download the font archives, and install them into your user font directory:
(
    set -euo pipefail

    rpmfile="$PWD/msttcore-fonts-installer-2.6-1.noarch.rpm"
    workdir=$(mktemp -d)
    trap 'rm -rf "$workdir"' EXIT

    fontdir="$HOME/.local/share/fonts/microsoft-core"
    mkdir -p "$fontdir"

    cd "$workdir"
    rpm2cpio "$rpmfile" | cpio -id --quiet
    ./usr/lib/msttcore-fonts-installer/refresh-msttcore-fonts.sh -F "$fontdir"
    for required_font in arial.ttf calibri.ttf; do
        if [ ! -s "$fontdir/$required_font" ]; then
            printf 'Missing expected font: %s\n' "$required_font"
            exit 1
        fi
    done
    fc-cache -f "$fontdir"
)
This path still needs the helper tools from the dependency step. It installs the fonts only for your Linux account, which is usually the safer choice on immutable desktops, shared systems, or machines where you do not want a system-wide font install. The file checks stop the block before fc-cache if a helper is missing or a cabinet extraction fails.
The extracted script was written for the system RPM, so a user-local run can print xset: command not found or a permission warning for /etc/fonts/conf.d/09-msttcore-fonts.conf. Those warnings do not block the user font directory; the follow-up fc-cache command and fc-match checks verify fontconfig registration.
Because this method does not register msttcore-fonts-installer in the RPM database, Fedora release upgrades do not have to run the package’s SourceForge download script in the offline upgrade environment.
Install Microsoft Fonts System-Wide without the RPM
This method installs the extracted fonts for every local user without registering
msttcore-fonts-installerin the RPM database. Use it on mutable Fedora systems where/usr/local/share/fontsis appropriate; use the user-local method on Atomic desktops unless you deliberately manage a host-wide local font directory.
From the directory that contains the verified RPM, extract the installer script into a temporary workspace, copy the verified font files into /usr/local/share/fonts/microsoft-core, return ownership to root, and refresh the system font cache:
(
    set -euo pipefail

    rpmfile="$PWD/msttcore-fonts-installer-2.6-1.noarch.rpm"
    workdir=$(mktemp -d)
    trap 'rm -rf "$workdir"' EXIT

    fontdir="/usr/local/share/fonts/microsoft-core"
    extractdir="$workdir/microsoft-core"

    cd "$workdir"
    rpm2cpio "$rpmfile" | cpio -id --quiet
    mkdir -p "$extractdir"
    ./usr/lib/msttcore-fonts-installer/refresh-msttcore-fonts.sh -F "$extractdir"
    for required_font in arial.ttf calibri.ttf; do
        if [ ! -s "$extractdir/$required_font" ]; then
            printf 'Missing expected font: %s\n' "$required_font"
            exit 1
        fi
    done
    sudo install -d -m 0755 "$fontdir"
    sudo find "$fontdir" -mindepth 1 -maxdepth 1 -exec rm -rf {} +
    sudo cp -a "$extractdir"/. "$fontdir"/
    sudo chown -R root:root "$fontdir"
    sudo find "$fontdir" -type d -exec chmod 0755 {} +
    sudo find "$fontdir" -type f -exec chmod 0644 {} +
    sudo fc-cache -f "$fontdir"
)
The extracted script runs without root privileges while it downloads and unpacks the cabinet files. It can print xset: command not found or a permission warning for /etc/fonts/conf.d/09-msttcore-fonts.conf; those warnings do not block the temporary font extraction. The file checks stop the block before anything is copied into /usr/local if a helper is missing or a cabinet extraction fails.
Because this method does not install the RPM, rpm -q msttcore-fonts-installer should still report that the package is not installed after the fonts are available.
Install the Legacy System-Wide RPM on Fedora
Use the legacy RPM method only when every local user needs these fonts and you can manage the package before Fedora release upgrades. The RPM stores a postinstall script that downloads font archives from SourceForge; if that script runs during
dnf system-upgradewithout working DNS or network access, the offline upgrade can stall while the script retries downloads.
For a controlled mutable Fedora system where you intentionally want the old package registered in RPM, install the verified RPM directly:
sudo rpm -ivh --nodigest --nofiledigest msttcore-fonts-installer-2.6-1.noarch.rpmThe --nodigest and --nofiledigest flags skip the RPM digest checks that this 2013 community package lacks. They do not add trust to the package, so keep the checksum step directly before the install and use this workaround only for this specific RPM.
Relevant output from a successful Fedora 44 legacy RPM install includes:
Preparing...                          ########################################
Updating / installing...
msttcore-fonts-installer-2.6-1        ########################################
### Downloading andale32.exe from http://downloads.sourceforge.net/corefonts
### cab file andale32.exe successfully downloaded
### Downloading PowerPointViewer.exe from http://downloads.sourceforge.net/mscorefonts2
### cab file PowerPointViewer.exe successfully downloaded
### Indexing the new fonts for Xft
/usr/bin/fc-cache-64: succeeded
On Wayland or headless sessions, the installer can also print xset: command not found. That warning affects the legacy X font path only; the fc-cache-64: succeeded line and the fc-match checks confirm the fonts are registered through fontconfig.
Fonts Included in msttcore-fonts-installer 2.6
The mscorefonts2 installer downloads the Microsoft core font set from two SourceForge-hosted collections:
- Classic Core Fonts: Andale Mono, Arial, Arial Black, Comic Sans MS, Courier New, Georgia, Impact, Times New Roman, Trebuchet MS, Verdana, Webdings, and Tahoma.
- ClearType Fonts: Calibri, Candara, Consolas, Constantia, Corbel, and Cambria Bold, Italic, and Bold Italic.
Cambria Regular and Cambria Math live inside CAMBRIA.TTC, which the mscorefonts2 installer does not install. Use the optional PowerPoint Viewer section if those fonts are required.
Verify Microsoft Fonts on Fedora
Check Microsoft Fonts with fc-match
Use fc-match to confirm that common Microsoft family names now resolve to Microsoft font files instead of Fedora substitutes:
fc-match Arial
fc-match "Times New Roman"
fc-match Calibri
fc-match Consolas
A successful install returns Microsoft font files:
arial.ttf: "Arial" "Regular"
times.ttf: "Times New Roman" "Regular"
calibri.ttf: "Calibri" "Regular"
consola.ttf: "Consolas" "Regular"
For the system-wide /usr/local extraction method, confirm the expected file count:
find /usr/local/share/fonts/microsoft-core -maxdepth 1 -type f | wc -lThe mscorefonts2 extraction creates 56 files in that directory, including the font files and legacy X font indexes:
56
For the user-local method, check the user font directory instead:
find "$HOME/.local/share/fonts/microsoft-core" -maxdepth 1 -type f | wc -lFor the legacy RPM method, check the package-owned directory instead:
find /usr/share/fonts/msttcore -maxdepth 1 -type f | wc -lVerify Fonts in GNOME Fonts
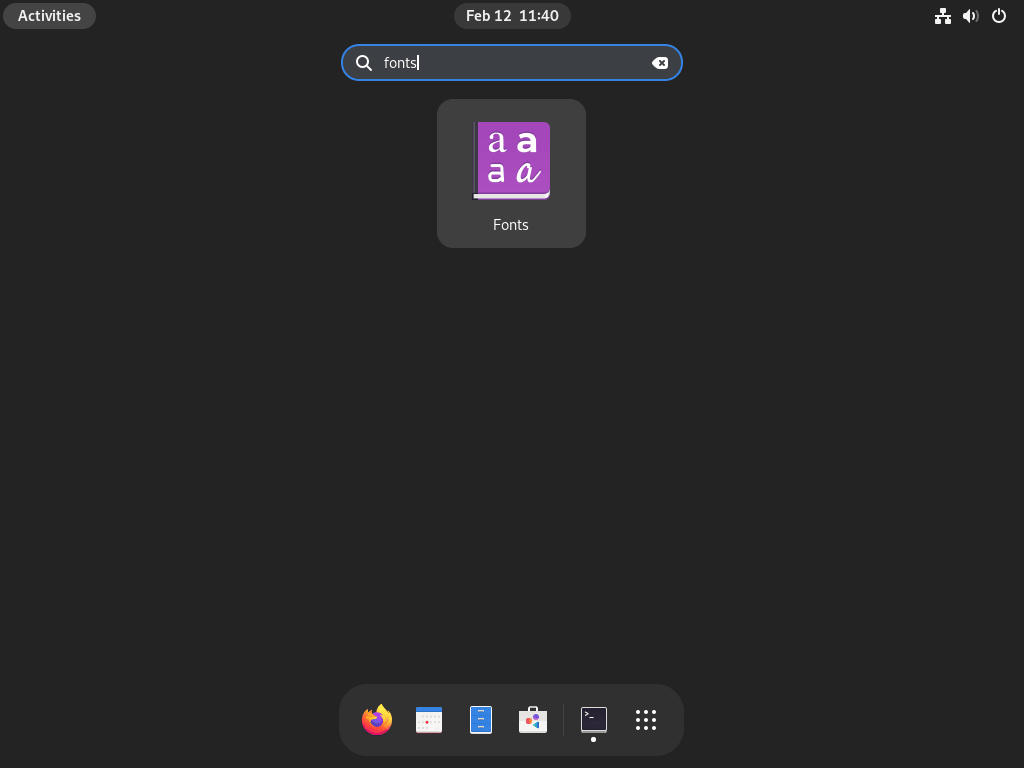
Fedora’s Fonts application gives a visual confirmation when you are working in a graphical desktop session. Search for “Fonts” in Activities to open it.
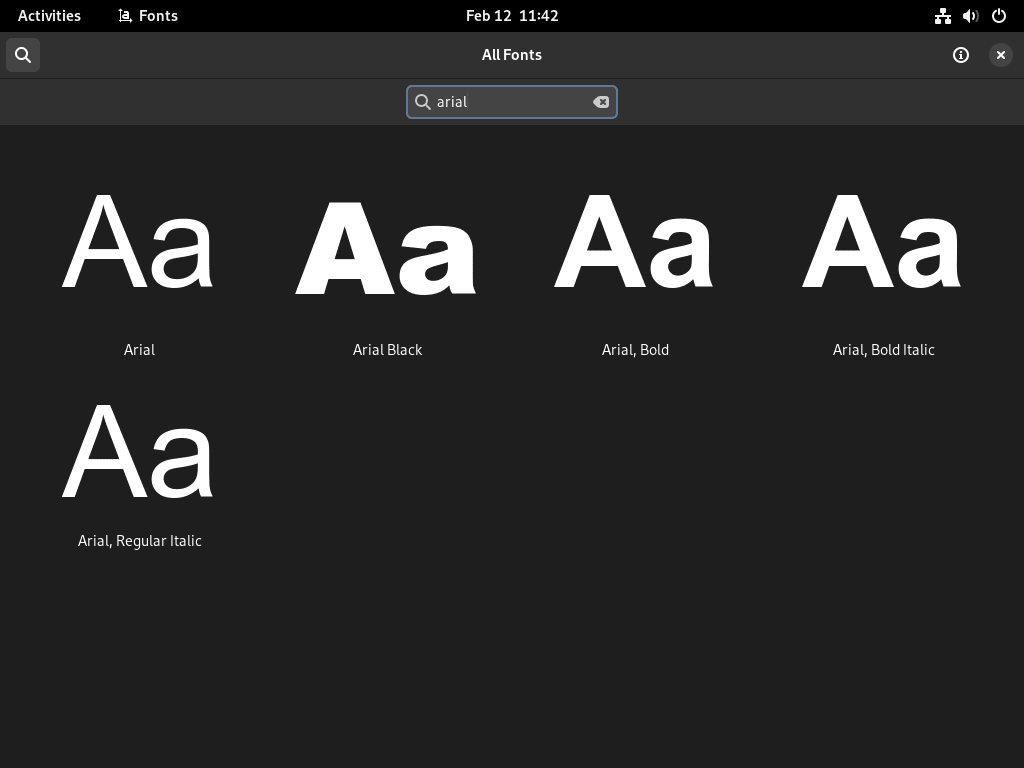
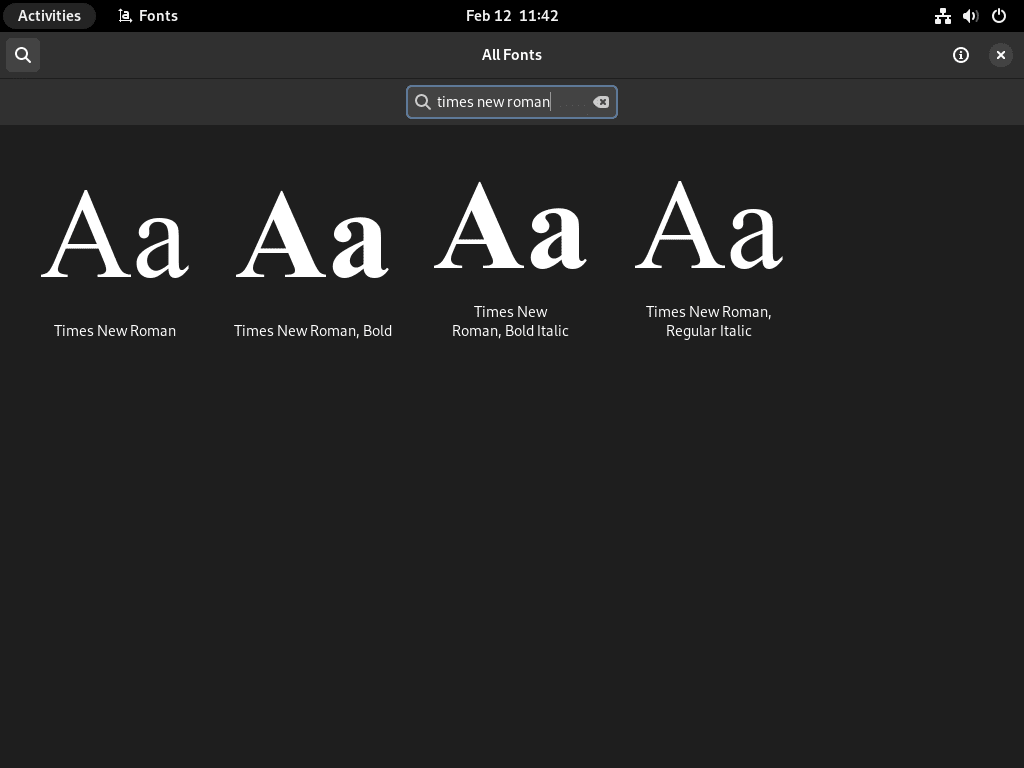
Search for “Arial,” “Calibri,” or “Times New Roman” to confirm these fonts appear in your system library. Each family shows its available styles separately.
Test Microsoft Fonts in LibreOffice on Fedora
Open LibreOffice Writer on Fedora and check the font dropdown:
- Search for “LibreOffice Writer” in Activities and open the application.
- Type a sentence, highlight it, and select Arial, Calibri, or Times New Roman from the font dropdown.
- Confirm the text changes to the selected Microsoft font without a substitution warning.
Documents that specify Microsoft fonts now render with the original typefaces instead of Fedora’s default substitutes.
Add the Complete Cambria Font Family on Fedora
The mscorefonts2 installer includes Cambria Bold, Italic, and Bold Italic, but not Cambria Regular. If your documents need the complete Cambria family, Cambria Math, or Meiryo, extract the archived Microsoft PowerPoint Viewer fonts into a user-local font directory.
These files come from Microsoft’s discontinued PowerPoint Viewer archived on Archive.org. The fonts remain Microsoft property. Use them for document compatibility only when your licensing situation allows it, and do not redistribute the font files.
Install PowerPoint Viewer Fonts on Fedora
Install cabextract if you skipped the shared dependency step:
sudo dnf install cabextract fontconfigDownload the archived viewer, verify Archive.org’s SHA1 metadata and the SHA256 fingerprint for this archived file, extract the font files, and refresh your user font cache:
(
    set -euo pipefail

    workdir=$(mktemp -d)
    trap 'rm -rf "$workdir"' EXIT

    fontdir="$HOME/.local/share/fonts/microsoft-office-viewer"
    mkdir -p "$fontdir"

    cd "$workdir"
    curl -fsSLo PowerPointViewer.exe "https://archive.org/download/PowerPointViewer_201801/PowerPointViewer.exe"
    printf '%s  PowerPointViewer.exe\n' 'ab48a8ebac88219c84f293c6c1e81f1a0f420da6' | sha1sum -c -
    printf '%s  PowerPointViewer.exe\n' '249473568eba7a1e4f95498acba594e0f42e6581add4dead70c1dfb908a09423' | sha256sum -c -
    cabextract -q PowerPointViewer.exe -F ppviewer.cab
    cabextract -q ppviewer.cab -F '*.TTF' -F '*.TTC'
    mv ./*.TTF ./*.TTC "$fontdir"/
    fc-cache -f "$fontdir"
)
The second cabextract command may print a warning about extra bytes at the end of ppviewer.cab. That warning is expected for this archive and does not stop the font extraction.
Verify Cambria Regular and Cambria Math
Confirm that fontconfig now resolves the regular Cambria faces from CAMBRIA.TTC:
fc-match Cambria
fc-match "Cambria Math"
Expected output after the user-local PowerPoint Viewer install is:
CAMBRIA.TTC: "Cambria" "Regular"
CAMBRIA.TTC: "Cambria Math" "Regular"
Install Aptos Fonts on Fedora
Microsoft publishes Aptos Fonts as a local-install ZIP for applications that do not have access to Office Font Service. On Fedora, install the TrueType files into a fontconfig directory so LibreOffice, OnlyOffice, WPS Office, and other desktop applications can find the same family names.
Aptos remains Microsoft property. Use the official Microsoft download for local document compatibility, review the license included in the ZIP, and do not redistribute the font files.
Install Aptos for One Fedora User
Install the ZIP helper if you skipped the shared dependency step:
sudo dnf install curl unzip fontconfigDownload the official Microsoft ZIP, copy the TrueType files into your user font directory, and refresh the cache:
(
    set -euo pipefail

    workdir=$(mktemp -d)
    trap 'rm -rf "$workdir"' EXIT

    fontdir="$HOME/.local/share/fonts/microsoft-aptos"
    aptos_url="https://download.microsoft.com/download/8/6/0/860a94fa-7feb-44ef-ac79-c072d9113d69/Microsoft%20Aptos%20Fonts.zip"

    mkdir -p "$fontdir"

    cd "$workdir"
    curl -fL -o "Microsoft Aptos Fonts.zip" "$aptos_url"
    unzip -q "Microsoft Aptos Fonts.zip" -d aptos-fonts
    find aptos-fonts -type f -iname '*.ttf' -exec cp -f -t "$fontdir" {} +
    for required_font in Aptos.ttf Aptos-Display.ttf Aptos-Mono.ttf Aptos-Serif.ttf; do
        if [ ! -s "$fontdir/$required_font" ]; then
            printf 'Missing expected font: %s\n' "$required_font"
            exit 1
        fi
    done
    fc-cache -f "$fontdir"
)
The current Microsoft ZIP contains 28 TrueType files, including Aptos, Aptos Display, Aptos Mono, Aptos Narrow, and Aptos Serif families. The required-file checks catch incomplete downloads, unexpected ZIP contents, or copy failures before the font cache refreshes.
Verify Aptos Fonts on Fedora
Check the regular Aptos face plus the related Office families:
fc-match 'Aptos:style=Regular'
fc-match 'Aptos Display'
fc-match 'Aptos Serif'
fc-match 'Aptos Mono'
Expected output after the user-local Aptos install is:
Aptos.ttf: "Aptos" "Regular"
Aptos-Display.ttf: "Aptos" "Display"
Aptos-Serif.ttf: "Aptos Serif" "Regular"
Aptos-Mono.ttf: "Aptos Mono" "Regular"
A bare fc-match Aptos can resolve to Aptos-Display.ttf because that file advertises both Aptos and Aptos Display family names. Use the style-qualified check above when you specifically need Aptos Regular.
Update Microsoft Fonts on Fedora
The mscorefonts2 RPM carries a fixed font set and does not receive normal DNF updates when you use it only as an extraction source. If SourceForge publishes a newer RPM, treat it as a new artifact: inspect the file details, calculate a fresh checksum, remove or replace the old extracted font directory, then repeat the user-local or /usr/local extraction method with the new filename. Do not reuse the 2.6 checksum for a different file.
If you used the legacy RPM method, remove msttcore-fonts-installer before running a Fedora release upgrade with dnf system-upgrade. After the upgrade completes, reinstall the fonts with the user-local or /usr/local extraction method unless you intentionally still need the old registered package.
For Aptos, download the current ZIP from Microsoft’s Download Center again and replace ~/.local/share/fonts/microsoft-aptos. For the Archive.org PowerPoint Viewer method, the archive is static; rerun the extraction only if you deleted the user-local fonts or need to rebuild that directory.
Troubleshoot Microsoft Fonts Issues on Fedora
The most common failures are DNF5 rejecting the old RPM, SourceForge downloads timing out, release upgrades running the RPM scriptlet offline, Atomic desktops blocking direct RPM writes, or applications keeping an old font cache until they restart.
DNF Reports “does not verify: no digest”
If you try to install the local RPM with DNF, Fedora 44 returns a digest failure:
sudo dnf install ./msttcore-fonts-installer-2.6-1.noarch.rpmRelevant output includes:
Transaction failed: Rpm transaction failed.
Warning: skipped OpenPGP checks for 1 package from repository: @commandline
  - package msttcore-fonts-installer-2.6-1.noarch does not verify: no digest
If you only need the fonts for your account, use the user-local extraction method and avoid registering the RPM as a package. If every local user needs the fonts, use the /usr/local extraction method before considering the legacy RPM path. Use the checksum verification step plus rpm -ivh --nodigest --nofiledigest only for the controlled legacy RPM method.
Fedora Release Upgrade Stalls on msttcore-fonts-installer
If dnf system-upgrade reboot appears stuck while logging SourceForge downloads such as EUupdate.EXE or andale32.exe, the registered msttcore-fonts-installer package is running its postinstall script in the offline upgrade environment. NetworkManager may not be active there, so DNS failures can repeat instead of letting the upgrade continue.
The same symptom can appear when another third-party package source installs or upgrades msttcore-fonts-installer. Remove the registered package before release upgrades and use the user-local or /usr/local extraction method afterward unless the old RPM package is still required for a controlled reason.
If you are already in the offline upgrade screen, switch to another TTY with Ctrl+Alt+F2, log in with an administrator account, and start NetworkManager. If you are logged in directly as root, omit sudo:
sudo systemctl start NetworkManagerAfter the release upgrade completes, remove the registered RPM and use an extraction method if you still need the fonts:
sudo dnf remove msttcore-fonts-installerBefore a future Fedora release upgrade, check for the package and remove it first when it is installed:
if rpm -q msttcore-fonts-installer; then
    sudo dnf remove msttcore-fonts-installer
fi
SourceForge Font Downloads Fail
When SourceForge mirrors are temporarily unreachable, the installer can fail while downloading one of the cabinet files:
### Downloading andale32.exe from http://downloads.sourceforge.net/corefonts
Could not download andale32.exe
Failed to download andale32.exe from http://downloads.sourceforge.net/corefonts
Check that the project page is reachable, then retry the install after a few minutes:
curl -I https://sourceforge.net/projects/mscorefonts2/files/rpms/If you chose the legacy RPM method and the package was partially registered, remove the package before retrying that legacy install:
sudo dnf remove msttcore-fonts-installer
sudo rpm -ivh --nodigest --nofiledigest msttcore-fonts-installer-2.6-1.noarch.rpm
For the user-local extraction method, remove the target directory and rerun the user-local extraction command:
The following command permanently deletes Microsoft Core fonts installed by the user-local extraction method. If you placed other files in the same directory, move them somewhere else first.
rm -rf "$HOME/.local/share/fonts/microsoft-core"For the system-wide /usr/local extraction method, remove the shared directory and rerun the system-wide extraction command:
The following command permanently deletes Microsoft Core fonts installed by the system-wide extraction method. If you placed other files in the same directory, move them somewhere else first.
sudo rm -rf /usr/local/share/fonts/microsoft-coreFedora Atomic Blocks Direct RPM Installation
On Fedora Atomic desktops, a direct rpm -ivh install can fail because the live system image is not managed like a mutable Fedora install:
error: can't create transaction lock on /usr/share/rpm/.rpm.lock
Read-only file system
Use the user-local msttcore extraction method instead. It installs the fonts under your home directory and avoids the read-only system tree. If you prefer a system layer, use rpm-ostree package layering from Fedora’s Atomic desktop documentation and plan for the required reboot and manual local-RPM maintenance.
Calibri or Other ClearType Fonts Are Missing
If Arial and Times New Roman work but Calibri or Consolas do not, the ClearType archive probably failed during the install. Check the Calibri file size for the method you used.
stat -c '%n %s bytes' "$HOME/.local/share/fonts/microsoft-core/calibri.ttf"
stat -c '%n %s bytes' /usr/local/share/fonts/microsoft-core/calibri.ttf
stat -c '%n %s bytes' /usr/share/fonts/msttcore/calibri.ttf
A successful install shows a normal font file size. The path depends on the method:
/usr/local/share/fonts/microsoft-core/calibri.ttf 352736 bytes
If the file is tiny or missing, remove the affected font directory or package and reinstall after SourceForge is reachable.
Fonts Do Not Appear in Applications
If fc-match finds the fonts but an already-open application does not, rebuild the relevant font cache and restart the application.
For the system-wide extraction method, refresh the /usr/local font cache:
sudo fc-cache -f /usr/local/share/fonts/microsoft-coreFor the legacy RPM method, refresh the package-owned directory:
sudo fc-cache -f /usr/share/fonts/msttcoreFor user-local font directories, refresh your account’s font cache:
fc-cache -f "$HOME/.local/share/fonts"Close and reopen LibreOffice, browsers, Wine applications, or any editor that kept an old font list in memory.
Remove Microsoft Fonts from Fedora
Remove only the method you installed. Package removal handles the legacy RPM, while extraction methods are normal font directories under your home folder or /usr/local/share/fonts.
Remove the Legacy System-Wide msttcore Package
Remove the RPM package and let its post-uninstall script rebuild the font cache:
sudo dnf remove msttcore-fonts-installerVerify that the package is gone:
rpm -q msttcore-fonts-installer || trueThe expected result is:
package msttcore-fonts-installer is not installed
If you installed the helper packages only for this article and no other workflow needs them, remove the optional extraction tools as well:
sudo dnf remove cabextract xorg-x11-font-utils mkfontscale cpio unzipRemove System-Wide Extracted Microsoft Core Fonts
The following command permanently deletes the Microsoft Core fonts installed by the
/usr/localextraction method. If you placed other files in the same directory, move them somewhere else first.
sudo rm -rf /usr/local/share/fonts/microsoft-core
sudo fc-cache -f /usr/local/share/fonts
Remove User-Local Microsoft Core Fonts
The following command permanently deletes the Microsoft Core fonts installed by the user-local extraction method. If you placed other files in the same directory, move them somewhere else first.
rm -rf "$HOME/.local/share/fonts/microsoft-core"
fc-cache -f "$HOME/.local/share/fonts"
After removal, Arial should fall back to Fedora’s substitute again:
fc-match ArialLiberationSans-Regular.ttf: "Liberation Sans" "Regular"
Remove Aptos Fonts
The following command permanently deletes the Aptos fonts installed in your user font directory.
rm -rf "$HOME/.local/share/fonts/microsoft-aptos"
fc-cache -f "$HOME/.local/share/fonts"
Confirm Aptos falls back to another Fedora font when the Microsoft files are gone:
fc-match 'Aptos:style=Regular'Remove PowerPoint Viewer Fonts
The following command permanently deletes the PowerPoint Viewer fonts installed in your user font directory, including Cambria Regular, Cambria Math, Meiryo, and the copied ClearType files.
rm -rf "$HOME/.local/share/fonts/microsoft-office-viewer"
fc-cache -f "$HOME/.local/share/fonts"
Confirm Cambria no longer resolves to the PowerPoint Viewer file:
fc-match CambriaCaladea-Regular.ttf: "Caladea" "Regular"
Conclusion
Microsoft fonts are now available on Fedora through user-local extraction, a system-wide /usr/local directory, the legacy RPM path, or Microsoft’s official Aptos ZIP, so Office documents and web pages can render Arial, Times New Roman, Calibri, Consolas, and Aptos without substitution. The same fonts carry into Windows apps after you install Wine on Fedora, and they help when you install WPS Office on Fedora or install OnlyOffice on Fedora.

Hello, this package seems to break the updates (dnf system-upgrade) for most of Fedora Linux users. It broke mine by getting stuck trying to download the fonts offline…
Sorry for the bad english, I’m not an english speaker.
Have a good day.
You were right. The system-wide
msttcore-fonts-installerRPM can rerun its SourceForge download script duringdnf system-upgrade, and an offline upgrade environment may not have DNS or network ready. That can make the upgrade look stuck while it retries font downloads.I updated the article to recommend extraction methods that do not register the old RPM and moved the RPM path behind a release-upgrade warning. If the package is already installed, remove it before a future release upgrade:
After upgrading, use the user-local or
/usr/localextraction method if you still need the fonts.I’m not sure if it’s related to the
msttcore-fonts-installer-2.6-1.noarch.rpmpackage from sourceforge.net because I had also the package from the OnlyOffice repositories (normally only intended for RHEL and CentOS – not recommended for Fedora: use the flatpak) before doing the upgrade.Another user had a similar error: https://discussion.fedoraproject.org/t/solved-offline-upgrade-from-43-to-44-stuck-it-was-in-infinite-loop-because-of-msttcore-fonts-installer/190361.
I think the only way to understand where the problem comes from is to run a test in two Fedora 43 virtual machines. The first with only the sourceforge.net package, the second with the OnlyOffice repository enabled and OnlyOffice installed, instructions on https://helpcenter.onlyoffice.com/desktop/installation/desktop-install-rhel.aspx#installingonlyofficedesktopeditorsfromtherepository_block (normally, this will install
msttcore-fonts-installer-2.6-1.noarch.rpmas it’s dependency. Then we need to do the upgrade to Fedora 44 and look which one will break the upgrade…Thank you for the hard work you’re doing and for what you already have done to help users like me use Linux with more ease.
That distinction is useful. I rechecked the current ONLYOFFICE CentOS repository metadata: it still carries
msttcore-fonts-installer, and the Document Server packages depend on it, while the current Desktop Editors package metadata I checked did not list it as a dependency.So your two-VM test would help identify which path pulled the package onto one system, but the upgrade risk is the same once
msttcore-fonts-installeris registered in RPM. The safer Fedora advice is still to remove it beforednf system-upgradeand reinstall fonts with a user-local or/usr/localextraction method afterward.I also tightened the Fedora ONLYOFFICE article so the CentOS/RHEL-oriented RPM repo path is clearly limited to Desktop Editors. For normal Fedora desktop use, Flatpak remains the cleaner path.
Hello again.
Could you improve the manual extraction method by using a system-wide installation (maybe /usr/local/share/fonts)? Is it also possible for you to add a section for installing other Microsoft fonts that are freely downloadable from the official Microsoft website, like Aptos (https://www.microsoft.com/en-us/download/details.aspx?id=106087)?
I think LibreOffice, OnlyOffice and other office suites should integrate Office Font Service or a setting to add it only for those who want it… That would avoid a lot of rendering/compatibility problems on Linux or other not Microsoft operating systems (Unix, BSD, ChromeOS, MacOS)
Finally, I have another suggestion. Could you add a guide presenting which must have fonts it would be good to install (IBM fonts : IBM Plex, Adobe fonts : Source, Google fonts : croscore & crosextra, etc.)
Finally, first of all, sorry for this excessive wall of text 😅 and perhaps work overload. Thank you again so much for your amazing work and have a great day!
P.S.: On mobile the Cloudflare anti robot button don’t work and line breaks work half the time…
Good suggestions. I added a system-wide extraction path that writes the mscorefonts2 files to
/usr/local/share/fonts/microsoft-corewithout registering the legacy RPM, so it avoids the release-upgrade scriptlet issue while still serving all local users on a mutable Fedora install.I also added an Aptos section using Microsoft’s official ZIP; Microsoft frames it for applications without Office Font Service, which fits LibreOffice, OnlyOffice, and similar Linux suites. The broader “must-have Linux fonts” idea is better as a separate roundup because IBM Plex, Adobe Source, Croscore/Crosextra, Noto, and similar families each need package-source and licensing checks.
That worked great. For other Windows fonts this didn’t install, I found a way to copy them from Windows to Linux, manually:
Copy from Windows (Direct Method):
If copying to the location in /usr, that needs to be done from the terminal.
Thanks for the feedback.
Thanks, worked well. The only hiccup was that it got stuck downloading PowerPointViewer.exe from sourgeforge.net for a while.
Trying to do this on Bazzite results in the following:
sudo rpm -ivh --nodigest --nofiledigest msttcore-fonts-installer-2.6-1.noarch.rpm
[sudo] password for [myusername]:
error: can’t create transaction lock on /usr/share/rpm/.rpm.lock (Success)
Thanks for reporting this, Blarg. Bazzite is an immutable Fedora Atomic variant, so
/usris read-only andrpmcannot create/usr/share/rpm/.rpm.lock, which triggers that error.Download the RPM as shown in the article, then layer it with
rpm-ostreeand reboot to apply the change:After reboot, the fonts should be in
/usr/share/fonts/msttcore/and available to applications.Hello, I can’t get the installation of the pre-requisite (curl cabextract xorg-x11-font-utils fontconfig) to work.
For some background, I’m trying it on Bazzite (Fedora Atomic)
ERROR: Feodra Atomic utilize rpm-ostree instead
Thanks for reporting this, Arthur. You are correct that the prerequisites command does not work on Bazzite or other Fedora Atomic variants (Silverblue, Kinoite, etc.). These immutable systems use
rpm-ostreeinstead ofdnffor base system packages.For Bazzite and Fedora Atomic systems, you have two options to install the Microsoft Fonts prerequisites:
Option 1: Layer packages with rpm-ostree (requires reboot)
After running that command, reboot your system to apply the layered packages. Then proceed with the font installation steps from the article.
Option 2: Install fonts to your user directory (no reboot needed)
Download the font installer RPM to your Downloads folder, then extract and install the fonts manually to your user font directory:
Note that the extraction script may require
cabextractto be available. If you encounter errors, layeringcabextractwith rpm-ostree is the most reliable approach. After fonts are installed, rebuild your font cache withfc-cache -fv.The article focuses on standard Fedora Workstation, but I will consider adding a note about Fedora Atomic variants for future readers.
Thank you very much that is very kind of you indeed. I am still getting acquainted with commands.
I managed to find an alternative way by copying over my Windows fonts .rtf files and by installing them using KDE options.
But the ‘rpm-ostree install’ instead of ‘dnf instal’ will come in handy. Have an excellent day.
doesn’t work december 2025, can’t install package
You were right, Joe. Fedora 43’s DNF5 rejects this old community RPM because it lacks the digest metadata DNF expects. At that point, the article was updated to verify the RPM checksum first, then use
rpmdirectly for the system-wide install:Verify with
fc-match Arial; it should returnarial.ttfafter the fonts register.Current note: the article now recommends the user-local extraction method for most Fedora installs. The
rpmpath remains documented only for controlled system-wide installs because the registered package can affect Fedora release upgrades.Instructions were much easier than doing it by hand. Thanx
thanks worked for me
Worked perfectly. Thank you very much.
Thanks, there are no good tutorials to install the fonts on my Fedora. Post for those who do not have the app to check the font, run this command to install it “sudo dnf install gnome-font-viewer”
Thanks for sharing this, Fabian! That is a great tip for anyone running a minimal Fedora setup or a desktop environment that does not include the Fonts app by default.
If the Font Viewer is missing, install it with:
After installing
gnome-font-viewer, you can follow the steps in the “Verify via Fonts Application” section to check Arial, Verdana, Times New Roman, and the other Microsoft fonts visually. This is especially helpful alongside the terminal check withfc-list.