digiKam is an open-source photo management application developed by the KDE project. It provides tools for organizing, editing, and sharing digital photos, including support for RAW file processing, face recognition, geotagging, batch processing, and advanced metadata management. Common use cases include managing large photo libraries, organizing images by tags and ratings, processing RAW files from DSLR cameras, and creating photo albums with geolocation data. By the end of this guide, you will have digiKam installed and configured on Ubuntu, ready to import and manage your photo collection.
Choose Your digiKam Installation Method
Because Ubuntu provides multiple installation paths for digiKam, each with different trade-offs regarding version availability, update frequency, and system integration, the comparison table below summarizes your options.
| Method | Channel | Version | Updates | Best For |
|---|---|---|---|---|
| APT (Default Repository) | Ubuntu Repos | Distribution default | Automatic via apt upgrade | Most users who prefer stable, distro-tested packages |
| Flatpak | Flathub | Latest stable | Manual via flatpak update | Users who want the newest features with sandboxed installation |
| Snap | Snapcraft | Latest stable | Automatic background updates | Users who prefer automatic updates and Snap integration |
| Source Compilation | KDE GitLab | Development or tagged release | Manual recompilation | Developers and users who need custom builds or the latest features |
For most users, the APT method is recommended because it provides automatic security updates, integrates well with system libraries, and requires minimal maintenance. However, APT versions vary by Ubuntu release: 22.04 LTS includes version 7.5, 24.04 LTS includes version 8.2, and 26.04 LTS includes version 8.8. If you need the latest digiKam features regardless of your Ubuntu version, consider Flatpak or Snap instead.
These steps cover Ubuntu 22.04 LTS, 24.04 LTS, and 26.04 LTS. APT package versions vary by release as noted above, while Flatpak and Snap provide the same latest version across all supported LTS releases. Commands are identical across versions unless otherwise noted.
Method 1: Install digiKam via APT
By default, the Ubuntu repository provides a stable, tested version of digiKam that integrates with your system’s KDE libraries. As a result, this method is the simplest and ensures automatic security updates through your regular system maintenance.
Update the Package Index
First, refresh your package index and upgrade existing packages to ensure you have the latest security patches and dependency versions:
sudo apt update && sudo apt upgradeInstall digiKam
Next, install digiKam using APT. The package manager will automatically resolve and install all required dependencies, including KDE libraries, image processing tools, and database components:
sudo apt install digikamAs a result, this command installs the digikam main package along with digikam-data (application data files) and digikam-private-libs (shared libraries for plugins).
Verify the Installation
Once installation completes, verify that digiKam is available by checking the installed package version:
dpkg -l digikam | grep digikamAs a result, the expected output varies by Ubuntu release:
On Ubuntu 26.04 LTS:
ii digikam 4:8.8.0-1ubuntu1 amd64 digital photo management application for KDE
For 24.04 LTS:
ii digikam 4:8.2.0-0ubuntu6.2 amd64 digital photo management application for KDE
On 22.04 LTS:
ii digikam 4:7.5.0-3fakesync1 amd64 digital photo management application for KDE
Method 2: Install digiKam via Flatpak
Alternatively, Flatpak provides the latest digiKam release in a sandboxed environment, independent of your Ubuntu version. Because Flatpak bundles its own dependencies, this method ensures you always have access to the newest features while maintaining system stability.
Flatpak is not pre-installed on Ubuntu. If you have not set it up yet, install it with
sudo apt install flatpakand restart your session before continuing. For detailed setup including the Flathub repository, follow our Flatpak installation guide for Ubuntu.
Add the Flathub Repository
First, ensure Flathub is configured as a remote since it is the primary repository for Flatpak applications. If you have not already added it, run:
sudo flatpak remote-add --if-not-exists flathub https://flathub.org/repo/flathub.flatpakrepoHere, the --if-not-exists flag prevents errors if Flathub is already configured on your system.
Install digiKam from Flathub
Now that Flathub is enabled, install digiKam using the following command:
sudo flatpak install flathub org.kde.digikam -yHere, the -y flag automatically confirms the installation. Consequently, Flatpak will download the application along with any required runtime libraries. Note that the initial download may be large since Flatpak includes bundled dependencies.
Verify the Flatpak Installation
Once installation finishes, confirm that digiKam was installed correctly by listing the installed Flatpak applications:
flatpak list | grep digikamExpected output:
digiKam org.kde.digikam 8.8.0 stable system
Method 3: Install digiKam via Snap
As another option, Snap packages are maintained by the digiKam team through Snapcraft, providing automatic background updates and consistent versions across all Ubuntu releases. Since Ubuntu includes Snap by default on standard desktop and server installations, no additional setup is typically required.
If
snapis unavailable on your system (minimal installs, containers, or WSL environments), install it withsudo apt install snapd.
Install digiKam from Snapcraft
To proceed, install the digiKam Snap package with the following command:
sudo snap install digikamBecause Snap automatically handles updates in the background, you will always have the latest stable version without manual intervention.
Verify the Snap Installation
After the download completes, confirm the installation by checking the Snap package information:
snap info digikam | grep -E "installed:|tracking:"Expected output:
tracking:    latest/stable
installed:   8.8.0 (xxx) 1.2GB -
Method 4: Build digiKam from Source
Compiling digiKam from source gives you access to the latest development features, custom build options, and the ability to modify the source code. This method is intended for developers, contributors, and advanced users who need capabilities not available in packaged versions.
Warning: Building digiKam 8.x from source requires KDE Frameworks 6 (KF6) libraries, which are only available in Ubuntu’s default repositories on 26.04 LTS. While Qt6 is available on 24.04 LTS, the KF6 development packages (
libkf6*-dev) are not packaged for that release. Ubuntu 22.04 and 24.04 can run digiKam 8.x through the Flatpak or Snap packages, which bundle their own KF6 dependencies. If you want the latest digiKam on these older releases, use Flatpak or Snap rather than source compilation. Building from source also requires extensive dependencies and may take 30-60 minutes depending on your hardware.
Install Build Dependencies
Since digiKam has extensive build dependencies including Qt6, KDE Frameworks 6, image processing libraries, and multimedia codecs, you must install the development packages first. The project provides a bootstrap script that handles CMake configuration, but first install the required packages.
Install the essential build tools:
sudo apt install git cmake extra-cmake-modules build-essential gettextThe build-essential package includes GCC and essential compilation tools. For more details on the C/C++ build environment, see our GCC compiler guide or CMake installation guide.
Next, install the core Qt6 and KDE Framework development libraries:
sudo apt install qt6-base-dev qt6-svg-dev qt6-multimedia-dev qt6-networkauth-dev \
  qt6-webengine-dev libkf6config-dev libkf6coreaddons-dev libkf6i18n-dev \
  libkf6xmlgui-dev libkf6windowsystem-dev libkf6service-dev libkf6solid-dev \
  libkf6notifyconfig-dev libkf6notifications-dev libkf6threadweaver-dev \
  libkf6iconthemes-dev libkf6sonnet-dev libkf6calendarcore-dev
Additionally, install the image processing and multimedia libraries:
sudo apt install libopencv-dev libtiff-dev libpng-dev libjpeg-dev libboost-all-dev \
  liblcms2-dev libexpat1-dev libexiv2-dev libheif-dev libx265-dev libxml2-dev \
  libxslt1-dev flex bison libeigen3-dev liblensfun-dev libgphoto2-dev \
  libmagick++-dev ffmpeg libavcodec-dev libavformat-dev libavutil-dev
Package names may vary slightly between Ubuntu versions. If a package is not found, search for alternatives with
apt-cache search <keyword>-dev. The CMake configuration step will report any missing dependencies.
Clone the digiKam Source Code
Clone the official digiKam repository from KDE GitLab. The master branch contains the latest development code compatible with Qt6:
git clone https://invent.kde.org/graphics/digikam.git ~/digikam-source
cd ~/digikam-source
If you prefer a specific stable release, list the available tags and check out the desired version:
git tag -l "v8.*" | tail -10
git checkout v8.8.0
Configure and Build digiKam
digiKam provides a bootstrap.linux script that configures CMake with sensible defaults. Run the script to prepare the build environment:
./bootstrap.linuxIf the bootstrap script reports missing dependencies, install them and run the script again. Once configuration succeeds, navigate to the build directory and compile:
cd build
make -j$(nproc)
Here, the -j$(nproc) flag uses all available CPU cores for parallel compilation. As a result, on a modern system, compilation typically takes 30-60 minutes.
Install the Compiled Build
After compilation completes successfully, install digiKam to your system:
sudo make install/fastBy default, the bootstrap script installs digiKam to /usr (the standard system directory for applications). Consequently, you can launch digiKam with the digikam command after installation.
For detailed build options, troubleshooting, and alternative configurations, refer to the official digiKam build documentation.
Launch digiKam
Once installed, you can launch digiKam from the terminal or through your desktop environment’s application menu.
Launch from Terminal
The command to launch digiKam depends on your installation method:
APT or source installation:
digikamFlatpak installation:
flatpak run org.kde.digikamSnap installation:
snap run digikamLaunch from Application Menu
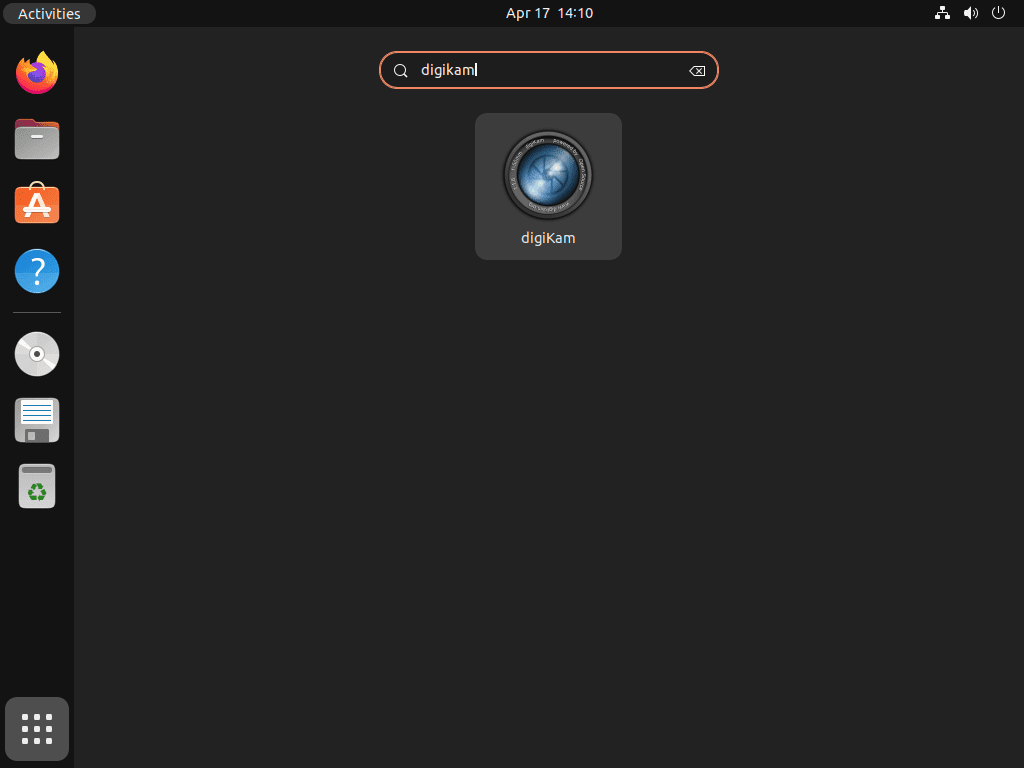
To launch digiKam graphically, open your application menu (search for applications or access it through your desktop environment’s launcher) and search for “digiKam.” Click the digiKam icon to start the application. The exact steps vary depending on whether you use GNOME, KDE Plasma, or another desktop environment.

Initial Configuration
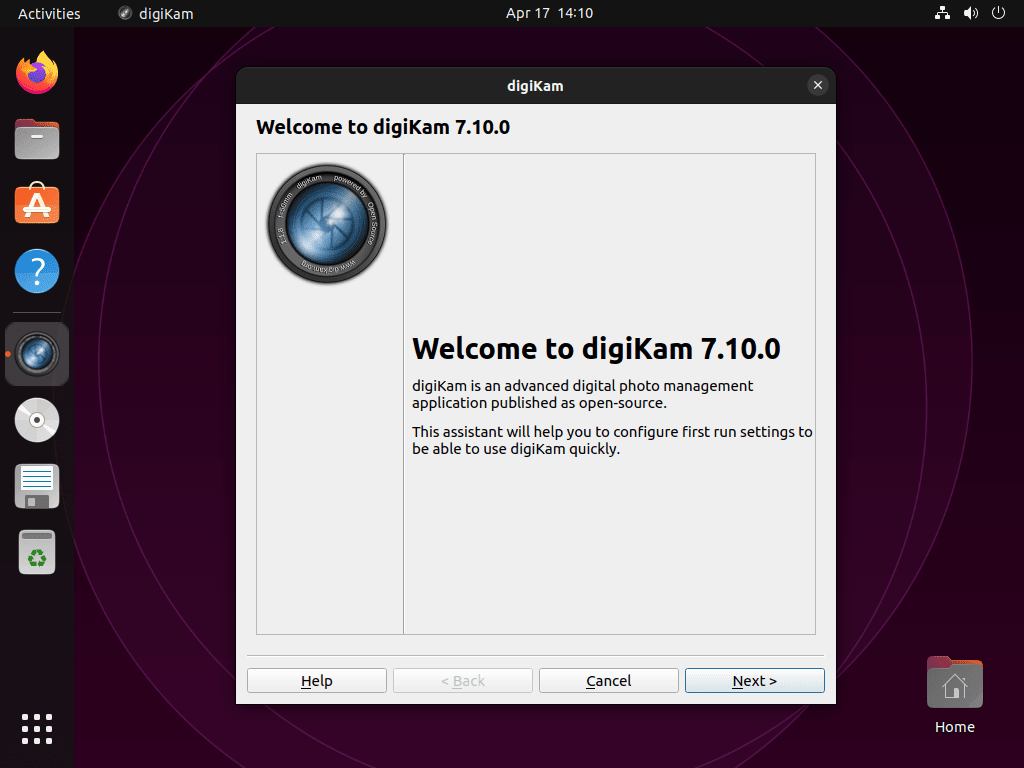
When you launch digiKam for the first time, the setup wizard guides you through initial configuration. During this process, you will set the location for your photo collection, configure image preview behavior, and optionally download additional binary components for advanced features like face recognition.
Configure Collection Location
The first wizard page asks where digiKam should store its database and where your photo collection is located. For most users, the default locations work well. You can always add additional collection folders later through Settings.

Download Optional Binary Components
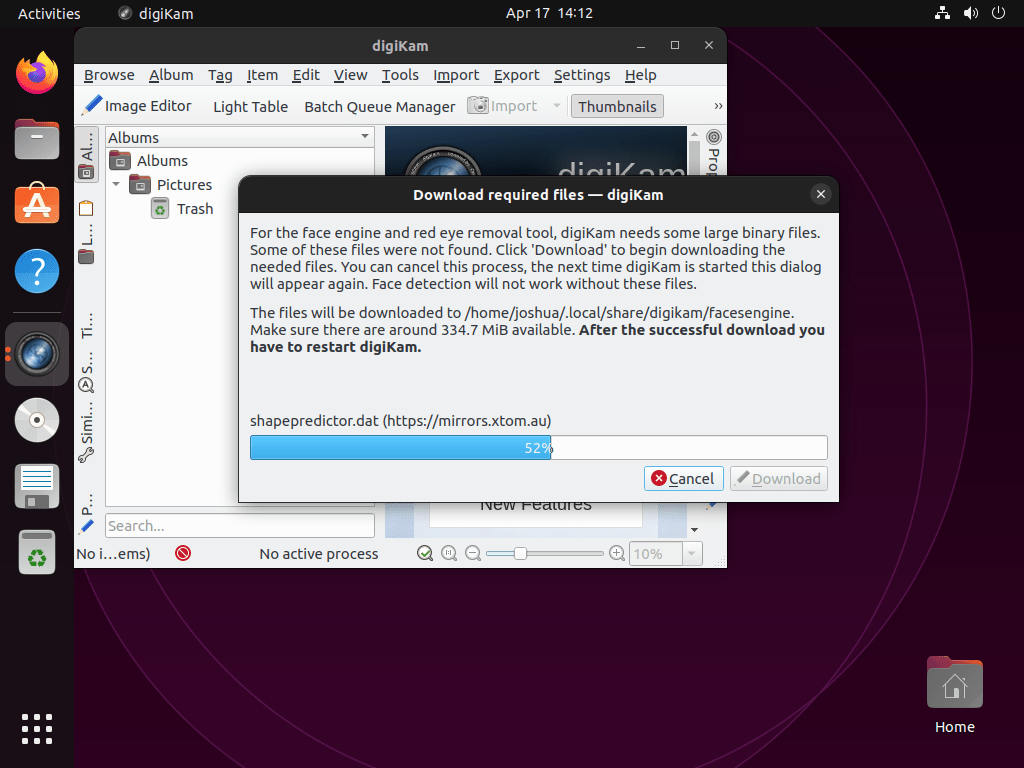
digiKam offers optional binary components for features that require external tools, including face detection models and deep learning components. If prompted, click “Download” to install these components. This step requires an internet connection but only occurs once.

Begin Using digiKam
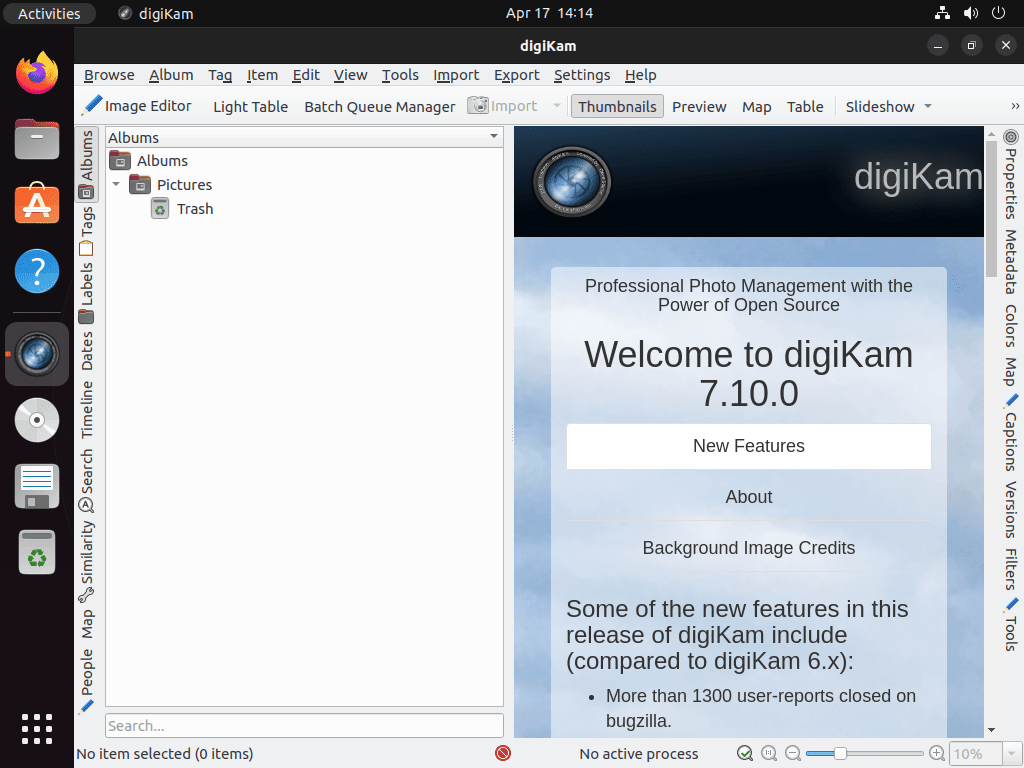
After setup completes, digiKam scans your photo collection and builds its database. As a result, the main interface provides access to albums, tags, timeline views, and search functionality. From here, you can start importing, organizing, and editing your photos immediately.

digiKam integrates well with KDE Plasma desktop but works on any Linux desktop environment. For the best KDE experience, consider installing KDE Plasma on Ubuntu.
Update digiKam
Keeping digiKam updated ensures you have the latest features, bug fixes, and security patches. However, the update method depends on how you installed the application.
Update APT Installation
If you installed digiKam via APT, updates are included in your regular system updates. To check for and apply updates specifically to digiKam:
sudo apt update
sudo apt install --only-upgrade digikam
The --only-upgrade flag ensures APT only upgrades the package if it is already installed, preventing accidental installation.
Update Flatpak Installation
Since Flatpak applications are updated separately from system packages, check for and apply Flatpak updates with:
sudo flatpak updateUpdate Snap Installation
Although Snap packages update automatically in the background, you can manually trigger an update with:
sudo snap refresh digikamRemove digiKam
If you no longer need digiKam, uninstall it using the appropriate method based on how you originally installed the application.
Remove APT Installation
For an APT installation, remove digiKam with the following commands:
sudo apt remove digikam
sudo apt autoremove
Subsequently, the autoremove command cleans up orphaned dependencies that were installed with digiKam but are no longer needed.
Remove Flatpak Installation
For the Flatpak version, remove digiKam along with its application data:
sudo flatpak uninstall --delete-data org.kde.digikam -yIn this case, the --delete-data flag removes Flatpak-specific application data stored in ~/.var/app/org.kde.digikam/.
Remove Snap Installation
For the Snap version, use this command:
sudo snap remove digikamRemove Source-Compiled Installation
If you compiled digiKam from source using the bootstrap script (which installs to /usr by default), the project does not provide a make uninstall target. Instead, remove the installed files manually.
Warning: The following commands permanently delete the source-compiled installation, including the digiKam and Showfoto binaries, shared libraries, and application data. Ensure you have a backup of any custom configurations or plugins before proceeding.
sudo rm -rf /usr/bin/digikam /usr/bin/showfoto
sudo rm -rf /usr/share/digikam /usr/share/showfoto
sudo rm -rf /usr/lib/x86_64-linux-gnu/digikam
rm -rf ~/digikam-source
Remove User Configuration Data
Warning: The following commands permanently delete your digiKam configuration files, database, and cached thumbnails. This includes your album organization, tags, ratings, and face recognition data. Export any data you want to keep before proceeding.
To completely remove digiKam user data after uninstalling the application:
rm -rf ~/.config/digikamrc ~/.config/digikam/
rm -rf ~/.local/share/digikam/
These directories contain your digiKam configuration, database files, and cached data. Your original photo files remain untouched in your photo collection folders.
Troubleshooting
digiKam Fails to Start
If digiKam fails to start or crashes immediately after launching, check the terminal output for error messages:
digikam 2>&1 | head -20Common issues include missing Qt platform plugins or corrupted configuration files. If you see Qt-related errors, reinstall the core Qt libraries. The package names differ between Ubuntu versions due to the time_t 64-bit transition that renamed many libraries with a t64 suffix. For 26.04 LTS and 24.04 LTS (which both use the t64 suffix):
sudo apt install --reinstall libqt6core6t64 libqt6gui6t64On 22.04 LTS (which uses the original package names):
sudo apt install --reinstall libqt6core6 libqt6gui6If the issue is a corrupted configuration rather than missing libraries, rename the existing config directory and restart digiKam to regenerate default settings:
mv ~/.config/digikam ~/.config/digikam.backup
digikam
Face Recognition Binary Download Fails
If the initial setup cannot download face recognition binaries, this is typically a network connectivity issue. Check your internet connection, and if you are behind a proxy, configure Qt to use your proxy settings. You can skip this step during initial setup and enable face recognition later through Settings > Configure digiKam > Views > Icon View.
Missing Dependencies for Source Build
If the CMake configuration step during source compilation reports missing dependencies, the error output indicates which packages are required. Search for the missing library:
apt-cache search <library-name>-devAfter that, install the missing development package and run the bootstrap script again.
Conclusion
You now have digiKam installed on Ubuntu, providing a complete solution for managing, editing, and organizing your photo collection. Whether you chose the stable APT package, the latest Flatpak or Snap release, or built from source, digiKam offers powerful features including RAW processing, face recognition, geotagging, and metadata editing. For additional functionality, explore digiKam’s plugin system and web service integrations to extend your photo workflow. If you need more advanced RAW processing, consider pairing digiKam with Darktable on Ubuntu, or for detailed image manipulation, see our guide on installing GIMP on Ubuntu.

