
HP printers on Ubuntu usually work best when CUPS, SANE, and HPLIP agree on the same device queue. To install HPLIP on Ubuntu, start with Ubuntu’s APT package for the core print and scan stack, then add hplip-gui when you want HP Device Manager, hp-toolbox, and graphical setup tools.
Ubuntu 26.04, 24.04, and 22.04 ship different HPLIP branches. Newer HP hardware may need HP’s current SourceForge download or the OpenPrinting Printer Application snap, but Ubuntu’s packages remain the cleanest path for most printers.
Install HPLIP on Ubuntu
Use APT first unless your printer model needs a newer HPLIP release than Ubuntu provides. The core hplip package installs CUPS integration, HP print drivers, SANE scanning support through libsane-hpaio, and command-line tools such as hp-setup, hp-plugin, hp-probe, hp-scan, and hp-testpage.
Quick HPLIP Install Commands for Ubuntu
For a normal Ubuntu desktop, install the core HPLIP stack and the graphical HP Device Manager together:
sudo apt update && sudo apt install hplip hplip-guiThe commands use
sudofor actions that need root privileges. If your user is not in the sudoers file yet, follow the guide on how to add a sudo user on Ubuntu.
For a server, minimal desktop, or print-only system where you do not need HP Device Manager, install the core package by itself:
sudo apt install hplipOn minimal or customized systems, hplip-gui may require Ubuntu’s Universe component. If APT cannot locate the package, enable Ubuntu’s Universe repository, refresh APT, and retry the install.
Verify the packages after installation. The exact version changes by Ubuntu release, but a full desktop install should include hplip, hplip-gui, and libsane-hpaio:
dpkg -l hplip hplip-gui libsane-hpaio | grep '^ii'ii hplip 3.24.4+dfsg0-0ubuntu8 amd64 HP Linux Printing and Imaging System (HPLIP) ii hplip-gui 3.24.4+dfsg0-0ubuntu8 all HP Linux Printing and Imaging - GUI utilities (Qt-based) ii libsane-hpaio 3.24.4+dfsg0-0ubuntu8 amd64 HP SANE backend for multi-function peripherals
HP Smart, HPLIP Downloads, and PPAs on Ubuntu
HP Smart, now presented by HP as the HP app, is not published as a native Ubuntu desktop package. On Ubuntu, HPLIP is the HP print and scan stack, while HP’s HPLIP download page on SourceForge provides manual .run installers for devices that need a newer upstream branch.
Avoid random HPLIP PPAs unless you have audited the maintainer and understand the packaging changes. The reliable paths are Ubuntu’s repository packages, HP’s official SourceForge downloads, or the OpenPrinting hplip-printer-app snap for Printer Application workflows.
Check HP Device Compatibility with HPLIP
Not every HP device is supported, and newer models can require a newer HPLIP release. Start with the OpenPrinting printer database, which lists supported models and recommended drivers. For detailed HPLIP version and plugin requirements, the source tarball includes a models database with the minimum required HPLIP version (support-ver) and proprietary plugin marker (plugin=1).
Replace the example model string with your exact printer name from the label or device menu:
If curl is missing, install it before downloading the models database:
sudo apt install curlThese commands use the curl command in Linux to fetch SourceForge metadata and the grep command in Linux to filter the model database for your printer name.
latest_version=$(curl -fsSL "https://sourceforge.net/projects/hplip/rss?path=/hplip" | grep -oE '/hplip/[0-9]+\.[0-9]+\.[0-9]+/' | sed -e 's|/hplip/||' -e 's|/||' | sort -V | tail -n 1)
if [ -z "$latest_version" ]; then
  echo "Could not determine the latest HPLIP version."
else
  curl -fL -o "hplip-${latest_version}.tar.gz" "https://sourceforge.net/projects/hplip/files/hplip/${latest_version}/hplip-${latest_version}.tar.gz/download"
  tar -xf "hplip-${latest_version}.tar.gz" "hplip-${latest_version}/data/models/models.dat"
  grep -i -A 30 -B 2 "OfficeJet All-in-One Printer" "hplip-${latest_version}/data/models/models.dat" | head -n 30
fi
Example output from the models file looks like this:
job-storage=0
linefeed-cal-type=0
model1=HP OfficeJet All-in-One Printer
monitor-type=0
panel-check-type=0
pcard-type=0
plugin=0
plugin-reason=0
power-settings=0
pq-diag-type=0
r-type=0
r0-agent1-kind=3
r0-agent1-sku=26(51626A)
r0-agent1-type=1
scan-src=0
scan-type=0
status-battery-check=0
status-dynamic-counters=0
status-type=0
support-released=True
support-subtype=2de2
support-type=2
support-ver=0.9.5
tech-class=DJ540
family-class=PCL4-Class1
tech-subclass=GrayscaleOnly
tech-type=1
usb-pid=0
usb-vid=3f0
wifi-config=0
Compare support-ver with your installed HPLIP version. If your installed version is lower, use HP’s manual SourceForge download so the required driver files are available.
Choose Your HPLIP Installation Method for Ubuntu
HPLIP offers multiple installation paths depending on your Ubuntu release and device age. Ubuntu’s APT repositories integrate cleanly with CUPS and SANE, HP’s SourceForge downloads provide newer device support at the cost of manual updates, and the Snap-based Printer Application focuses on printing through a web interface.
| Method | Source | Updates | Best Fit |
|---|---|---|---|
| APT packages | Ubuntu repositories | Through normal APT upgrades | Most users who want printing, scanning, CLI tools, and optional HP Device Manager |
HP .run installer | HP SourceForge downloads | Manual rerun | Newer HP devices whose support-ver exceeds Ubuntu’s repository branch and whose Ubuntu release is listed by HP’s installer |
hplip-printer-app snap | Snapcraft, OpenPrinting publisher | Automatic snap refreshes | Printer Application workflows for older HPLIP-supported models, currently without classic HPLIP GUI or scan tools |
Use the APT packages unless your model database entry proves that Ubuntu’s branch is too old. Manual installs deliver newer device support but require manual updates and can lag behind new Ubuntu release support.
Ubuntu’s repository branches and package revisions differ by release:
| Ubuntu Release | Repository Branch | Current Candidate | Current HP SourceForge Release |
|---|---|---|---|
| Ubuntu 26.04 (resolute) | 3.24.x | 3.24.4+dfsg0-0ubuntu8 | 3.25.8 |
| Ubuntu 24.04 (noble) | 3.23.x | 3.23.12+dfsg0-0ubuntu5 | 3.25.8 |
| Ubuntu 22.04 (jammy) | 3.21.x | 3.21.12+dfsg0-1 | 3.25.8 |
Update Ubuntu Before Installing HPLIP
Update your package lists and apply pending upgrades before installing HPLIP:
sudo apt update && sudo apt upgradeCheck for an Existing HPLIP Installation on Ubuntu
Standard Ubuntu desktop installs commonly include the core hplip package already, while minimal, server, or customized installs may not. Check the installed packages and compare the version with your printer’s support-ver requirement:
dpkg -l | grep -E '^ii[[:space:]]+hplip'If HPLIP is installed, output looks similar to this Ubuntu 26.04 example:
ii  hplip         3.24.4+dfsg0-0ubuntu8  amd64  HP Linux Printing and Imaging System (HPLIP)
ii  hplip-data    3.24.4+dfsg0-0ubuntu8  all    HP Linux Printing and Imaging - data files
The version number appears in the third column. If the installed version is older than your printer requires, use HP’s manual SourceForge method. If no packages appear, use the APT install commands.
Install HPLIP via APT on Ubuntu (Recommended)
Install HPLIP from Ubuntu’s repositories for the best integration with CUPS, SANE, AppArmor, and Ubuntu package updates. The main packages are:
- hplip: Core drivers, CUPS integration, and command-line utilities
- hplip-data: Device configuration files and printer definitions, installed as a dependency of
hplip - hplip-gui: HP Device Manager,
hp-toolbox, and graphical setup tools - hplip-doc: Optional offline documentation and help files
Install the full desktop setup with the graphical tools:
sudo apt install hplip hplip-guiAdd the documentation package only if you want the local help files:
sudo apt install hplip-docAfter installation completes, verify the core, GUI, and scan backend packages:
dpkg -l hplip hplip-gui libsane-hpaio | grep '^ii'ii hplip 3.24.4+dfsg0-0ubuntu8 amd64 HP Linux Printing and Imaging System (HPLIP) ii hplip-gui 3.24.4+dfsg0-0ubuntu8 all HP Linux Printing and Imaging - GUI utilities (Qt-based) ii libsane-hpaio 3.24.4+dfsg0-0ubuntu8 amd64 HP SANE backend for multi-function peripherals
Server users can skip hplip-gui and hplip-doc if graphical tools and local documentation are not needed:
sudo apt install hplipHPLIP Proprietary Plugin Requirements
Some HP devices need a proprietary plugin for full functionality, especially on models that rely on HP-specific print languages. The models database marks this with plugin=1, and the hp-plugin tool downloads the binary after you accept HP’s license agreement.
If the database shows a plugin requirement, install it before running the setup wizard so HPLIP can detect all device features.
Use HP SourceForge Downloads for Newer HPLIP Support
Use HP’s SourceForge installer only when your printer’s support-ver value is newer than Ubuntu’s repository branch. The .run installer sits outside APT, so updates and removals are manual; the source tarball is mainly useful here for checking HP’s model database.
The current HPLIP 3.25.8 installer metadata lists Ubuntu versions through 24.04. On Ubuntu 26.04, keep the APT packages or use the Printer Application snap unless a newer HP release explicitly adds 26.04 support. Forcing an older SourceForge installer onto a newer LTS can leave a mixed HPLIP stack that is harder to update or remove.
If curl is missing on your system, install it first:
sudo apt install curlSet the current SourceForge version, download the automatic installer, and start it from a terminal:
HPLIP_VERSION="3.25.8"
curl -fL -o "hplip-${HPLIP_VERSION}.run" "https://sourceforge.net/projects/hplip/files/hplip/${HPLIP_VERSION}/hplip-${HPLIP_VERSION}.run/download"
chmod +x "hplip-${HPLIP_VERSION}.run"
./"hplip-${HPLIP_VERSION}.run"
Replace 3.25.8 with the current version listed on the HPLIP SourceForge download page. The installer presents an interactive menu for dependency checks, build configuration, and installation. If it reports that your Ubuntu release is unsupported, stop and use the APT or Snap method until HP updates the installer.
The automatic installer requires build tools (GCC on Ubuntu, make) and development libraries. If dependency installation fails, the installer displays specific package names. Install them manually with
sudo apt install <package-name>and re-run the installer.
Download the HPLIP Source Tarball for Model Checks
The source tarball is still useful even when you do not compile HPLIP. It contains the model database used in the compatibility check near the start, including support-ver and plugin values for HP devices.
Download and extract only the models database:
HPLIP_VERSION="3.25.8"
curl -fL -o "hplip-${HPLIP_VERSION}.tar.gz" "https://sourceforge.net/projects/hplip/files/hplip/${HPLIP_VERSION}/hplip-${HPLIP_VERSION}.tar.gz/download"
tar -xf "hplip-${HPLIP_VERSION}.tar.gz" "hplip-${HPLIP_VERSION}/data/models/models.dat"
Search that file for your model name, then compare the required HPLIP version with the branch available on your Ubuntu release:
grep -i -A 30 -B 2 "OfficeJet All-in-One Printer" "hplip-${HPLIP_VERSION}/data/models/models.dat" | head -n 30Compiling the tarball is an advanced fallback, not the normal Ubuntu path. If you choose to compile anyway, remove distro packages first, test the build on your exact Ubuntu release, and keep the extracted source directory so uninstall.py is available later.
Install HPLIP via Snap on Ubuntu
The HPLIP Printer Application snap, published by OpenPrinting, wraps HPLIP inside a Printer Application and emulates a driverless IPP printer. This method is useful for older HP models that still need classic HPLIP printer drivers, but it is not a full replacement for the APT packages because it does not provide HP Device Manager, hp-toolbox, or the classic HPLIP scan utilities.
If the snap command is missing, install the Snap runtime first:
sudo apt install snapdInstall the HPLIP Printer Application:
sudo snap install hplip-printer-appConfirm that the snap comes from OpenPrinting and review the current stable channel:
snap info hplip-printer-app | sed -n '1,16p'Because the Snap runs in strict confinement, connect the interfaces that grant access to USB printers and mDNS discovery (network-only printers may not need raw-usb):
sudo snap connect hplip-printer-app:raw-usb
sudo snap connect hplip-printer-app:avahi-control
After the interfaces are connected, open the web interface at http://localhost:8000 to add and configure printers. If port 8000 is already in use, the application may use http://localhost:8001 instead. A working setup loads the Printer Application page with an Add Printer option and a device list.
OpenPrinting notes that the snap targets around 3,000 HPLIP-supported models, but scanning support belongs to a later release track. Use the APT or SourceForge install when you need scanning, proprietary plugin handling through
hp-plugin, HP Device Manager, or the classic HPLIP command-line tools.
Configure Classic HPLIP After Installation on Ubuntu
After installing HPLIP through APT or HP’s SourceForge installer, complete the steps that apply to your setup so permissions and device discovery work correctly. Snap users should configure printers from the Printer Application web interface instead of using the classic hp-setup, hp-plugin, and hp-toolbox workflow.
Add User to HPLIP Printer Groups
For local printer access and CUPS administration, make sure your user account belongs to the lp (line printer) and lpadmin (printer administration) groups. Add your current user to both groups:
sudo usermod -a -G lp,lpadmin $USERAfter running this command, you must log out and log back in (or restart your PC) for group membership changes to take effect. The system only reads group assignments during login, so changes won’t apply to your current session. Verify membership after logging back in with the
groupscommand.
groupsYour output should include lp and lpadmin.
Reconnect USB Printers for HPLIP
If you have a USB printer already connected during HPLIP installation, Ubuntu won’t recognize it properly until you reset the USB connection. This happens because HPLIP’s udev rules (device detection rules) weren’t active when the printer was first plugged in. Reset the connection by doing one of the following:
- Unplug the USB cable from your computer and plug it back in, or
- Restart your computer (which also reloads all USB devices)
After reconnecting, Ubuntu can apply HPLIP’s udev rules and make the printer available for configuration.
Install HPLIP Proprietary Plugin (If Required)
If the models database shows plugin=1 for your device (or your printer documentation requires it), install the proprietary plugin before configuring your printer:
sudo hp-pluginThe plugin installer downloads the binary plugin from HP’s servers and prompts you to accept HP’s license agreement. Run it with sudo so it can place firmware under /usr/share/hplip. The download requires internet access and may take a few minutes depending on connection speed. If the download fails, check your network connection and firewall settings, then try again.
Corporate or restrictive networks may block access to HP’s plugin servers. If downloads consistently fail after multiple attempts, temporarily connect to a different network (mobile hotspot, home network) to complete plugin installation, or configure proxy settings to allow access to sourceforge.net and HP’s download servers.
Launch Classic HPLIP Tools on Ubuntu
After installation completes, launch HPLIP using either the desktop tools or the terminal. The HP Device Manager requires the hplip-gui package and an active desktop session.
Launch HPLIP from the Applications Menu
Open your application menu and search for “HPLIP” or “HP Device Manager.” Click the HP Device Manager icon to launch the interface. Alternatively, access the setup wizard by searching for “HP Device Setup.”
Launch HPLIP Toolbox from the Terminal
Open the HPLIP toolbox directly from the terminal:
hp-toolboxThis command opens the HP Device Manager where you can configure printers, check ink levels, and perform maintenance tasks. If the command is missing, install hplip-gui.
Set Up Your HP Printer with Classic HPLIP on Ubuntu
After installing classic HPLIP, configure your HP devices and verify they work correctly. The setup process uses the hp-setup wizard to detect devices, install drivers, and establish connections.
Step 1: Run HPLIP Setup
Run the hp-setup command with administrative privileges so it can create printers under CUPS. Use the graphical flag on desktop systems:
sudo hp-setup -uOn headless or server installs without an X session, switch to the interactive text mode:
sudo hp-setup -i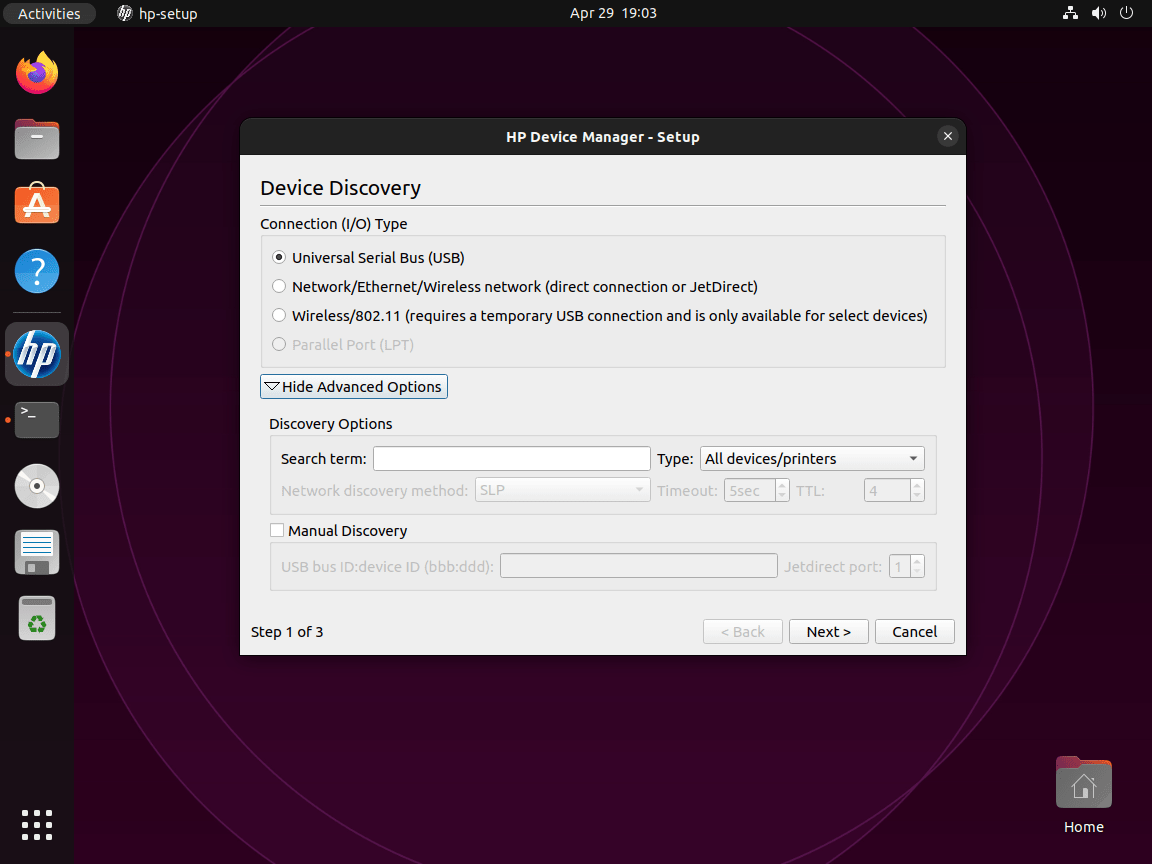
Step 2: Select HPLIP Connection Type
When the HPLIP setup window appears, you will be prompted to choose the connection type for your HP device. Available options include USB, Network/Ethernet/Wireless, and Parallel (legacy printers) based on how your device connects. Choose the appropriate connection type for your device and click “Next.”
Parallel port connections are rare on modern systems but still supported for legacy HP LaserJet and DeskJet printers from the 1990s-early 2000s. Most current HP devices use USB or network connections. If your system lacks a parallel port, USB-to-parallel adapters may work but aren’t officially supported by HPLIP.
Step 3: Discover and Select Your HP Device
HPLIP will now scan for connected HP devices based on the connection type you selected. If your device is not automatically detected, you may need to manually enter its IP address or hostname (for Network/Ethernet/Wireless connections). Once your device appears in the list, select it and click “Next.”
Step 4: Configure HPLIP Printer Settings
Next, configure basic settings for your HP printer, such as the printer name and description. You can also share the printer on your local network if desired. After configuring the settings, click Next to continue.
Step 5: Install the HPLIP Printer Driver
HPLIP will now prompt you to install the appropriate printer driver for your device. It will automatically select the recommended driver, but you can also choose a different driver from the list if needed. Click “Next” to begin the driver installation process.
Test Classic HPLIP Installation on Ubuntu
After configuring your HP devices, test the installation to confirm everything works correctly. This section covers discovering connected devices and testing print and scan functionality.
Discover Connected HP Devices with HPLIP
Before testing, verify HPLIP detects your HP devices correctly. Run hp-probe as your normal user; it warns if you run it with sudo. The command scans for all connected HP printers and scanners regardless of connection type (USB, network, or parallel):
hp-probeThis command outputs device URIs (Uniform Resource Identifiers), connection types, and model information for each detected HP device. USB devices appear with URIs like hp:/usb/DeskJet_2600_series?serial=XXXXX, while network devices show hp:/net/DeskJet_2600_series?ip=192.168.1.100. Use these URIs when manually specifying devices in other HPLIP commands.
Add the -g flag when you need verbose debug output that shows every discovery step and USB query:
hp-probe -gFor a network-only search, restrict discovery to network backends:
hp-probe -bnetIf you prefer a graphical device list, open HP Device Manager instead of relying on hp-probe:
hp-toolboxVerify CUPS Scheduler Status for HPLIP
Confirm that the CUPS scheduler is running before printing a test page:
lpstat -rscheduler is running
If you see scheduler is not running, use the CUPS troubleshooting commands later in the troubleshooting section to start the service.
Print an HPLIP Test Page
First, identify your configured printer name. Run this command to list all available printers:
lpstat -p -dThe output shows your printer names and the default printer. The -p flag lists all printers, while -d displays the default printer. Use this information for the test print commands.
Print HPLIP Test Page via Command Line
Print a test page from the terminal using either the HPLIP-specific command or the standard CUPS command. The HPLIP method automatically selects your default printer and sends HP’s test page:
hp-testpageThis command prints a formatted test page showing your printer model, HPLIP version, and color/alignment patterns. Alternatively, use the standard CUPS test print command to target a specific printer, replacing printer_name with your actual printer name from the previous lpstat command:
lp -d printer_name /usr/share/cups/data/testprintThe hp-testpage command is simpler for quick verification, while lp offers more control when managing multiple printers.
Print an HPLIP Test Page from the Printers App
- Open the Printers application on your Ubuntu system.
- Locate and select your HP printer in the list of available printers.
- Right-click on the printer and choose Properties.
- In the printer properties window, click the Print Test Page button.
A successful test page confirms your HP printer is properly configured with HPLIP.
Test HPLIP Scanning Functionality
For HP all-in-one devices with scanning capabilities, test the scanner using HPLIP’s built-in scan utility. If you have multiple scanners, first list available devices:
hp-scan -iThis command starts interactive mode, lists detected scanners, and prompts you to choose the correct device URI before running a scan.
Test HPLIP Scan via Command Line
Once you’ve identified your scanner, run the scan as your normal user and save the output:
hp-scan --output=my-test-scan.pngThis saves the scan to my-test-scan.png in your current directory. Choose a different filename if you want to keep multiple test scans.
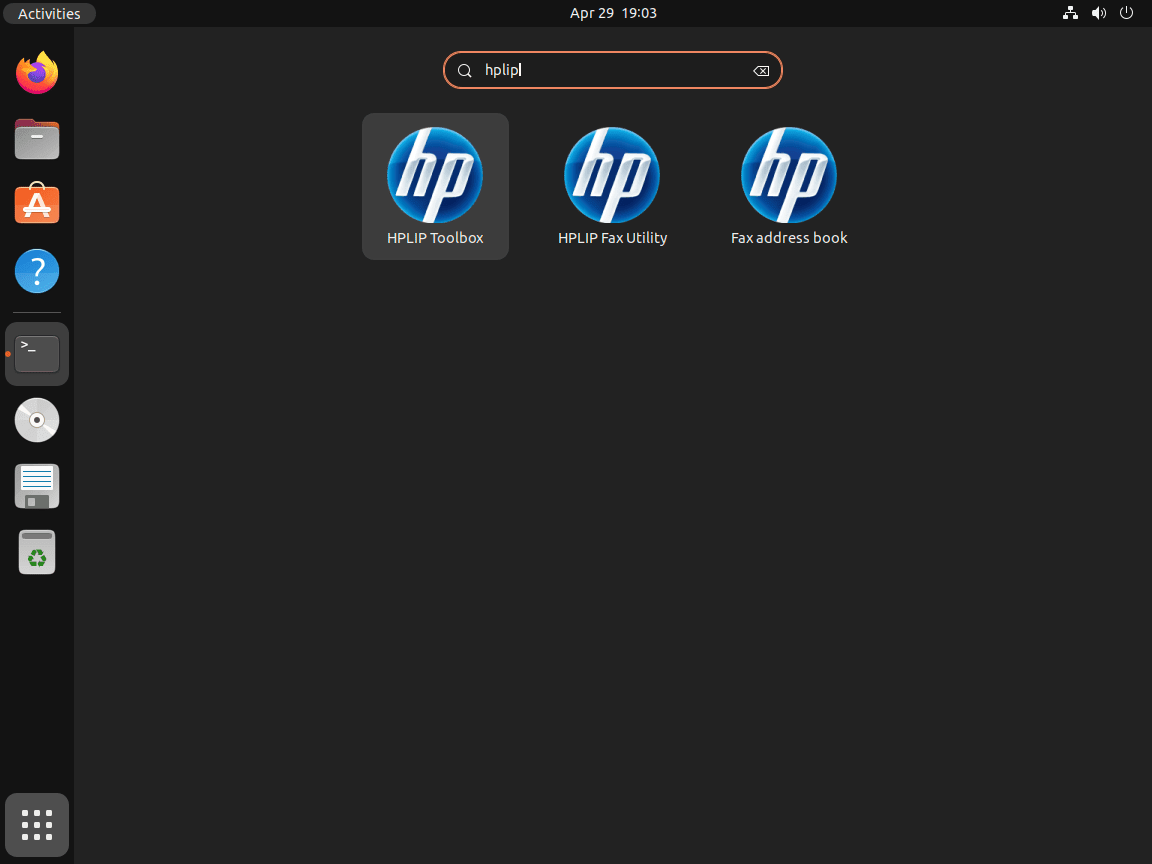
Test HPLIP Scanning from the Applications Menu
- Launch the HPLIP Toolbox by searching for “HPLIP” in your application menu and clicking the HPLIP Toolbox icon.
- In the HPLIP Toolbox window, locate and select your HP all-in-one device.
- Click the Scan button to open the scanning utility.
- Follow the on-screen instructions to perform a test scan, adjusting the scan settings as needed.
A successful test scan confirms your HP all-in-one device’s scanning functionality works properly with HPLIP.
Manage HPLIP Printers via the CUPS Web Interface on Ubuntu
The CUPS (Common UNIX Printing System) web interface provides advanced printer management capabilities beyond what HPLIP’s tools offer. Through this browser-based interface, you can configure print queues, modify printer options, view detailed job histories, adjust PPD (PostScript Printer Description) settings, and manage printer sharing across your network. This is particularly useful for server environments, troubleshooting complex configuration issues, or when you need fine-grained control over printer behavior.
Access the CUPS administration panel by opening your browser and visiting http://localhost:631.
The CUPS interface organizes functions under several tabs:
- Administration: Add/remove printers, manage server settings, enable printer sharing, configure remote administration
- Printers: View all configured printers, check status, set defaults, access printer-specific options
- Jobs: Monitor active print jobs, view completed jobs, cancel or hold queued jobs
- Classes: Create printer pools (groups of printers that share a queue for load balancing)
When you click administrative functions like “Add Printer” or modify printer settings, CUPS prompts for authentication. Enter your Ubuntu username and password (the same credentials you use with sudo). Your user must belong to the lpadmin group to perform administrative tasks.
By default, CUPS only accepts connections from localhost (127.0.0.1), preventing remote access to the web interface. To enable remote administration from other computers on your network, you must explicitly configure CUPS to listen on network interfaces and allow remote connections. This creates security risks; only enable remote access when necessary and implement firewall rules or VPN tunnels to restrict access to trusted networks.
Common CUPS administrative tasks include:
- Setting default options: Configure paper size, print quality, duplex settings, and color management as defaults for all jobs
- Enabling printer sharing: Allow other Linux, macOS, or Windows computers on your network to print through your Ubuntu system
- Viewing error logs: Access detailed logging information when troubleshooting printer communication or driver issues
- Managing print quotas: Set page limits or implement accounting for shared printers in office environments
The CUPS web interface complements HPLIP’s tools by providing system-level printing configuration, while HPLIP focuses on HP-specific features like ink level monitoring, print head alignment, and scanner access.
Troubleshoot HPLIP Issues on Ubuntu
Common HPLIP issues usually involve device detection, permissions, plugins, CUPS, or network discovery. Start with HPLIP’s diagnostic tool, then use the targeted checks that match the failure:
hp-doctorThis command checks for deprecated configurations, missing plugins, dependency issues, printer queue problems, and permission errors. Run it as your normal user; it will prompt you if elevated privileges are needed.
hp-check -rcan be useful when it runs cleanly, but some Ubuntu releases produce noisy dependency warnings or Python tracebacks. Treat it as supporting diagnostics, not as the only proof that printing or scanning is broken.
HPLIP Printer Not Detected During Setup
If HPLIP fails to detect your printer during setup, first verify the connection. For USB printers, check the physical connection and run:
lsusb | grep -i hewlettIf you see lsusb: command not found, install the USB utilities package:
sudo apt install usbutilsThis command lists connected HP USB devices. If nothing appears, the issue is hardware-related. Check the cable and try a different USB port. For network printers, verify the printer’s IP address is reachable:
ping -c 4 printer_ip_addressReplace printer_ip_address with your printer’s actual IP address. Network discovery failures often indicate firewall issues, incorrect network settings, or the printer being on a different subnet. You can also run a network-only HPLIP probe:
hp-probe -bnetHPLIP Setup Window Has No Next Button
If the graphical setup window does not show an enabled Next button, first select a detected device, maximize the window, and check whether the dialog is hidden behind another window. If the GUI still blocks progress, use text mode so the layout cannot stop setup:
sudo hp-setup -iFor a network printer with a known address, pass the IP address directly:
sudo hp-setup -i 192.168.1.50Repository HPLIP Version Too Old
When your HP device requires a newer HPLIP version than Ubuntu’s repositories provide, the device may not appear during setup, or certain features may fail even after successful configuration. This commonly affects recently released HP printers that weren’t supported in the HPLIP version packaged with your Ubuntu release.
First, verify your installed HPLIP version and compare it to the support-ver value in the models database from the HPLIP tarball (see the compatibility section earlier):
dpkg -l | grep -E '^ii[[:space:]]+hplip' | head -1The version number appears in the third column. If the installed version is older than required, use HP’s SourceForge download. Newer HPLIP versions add device support that may not be present in older repository packages.
CUPS Service Not Running for HPLIP
HPLIP requires the CUPS (Common UNIX Printing System) printing service to function. This service manages all print jobs and printer communication on Linux systems. First, check if the CUPS scheduler is running:
lpstat -rIf the scheduler is not running, start and enable CUPS so it launches on boot:
sudo systemctl enable --now cupsOn Ubuntu, CUPS can be socket-activated; seeing cups.socket active with cups.service inactive is normal until a print job arrives.
Missing HPLIP Printer Driver or Plugin
Some HP printers require proprietary plugins for full functionality, while others fail because scan or CUPS packages are missing. Check the installed package set first:
dpkg -l hplip libsane-hpaio printer-driver-hpcups | grep '^ii'If an expected package is missing, reinstall the repository stack before chasing device-specific errors:
sudo apt install --reinstall hplip libsane-hpaio printer-driver-hpcupsIf APT reports broken packages after a failed manual install or interrupted upgrade, repair the package database separately:
sudo apt --fix-broken installIf the diagnostic indicates your printer requires a proprietary plugin, install it:
sudo hp-pluginFollow the on-screen instructions to download and install the proprietary plugin. The plugin must be downloaded from HP’s servers, requires accepting their license agreement, and needs root privileges so files can be written into system directories.
If the plugin download fails due to network issues or server unavailability, wait a few minutes and try again. Some corporate or restrictive networks may block access to HP’s plugin servers. Temporarily disable proxy settings or try from a different network if the download consistently fails.
HPLIP Multi-Function Device Partial Failure
When printing works but scanning fails (or vice versa), this typically indicates missing dependencies for one function. Check if the required scanning packages are installed:
dpkg -l | grep -E 'python3-pil|libsane-hpaio'If either package is missing, install the common scanning dependencies:
sudo apt install python3-pil libsane-hpaioAfter installing missing packages, restart the CUPS service and test both functions again:
sudo systemctl restart cupsNetwork Printer Hostname Resolution for HPLIP
If network printer discovery fails despite correct network configuration, mDNS (multicast DNS) may not be functioning properly. First, verify the printer responds to its hostname:
ping -c 4 printer-hostname.localIf the hostname doesn’t resolve, install Avahi (the Linux mDNS implementation):
sudo apt install avahi-daemon avahi-utilsThen enable and start the Avahi service:
sudo systemctl enable --now avahi-daemonAlternatively, use the printer’s IP address directly instead of its hostname during setup. Find the IP address from your router’s admin panel or the printer’s network settings menu.
Network Printer Security with HPLIP
Network printers expose services to your local network and potentially beyond if not properly secured. When configuring network printers, consider these security practices:
- Restrict firewall rules: Only allow printer ports (631/tcp, 5353/udp) from trusted networks, not all interfaces
- Verify plugin authenticity: The
hp-plugintool downloads proprietary code from HP servers; ensure you’re on a trusted network during installation - Disable remote administration: Access the CUPS web interface at
http://localhost:631and disable remote administration unless specifically needed - Use printer authentication: Configure printer passwords or access controls when available to prevent unauthorized print jobs
For public-facing servers, avoid exposing CUPS ports directly to the internet. Use VPN access or SSH tunneling instead.
Network Printer Firewall Configuration for HPLIP
Network printer access requires specific firewall ports. If using UFW firewall on Ubuntu, allow CUPS and IPP (Internet Printing Protocol) traffic:
If you manage this system over SSH, confirm your firewall rules before enabling or reloading UFW to avoid locking yourself out.
sudo ufw allow 631/tcp
sudo ufw allow 5353/udp
Port 631 handles CUPS/IPP printing, while port 5353 enables Bonjour/mDNS (multicast DNS) printer discovery for automatic network printer detection.
Manage HPLIP Installation on Ubuntu
This section covers updating and removing HPLIP for each installation method.
Update HPLIP (APT)
APT updates come from Ubuntu’s repositories. Refresh the package index and upgrade the HPLIP packages you installed:
sudo apt update
sudo apt install --only-upgrade hplip hplip-gui
If you installed hplip-doc, include it in the upgrade command. On server installs where you only installed hplip, limit the upgrade to that package.
Verify the updated version:
dpkg -l hplip hplip-gui libsane-hpaio | grep '^ii'ii hplip 3.24.4+dfsg0-0ubuntu8 amd64 HP Linux Printing and Imaging System (HPLIP) ii hplip-gui 3.24.4+dfsg0-0ubuntu8 all HP Linux Printing and Imaging - GUI utilities (Qt-based) ii libsane-hpaio 3.24.4+dfsg0-0ubuntu8 amd64 HP SANE backend for multi-function peripherals
For production servers, consider configuring unattended upgrades on Ubuntu to keep HPLIP and other system packages current automatically.
Update HPLIP (Snap)
Snaps refresh automatically, but you can trigger an update at any time:
sudo snap refresh hplip-printer-appReopen the web interface to confirm the Printer Application loads after the refresh.
Update HPLIP from HP SourceForge
SourceForge installs do not receive APT upgrades. Check the current HP release manually, then download and run the newer installer only when your device needs that branch and the installer supports your Ubuntu release.
Check the latest release advertised by SourceForge:
curl -fsSL "https://sourceforge.net/projects/hplip/rss?path=/hplip" | grep -oE '/hplip/[0-9]+\.[0-9]+\.[0-9]+/' | sed -e 's|/hplip/||' -e 's|/||' | sort -V | tail -n 1If that release is newer than the SourceForge version you installed, repeat the download command from the SourceForge section with the new version number. Keep this update manual; the installer is interactive, and new HP releases can change dependency checks or Ubuntu support before the build finishes.
Do not schedule SourceForge HPLIP updates with cron or another unattended job. A failed interactive installer can break a working printer stack and leave files outside APT’s package database.
Remove HPLIP (APT)
If you no longer need HPLIP, remove the packages you installed:
sudo apt remove hplip hplip-gui hplip-docUse purge only when you also want to remove package configuration files such as HPLIP’s D-Bus policy file:
sudo apt purge hplip hplip-gui hplip-docPreview unused dependency cleanup before running it. Reused desktops can have old kernels or unrelated packages in the autoremove list, so continue only if the preview matches what you expect to remove:
sudo apt autoremove --dry-runIf the preview only lists packages you intended to remove, run the cleanup interactively:
sudo apt autoremoveVerify the removal completed:
dpkg-query -W -f='${db:Status-Abbrev} ${binary:Package}\n' hplip hplip-gui hplip-doc 2>/dev/null | grep '^ii' || echo "HPLIP packages are not installed"HPLIP packages are not installed
The message confirms that the named packages are no longer installed. The packages remain available in Ubuntu’s repositories for reinstallation.
Remove HPLIP (Snap)
Remove the Printer Application snap:
sudo snap remove --purge hplip-printer-appVerify that the snap is gone:
snap list hplip-printer-app 2>/dev/null || echo "hplip-printer-app is not installed"Remove HPLIP (HP SourceForge Install)
If you installed HPLIP from HP’s SourceForge download, run HP’s uninstall script from the matching source release. Replace 3.25.8 with the version you installed:
HPLIP_VERSION="3.25.8"
mkdir -p ~/hplip-sourceforge-remove
cd ~/hplip-sourceforge-remove
curl -fL -o "hplip-${HPLIP_VERSION}.tar.gz" "https://sourceforge.net/projects/hplip/files/hplip/${HPLIP_VERSION}/hplip-${HPLIP_VERSION}.tar.gz/download"
tar -xf "hplip-${HPLIP_VERSION}.tar.gz"
cd "hplip-${HPLIP_VERSION}"
sudo ./uninstall.py
Removing the temporary SourceForge removal workspace and your HPLIP profile deletes local configuration and cached data. Back up anything you want to keep before running the cleanup commands.
rm -rf ~/hplip-sourceforge-remove
rm -rf ~/.hplip
Conclusion
HPLIP is ready on Ubuntu once the APT packages, CUPS scheduler, device queue, and any required HP plugin line up. Keep APT as the default maintenance path when your printer works with Ubuntu’s branch, use HP’s SourceForge download only for newer model support, and secure shared network printers with UFW firewall on Ubuntu when queues are reachable beyond the local desktop.

Very good description of the process.
Great Job! Thank you so very much for caring far more than HP does.