

KDE Plasma replaces Ubuntu’s default GNOME desktop with a highly customizable environment where you control panel layouts, desktop widgets, window behavior, and theming down to individual accent colors. If GNOME feels restrictive or you need features like advanced tiling workflows, per-monitor DPI scaling, Activities for workspace organization, or extensive keyboard shortcut customization, Plasma delivers those capabilities without requiring a distribution switch.
This guide covers installing KDE Plasma from Ubuntu’s default repositories, which provides a stable Plasma version matched to your LTS release. You will learn how to choose between minimal, standard, and full installation profiles, configure the SDDM display manager, avoid the virtual keyboard bug in VM environments, verify your installation, and cleanly remove Plasma if needed. An optional section covers adding the Kubuntu Updates PPA for early access to bugfix releases on supported versions.
Understand Ubuntu Version and Plasma Availability
Ubuntu uses different Plasma versions depending on your LTS release. Before installing, confirm your Ubuntu version so you know what to expect:
| Ubuntu Version | Codename | Plasma Version (Default Repos) | Support Until |
|---|---|---|---|
| Ubuntu 26.04 LTS | resolute | Plasma 6.5.x | July 2031 |
| Ubuntu 24.04 LTS | noble | Plasma 5.27.x | June 2029 |
| Ubuntu 22.04 LTS | jammy | Plasma 5.24.x | June 2027 |
Plasma 5.27 (available on 24.04) includes significant improvements over 5.24, including better Wayland support, a revamped System Settings interface, and improved multi-monitor handling. Ubuntu 26.04 ships with Plasma 6, which introduces a new default Wayland session and updated application designs. All versions provide a fully functional KDE desktop experience.
Update Your System Before Installation
Before installing KDE Plasma, update your system to ensure you have the latest security patches and package versions. This prevents dependency conflicts during the desktop environment installation:
sudo apt update && sudo apt upgradeReview the list of packages to be upgraded before confirming. Once the upgrade completes, proceed to choose your installation method.
Check for Existing KDE Installation
Before proceeding, verify that KDE meta packages are not already installed on your system:
dpkg -l | grep -E '^ii.*(kde-plasma-desktop|kde-standard|kde-full)'If the command returns any results showing installed packages, Plasma is already on your system and you can skip to the SDDM configuration section. An empty output means no KDE meta packages are installed and you can proceed with the installation.
Choose Your KDE Plasma Installation Package
KDE Plasma is available through three meta packages, each providing a different level of completeness. The table below summarizes your options:
| Use Case | Meta Package | Approximate Size | What You Get |
|---|---|---|---|
| Minimal install for VMs or custom setups | kde-plasma-desktop | ~1.0-1.5 GB | Plasma shell, KWin, System Settings, and essential configuration utilities without extra KDE apps. |
| Balanced daily-driver desktop | kde-standard | ~1.5-2.0 GB | Adds Dolphin file manager, Konsole terminal, Discover app store, Gwenview image viewer, and core KDE frameworks. |
| Complete KDE workflow | kde-full | ~4.0-5.0 GB | Includes KDE PIM (KMail, KOrganizer), Calligra office suite, educational apps, games, and the complete Kubuntu application set. |
For most users, kde-standard provides the best balance between functionality and disk space. It includes the applications most people need without the bloat of rarely-used educational software or games. Choose kde-plasma-desktop if you prefer to install applications individually, or kde-full if you want the complete KDE ecosystem.
To preview exactly what packages will be installed and see the precise disk space requirement for your system, run a simulation with the -s flag:
sudo apt install -s kde-standardSubstitute kde-plasma-desktop or kde-full to preview those options instead. The simulation shows the full package list and disk usage without making any changes to your system.
Install KDE Standard (Recommended)
The standard installation provides a balanced KDE Plasma desktop with essential applications for daily use. Run the following command to install:
sudo apt install kde-standard -yThis command installs Dolphin file manager, Konsole terminal, Discover app store, Gwenview image viewer, and the core KDE frameworks that enable widgets, Activities, and Plasma’s customization features. The installation typically takes 5-15 minutes depending on your internet connection and disk speed.
Install KDE Minimal (Lightweight)
For a lighter installation suitable for virtual machines or custom setups where you want to choose your own applications:
sudo apt install kde-plasma-desktop -yThis deploys only the Plasma shell, KWin window manager, and System Settings without bundled applications. You will need to install a file manager, terminal emulator, and other utilities separately.
Install KDE Full (Complete Suite)
For the complete KDE experience with all default applications:
sudo apt install kde-full -yThis includes KDE PIM (KMail, KOrganizer, Kontact), Calligra office suite, educational apps, games, and every utility shipping with Kubuntu. Choose this option if you want the full KDE ecosystem and have sufficient disk space.
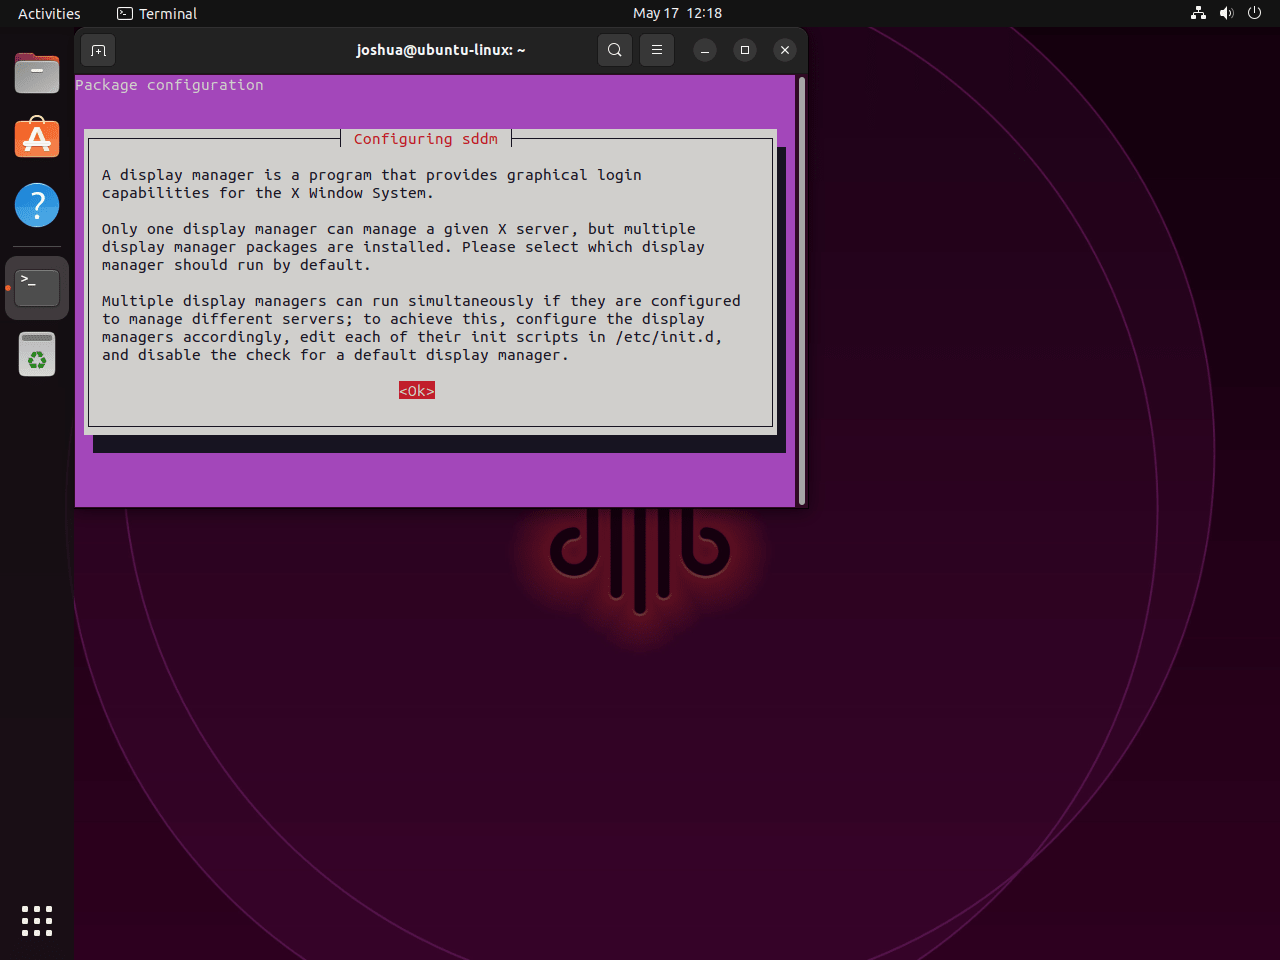
Configure SDDM Display Manager
During installation, a prompt appears asking you to choose the default display manager. The display manager controls the login screen and session selection. You have two practical options:
| Display Manager | Best For | Advantages | Considerations |
|---|---|---|---|
| SDDM | Dedicated KDE Plasma users | Native KDE integration, better theme support, modern features | Additional package to maintain, designed specifically for KDE |
| GDM3 | Multi-desktop setups | Ubuntu default, good GNOME integration, works with all desktops | Less polished with KDE themes, fewer Plasma-specific features |
For most users installing KDE Plasma, select SDDM when prompted. It provides the best integration with Plasma’s theming system and features like automatic session restoration. If you frequently switch between GNOME and Plasma or prefer the familiar Ubuntu login screen, GDM3 remains a solid universal choice.
To proceed with SDDM in the terminal dialog, press the TAB key to highlight <Ok>, then press ENTER.
Fix the Virtual Machine Keyboard Bug
In some virtual environments (VirtualBox, VMware, QEMU), a bug causes the SDDM login screen to display only a large on-screen keyboard after rebooting, making it impossible to log in normally. To prevent this issue, create an SDDM drop-in configuration before rebooting:
sudo mkdir -p /etc/sddm.conf.d
printf "[General]\nInputMethod=\n" | sudo tee /etc/sddm.conf.d/virtualkbd.conf
The first command creates the configuration directory if it does not exist. The second command writes a drop-in file that sets InputMethod= to empty, which disables the virtual keyboard. SDDM automatically loads configuration files from /etc/sddm.conf.d/ even when the main /etc/sddm.conf file does not exist, so this approach works without generating the base configuration manually.
This fix is only necessary if you are running Ubuntu inside a virtual machine. If you are installing on physical hardware, you can skip this step.
Reboot and Verify Installation
Once the installation completes, reboot your system to apply the desktop environment and display manager changes:
rebootAfter restarting, you will arrive at the login screen. If you selected SDDM, you will see the KDE-themed login interface.
Select KDE Plasma at Login
Before entering your credentials, ensure KDE Plasma is selected as your desktop session:
- Click the session selector (gear icon or dropdown menu) typically located in the bottom-left corner of the SDDM login screen.
- Select “Plasma” or “Plasma (X11)” from the list. If you want to try Wayland, select “Plasma (Wayland)” instead.
- Enter your username and password to log in.
Your selection is remembered for future logins, so you only need to choose the session once unless you want to switch between desktops.
Verify KDE Plasma Installation
After logging in, verify your Plasma installation by checking the version. Open Konsole (the KDE terminal) from the application launcher and run:
plasmashell --versionExpected output on Ubuntu 26.04 LTS:
plasmashell 6.5.4
Expected output on Ubuntu 24.04 LTS:
plasmashell 5.27.12
Expected output on Ubuntu 22.04 LTS:
plasmashell 5.24.7
The version number confirms KDE Plasma is installed and running. Minor version numbers may differ slightly after system updates.
(Optional) Enable Kubuntu Updates PPA for Early Bugfixes
The Kubuntu Updates PPA provides KDE Plasma bugfix releases before they reach Ubuntu’s main repositories. This PPA does not deliver major version upgrades (you will still receive the same Plasma major version as your Ubuntu release), but you may get point releases with bug fixes slightly earlier than the default update schedule.
This PPA currently supports Ubuntu 22.04 LTS (jammy) and Ubuntu 24.04 LTS (noble). Ubuntu 26.04 LTS (resolute) support will be added when the Kubuntu team publishes packages for that release. If you are on 26.04, skip this section and use the default repository packages.
To add the Kubuntu Updates PPA, run:
sudo add-apt-repository ppa:kubuntu-ppa/ppa -yAfter adding the PPA, update your package lists:
sudo apt updateIf you have already installed KDE Plasma from the default repositories, upgrade to receive any newer bugfix versions from the PPA:
sudo apt upgrade -yTo remove the PPA later and revert to official repository packages, use ppa-purge:
sudo apt install ppa-purge -y
sudo ppa-purge ppa:kubuntu-ppa/ppa
The ppa-purge utility removes the PPA and downgrades any packages that were updated from it back to official repository versions.
Switch Display Managers
After installation, you may want to switch between display managers. For example, you might return to GDM3 for GNOME or try a different login experience. You can reconfigure the default at any time.
Reconfigure the Default Display Manager
Open a terminal and run the reconfigure command:
sudo dpkg-reconfigure sddmA dialog appears listing all installed display managers. Use the arrow keys to select your preferred option and press ENTER. After making your selection, reboot to apply the change:
rebootOnce restarted, your system uses the newly selected display manager.
Troubleshoot Common KDE Plasma Issues
Desktop environment installations can occasionally run into issues. This section covers the most common problems and their solutions.
Login Screen Shows Only Virtual Keyboard
If the SDDM login screen displays only a large on-screen keyboard with no option to type your password normally, the virtual keyboard bug is affecting your system. This typically happens in virtual machines.
To fix this, switch to a text console by pressing Ctrl+Alt+F3, log in with your username and password, then run:
sudo mkdir -p /etc/sddm.conf.d
printf "[General]\nInputMethod=\n" | sudo tee /etc/sddm.conf.d/virtualkbd.conf
reboot
After rebooting, the login screen should display the normal password field.
Plasma Session Not Available at Login
If “Plasma” does not appear in the session selector at the login screen, the session files may not have been installed correctly. Verify the installation by checking for the session file:
ls /usr/share/xsessions/ | grep plasmaExpected output:
plasma.desktop
If the file is missing, reinstall the plasma-desktop package:
sudo apt install --reinstall plasma-desktopPlasma Crashes After Login
If Plasma crashes immediately after login or you see a black screen, a corrupted configuration file may be the cause. Switch to a text console with Ctrl+Alt+F3, log in, and rename your Plasma configuration directory to reset settings:
mv ~/.config/plasma-org.kde.plasma.desktop-appletsrc ~/.config/plasma-org.kde.plasma.desktop-appletsrc.backup
mv ~/.config/kwinrc ~/.config/kwinrc.backup
Then switch back to the graphical login with Ctrl+Alt+F1 and try logging in again. If this resolves the issue, you can gradually restore settings from the backup files or reconfigure Plasma manually.
NVIDIA Graphics Issues
If you experience screen tearing, black screens, or graphical glitches with NVIDIA graphics cards, ensure you have the proprietary NVIDIA drivers installed. For detailed instructions, see the guide on installing NVIDIA drivers on Ubuntu. KDE Plasma works well with both proprietary and open-source drivers, but Wayland sessions may have limited support on older NVIDIA hardware. For X11 sessions, the proprietary driver typically provides the best experience.
Remove KDE Plasma from Ubuntu
If you decide to remove KDE Plasma and return to your previous desktop setup, follow these steps to cleanly uninstall all components.
Switch Back to GDM3 Before Removal
Before purging KDE components, return the system to Ubuntu’s default display manager (GDM3) so the login screen still works after Plasma is removed:
sudo dpkg-reconfigure gdm3Select GDM3 in the dialog, then verify the change took effect:
cat /etc/X11/default-display-managerExpected output:
/usr/sbin/gdm3
Only proceed with removal once this file shows the correct display manager.
Uninstall KDE Plasma Packages
Remove the KDE meta packages and core components. This command covers all three installation profiles:
sudo apt purge kde-standard kde-plasma-desktop kde-full plasma-desktop kubuntu-desktop sddm -yAfter the meta packages are removed, clean up orphaned dependencies:
sudo apt autoremove --purge -yRemove Leftover KDE Applications
The autoremove command may not catch every KDE application. Check for remaining packages:
dpkg -l | grep -E '^ii.*(konsole|dolphin|okular|gwenview|kate|ark|kwrite)'If this command shows installed packages, remove them individually:
sudo apt purge konsole dolphin okular gwenview kate ark kwrite -y
sudo apt autoremove --purge -y
Remove the Kubuntu Updates PPA
If you previously added the Kubuntu Updates PPA, remove it to prevent future conflicts:
sudo add-apt-repository ppa:kubuntu-ppa/ppa --remove -yRemove KDE Configuration Files
The following commands permanently delete KDE Plasma configuration files, including customized panel layouts, widget settings, and application preferences. If you might reinstall Plasma later and want to keep your settings, skip this step.
To fully clean up user-level configuration files:
rm -rf ~/.config/kde* ~/.config/plasma* ~/.config/kwin* ~/.local/share/kded5 ~/.local/share/plasma*Reinstall Ubuntu GNOME Desktop
After removing KDE Plasma, some GNOME packages that were removed as dependencies may need to be reinstalled. Update your package list and reinstall the Ubuntu desktop meta package:
sudo apt update && sudo apt install ubuntu-desktop --reinstall -yVerify Removal and Reboot
Confirm KDE Plasma has been fully removed:
dpkg -l | grep -E '^ii.*plasma'If no output appears, all Plasma packages have been removed. Reboot to complete the process:
rebootAfter restarting, your system will boot into the GNOME desktop with GDM3 as the login screen.
Conclusion
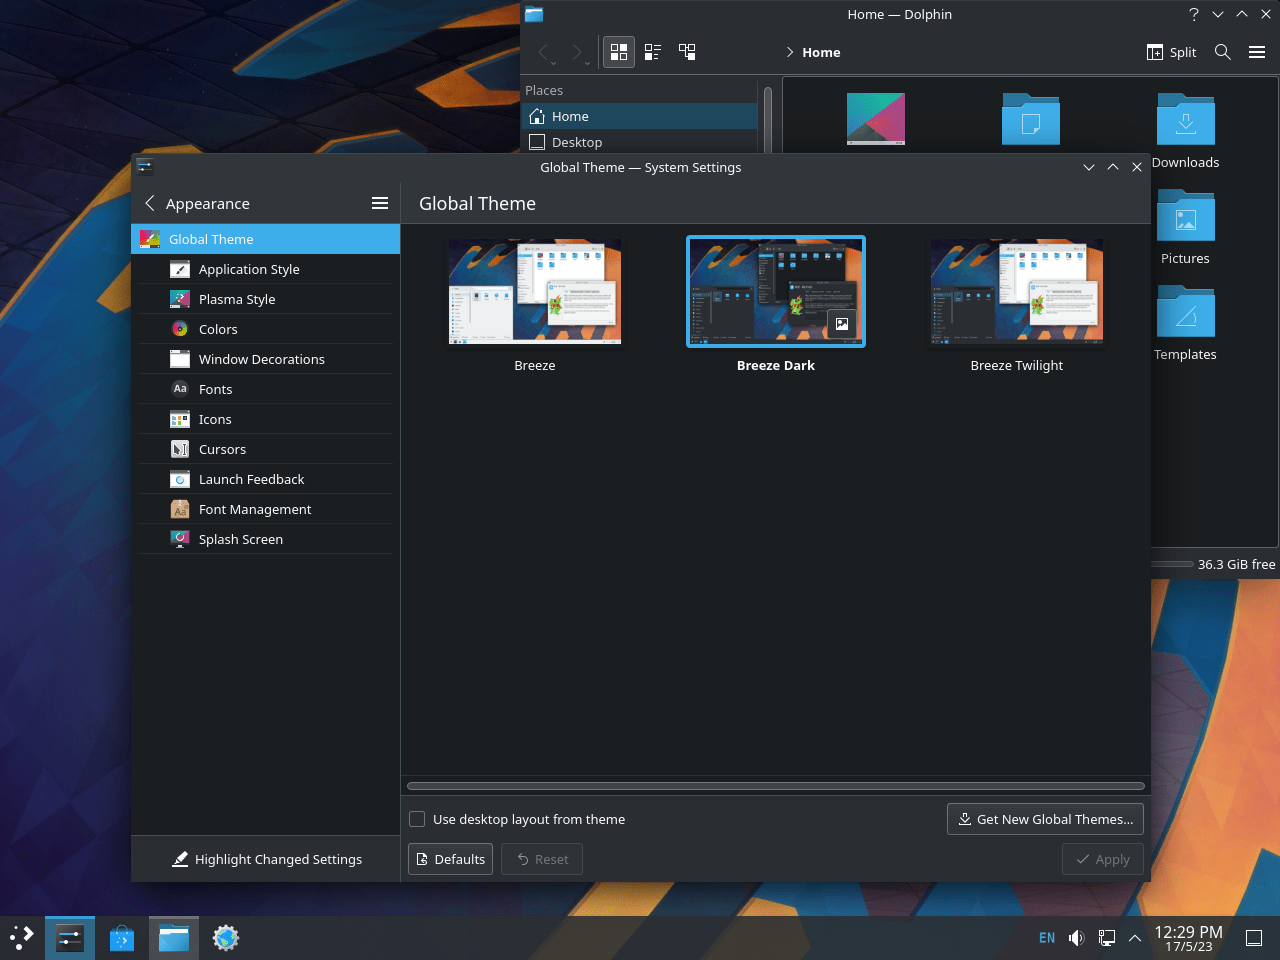
You now have KDE Plasma installed on Ubuntu, complete with configuration options for display managers and the knowledge to troubleshoot common issues. Plasma provides extensive customization through System Settings, including panel positioning, widget management, desktop effects, and theming. To switch between GNOME and Plasma, select your preferred session from the login screen without needing to reinstall anything. If you find Plasma too resource-intensive for your hardware, consider installing XFCE on Ubuntu as a lightweight alternative.
Official KDE Resources
For further information, updates, and community support related to KDE Plasma:
- KDE Plasma Desktop – Official Plasma homepage with feature highlights and the latest release information.
- KDE Community Wiki – Documentation, development resources, and community discussions.
- KDE UserBase Plasma Documentation – User-focused guides for configuring and customizing Plasma.
- Kubuntu Updates PPA – Optional PPA providing early access to KDE Plasma bugfix releases for Ubuntu.

Formatting tips for your comment
You can use basic HTML to format your comment. Useful tags currently allowed in published comments:
<code>command</code>command<strong>bold</strong><em>italic</em><blockquote>quote</blockquote>