
MySQL 8.0 still matters on Ubuntu when an application, backup chain, or replication setup is tied to that branch instead of a newer MySQL LTS release. It remains common on Ubuntu 24.04 and 22.04 servers because those releases ship MySQL 8.0 packages in the default APT repositories, with Oracle’s MySQL APT repository available when you need Oracle’s Community Server build.
Install MySQL 8.0 on Ubuntu 24.04 or 22.04 from Ubuntu’s package source for the simplest maintenance path, or use Oracle’s repository when you specifically need the upstream Community Server package. Ubuntu 26.04 installs MySQL 8.4 from its default repositories, so new deployments on that release should use the MySQL 8.4 LTS guide for Ubuntu.
Oracle moved MySQL 8.0 into Sustaining Support on April 21, 2026 and encourages upgrades to MySQL 8.4 LTS or 9.7 LTS. Use MySQL 8.0 only when compatibility requires it; choose MySQL 8.4 for new Ubuntu 26.04 deployments or longer support planning.
Install MySQL 8.0 on Ubuntu
Start from current package metadata so APT can resolve the newest MySQL 8.0 package available for your Ubuntu release.
sudo apt update
sudo apt upgrade
Check MySQL 8.0 Release Compatibility
MySQL 8.0 is an Ubuntu 24.04 and 22.04 workflow. Ubuntu 26.04 uses MySQL 8.4 in the default repository, and Oracle’s MySQL APT repository currently publishes Ubuntu 24.04 (noble) and 22.04 (jammy) metadata for MySQL 8.0, not an Ubuntu 26.04 (resolute) repository path.
. /etc/os-release
printf '%s\n' "$VERSION_ID ($VERSION_CODENAME)"
Expected Ubuntu 24.04 output:
24.04 (noble)
If the command prints 26.04 (resolute), install MySQL 8.4 instead. Do not point a 26.04 system at Oracle’s older noble or jammy repository path.
Choose a MySQL 8.0 Package Source
Two MySQL 8.0 package paths are available on Ubuntu 24.04 and 22.04. The default Ubuntu package is the best fit for most compatibility-driven installs because it stays inside the normal Ubuntu update flow. Oracle’s package is useful when your environment expects Oracle’s Community Server packaging or a specific upstream build from the MySQL APT repository.
| Method | Source | Release Scope | Updates | Best Fit |
|---|---|---|---|---|
| Ubuntu repository | Ubuntu main repository | Ubuntu 24.04 and 22.04 | APT-managed updates from Ubuntu | Production servers that need the distro-maintained MySQL 8.0 branch |
| Oracle MySQL APT repository | Oracle MySQL Community Server, mysql-8.0 component | Ubuntu 24.04 and 22.04 on amd64 | Updates through Oracle’s MySQL APT repository | Systems that need Oracle’s MySQL Community Server package or an upstream 8.0 build |
Oracle’s MySQL APT repository affects package selection while it is enabled. Disable or remove the Oracle source before returning a system to Ubuntu’s repository packages.
Option 1: Install MySQL 8.0 from Ubuntu’s Repository
Ubuntu 24.04 and 22.04 ship MySQL 8.0 as the default mysql-server package. Confirm the candidate first if you want to make sure your system is still resolving the Ubuntu package, not an Oracle source left from an earlier install.
apt-cache policy mysql-serverRelevant output on Ubuntu 24.04 includes:
mysql-server:
  Installed: (none)
  Candidate: 8.0.45-0ubuntu0.24.04.1
  Version table:
     8.0.45-0ubuntu0.24.04.1 500
        500 http://archive.ubuntu.com/ubuntu noble-updates/main amd64 Packages
Ubuntu 22.04 should show an 8.0 candidate from jammy-updates/main. If Ubuntu 24.04 or 22.04 shows repo.mysql.com, the Oracle repository is already active and APT may prefer that source.
sudo apt install mysql-serverThe Ubuntu package installs non-interactively, starts mysql.service, and normally uses the auth_socket plugin for the local root account instead of prompting for a MySQL root password. After installation, run the security script to remove unsafe defaults and set a password if your workflow needs password-based root access.
mysql --versionRelevant output on Ubuntu 24.04 includes:
mysql Ver 8.0.45-0ubuntu0.24.04.1 for Linux on x86_64 ((Ubuntu))
Option 2: Install MySQL 8.0 from Oracle’s Repository
Oracle’s MySQL APT repository publishes the mysql-community-server package for Ubuntu 24.04 and 22.04 under the mysql-8.0 component. Oracle documents this package family in the MySQL 8.0 APT repository guide, and its supported-platforms page currently lists Ubuntu 24.04 and 22.04 as supported Ubuntu x86_64 platforms, not Ubuntu 26.04.
The commands here use Oracle’s repository and signing key, but store the source as a DEB822 .sources file with a dedicated keyring for easier auditing and cleanup.
Install Repository Prerequisites
Install the small set of tools needed to fetch the signing key and write the DEB822 source file.
sudo apt install ca-certificates curl gpgAdd the MySQL APT Repository
Oracle publishes the current MySQL package signing key as RPM-GPG-KEY-mysql-2025. Oracle’s signature documentation identifies the key ID as B7B3B788A8D3785C; verify the full fingerprint if you audit the key manually: BCA4 3417 C3B4 85DD 128E C6D4 B7B3 B788 A8D3 785C.
curl -fsSL "https://repo.mysql.com/RPM-GPG-KEY-mysql-2025" | sudo gpg --dearmor --yes -o /usr/share/keyrings/mysql.gpgCreate a DEB822 source file for MySQL 8.0. The release guard skips the file on Ubuntu 26.04 or any other unsupported codename, and the architecture guard keeps the source aligned with Oracle’s published Ubuntu server packages.
. /etc/os-release
MYSQL_ARCH="$(dpkg --print-architecture)"
case "$VERSION_CODENAME" in
  noble|jammy) MYSQL_SUITE="$VERSION_CODENAME" ;;
  *) MYSQL_SUITE="" ;;
esac

if [ -z "$MYSQL_SUITE" ]; then
  printf 'Oracle does not publish MySQL 8.0 packages for %s.\n' "$VERSION_CODENAME"
elif [ "$MYSQL_ARCH" != "amd64" ]; then
  printf "Oracle's MySQL APT packages for Ubuntu target amd64.\n"
else
  printf '%s\n' \
    "Enabled: yes" \
    "Types: deb" \
    "URIs: https://repo.mysql.com/apt/ubuntu" \
    "Suites: $MYSQL_SUITE" \
    "Components: mysql-8.0" \
    "Architectures: amd64" \
    "Signed-By: /usr/share/keyrings/mysql.gpg" | sudo tee /etc/apt/sources.list.d/mysql.sources > /dev/null
fi
Inspect the source file before refreshing APT.
cat /etc/apt/sources.list.d/mysql.sourcesExpected output on Ubuntu 24.04:
Enabled: yes
Types: deb
URIs: https://repo.mysql.com/apt/ubuntu
Suites: noble
Components: mysql-8.0
Architectures: amd64
Signed-By: /usr/share/keyrings/mysql.gpg
Ubuntu 22.04 should show Suites: jammy. If the file shows resolute, remove it and use the MySQL 8.4 path because Oracle does not publish a MySQL 8.0 repository for Ubuntu 26.04.
Refresh APT After Adding MySQL
Refresh APT and confirm the candidate comes from Oracle’s mysql-8.0 component.
sudo apt update
apt-cache policy mysql-community-server
Relevant output on Ubuntu 24.04 includes:
mysql-community-server:
  Installed: (none)
  Candidate: 8.0.46-1ubuntu24.04
  Version table:
     8.0.46-1ubuntu24.04 500
        500 https://repo.mysql.com/apt/ubuntu noble/mysql-8.0 amd64 Packages
Install MySQL 8.0 Community Edition Server
Install Oracle’s MySQL Community Server package after the candidate points to the expected repository.
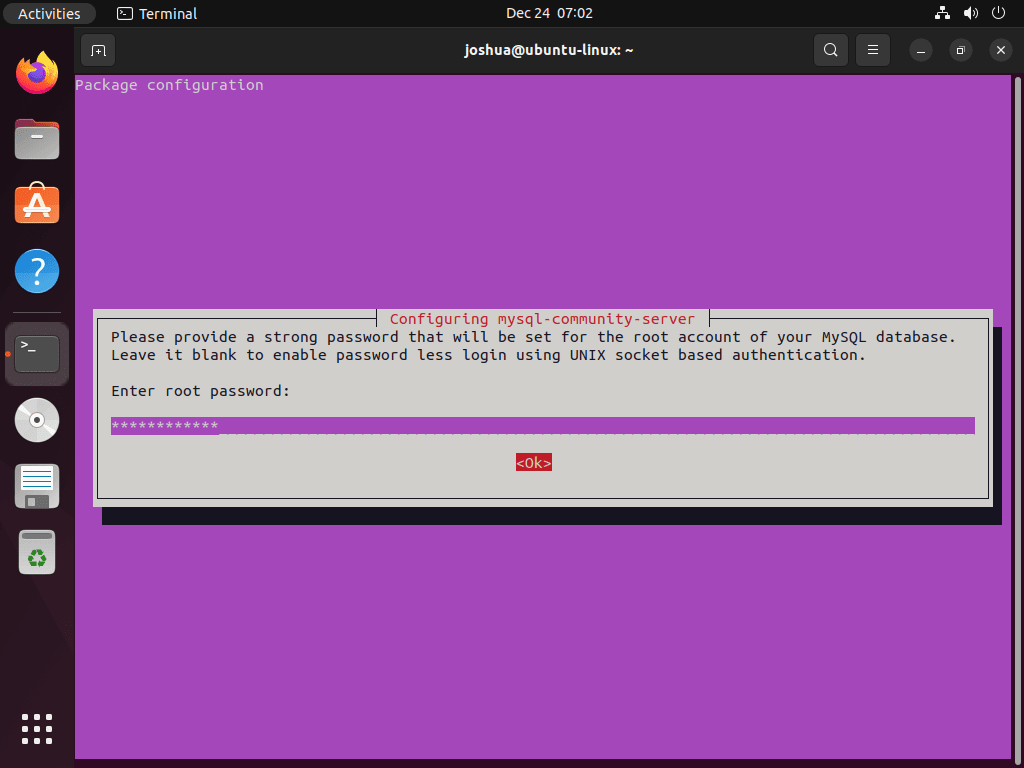
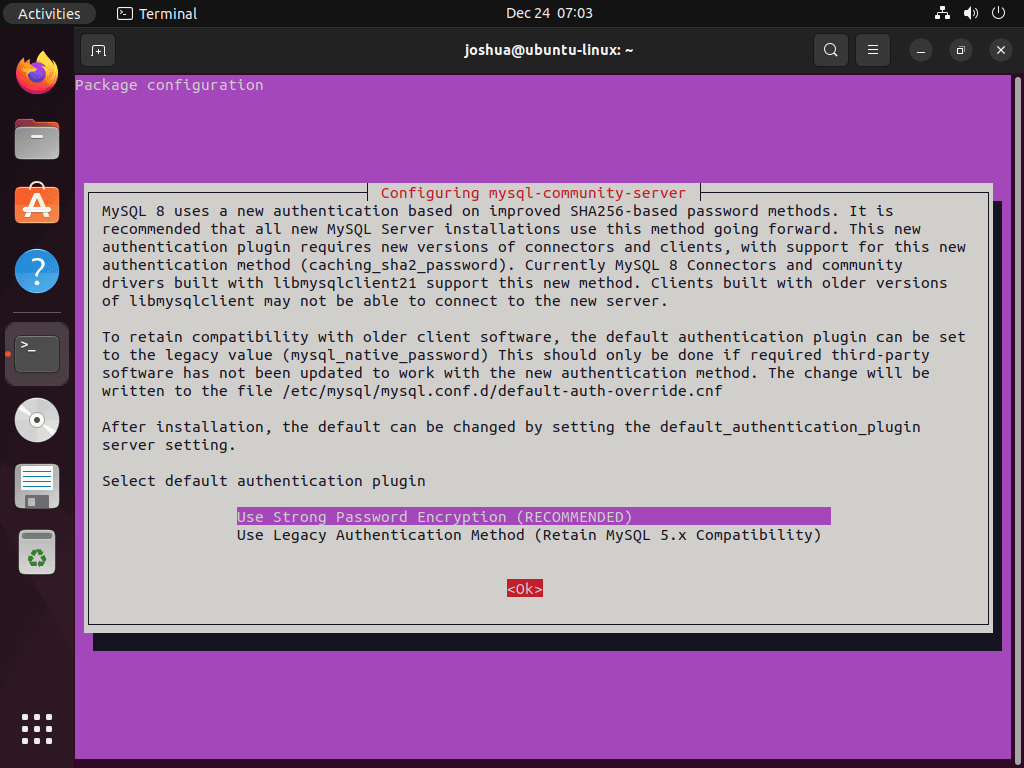
sudo apt install mysql-community-serverThe package prompts for a MySQL root password during installation. After confirming the password, choose the default authentication plugin. Use the recommended strong password encryption option unless an older connector or application requires the legacy MySQL 5.x-compatible plugin.
Confirm the installed package source and version after installation.
apt policy mysql-community-serverRelevant output on Ubuntu 24.04 includes:
mysql-community-server:
  Installed: 8.0.46-1ubuntu24.04
  Candidate: 8.0.46-1ubuntu24.04
  Version table:
 *** 8.0.46-1ubuntu24.04 500
        500 https://repo.mysql.com/apt/ubuntu noble/mysql-8.0 amd64 Packages
        100 /var/lib/dpkg/status
The version number shows the installed MySQL 8.0 build, and the repo.mysql.com source confirms the package came from Oracle’s MySQL APT repository. If the candidate is empty, the source file, keyring, or release scope needs correction before installing.
Manage the MySQL 8.0 Service on Ubuntu
Both Ubuntu’s MySQL package and Oracle’s MySQL Community Server package use the mysql systemd service name. The service normally starts during installation and remains enabled for boot.
Check whether the service is active:
systemctl is-active mysqlSuccessful output:
active
Check whether MySQL starts automatically during boot:
systemctl is-enabled mysqlExpected output when boot startup is enabled:
enabled
If the active check returns inactive, start the service before connecting to the database.
Stopping the MySQL Service
Stop MySQL when you need a clean maintenance window or before package removal.
sudo systemctl stop mysqlStarting the MySQL Service
Start MySQL after maintenance or when the active check reports inactive.
sudo systemctl start mysqlDisabling the MySQL Service at System Startup
Disable boot startup only when the database should run on demand.
sudo systemctl disable mysqlEnabling the MySQL Service at System Startup
Enable boot startup again for normal server use.
sudo systemctl enable mysqlRestarting the MySQL Service
Restart MySQL after configuration changes that require the daemon to reload its settings.
sudo systemctl restart mysqlVerify MySQL Connection After Installation
After installation completes, verify that MySQL is accepting connections. For Ubuntu’s repository packages, root uses the auth_socket plugin, so connect with:
sudo mysqlIf you installed from the MySQL Community repository and set a root password, connect with:
mysql -u root -pSuccessful authentication opens the MySQL prompt:
mysql>
This confirms MySQL is running and accepting connections. Type EXIT; to close the connection and return to the terminal.
Secure MySQL 8.0 on Ubuntu
Fresh MySQL installs include defaults that are convenient for local setup but too loose for most server workloads. The mysql_secure_installation script removes anonymous users, disables remote root login, removes the test database, and reloads privileges after those changes.
Running the MySQL Security Script on Ubuntu
Run the hardening script from an interactive terminal. If you installed from Ubuntu’s repository and root uses auth_socket, the script may skip the root password prompt. Oracle’s package asks for the root password you set during installation.
sudo mysql_secure_installationInteracting with the Security Script on Ubuntu
The script may offer the VALIDATE PASSWORD component before it asks cleanup questions. Enable it when you want MySQL to enforce password-strength checks for local accounts, then answer Y to the cleanup prompts unless you intentionally need the default test objects for a disposable lab.
The common prompts look like this:
1. Password Settings for Root Accounts
Set or change the root password when the script offers the option. Skip this prompt only when your root authentication method is already intentional.
New password:
Re-enter new password:
2. Removal of Anonymous Users
Remove anonymous accounts so only named MySQL users can authenticate.
Remove anonymous users? (Press y|Y for Yes, any other key for No) : Y
3. Disallowing Root Login Remotely
Keep root restricted to local connections. Create a separate application or administration user for remote access instead of exposing root over the network.
Disallow root login remotely? (Press y|Y for Yes, any other key for No) : Y
4. Removal of Test Database
Remove the default test database and its permissions before using the server for real data.
Remove test database and access to it? (Press y|Y for Yes, any other key for No) : Y
5. Reloading Privilege Tables
Reload the privilege tables so account changes take effect immediately.
Reload privilege tables now? (Press y|Y for Yes, any other key for No) : Y
After the script finishes, reconnect with the login method that matches your install source and confirm the server still accepts local connections.
Update and Remove MySQL 8.0 on Ubuntu
MySQL updates and removals stay package-manager owned. Keep the package source in mind because Ubuntu repository packages and Oracle repository packages use different package names and cleanup steps.
Update MySQL 8.0
Use the normal APT workflow to refresh package metadata and install available updates. For a fuller explanation of Ubuntu package updates, see the Ubuntu command-line package update guide.
sudo apt update
sudo apt upgrade
When Oracle’s repository is enabled, apt upgrade can pull MySQL packages from repo.mysql.com. Disable the Oracle source first if you want the system to return to Ubuntu’s repository packages.
Remove MySQL 8.0
Stop MySQL before removing the package. Package removal does not automatically mean you want to delete databases, so keep data cleanup separate and run it only after a verified backup.
Stop the MySQL Service on Ubuntu
Stop the running service first.
sudo systemctl stop mysqlRemove MySQL Packages
If you installed Oracle’s MySQL Community Server package, purge the Oracle package names and remove unused dependencies.
sudo apt purge mysql-community-server mysql-community-client
sudo apt autoremove --purge
If you installed Ubuntu’s repository package, purge the Ubuntu package names instead. For more package-removal background, see the Ubuntu APT package removal guide.
sudo apt purge mysql-server mysql-client
sudo apt autoremove --purge
Review the APT removal summary before confirming. If APT proposes removing MariaDB, PHP database drivers, monitoring agents, or unrelated application packages you still need, stop and plan the dependency change first.
Remove MySQL 8.0 Repository
If you used Oracle’s repository and no longer need any Oracle MySQL APT components, remove the source and keyring created earlier, then refresh APT.
sudo rm -f /etc/apt/sources.list.d/mysql.sources
sudo rm -f /usr/share/keyrings/mysql.gpg
sudo apt update
After source cleanup, apt-cache policy mysql-community-server should no longer list repo.mysql.com as an active package source.
Remove MySQL Data Files (Optional)
For a complete removal, preview the database and configuration paths before deleting them.
The cleanup commands in this section permanently delete MySQL databases, local MySQL accounts, and configuration files. Export and verify any data you need before continuing.
sudo find /var/lib/mysql /etc/mysql -maxdepth 1 -print 2>/dev/nullIf the preview shows only MySQL paths you intend to remove, delete them.
sudo rm -rf /var/lib/mysql /etc/mysqlTroubleshoot MySQL 8.0 on Ubuntu
Most failed installs come from repository scope, service conflicts, leftover database configuration, or a client connecting to the wrong socket path. Start with the symptom that matches your terminal output.
MySQL Service Won’t Start After Installation
Symptom: systemctl status mysql shows inactive (dead) or displays error messages.
Solution: Check the MySQL error log to understand why the service failed:
sudo tail -50 /var/log/mysql/error.logCommon causes and fixes:
Port 3306 already in use: Another MySQL instance or service is using the default port.
sudo ss -ltnp | grep ':3306'If another process uses the port, either stop that process or configure MySQL to use a different port in /etc/mysql/mysql.conf.d/mysqld.cnf (change port = 3306 to port = 3307).
Permission denied on data directory: The MySQL user lacks write permissions to the data directory.
sudo stat -c '%U:%G %a %n' /var/lib/mysqlThe owner should be mysql:mysql. If a failed restore or manual copy changed that owner, repair the directory ownership and restart MySQL.
sudo chown -R mysql:mysql /var/lib/mysql
sudo chmod 750 /var/lib/mysql
sudo systemctl start mysql
Access Denied for User ‘root’ at Login
Symptom: mysql -u root -p returns “Access denied for user ‘root’@’localhost'”
Solution: First, check whether root uses socket authentication. On Ubuntu’s repository packages, root commonly uses the auth_socket plugin, so connect with sudo mysql instead of a password.
sudo mysqlIf you intentionally want password-based root access on a local system, run the SQL inside that authenticated session and replace the sample password before pressing Enter.
ALTER USER 'root'@'localhost' IDENTIFIED WITH caching_sha2_password BY 'your_new_password';
FLUSH PRIVILEGES;
For Oracle MySQL Community installs that already rely on a root password, use the password entered during package installation. If that password is lost, follow Oracle’s root password reset procedure; do not rely on a generic mysqld_safe command because current systemd-managed packages may not include that helper.
Socket Error: Can’t Connect to Local MySQL Server
Symptom: ERROR 2002 (HY000): Can't connect to local MySQL server through socket '/var/run/mysqld/mysqld.sock'
Solution: This error indicates the MySQL service is not running or the socket file doesn’t exist. First, verify the service is running:
systemctl is-active mysqlIf the service is stopped, start it:
sudo systemctl start mysqlIf the error persists after starting, check if the socket file exists:
ls -la /var/run/mysqld/mysqld.sockIf the error mentions a different path such as /var/lib/mysql/mysql.sock, check whether an old client or custom option file overrides the socket path.
grep -R "^[[:space:]]*socket" /etc/mysql/ 2>/dev/nullRepository Not Found During Installation
Symptom: E: Unable to locate package mysql-community-server when running sudo apt install mysql-community-server
Solution: The MySQL repository either was not imported correctly, the APT cache was not refreshed, or the system is using an unsupported release such as Ubuntu 26.04. Verify the repository file first:
cat /etc/apt/sources.list.d/mysql.sourcesThe Suites line must be noble on Ubuntu 24.04 or jammy on Ubuntu 22.04. If you previously used a legacy mysql.list file, remove or disable it to avoid duplicate source entries, then refresh APT and check the candidate again.
sudo apt update
apt-cache policy mysql-community-server
If the candidate is still empty on Ubuntu 24.04 or 22.04, recreate the DEB822 source from the Oracle repository method. On Ubuntu 26.04, switch to the MySQL 8.4 guide because Oracle does not publish a resolute MySQL 8.0 repository.
GPG Key Error During apt update
Symptom: GPG error: https://repo.mysql.com/apt/ubuntu ... NO_PUBKEY or EXPKEYSIG B7B3B788A8D3785C when running sudo apt update
Solution: The MySQL GPG key may be missing, expired, or corrupted. Re-import Oracle’s current repository key:
curl -fsSL "https://repo.mysql.com/RPM-GPG-KEY-mysql-2025" | sudo gpg --dearmor --yes -o /usr/share/keyrings/mysql.gpg
sudo apt update
If the error persists, verify the key was imported:
gpg --show-keys --fingerprint /usr/share/keyrings/mysql.gpgThe fingerprint should include BCA4 3417 C3B4 85DD 128E C6D4 B7B3 B788 A8D3 785C. If you expected a file named RPM-GPG-KEY-mysql-2026, Oracle does not currently publish that filename; trust the verified fingerprint, not the year in the key-file name.
Installation Hangs or Prompts Unexpectedly
Symptom: sudo apt install mysql-community-server hangs without prompting for password or shows configuration dialogs that won’t respond.
Solution: Oracle’s package uses interactive debconf prompts for the root password and authentication plugin. Run the install from a terminal that can display those prompts, not from a detached background job.
sudo dpkg --configure -a
sudo apt install mysql-community-server
Avoid putting MySQL passwords in shell history or process arguments. If you need unattended installation for automation, store debconf selections in a protected automation secret and test that path outside an interactive production shell.
MySQL Command Not Found
Symptom: mysql: command not found when attempting to connect.
Solution: The MySQL client may not be installed. For Ubuntu’s repository package path, install mysql-client:
sudo apt install mysql-clientFor Oracle’s repository path, install the matching Community client package instead.
sudo apt install mysql-community-clientAfter installation, verify the client works:
mysql --versionSource Build Prerequisite Confusion
APT package installation does not require GCC or source-build prerequisites. If you need to compile MySQL 8.0 from source for a custom build, use Oracle’s source installation documentation and test that workflow separately from a package-managed server.
Conclusion
MySQL 8.0 is now best treated as a compatibility branch on Ubuntu 24.04 and 22.04. Use Ubuntu’s package for the cleanest maintenance path, use Oracle’s repository only when its Community Server build is required, and move new Ubuntu 26.04 deployments to MySQL 8.4 instead.

Formatting tips for your comment
You can use basic HTML to format your comment. Useful tags currently allowed in published comments:
<code>command</code>command<strong>bold</strong><em>italic</em><a href="https://example.com">link</a><blockquote>quote</blockquote>