
Most Ubuntu desktop installs already include Python, but pip is what turns that interpreter into something you can use for project dependencies, quick library installs, and repeatable requirements files. If you need to install Python pip on Ubuntu, use the python3-pip package from APT and pair it with python3-venv so project packages stay out of the system interpreter.
Ubuntu 24.04 and 26.04 also block both normal and --user installs outside a virtual environment, while Ubuntu 22.04 still allows per-user installs. Using the same venv-first workflow across all three releases keeps package management predictable and avoids the system Python conflicts that usually cause trouble later.
Install Python pip on Ubuntu
Install Python pip on Ubuntu with the python3-pip package from Ubuntu’s repositories. Each supported Ubuntu LTS release ships a different default Python branch and APT-packaged pip version, and the outside-venv behavior changes with it.
| Ubuntu release | Default Python | APT pip version | Outside-venv behavior |
|---|---|---|---|
| 26.04 | Python 3.14.x | pip 25.1.1 | PEP 668 blocks both normal and --user installs |
| 24.04 | Python 3.12.x | pip 24.0 | PEP 668 blocks both normal and --user installs |
| 22.04 | Python 3.10.x | pip 22.0.2 | Plain installs fall back to the user site, and --user still works |
The workflow below is written for Ubuntu 26.04, 24.04, and 22.04. If you are still on Ubuntu 20.04, upgrade to a newer LTS release before relying on these examples for production systems.
If you are using a minimal image, server build, or container, check whether Python is present before installing pip. Standard desktop installs already return a version, and the install command below also includes python3 so APT can install the base interpreter when needed.
python3 --versionPython 3.14.4
Start by refreshing the package index on your Ubuntu system:
sudo apt updateThese commands use
sudofor package-management tasks. If your account does not have administrative access yet, follow the guide on add a new user to sudoers on Ubuntu before you continue.
Install Python, pip, and the virtual environment module together so the recommended venv workflow is ready right away:
sudo apt install python3 python3-pip python3-venvAPT installs recommended packages by default. On current Ubuntu LTS releases, python3-pip recommends build-essential and python3-dev, so the transaction may add compiler and header packages that help pip build Python packages with native extensions. Review APT’s package list before confirming if you are keeping a minimal host lean.
Ubuntu serves python3-pip from the Universe component. If APT reports that it cannot find the package on a minimal image or cloud host, enable Universe and Multiverse in Ubuntu, then rerun the install command.
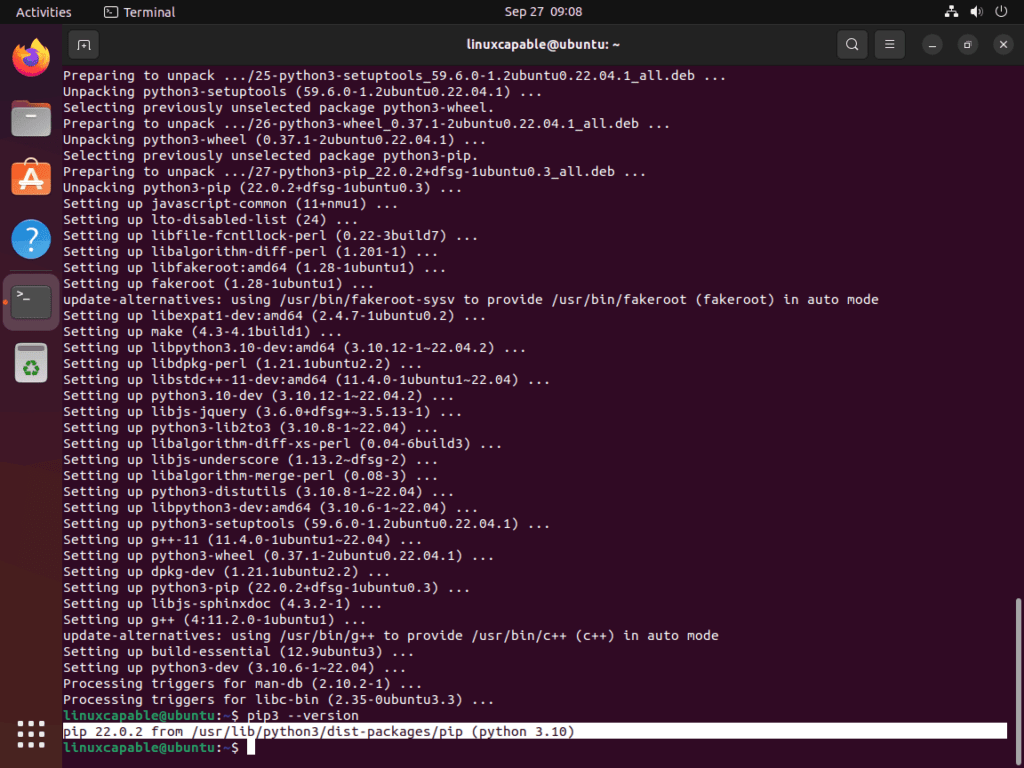
Verify that pip is installed and attached to the Python version your release ships by default:
python3 -m pip --versionpip 25.1.1 from /usr/lib/python3/dist-packages/pip (python 3.14)
On Ubuntu 24.04, the same command reports pip 24.0 with Python 3.12. On Ubuntu 22.04, it reports pip 22.0.2 with Python 3.10. The command format stays the same across supported LTS releases even though the version string changes.
Use Python pip in virtual environments on Ubuntu
Virtual environments are the cleanest pip workflow on every supported Ubuntu LTS release. They are mandatory for most non-Debian Python packages on Ubuntu 24.04 and 26.04 because PEP 668 blocks outside-venv installs, and they are still the safer habit on Ubuntu 22.04 because each project keeps its own dependency set.
If you want the full workflow in more detail, read how to create a Python virtual environment on Ubuntu. If a project needs a specific interpreter branch before you build the venv, use the matching version guide, such as install Python 3.14 on Ubuntu, then create the environment with that interpreter.
Create a virtual environment for Python pip
Create the environment in your home directory so you can reuse it for one project without touching the system Python packages:
python3 -m venv ~/venvs/projectActivate the environment before you run any pip commands inside it:
source ~/venvs/project/bin/activateOnce the shell is active, confirm that pip now points at the environment instead of Ubuntu’s system path:
python -m pip --versionpip 25.1.1 from /home/linuxcapable/venvs/project/lib/python3.14/site-packages/pip (python 3.14)
The path changes from /usr/lib/python3/dist-packages to your venv directory, which is how you know new installs will stay isolated from the Ubuntu-managed Python packages.
Use common Python pip commands on Ubuntu
After activation, use python -m pip. If you are working against Ubuntu’s system interpreter instead, use the same commands with python3 -m pip.
Choose the command form that matches the interpreter you mean:
| Command form | Best use |
|---|---|
python -m pip | Active virtual environments, where python points at the environment interpreter |
python3 -m pip | Ubuntu’s default Python 3 interpreter, without relying on wrapper commands |
pip or pip3 | Interactive shortcuts installed by python3-pip; convenient, but easier to confuse with aliases or virtual environments |
Install packages with Python pip on Ubuntu
Install a package from PyPI by naming it after python -m pip install. The example below installs the widely used requests library:
python -m pip install requestsCheck the package metadata after the install to confirm the version, location, and dependencies:
python -m pip show requestsReview the Name, Version, Location, and Requires fields in the output. The Location field is especially useful when you are checking whether a package landed inside the active venv or somewhere else on the system.
List installed packages with Python pip on Ubuntu
List the current environment whenever you want a quick inventory of what pip installed:
python -m pip listThe output lists each package and version in the active environment. This is also a fast way to confirm that pip pulled in the dependency chain a package needs instead of installing only the top-level library.
Pin versions with Python pip on Ubuntu
Pin a package when a project depends on one specific release and you do not want pip to pull in a newer branch automatically:
python -m pip install requests==2.28.0Use the same pattern for any pinned dependency. Replace requests==2.28.0 with the package and exact version your project needs, then run your project’s tests before freezing the requirement.
Check outdated packages with Python pip on Ubuntu
Review outdated packages before you upgrade them so you can see which installed version is behind and how far the latest release moved ahead:
python -m pip list --outdatedThe output lists the installed version, latest available version, and package type. When you are ready to update one package, use python -m pip install --upgrade package_name. That leaves the rest of the environment untouched while you move only the package you selected.
Export requirements with Python pip on Ubuntu
Freeze the environment into a requirements file when you want another system, teammate, or CI runner to recreate the same dependency set:
python -m pip freezeThe output uses one package==version line for each installed package. Redirect that output into a file with python -m pip freeze > requirements.txt, then recreate it later with python -m pip install -r requirements.txt.
Troubleshoot Python pip on Ubuntu
Most pip problems on Ubuntu come down to one of three issues: PEP 668 blocking installs, shell commands resolving to the wrong pip binary, or using a per-user install on a release where Ubuntu now forbids it.
Fix the externally-managed-environment error for Python pip on Ubuntu
Ubuntu 24.04 and 26.04 protect the system Python environment with externally managed environment markers, the packaging standard that came from PEP 668, so pip stops outside-venv installs before they can overwrite files APT manages:
error: externally-managed-environment

× This environment is externally managed
╰─> To install Python packages system-wide, try apt install python3-xyz
That restriction applies to both python3 -m pip install package_name and python3 -m pip install --user package_name on Ubuntu 24.04 and 26.04. Ubuntu 22.04 still allows --user installs, but the most reliable cross-release fix is the same everywhere: create a virtual environment, activate it, and rerun the install there.
python3 -m venv ~/venvs/project
source ~/venvs/project/bin/activate
python -m pip install package_name
If the package also exists in Ubuntu’s repositories, prefer sudo apt install python3-packagename for system-wide use. That keeps Ubuntu’s package database and the Python files it owns in sync.
If you are installing a Python command-line application instead of a project library, consider pipx. Ubuntu provides pipx from Universe on Ubuntu 26.04, 24.04, and 22.04, and pipx creates an isolated virtual environment for each application.
Fix ensurepip is disabled on Ubuntu
If virtual environment creation fails because ensurepip is unavailable, install python3-venv for Ubuntu’s default interpreter, then recreate the environment. If you see ensurepip is disabled in Debian/Ubuntu for the system Python after running python3 -m ensurepip directly, do not rerun it with sudo against /usr/bin/python3; Ubuntu expects system pip to come from python3-pip and venv pip to come from the python3-venv workflow.
sudo apt install python3-venvFix the pip or pip3 command not found error on Ubuntu
After you install python3-pip, Ubuntu places both pip and pip3 in /usr/bin. If your shell still says one of those commands is missing, confirm the paths directly and fall back to python3 -m pip, which works even when your shell cache has not refreshed yet.
command -v pip
command -v pip3
python3 -m pip --version
/usr/bin/pip /usr/bin/pip3 pip 25.1.1 from /usr/lib/python3/dist-packages/pip (python 3.14)
On Ubuntu 24.04 and 22.04, the two command paths stay the same but the pip version line changes with the release. For scripts and documentation, python3 -m pip is still the clearest form because it names the interpreter explicitly.
Remove Python pip from Ubuntu
Remove the Ubuntu package only when you no longer need pip from the system interpreter. Most readers can leave the package installed and simply delete old virtual environments as projects expire.
sudo apt remove python3-pipReview APT’s removal list before you confirm the transaction. Keep
python3-venvinstalled unless you are sure you no longer need to create virtual environments on this system.
If APT reports no-longer-required support packages after removing pip, preview the cleanup separately before deciding whether it belongs on your machine:
sudo apt autoremove --dry-runIf you only want to clear one project environment, remove that directory instead of touching the system package:
rm -rf ~/venvs/projectDeleting a virtual environment removes the project-specific interpreter, pip executable, and installed packages inside that environment, but it does not affect Ubuntu’s system Python packages.
Check the installed package state after removal with dpkg-query:
dpkg-query -W -f='${db:Status-Abbrev} ${binary:Package}\n' python3-pip 2>/dev/null | grep '^ii' || echo "python3-pip is not installed"python3-pip is not installed
The grep '^ii' filter keeps the proof tied to installed packages instead of removed packages that may still have config-file records. For more filter examples, see the grep command in Linux guide.
Use apt-cache policy python3-pip only when you need to check the available repository candidate afterward. It can still show a candidate from Ubuntu’s repositories even when the package is no longer installed.
Conclusion
Python pip is installed on Ubuntu and ready for package work, but the smoother long-term setup is building each project inside its own virtual environment instead of leaning on the system interpreter. That keeps Ubuntu’s Python packages stable, gives you repeatable requirements files, and makes it much easier to swap interpreter branches later when a project outgrows the distro default.

Formatting tips for your comment
You can use basic HTML to format your comment. Useful tags currently allowed in published comments:
<code>command</code>command<strong>bold</strong><em>italic</em><a href="https://example.com">link</a><blockquote>quote</blockquote>