Terminator lets you split a single window into multiple terminal panes, eliminating the need to switch between separate terminal windows. You can monitor Apache access logs in one pane while tailing error logs in another, manage SSH connections to production and staging servers side by side, or run test suites alongside development servers to catch failures immediately. When debugging across multiple environments or managing distributed systems, Terminator keeps every command visible without cluttering your taskbar. By the end of this guide, you will have Terminator installed and configured with keyboard shortcuts for efficient split-pane workflows on Linux Mint.
Install Terminator on Linux Mint using APT from the default repository for a stable, distribution-tested package, or from the Terminator team’s Launchpad PPA for the latest upstream release. This guide covers both methods so you can choose the approach that fits your needs.
Choose Your Terminator Installation Method
Linux Mint offers two ways to install Terminator. The default repository provides a stable, distribution-tested version that receives security updates through Linux Mint’s normal update cycle. The Launchpad PPA delivers the latest upstream release with new features and bug fixes as soon as they are published, but requires adding a third-party repository maintained by the Terminator development team.
| Method | Channel | Stability | Best For |
|---|---|---|---|
| Distribution package | Ubuntu Repos | Stable | Most users who prefer tested packages |
| Launchpad PPA | Terminator Team PPA | Latest upstream | Users who want new features immediately |
For most users, the default repository is the recommended choice. However, choose the PPA method if you need specific features from the latest release or want to stay current with upstream development.
Update Linux Mint System Before Installation
Before installing any software, update your system’s package database to ensure you get the latest available versions and avoid dependency conflicts. Open a terminal from the applications menu or by pressing the keyboard shortcut configured on your system, then run:
sudo apt update && sudo apt upgradeThe update command refreshes your package lists and shows how many packages can be upgraded. Subsequently, if upgrades are available, the system installs them and may prompt you to confirm.
If you need to configure sudo access on Linux Mint, ensure your user account has the necessary permissions before proceeding.
Method 1: Install Terminator via Linux Mint Repository
After updating your system, install Terminator with this command:
sudo apt install terminatorVerify the installation by checking the version:
terminator --versionExpected output varies by Linux Mint release:
terminator 2.1.3
Linux Mint 22.x (based on Ubuntu 24.04) ships Terminator 2.1.3, while Linux Mint 21.x (based on Ubuntu 22.04) ships version 2.1.1. Both versions provide full split-pane functionality and keyboard shortcuts documented in this guide.
If you want the latest upstream release with new features as soon as they are published, continue to Method 2 to install from the Terminator Team’s Launchpad PPA.
Method 2: Install Terminator via Launchpad PPA
The Terminator Team maintains a PPA with the latest stable release, receiving regular updates with bug fixes and new features before they reach the default repositories.
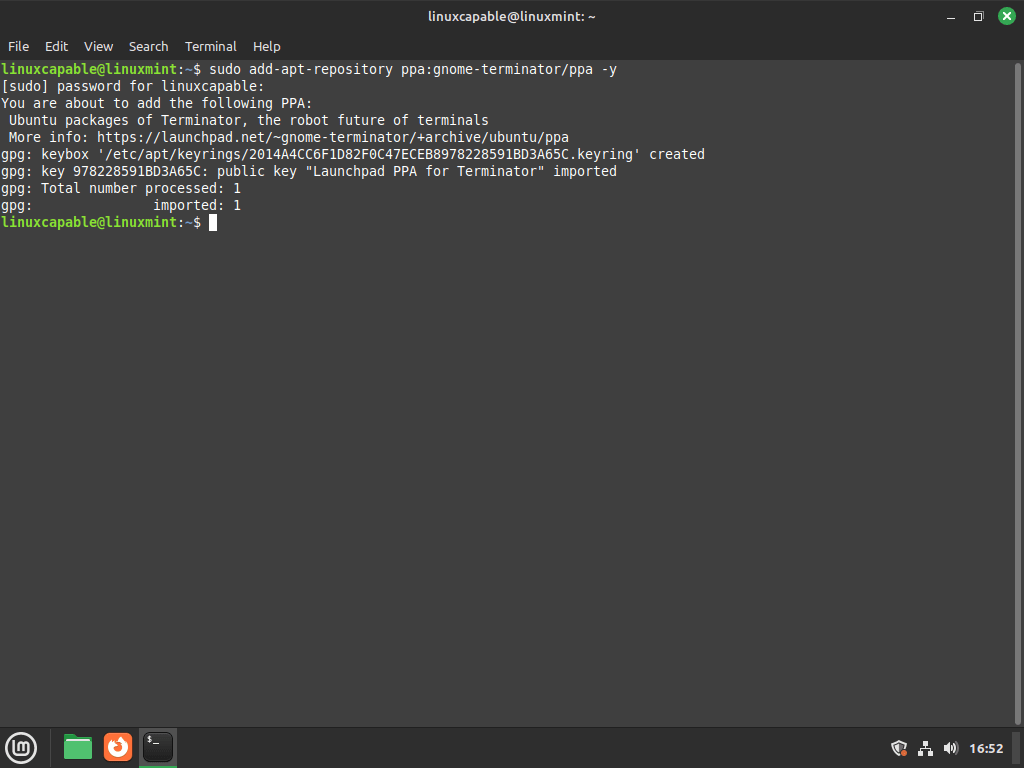
Use this command to add the PPA:
sudo add-apt-repository ppa:gnome-terminator/ppa -yAfter the command completes, you should see confirmation showing the repository details and the file path where APT stores the configuration:
Repository: 'deb https://ppa.launchpadcontent.net/gnome-terminator/ppa/ubuntu noble main'
Description:
Ubuntu packages of Terminator, the robot future of terminals
More info: https://launchpad.net/~gnome-terminator/+archive/ubuntu/ppa
Adding repository.
Adding deb entry to /etc/apt/sources.list.d/gnome-terminator-ubuntu-ppa-noble.sources
Adding disabled deb-src entry to /etc/apt/sources.list.d/gnome-terminator-ubuntu-ppa-noble.sources

Refresh Package Index After Adding Terminator PPA
Once the PPA is added, refresh your system’s package index. Specifically, this step ensures your package manager recognizes the newly added PPA and its packages.
Update the package index with this command:
sudo apt updateFinalize Installation of Terminator via APT Command
With the Terminator Team PPA added and the package index updated, you are now ready to install Terminator. Next, use the following command to install it from the PPA:
sudo apt install terminatorVerify you now have the PPA version installed:
terminator --versionYou should see the PPA version (2.1.5 at the time of writing):
terminator 2.1.5
If Terminator was already installed from the default repository, the install command above upgrades it to the PPA version automatically. The PPA version number will be higher than the repository version (2.1.5 from PPA vs 2.1.3 from Mint 22 repos or 2.1.1 from Mint 21 repos), confirming the upgrade succeeded.
Launch Terminator on Linux Mint
Launching from the Command Line
If you already have a terminal open, you can start Terminator directly by simply running:
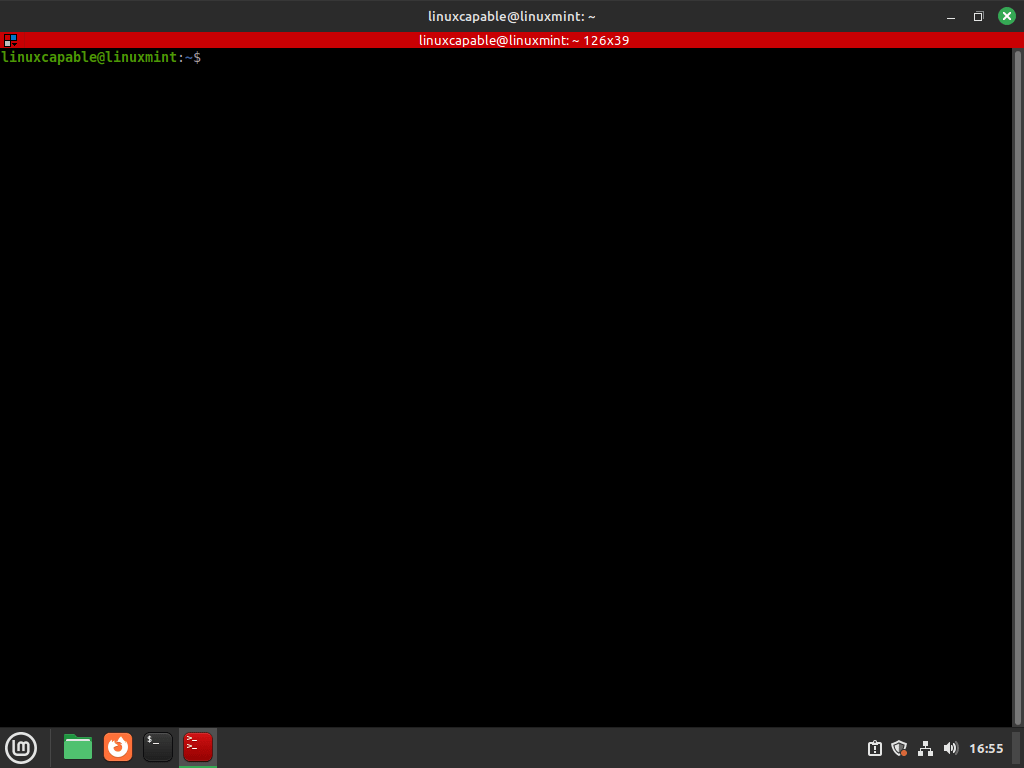
terminatorTerminator opens in its own window. From here, you can immediately start splitting panes using the keyboard shortcuts below.
Launching from the Desktop Environment
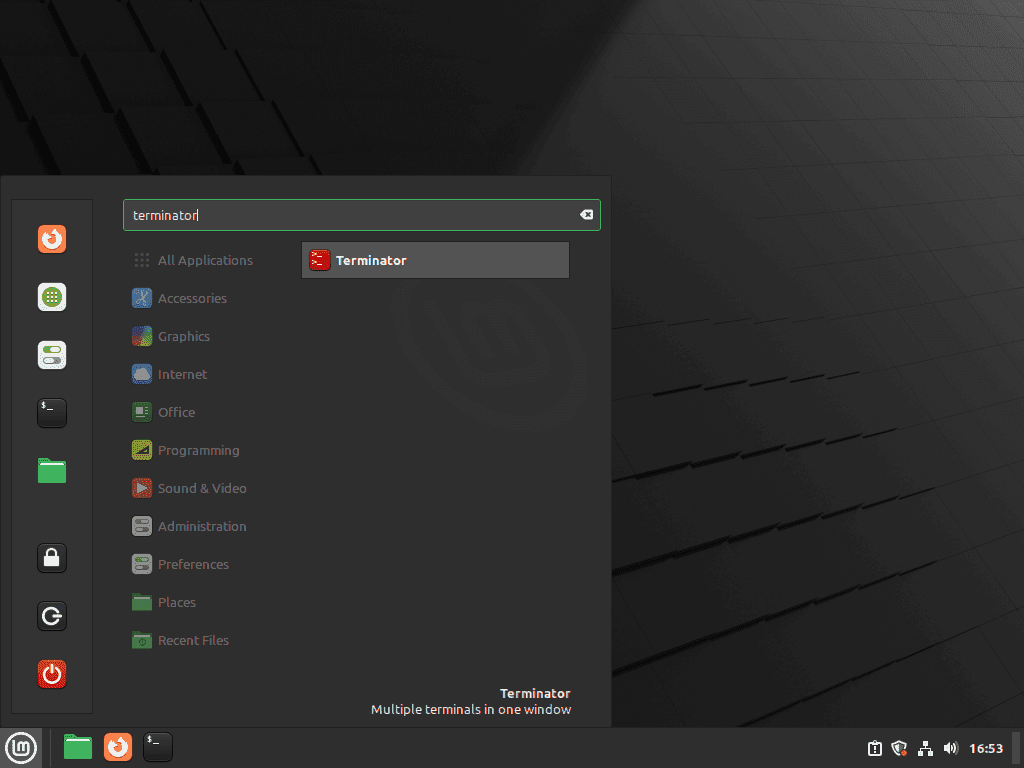
Alternatively, Linux Mint ships with Cinnamon, MATE, or Xfce desktop environments. To launch Terminator from any of these:
- Click the Menu button in the bottom-left corner (or press the
Superkey) - Type “Terminator” in the search bar
- Click the Terminator icon to launch it


Essential Terminator Keyboard Shortcuts
Terminator’s main advantage is managing multiple terminals in one window. Consequently, these shortcuts help you work efficiently:
| Action | Shortcut |
|---|---|
| Split terminal horizontally | Ctrl+Shift+O |
| Split terminal vertically | Ctrl+Shift+E |
| Move to next terminal | Ctrl+Shift+N |
| Move to previous terminal | Ctrl+Shift+P |
| New tab | Ctrl+Shift+T |
| Close current terminal | Ctrl+Shift+W |
| Toggle fullscreen | F11 |
| Open preferences | Right-click > Preferences |
You can customize these shortcuts and create profiles through Preferences. For additional developer tools on Linux Mint, consider installing Git or setting up VS Code for a complete development environment.
Troubleshooting Common Issues
Terminator Fails to Launch
If Terminator does not open, check for error messages by launching it from an existing terminal:
terminator -dThe -d flag enables debug output showing exactly what failed. A common issue is a corrupted configuration file. If you see errors mentioning ConfigObj, ConfigParser, or messages like Error reading config file with references to ~/.config/terminator/config, rename the existing config to reset Terminator to defaults:
mv ~/.config/terminator/config ~/.config/terminator/config.backupThen launch Terminator again. If it works, you can gradually migrate settings from your backup file to restore your customizations without the corruption.
PPA Returns “No Release File” Error
If the PPA fails to add, you may see an error message like this:
E: The repository 'https://ppa.launchpadcontent.net/gnome-terminator/ppa/ubuntu wilma Release' does not have a Release file.
N: Updating from such a repository can't be done securely, and is therefore disabled by default.
This happens when your Linux Mint version is based on an Ubuntu release that the PPA does not yet support. To verify this, check which Ubuntu base your Linux Mint uses:
cat /etc/upstream-release/lsb-releaseYou should see output showing the Ubuntu base:
DISTRIB_ID=Ubuntu
DISTRIB_RELEASE=24.04
DISTRIB_CODENAME=noble
DISTRIB_DESCRIPTION="Ubuntu 24.04 LTS"
Visit the PPA page on Launchpad to verify your Ubuntu base version is supported. If the PPA reports an unsupported codename, this may be a detection issue with minimal containers or non-standard installations. In this case, use Method 1 (default repository) instead, which provides a stable version that works on all Linux Mint releases.
PPA Detection Issues (Minimal Installations)
If add-apt-repository reports “This codename isn’t currently supported” despite using a supported Linux Mint release, this typically occurs in minimal or container environments. The PPA tool detects the Ubuntu base codename (noble for Mint 22, jammy for Mint 21) but may fail to recognize it as valid.
To resolve this, use Method 1 (default repository) which provides a stable, distribution-tested version without requiring PPA detection. The default repository version (2.1.3 on Mint 22, 2.1.1 on Mint 21) includes all core split-pane functionality and receives security updates through Linux Mint’s standard update cycle.
Remove Terminator from Linux Mint
To uninstall Terminator while keeping your configuration files for future reinstallation:
sudo apt remove terminatorTo remove Terminator along with its configuration files completely:
sudo apt purge terminatorAfter removing Terminator, clean up automatically installed dependencies that are no longer needed:
sudo apt autoremoveThis removes orphaned packages such as Python dependencies and libraries that were installed alongside Terminator but are not required by other applications.
If you added the Launchpad PPA and want to remove it as well:
sudo add-apt-repository --remove ppa:gnome-terminator/ppa -yAfter removing the PPA, update the package cache:
sudo apt updateRemoving the PPA does not automatically downgrade Terminator to the repository version. If you installed version 2.1.5 from the PPA and then remove the PPA, the 2.1.5 version remains installed. To downgrade to the repository version (2.1.3 on Mint 22 or 2.1.1 on Mint 21), run
sudo apt install --reinstall terminatorafter updating the package cache.
Conclusion
You now have Terminator installed with split-pane capabilities that let you monitor multiple processes, debug across environments, and manage remote connections without switching windows. Use Ctrl+Shift+O and Ctrl+Shift+E to split panes on demand, customize your layout through the Preferences menu, and save your configuration to ~/.config/terminator/config for backup or transfer to other machines. Combine Terminator with GitHub Desktop for version control workflows, VS Code for integrated development, or Git for command-line version control to create a complete development environment.


Formatting tips for your comment
You can use basic HTML to format your comment. Useful tags currently allowed:
<code>command</code>command<strong>bold</strong><em>italic</em><a href="URL">link</a><blockquote>quote</blockquote>