WordPress on Debian needs a web server, a database, PHP-FPM, and a writable application directory that all agree on the same domain and file paths. Installing WordPress with Nginx on Debian through the default APT packages keeps Nginx, MariaDB, PHP-FPM, and Certbot on distro-managed updates while WordPress core, themes, and plugins continue to update through WordPress itself.
The installation path targets Debian 13 (Trixie), Debian 12 (Bookworm), and Debian 11 (Bullseye LTS). Debian 13 is the best fit for a new production server because its default PHP and MariaDB branches align with current WordPress recommendations. Debian 12 remains workable with Debian-maintained packages but uses an older PHP branch, while Debian 11 falls into WordPress legacy-runtime territory and should be treated as an existing-system path rather than a new public-site default.
Install WordPress with Nginx on Debian
Default package branches differ by release: Debian 13 provides PHP 8.4, MariaDB 11.8, and Nginx 1.26; Debian 12 provides PHP 8.2, MariaDB 10.11, and Nginx 1.22; Debian 11 provides PHP 7.4, MariaDB 10.5, and Nginx 1.18. Match the PHP-FPM service, socket path, and php.ini directory to the installed PHP branch.
Update Debian Before Installing WordPress
Before you install WordPress, refresh package metadata and apply pending system updates so the web stack starts from current Debian packages:
sudo apt update && sudo apt upgradeThe first command refreshes your package lists from the repositories, while the second command upgrades all installed packages to their newest versions. When prompted about disk space usage, type Y and press Enter to proceed.
Install the Necessary Packages
Minimal Debian systems may not include the tools used later for downloads, archive extraction, and API requests. Install the required utilities with:
sudo apt install curl wget unzipThese packages cover the helper commands used in the setup:
curlretrieves data from APIs, including the WordPress secret-key endpoint.wgetdownloads the WordPress release archive.unzipextracts the WordPress ZIP archive into the web root.
APT skips packages that are already installed and installs only missing dependencies.
Install Nginx for WordPress
Nginx serves the WordPress site and passes PHP requests to PHP-FPM. Debian 13 includes Nginx 1.26, Debian 12 includes Nginx 1.22, and Debian 11 includes Nginx 1.18 from the default repositories. For a broader Nginx package and service overview, see Install Nginx on Debian.
sudo apt install nginxAfter installation, verify that Nginx is active and enabled at boot:
systemctl is-active nginx
systemctl is-enabled nginx
Expected output:
active
enabled
If Nginx is not active, start it and enable it for future reboots:
sudo systemctl enable nginx --nowThis command also makes Nginx start automatically after a reboot.
The default Nginx version works well for most WordPress sites. For access to newer features like HTTP/3 or improved TLS performance, review installing Nginx Mainline on Debian.
Setting Up UFW Firewall for Nginx
If UFW is enabled or you plan to enable it, allow SSH before web traffic so a remote shell remains reachable. Debian’s Nginx package provides UFW application profiles for HTTP and HTTPS.
Installing UFW
If UFW is not installed yet, install it first. For a dedicated firewall walkthrough, see Install UFW on Debian.
sudo apt install ufwConfigure Firewall Rules Before Enabling UFW
Before enabling UFW, add the rules you need. UFW blocks incoming connections by default, so configure SSH first when you are connected remotely.
If you are connected over SSH, allow SSH before enabling UFW and keep the current SSH session open until you confirm a new login works.
First, allow SSH access:
sudo ufw allow OpenSSHNext, allow web traffic. Use Nginx Full to open both HTTP on port 80 and HTTPS on port 443:
sudo ufw allow 'Nginx Full'Keep port 80 open even after obtaining SSL certificates. Let’s Encrypt uses HTTP for domain validation during certificate renewals. Blocking port 80 will cause renewal failures.
Now enable the firewall:
sudo ufw enableVerify the firewall status and rules:
sudo ufw statusExpected output:
Status: active

To                         Action      From
--                         ------      ----
OpenSSH                    ALLOW       Anywhere
Nginx Full                 ALLOW       Anywhere
OpenSSH (v6)               ALLOW       Anywhere (v6)
Nginx Full (v6)            ALLOW       Anywhere (v6)
Alternative UFW Profiles
To view all available Nginx profiles:
sudo ufw app listThe common Nginx UFW profiles are:
Nginx HTTPopens port 80 only.Nginx Secureopens port 443 only, which is useful after certificates exist.Nginx Fullopens ports 80 and 443 and is the normal choice for this WordPress setup.
Add only the extra ports your server actually needs. Public WordPress servers usually require SSH, HTTP, and HTTPS; database ports should remain closed unless you have a separately secured remote database design.
Install MariaDB for WordPress
MariaDB stores WordPress posts, settings, users, and plugin data. Debian 13 includes MariaDB 11.8, Debian 12 includes MariaDB 10.11, and Debian 11 includes MariaDB 10.5 from the default repositories. For standalone database setup and tuning, see Install MariaDB on Debian.
Install the MariaDB server and client packages:
sudo apt install mariadb-server mariadb-clientAfter installation, verify that MariaDB is active and enabled at boot:
systemctl is-active mariadb
systemctl is-enabled mariadb
Expected output:
active
enabled
If MariaDB is not running, start it with:
sudo systemctl enable mariadb --nowThis keeps the database available after system reboots.
Secure MariaDB with Security Script
Run MariaDB’s hardening helper to remove anonymous users, disable remote root login, remove the test database, and reload privileges. The exact prompts can vary by MariaDB branch, so read each prompt before accepting the default.
Run the security script:
sudo mariadb-secure-installationThe helper walks through these common hardening choices:
- Keeping local root administration on Unix socket authentication or setting a root password when your policy requires one.
- Deleting anonymous user accounts to limit database access to authorized users.
- Restricting remote login for root user accounts.
- Removing the test database and reloading privilege tables.
For a normal local WordPress database, accept the options that remove anonymous users, disallow remote root login, remove the test database, and reload privilege tables. Keep socket authentication for local root administration unless you specifically need password-based root access.
Remove anonymous users? [Y/n] Y
Disallow root login remotely? [Y/n] Y
Remove test database and access to it? [Y/n] Y
Reload privilege tables now? [Y/n] Y
After the helper completes, create a dedicated WordPress database and user instead of using the MariaDB root account for the application.
Install PHP-FPM and WordPress Extensions
PHP-FPM executes WordPress PHP code for Nginx, and the extension packages add database, XML, image, internationalization, archive, and HTTP support commonly needed by WordPress and its plugins. Debian 13 includes PHP 8.4, Debian 12 includes PHP 8.2, and Debian 11 includes PHP 7.4.
This setup uses Debian’s default PHP branch. For newer branch choices from third-party repositories, use the source-specific coverage in Install PHP on Debian before building the WordPress stack.
Install PHP-FPM, the PHP CLI, and the WordPress extension set. The command intentionally avoids the generic php metapackage so APT does not pull Apache PHP modules into an Nginx-focused server:
sudo apt install php-fpm php-cli php-mbstring php-bcmath php-xml php-mysql php-gd php-curl php-zip php-imagick php-intlCheck the installed PHP branch:
php -vExample output on Debian 13:
PHP 8.4.x (cli) (built: ...)
Copyright (c) The PHP Group
Zend Engine v4.4.x, Copyright (c) Zend Technologies
    with Zend OPcache v8.4.x, Copyright (c), by Zend Technologies
Then check PHP-FPM using the service name for your Debian release:
systemctl is-active php8.4-fpm   # Debian 13
systemctl is-active php8.2-fpm   # Debian 12
systemctl is-active php7.4-fpm   # Debian 11
The command that matches your installed release should return:
active
Keep the PHP branch in mind because the Nginx FastCGI socket and php.ini path must use the same version number.
Configure WordPress Files and Database
Create WordPress Directory Structure
Download the current WordPress release archive from WordPress.org. The latest.zip URL tracks the current stable WordPress package, so the downloaded version changes over time:
wget -O wordpress-latest.zip https://wordpress.org/latest.zipExtract the archive under Nginx’s web root. The ZIP archive creates a wordpress subdirectory automatically:
sudo unzip wordpress-latest.zip -d /var/www/html/After extraction, set ownership for WordPress self-updates. The www-data account must be able to read WordPress files and write uploads, plugin updates, theme updates, and generated cache files:
sudo chown -R www-data:www-data /var/www/html/wordpress/Set conservative permissions for directories and files. Directories need execute permission so the web server can traverse them, while files normally need read/write permission for the owner and read permission for group and others:
Set directory permissions:
sudo find /var/www/html/wordpress -type d -exec chmod 755 {} \;Set file permissions:
sudo find /var/www/html/wordpress -type f -exec chmod 644 {} \;Verify ownership and permissions with a stable summary instead of a full directory listing:
stat -c '%U %G %A %n' /var/www/html/wordpress /var/www/html/wordpress/wp-contentExpected output shows www-data ownership and executable directory permissions:
www-data www-data drwxr-xr-x /var/www/html/wordpress
www-data www-data drwxr-xr-x /var/www/html/wordpress/wp-content
WordPress can now read its files and write content such as uploads, plugins, themes, and generated cache files through the www-data account.
Create a Database for WordPress
To run WordPress on Debian with Nginx, create a database using MariaDB. For advanced database configuration including performance tuning and remote access, see Install MariaDB on Debian. Access the MariaDB shell as root:
sudo mariadb -u rootOnce in the MariaDB shell, create a database for WordPress:
CREATE DATABASE WORDPRESSDB;Next, create a local database user for WordPress:
CREATE USER 'WPUSER'@'localhost' IDENTIFIED BY 'strong_password_here';Replace
WPUSERandstrong_password_herewith your desired username and a strong unique password.
Grant that user access to the WordPress database only:
GRANT ALL PRIVILEGES ON WORDPRESSDB.* TO 'WPUSER'@'localhost';The password was already set in the earlier
CREATE USERstatement, soIDENTIFIED BYis not needed. Using quotes around the username and hostname ('WPUSER'@'localhost') follows SQL best practice.
After creating the user account, flush the privileges to ensure the new changes take effect:
FLUSH PRIVILEGES;Before exiting, verify that the database was created successfully:
SHOW DATABASES;Expected output includes your new database:
+--------------------+
| Database           |
+--------------------+
| WORDPRESSDB        |
| information_schema |
| mysql              |
| performance_schema |
+--------------------+
Also verify the user was created with correct privileges:
SHOW GRANTS FOR 'WPUSER'@'localhost';Expected output includes a grant for the WordPress database:
GRANT ALL PRIVILEGES ON `WORDPRESSDB`.* TO `WPUSER`@`localhost`
Exit the MariaDB shell:
EXIT;Set WordPress Configuration Files
WordPress reads database credentials and site-specific constants from wp-config.php. Start from the sample file that ships with the release archive.
Move into the WordPress directory:
cd /var/www/html/wordpress/Copy the sample configuration file:
sudo cp wp-config-sample.php wp-config.phpOpen the new configuration file:
sudo nano wp-config.phpSet the database name, user, password, and host to match the MariaDB objects you created earlier:
define( 'DB_NAME', 'WORDPRESSDB' );
define( 'DB_USER', 'WPUSER' );
define( 'DB_PASSWORD', 'strong_password_here' );
define( 'DB_HOST', 'localhost' );
define( 'DB_CHARSET', 'utf8' );
define( 'DB_COLLATE', '' );
For this file-permission model, add these constants if they are not already present:
/** ## Save files direct method ## */
define( 'FS_METHOD', 'direct' );

/** ## Increase memory limit, 256MB is recommended ## */
define( 'WP_MEMORY_LIMIT', '256M' );
Adjust the memory limit to match your server size and plugin workload. Increase it gradually, then monitor PHP-FPM memory use under real traffic.
Do not raise PHP memory limits to hide an overloaded server. If PHP-FPM begins exhausting RAM, reduce the limit, tune worker counts, or add capacity.
The database section and added constants should resemble this after editing:
// ** Database settings - You can get this info from your web host ** //
/** The name of the database for WordPress */
define( 'DB_NAME', 'WORDPRESSDB' );

/** Database username */
define( 'DB_USER', 'WPUSER' );

/** Database password */
define( 'DB_PASSWORD', 'strong_password_here' );

/** Database hostname */
define( 'DB_HOST', 'localhost' );

/** Database charset to use in creating database tables. */
define( 'DB_CHARSET', 'utf8' );

/** The database collate type. Don't change this if in doubt. */
define( 'DB_COLLATE', '' );

/** ## Save files direct method ## */
define( 'FS_METHOD', 'direct' );

/** ## Increase memory limit, 256MB is recommended ## */
define( 'WP_MEMORY_LIMIT', '256M' );
Add WordPress Security Salt Keys
WordPress salts protect authentication cookies and session-related hashes. Generate unique values for every site, then replace the placeholder salt section in wp-config.php.
Generating Security Salt Keys
Use the official WordPress secret-key API to generate a fresh set of keys:
curl -s https://api.wordpress.org/secret-key/1.1/salt/The API returns ready-to-paste define() lines. Do not reuse example keys from an article, screenshot, or previous site.
Integrating Security Salt Keys
Open wp-config.php again:
sudo nano /var/www/html/wordpress/wp-config.phpFind the placeholder block that starts with AUTH_KEY and replace all placeholder lines with the generated output from the API.
After replacing the keys, save and close the file. In nano, press CTRL+X, then Y, then Enter.
Create the Nginx Server Block for WordPress
The server block maps your domain to the WordPress directory and sends PHP files to PHP-FPM. The try_files $uri $uri/ /index.php?$args; rule keeps WordPress permalinks and query strings intact.
Create a server block file for your domain. Replace example.com with the domain you will point to this server:
sudo nano /etc/nginx/sites-available/example.com.confThe sample below is for Debian’s default Nginx package layout and Debian 13’s PHP 8.4 socket. Adjust server_name and the PHP-FPM socket before enabling the file on Debian 12 or Debian 11.
Use this server block as the starting point:
server {
  listen 80;
  listen [::]:80;
  server_name www.example.com example.com;
  root /var/www/html/wordpress;
  index index.php index.html index.htm index.nginx-debian.html;

  location / {
    try_files $uri $uri/ /index.php?$args;
  }

  location ~* /wp-sitemap.*\.xml {
    try_files $uri $uri/ /index.php$is_args$args;
  }

  client_max_body_size 100M;

  location ~ \.php$ {
    fastcgi_pass unix:/run/php/php8.4-fpm.sock;
    include snippets/fastcgi-php.conf;
    fastcgi_buffer_size 128k;
    fastcgi_buffers 4 128k;
    fastcgi_intercept_errors on;
  }

  gzip on;
  gzip_comp_level 6;
  gzip_min_length 1000;
  gzip_proxied any;
  gzip_disable "msie6";
  gzip_types application/atom+xml application/geo+json application/javascript application/x-javascript application/json application/ld+json application/manifest+json application/rdf+xml application/rss+xml application/xhtml+xml application/xml font/eot font/otf font/ttf image/svg+xml text/css text/javascript text/plain text/xml;

  location ~* \.(?:css(\.map)?|js(\.map)?|jpe?g|png|gif|ico|cur|heic|webp|tiff?|mp3|m4a|aac|ogg|midi?|wav|mp4|mov|webm|mpe?g|avi|ogv|flv|wmv)$ {
    expires 90d;
    access_log off;
  }

  location ~* \.(?:svgz?|ttf|ttc|otf|eot|woff2?)$ {
    add_header Access-Control-Allow-Origin "*";
    expires 90d;
    access_log off;
  }

  location ~ /\.ht {
    access_log off;
    log_not_found off;
    deny all;
  }
}
Adjust the PHP-FPM socket path to match your PHP version. Use
php8.4-fpm.sockfor Debian 13,php8.2-fpm.sockfor Debian 12, orphp7.4-fpm.sockfor Debian 11.
For example, if running Debian 12 with PHP 8.2, change fastcgi_pass unix:/run/php/php8.4-fpm.sock; to fastcgi_pass unix:/run/php/php8.2-fpm.sock;. Run php -v to confirm your version.
Understanding the WordPress Nginx Server Block
The server block includes several WordPress-specific choices:
try_fileswith$argspasses query strings to WordPress for REST API requests and pretty permalinks.fastcgi_passforwards PHP requests to PHP-FPM through a Unix socket.- Gzip compression reduces transfer size for text-based assets.
- Static file caching sets 90-day expiration headers for images, CSS, JavaScript, and fonts.
.htfile blocking prevents visitors from reading Apache-style configuration files that plugins may create.
For broader package and service management, use Install Nginx on Debian.
Setting Up the Nginx Server Block with a Symbolic Link
Debian’s Nginx package includes both /etc/nginx/conf.d/*.conf and /etc/nginx/sites-enabled/* from nginx.conf. Activate the server block by linking it from sites-available into sites-enabled.
Create the symbolic link:
sudo ln -s /etc/nginx/sites-available/example.com.conf /etc/nginx/sites-enabled/example.com.confIf you installed Nginx from nginx.org instead of Debian’s repositories, place the server block in /etc/nginx/conf.d/example.com.conf and skip the sites-enabled symlink command unless you have deliberately added that include path. After enabling the site, test the configuration:
sudo nginx -tExpected output:
nginx: the configuration file /etc/nginx/nginx.conf syntax is ok
nginx: configuration file /etc/nginx/nginx.conf test is successful
If the syntax test passes, reload Nginx to apply the server block without dropping active connections:
sudo systemctl reload nginxVerify that Nginx is still active:
systemctl is-active nginxactive
With these steps completed, your WordPress site should now be accessible via Nginx.
Tune PHP Upload and Memory Limits
WordPress media uploads and some plugins need higher PHP limits than a minimal default configuration. Tune the PHP-FPM php.ini file for your installed branch.
To access your php.ini file, use the terminal. The file path includes your PHP version number:
# Debian 13 (PHP 8.4)
sudo nano /etc/php/8.4/fpm/php.ini

# Debian 12 (PHP 8.2)
sudo nano /etc/php/8.2/fpm/php.ini

# Debian 11 (PHP 7.4)
sudo nano /etc/php/7.4/fpm/php.ini
Find and adjust these values as needed:
; Increase to the maximum file size you want to upload (recommended 50-100MB)
upload_max_filesize = 100M

; Increase to the maximum post size (recommended 50-100MB)
post_max_size = 100M

; Increase maximum execution time (recommended 150-300 seconds)
max_execution_time = 300

; Increase maximum GET/POST/COOKIE input variables (recommended 5000-10000)
max_input_vars = 5000

; Increase memory limit (recommended 256M or 512M, ensure your system has enough RAM)
memory_limit = 256M
Restart PHP-FPM after editing php.ini so the new limits take effect.
Synchronize Upload Limits Between PHP and Nginx
The server block includes client_max_body_size 100M; to match the PHP upload limit. If you change upload_max_filesize or post_max_size in php.ini, update this Nginx directive to the same size or larger. After any Nginx change, test and reload the configuration:
sudo nginx -t && sudo systemctl reload nginxRestarting PHP-FPM
After adjusting the PHP settings in php.ini, restart the PHP-FPM server for those changes to take effect. Use the command matching your PHP version:
# Debian 13 (PHP 8.4)
sudo systemctl restart php8.4-fpm

# Debian 12 (PHP 8.2)
sudo systemctl restart php8.2-fpm

# Debian 11 (PHP 7.4)
sudo systemctl restart php7.4-fpm
Complete the WordPress Web Installer
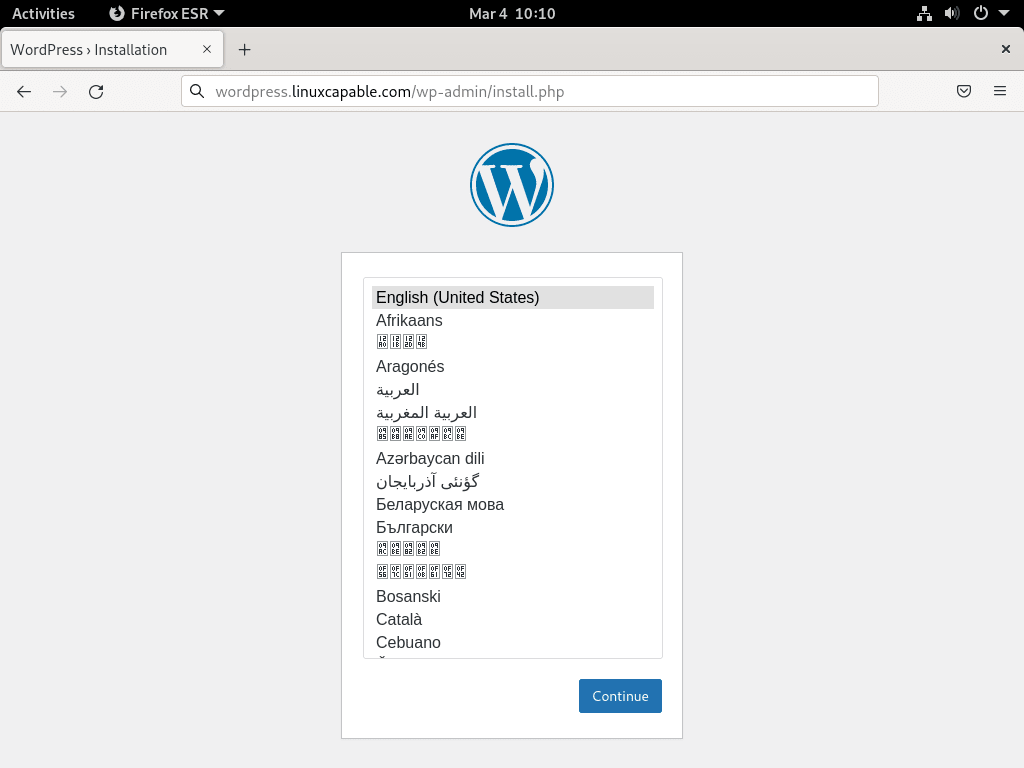
After Nginx, MariaDB, PHP-FPM, and wp-config.php are ready, open the WordPress installer in a browser. Use http://example.com/wp-admin/install.php before issuing a certificate, or https://example.com/wp-admin/install.php after HTTPS is configured.
If DNS is not live yet, test Nginx locally with a host override first, then complete the browser installer after the domain resolves to the server.
Select the WordPress Language
Select the site language and choose Continue.
Create the WordPress Admin User
The next screen asks for the site title, administrator username, password, and administrator email address.
Use a strong password and a valid admin email address. You can modify other settings later inside the WordPress settings panel.
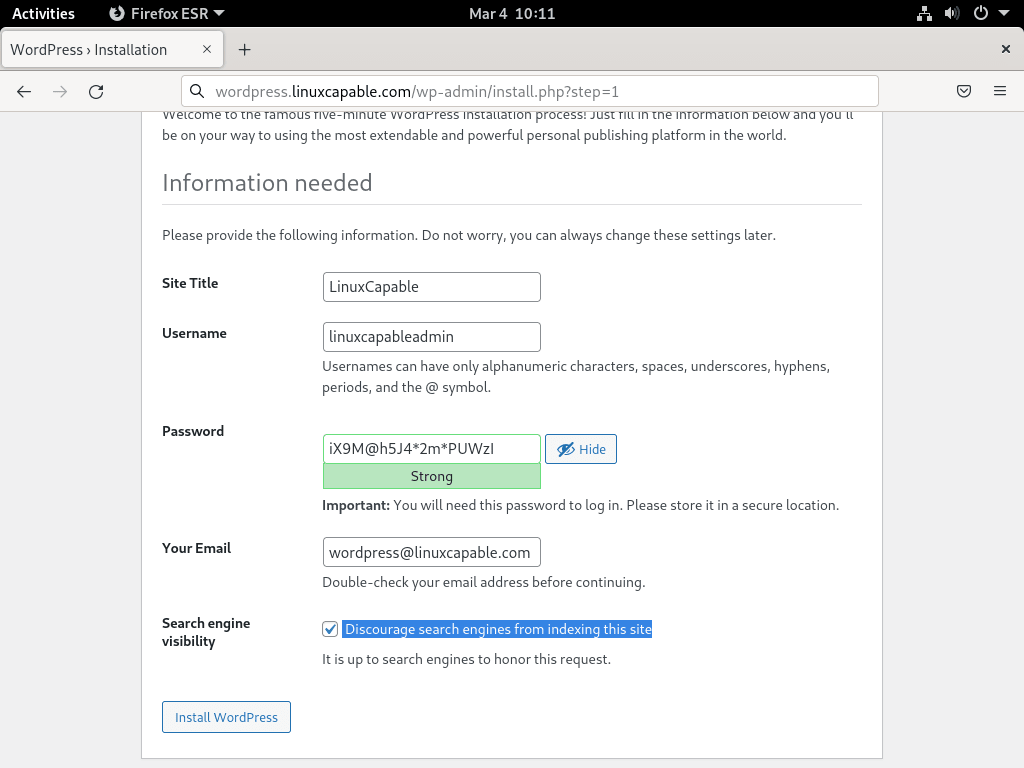
For staging or private builds, select the option that discourages search engines from indexing the site until it is ready.
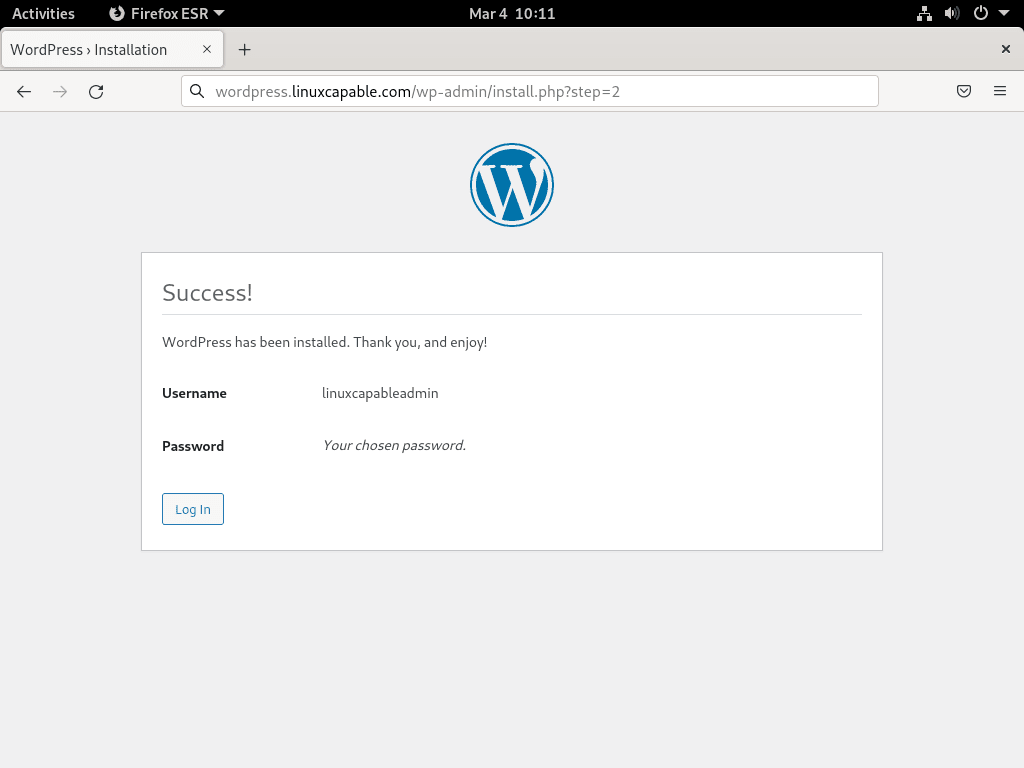
Install WordPress from the Web Installer
After entering the site details and indexing preference, choose Install WordPress. A successful installation redirects to the login page.
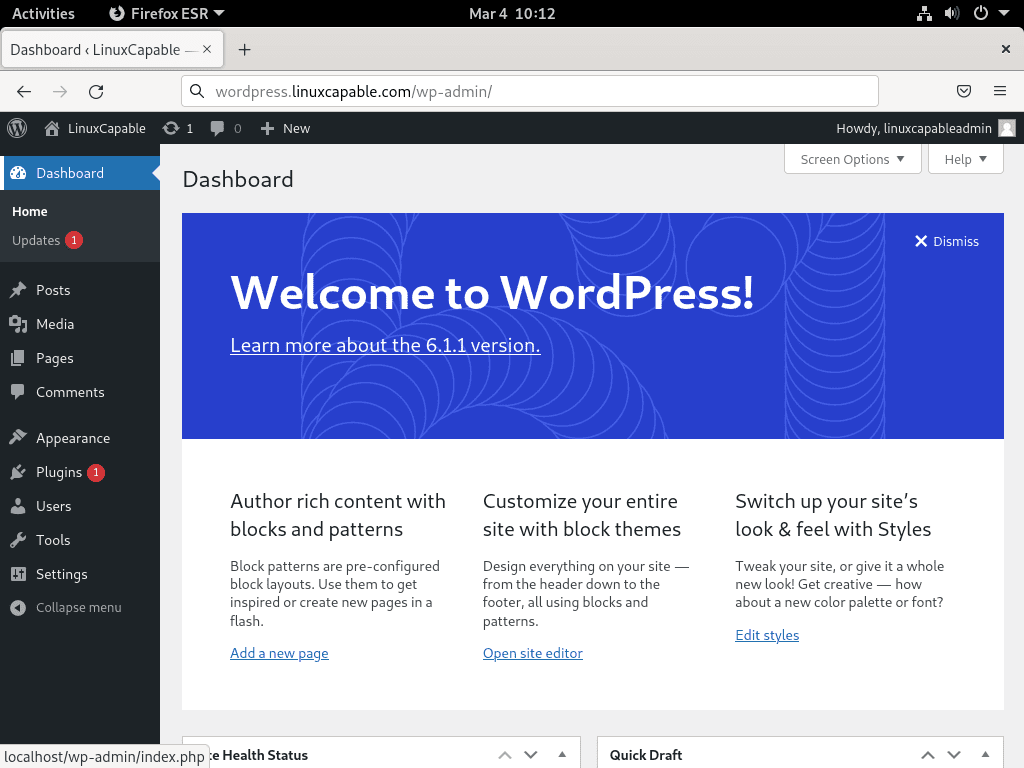
Log In to the WordPress Admin Page
Enter the administrator credentials and choose Log in. The dashboard opens after authentication.

Review the WordPress Dashboard
The WordPress dashboard is where you manage posts, pages, themes, plugins, users, and settings.
Before adding public content, confirm permalink settings, site title, admin email, update settings, and any plugin requirements for your site.
Secure and Maintain WordPress with Nginx
After the installer works over HTTP, add HTTPS and review basic hardening. For server-level protection against repeated failed logins, see Install Fail2Ban on Debian.
Securing WordPress and Nginx with Let’s Encrypt SSL Certificate
HTTPS protects WordPress logins and cookies. The short path below uses Certbot’s Nginx plugin; for a complete certificate workflow and renewal troubleshooting, use Secure Nginx with Let’s Encrypt on Debian.
Installing Certbot
Install Certbot and the Nginx plugin from Debian’s repositories:
sudo apt install python3-certbot-nginxGenerating the SSL Certificate
Generate a certificate for both the apex and www hostnames after DNS points to the server:
sudo certbot --nginx --agree-tos --redirect --email you@example.com -d example.com -d www.example.comInclude both the apex domain (
example.com) andwwwsubdomain to ensure both URLs receive certificates. The http-01 challenge requires port 80 to remain open until certificate issuance completes.
Certbot may ask whether to share your email with the EFF. Choose the option that matches your preference.
After issuance, Certbot edits the Nginx server block and adds an HTTP-to-HTTPS redirect. Add HSTS only after you are certain every required subdomain works over HTTPS, because browsers can cache HSTS policy for a long time.
Setting Up Automatic Certificate Renewal
Let’s Encrypt certificates expire after 90 days. Debian’s Certbot package installs a systemd timer for automatic renewal. Verify the timer is active:
systemctl is-active certbot.timer
systemctl is-enabled certbot.timer
Expected output:
active
enabled
Next, test that renewal works correctly:
sudo certbot renew --dry-runExpected output on success:
Congratulations, all simulated renewals succeeded:
  /etc/letsencrypt/live/example.com/fullchain.pem (success)
Once the dry run succeeds, automatic renewal is configured. The timer checks certificates twice daily and renews them when they approach expiration.
Resolving PHP Session Errors
Some plugins use PHP sessions and fail when PHP cannot write to the configured session directory. On Debian, the default session directory is normally /var/lib/php/sessions, but confirm the active path before changing permissions.
Adjusting Directory Permissions
Check the configured session path and directory permissions:
php -i | grep '^session.save_path'
ls -ld /var/lib/php/sessions
If the directory is missing or does not allow PHP session writes, restore the standard root-owned directory with a sticky writable mode:
sudo install -d -o root -g root -m 1733 /var/lib/php/sessionsRestart PHP-FPM after fixing the directory, using the service name for your installed PHP branch.
Resolving HTTPS Redirect Loop in WordPress
If WordPress is behind an additional reverse proxy or load balancer, the browser may use HTTPS while PHP sees the backend request as HTTP. That mismatch can create redirect loops. Do not add this snippet for a direct Certbot-managed Nginx site unless a proxy is actually setting X-Forwarded-Proto.
Modifying the wp-config.php File
For a trusted reverse proxy that sends X-Forwarded-Proto, add this guarded snippet to wp-config.php:
define( 'FORCE_SSL_ADMIN', true );

if ( isset( $_SERVER['HTTP_X_FORWARDED_PROTO'] ) && strpos( $_SERVER['HTTP_X_FORWARDED_PROTO'], 'https' ) !== false ) {
    $_SERVER['HTTPS'] = 'on';
}
The snippet does two things:
FORCE_SSL_ADMINkeeps admin pages on HTTPS.- The header check marks the request as HTTPS only when the trusted proxy reports HTTPS.
If the loop continues, inspect the proxy, CDN, or load balancer configuration as well; WordPress can only trust forwarding headers that those layers send consistently.
Fix Domain Name Redirect Loop
A redirect loop can also come from mismatched WordPress home and site URLs. Check these constants only if you set them manually or inherited a migrated configuration.
Checking the wp-config.php File
Inspect these lines in wp-config.php when they exist:
define('WP_HOME','https://example.com');
define('WP_SITEURL','https://example.com');
If the domain name does not match the website’s canonical domain, correct it and reload the site in a private browser window.
Troubleshooting Common Issues
413 Request Entity Too Large
A 413 error means Nginx rejected the upload before WordPress or PHP could process it. Check the Nginx body-size limit and the PHP upload limits together.
413 Request Entity Too Large
Inspect the active Nginx value in your WordPress server block:
grep -n 'client_max_body_size' /etc/nginx/sites-available/example.com.confThen confirm the matching PHP limits for your branch:
php -i | grep -E 'upload_max_filesize|post_max_size'Set client_max_body_size to the same value as, or a larger value than, post_max_size. After editing Nginx or PHP-FPM settings, test and reload Nginx, then restart the matching PHP-FPM service.
sudo nginx -t && sudo systemctl reload nginx502 Bad Gateway Error
Occasionally, when accessing your WordPress site, the browser displays:
502 Bad Gateway
This error means Nginx cannot connect to PHP-FPM. The usual causes are a wrong socket path, a stopped PHP-FPM service, or permissions on the socket. For deeper upstream diagnostics, see fix Nginx 502 Bad Gateway.
Check which PHP-FPM sockets exist:
ls /run/php/Expected output (example for Debian 13):
php8.4-fpm.pid php8.4-fpm.sock
Verify your Nginx config uses the correct socket. The fastcgi_pass line must match the socket file listed by ls /run/php/:
grep -n 'fastcgi_pass' /etc/nginx/sites-available/example.com.confVerify PHP-FPM is running:
# Debian 13
systemctl status php8.4-fpm --no-pager

# Debian 12
systemctl status php8.2-fpm --no-pager

# Debian 11
systemctl status php7.4-fpm --no-pager
Expected output includes Active: active (running). If stopped, start it:
sudo systemctl start php8.4-fpm # Adjust version as neededAfter fixing the socket path or service state, test and reload Nginx:
sudo nginx -t && sudo systemctl reload nginxDatabase Connection Error
Occasionally, WordPress displays this error on the front end:
Error establishing a database connection
Typically, this means WordPress cannot connect to MariaDB. This usually results from wrong credentials in wp-config.php or MariaDB not running.
Verify MariaDB is running:
systemctl status mariadb --no-pagerTest the database credentials from wp-config.php without sudo:
mariadb -u WPUSER -p -e "SHOW DATABASES;"When prompted, enter the password from your wp-config.php. Successful output shows:
+--------------------+
| Database           |
+--------------------+
| WORDPRESSDB        |
| information_schema |
+--------------------+
If authentication fails with Access denied and the password in wp-config.php is wrong, reset the database user’s password inside the MariaDB shell instead of placing the password on the shell command line:
sudo mariadb -u rootALTER USER 'WPUSER'@'localhost' IDENTIFIED BY 'new_strong_password';
FLUSH PRIVILEGES;
EXIT;Update wp-config.php to match the new password before testing the site again.
Permission Denied Errors
Sometimes WordPress shows errors when installing plugins or uploading media:
Installation failed: Could not create directory.

Unable to create directory wp-content/uploads/YYYY/MM. Is its parent directory writable by the server?
Check current ownership:
stat -c '%U %G %A %n' /var/www/html/wordpress /var/www/html/wordpress/wp-contentFor this file-permission model, those directories should show www-data www-data ownership. If they show root root or another user, fix ownership and permissions with:
sudo chown -R www-data:www-data /var/www/html/wordpress/
sudo find /var/www/html/wordpress -type d -exec chmod 755 {} \;
sudo find /var/www/html/wordpress -type f -exec chmod 644 {} \;
If the uploads directory has not been created yet, create it with the same ownership before verifying permissions:
sudo install -d -o www-data -g www-data -m 755 /var/www/html/wordpress/wp-content/uploadsVerify the fix:
stat -c '%U %G %A %n' /var/www/html/wordpress/wp-content /var/www/html/wordpress/wp-content/uploadsExpected output:
www-data www-data drwxr-xr-x /var/www/html/wordpress/wp-content
www-data www-data drwxr-xr-x /var/www/html/wordpress/wp-content/uploads
White Screen of Death (WSOD)
Sometimes WordPress displays a completely blank white page with no error message. Typically, this indicates a PHP fatal error that is not being displayed.
Enable WordPress debug logging so the error is written to a file. Open wp-config.php:
sudo nano /var/www/html/wordpress/wp-config.phpFind the line define( 'WP_DEBUG', false ); and change it to:
define( 'WP_DEBUG', true );
define( 'WP_DEBUG_LOG', true );
define( 'WP_DEBUG_DISPLAY', false );
@ini_set( 'display_errors', 0 );
Reload the page, then inspect the WordPress debug log:
sudo tail -50 /var/www/html/wordpress/wp-content/debug.logCommon causes include:
- Memory exhaustion – Increase
WP_MEMORY_LIMITin wp-config.php ormemory_limitin php.ini - Plugin conflict – Rename
wp-content/pluginsfolder to disable all plugins - Theme error – Rename
wp-content/themes/your-themeto fall back to default
Also check the PHP-FPM error log for branch-specific runtime errors:
# Debian 13
sudo tail -50 /var/log/php8.4-fpm.log

# Debian 12
sudo tail -50 /var/log/php8.2-fpm.log

# Debian 11
sudo tail -50 /var/log/php7.4-fpm.log
After fixing the issue, disable debug mode by reverting the changes:
define( 'WP_DEBUG', false );Never leave debug mode enabled on production sites. Debug output can expose sensitive information like file paths and database queries to visitors.
Nginx Configuration Test Fails
Occasionally, when running nginx -t, you see syntax errors:
nginx: [emerg] unknown directive "fastcgi_passs" in /etc/nginx/sites-enabled/example.com.conf:18
nginx: configuration file /etc/nginx/nginx.conf test failed
For request failures that do not appear in nginx -t, inspect the access and error logs with the workflow in Nginx access and error logs.
Open the configuration file at the line number indicated:
sudo nano +18 /etc/nginx/sites-available/example.com.confFix the typo or syntax error. Common mistakes include:
- Missing semicolons at the end of directives
- Typos in directive names (like
fastcgi_passsinstead offastcgi_pass) - Unmatched braces
{} - Wrong PHP-FPM socket path
Test again and reload:
sudo nginx -t && sudo systemctl reload nginxExpected successful output:
nginx: the configuration file /etc/nginx/nginx.conf syntax is ok
nginx: configuration file /etc/nginx/nginx.conf test is successful
Remove WordPress, Nginx, MariaDB, and PHP-FPM
Removal has two parts: WordPress application data and optional stack packages. Back up the web root and database before deleting either one.
Remove WordPress Files
Removing the WordPress directory permanently deletes files, uploads, themes, and plugins under
/var/www/html/wordpress. Create a backup first if the site contains anything you may need later.
sudo rm -rf /var/www/html/wordpress/Remove the WordPress Database and User
Connect to MariaDB and remove only the WordPress database and user created for this site:
sudo mariadb -u rootAt the MariaDB prompt, remove the database and user:
DROP DATABASE IF EXISTS WORDPRESSDB;
DROP USER IF EXISTS 'WPUSER'@'localhost';
FLUSH PRIVILEGES;
EXIT;
Remove the Nginx Server Block
Remove the site configuration files, then test and reload Nginx:
sudo rm -f /etc/nginx/sites-available/example.com.conf
sudo rm -f /etc/nginx/sites-enabled/example.com.conf
sudo nginx -t && sudo systemctl reload nginx
Remove Let’s Encrypt SSL Certificates
If you configured SSL certificates, remove them to prevent renewal attempts for a non-existent site:
sudo certbot delete --cert-name example.comVerify the certificate was removed:
sudo certbot certificatesExpected output shows no certificates for your domain:
- - - - - - - - - - - - - - - - - - - - - - - - - - - - - - - - - - - - - - - -
No certificates found.
- - - - - - - - - - - - - - - - - - - - - - - - - - - - - - - - - - - - - - - -
Remove Web Stack Packages (Optional)
Remove the packages only if this server no longer needs Nginx, MariaDB, PHP-FPM, or Certbot for another site. This command preserves package configuration files:
sudo apt remove nginx mariadb-server mariadb-client php-fpm php-cli php-mbstring php-bcmath php-xml php-mysql php-gd php-curl php-zip php-imagick php-intl python3-certbot-nginx certbot
sudo apt autoremove
Review the autoremove transaction before accepting it, especially on servers that host more than one application.
To remove package configuration files as well, use purge instead of remove:
sudo apt purge nginx mariadb-server mariadb-client php-fpm php-cli php-mbstring php-bcmath php-xml php-mysql php-gd php-curl php-zip php-imagick php-intl python3-certbot-nginx certbot
sudo apt autoremove
Do not delete shared directories such as
/etc/nginx,/etc/mysql, or/var/lib/mysqlas a routine cleanup step. Remove the specific WordPress files, database, certificate, and server block first, then delete broader service data only when decommissioning a dedicated server and after a verified backup.
Verify Removal
After package removal, confirm the main stack packages are no longer installed:
dpkg -l nginx mariadb-server mariadb-client php-fpm php-cli php-mbstring php-bcmath php-xml php-mysql php-gd php-curl php-zip php-imagick php-intl python3-certbot-nginx certbot | grep '^ii' || trueNo output means none of those package names are currently installed. If a row still appears, remove or purge that package explicitly.
Conclusion
WordPress is running behind Nginx with MariaDB, PHP-FPM, domain-aware server block routing, and optional Let’s Encrypt HTTPS. For production sites, add automated file and database backups, then consider object caching with Redis on Debian or Memcached on Debian when plugin or traffic patterns justify it.

On Debian 12, nginx (stable from nginx repo) was configured to use `/etc/nginx/conf.d/*.conf` rather than `/etc/nginx/sites-enabled/*.conf` to search for sites, in spite of this directory being available.
It might be good to update the guide to suggest verifying and possibly adding an `include /etc/nginx/sites-enabled/*.conf` instruction into the `http` settings of `/etc/nginx/nginx.conf`.
Otherwise, great guide; thanks!
Thanks for catching this, Dylan. You are right that Nginx packages from nginx.org use
/etc/nginx/conf.d/by default, while Debian’s packaged Nginx includes thesites-enableddirectory. I updated the article to separate those layouts more clearly.When using Debian’s Nginx packages, the
sites-availableandsites-enabledpattern works out of the box. When using nginx.org packages, place the server block at/etc/nginx/conf.d/example.com.confand skip thesites-enabledsymlink unless you intentionally add that include path.If you prefer the Debian-style layout with nginx.org packages, add this include directive inside the
httpblock in/etc/nginx/nginx.conf, then test and reload Nginx:Thanks for the suggestion to clarify this for users on non-default Nginx builds.