
Writing install media with dd works until one mistyped device path wipes the wrong drive. That risk is exactly why many people install balenaEtcher on Ubuntu: its guided three-step workflow and post-write validation make USB and SD card jobs much harder to botch.
The current upstream .deb installs cleanly on Ubuntu 26.04, 24.04, and 22.04. The package comes from balena’s GitHub releases rather than Ubuntu’s default repositories, and the application still needs an active graphical desktop session to open.
Install balenaEtcher on Ubuntu
balenaEtcher is not in Ubuntu’s default repositories, and current Flathub appstream metadata and Snapcraft search do not list a balenaEtcher app. The upstream project points Debian and Ubuntu users to the official GitHub releases page and its current amd64 .deb package.
Current balenaEtcher releases, starting with 2.1.5, install on Ubuntu 26.04, 24.04, and 22.04. They accept both the older
libgdk-pixbuf2.0-0dependency name and Ubuntu 26.04’s renamedlibgdk-pixbuf-2.0-0package, so older dependency errors usually mean you are installing a stale.deb.
Update Ubuntu before installing balenaEtcher on Ubuntu
Refresh package metadata first so APT resolves the local .deb against current Ubuntu libraries.
sudo apt update && sudo apt upgradeThese commands use
sudofor tasks that need root privileges. If your account is not set up for sudo yet, follow the guide to add a new user to sudoers on Ubuntu.
Install curl and jq on Ubuntu if they are missing
The download command uses curl to fetch release metadata and jq to parse GitHub’s JSON response. Install both tools before you resolve the latest package URL.
sudo apt install -y curl jqDownload the latest balenaEtcher .deb package on Ubuntu
Resolve the newest balenaEtcher release from GitHub, download the amd64 .deb, and verify it against the Linux checksum file published with the same release.
(
  set -e
  API_URL="https://api.github.com/repos/balena-io/etcher/releases/latest"
  rm -f balena-etcher_*_amd64.deb SHA256SUMS.Linux.x64.txt
  RELEASE_JSON=$(curl -fsSL "$API_URL")
  DEB_URL=$(printf '%s\n' "$RELEASE_JSON" | jq -r '[.assets[].browser_download_url | select(test("balena-etcher_[0-9.]+_amd64\\.deb$"))][0] // empty')
  SUMS_URL=$(printf '%s\n' "$RELEASE_JSON" | jq -r '[.assets[].browser_download_url | select(test("SHA256SUMS\\.Linux\\.x64\\.txt$"))][0] // empty')

  if [ -z "$DEB_URL" ] || [ -z "$SUMS_URL" ]; then
    echo "Could not find the balenaEtcher amd64 .deb or Linux checksum file."
    exit 1
  fi

  DEB_FILE=${DEB_URL##*/}
  SUMS_FILE=${SUMS_URL##*/}

  curl -fLO --progress-bar "$DEB_URL"
  curl -fLO --progress-bar "$SUMS_URL"
  grep "  $DEB_FILE$" "$SUMS_FILE" | sha256sum -c -
)
The checksum check should return an OK line for the downloaded package.
balena-etcher_2.1.x_amd64.deb: OK
Confirm that the package landed in your current directory before you install it.
ls -1 balena-etcher_*_amd64.debbalena-etcher_2.1.x_amd64.deb
Install the balenaEtcher package on Ubuntu
APT can install the local file directly and resolve any release-specific desktop libraries that are not already present.
DEB_FILE=$(find . -maxdepth 1 -type f -name 'balena-etcher_*_amd64.deb' -printf '%f\n' | sort -V | tail -n 1)
test -n "$DEB_FILE" || { echo "No balenaEtcher .deb file found in this directory."; false; }
sudo apt install -y "./$DEB_FILE"
The exact dependency list varies by release, but relevant output includes the package setup line and the harmless chrome-sandbox warning.
The following NEW packages will be installed:
  balena-etcher ...
Setting up balena-etcher (2.1.x) ...
chmod: cannot access '/opt/balenaEtcher/chrome-sandbox': No such file or directory
Verify the balenaEtcher install on Ubuntu
Check the installed version, command path, and desktop launcher before you switch to the graphical app.
apt-cache policy balena-etcher
command -v balena-etcher
grep -E '^(Name|Exec)=' /usr/share/applications/balena-etcher.desktop
balena-etcher:
Installed: 2.1.x
Candidate: 2.1.x
Version table:
*** 2.1.x 100
100 /var/lib/dpkg/status
/usr/bin/balena-etcher
Name=balenaEtcher
Exec=balena-etcher %U
The /var/lib/dpkg/status entry is expected here because balenaEtcher was installed from a local .deb, not from a persistent APT repository.
Open balenaEtcher on Ubuntu
The package installs from the terminal, but the balenaEtcher window opens from an active graphical session such as GNOME, KDE Plasma, or Xfce.
Open balenaEtcher from the applications menu on Ubuntu
Use your desktop launcher if you prefer to stay out of the terminal after the package is installed.
- Open Activities or your desktop environment’s main applications menu.
- Search for balenaEtcher.
- Select the balenaEtcher icon to open the application.
Open balenaEtcher from a terminal on Ubuntu
If you are already inside the desktop session, the same launcher is available from a terminal.
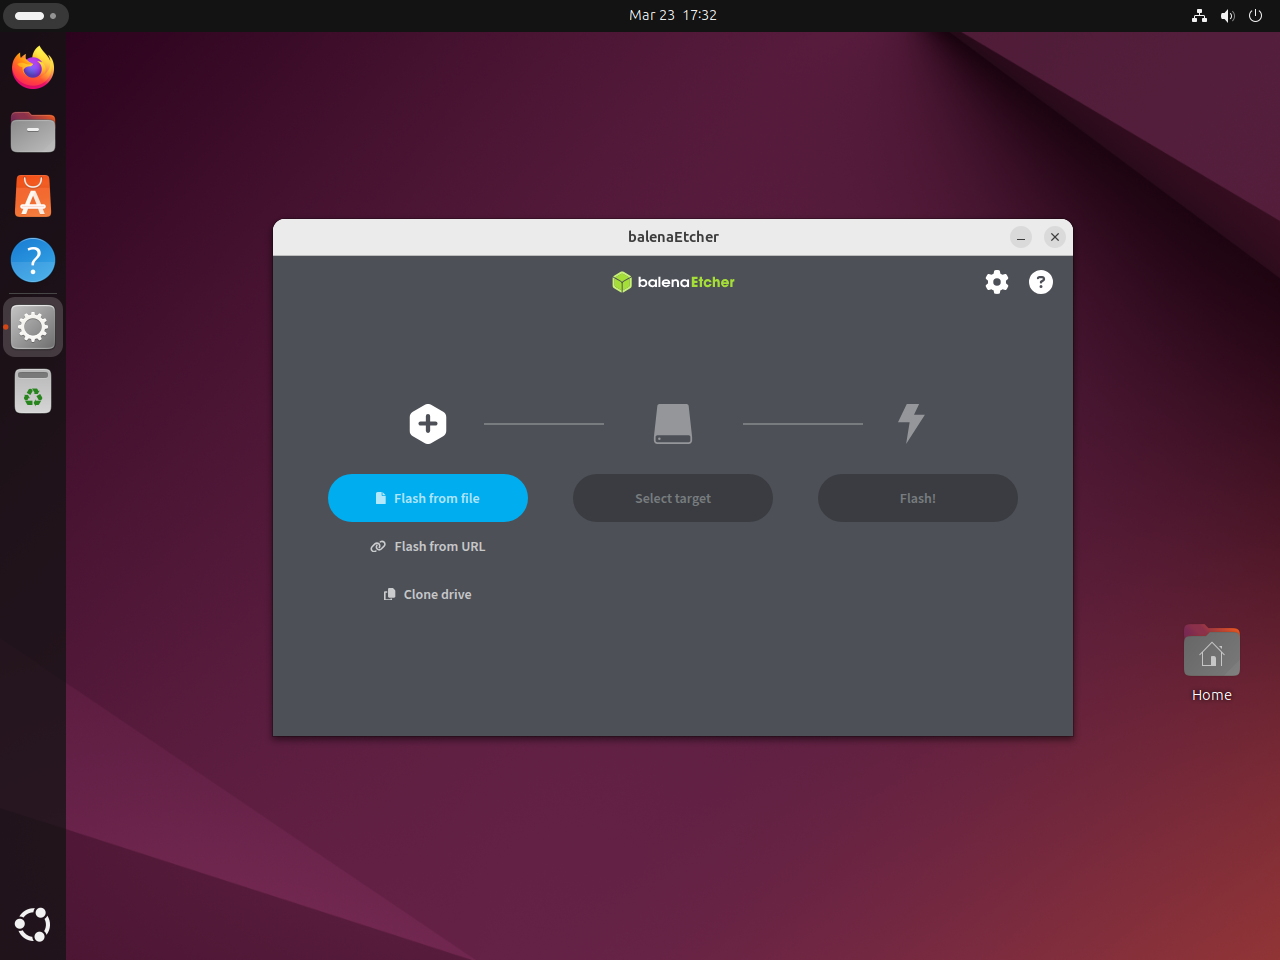
balena-etcherThe window should open with the usual three steps: Flash from file, Select target, and Flash. If no window appears, start it from the applications menu inside your desktop session.
Flash images safely with balenaEtcher on Ubuntu
balenaEtcher is simple once the image file is ready. Most mistakes come from choosing the wrong target drive or using Windows installation media that needs a different tool.
Confirm the target drive before flashing with balenaEtcher on Ubuntu
Check removable devices in a terminal before you click Flash. The TRAN column should show usb for a typical USB stick.
lsblk -o NAME,SIZE,TYPE,MODEL,TRANNAME SIZE TYPE MODEL TRAN loop0 4K loop loop1 74M loop loop2 251.7M loop loop3 16.4M loop loop4 91.7M loop loop5 10.8M loop loop6 531.4M loop loop7 18.5M loop loop8 48.1M loop loop9 576K loop loop10 254.9M loop sda 125G disk VBOX HARDDISK sata sda1 1M part sda2 125G part sr0 1024M rom VBOX CD-ROM ata
When your USB stick is attached, you should see one more disk entry with TRAN set to usb. Stop immediately if the size does not match the drive you intend to erase.
Use WoeUSB instead of balenaEtcher for Windows installer media on Ubuntu
balenaEtcher writes images byte-for-byte, which works well for Linux ISOs and appliance images, but many Windows ISOs need extra boot-media handling. If your goal is a Windows installer USB, install WoeUSB on Ubuntu instead.
Troubleshoot balenaEtcher on Ubuntu
The common Ubuntu failures are stale .deb files, the cosmetic chrome-sandbox warning during installation, and launching the GUI outside a desktop session.
Fix old balenaEtcher dependency errors on Ubuntu
If APT still says libgdk-pixbuf2.0-0 is not installable, check the version and dependency line in the .deb you downloaded.
DEB_FILE=$(find . -maxdepth 1 -type f -name 'balena-etcher_*_amd64.deb' -printf '%f\n' | sort -V | tail -n 1)
test -n "$DEB_FILE" || { echo "No balenaEtcher .deb file found in this directory."; false; }
dpkg-deb -f "$DEB_FILE" Version
dpkg-deb -f "$DEB_FILE" Depends | grep -o 'libgdk-pixbuf[^,]*'
2.1.5 libgdk-pixbuf2.0-0 | libgdk-pixbuf-2.0-0
Version 2.1.5 or newer includes the Ubuntu 26.04-compatible dependency alternative. If your output shows only libgdk-pixbuf2.0-0, remove the stale download and rerun the latest-release download block.
rm -f balena-etcher_*_amd64.deb SHA256SUMS.Linux.x64.txtUnderstand the chrome-sandbox warning when installing balenaEtcher on Ubuntu
APT currently prints this warning during the package setup stage.
chmod: cannot access '/opt/balenaEtcher/chrome-sandbox': No such file or directory
The package still installs chrome-sandbox under /usr/lib/balena-etcher/ and registers the normal /usr/bin/balena-etcher launcher. This warning comes from a stale post-install path reference, not from a failed installation.
Fix a missing balenaEtcher window on Ubuntu
If the command returns without opening a window, start balenaEtcher from the applications menu inside your desktop session. Do not run the whole application with sudo just to make the window appear; balenaEtcher can request elevated write access when it needs to flash a target drive.
Update balenaEtcher on Ubuntu
balenaEtcher no longer publishes an Ubuntu repository, so updates mean replacing the local .deb with the newest release. If you do not want to repeat the download command by hand each time, add a reusable updater to /usr/local/bin.
Create a balenaEtcher update script on Ubuntu
This script checks the installed version against the latest GitHub release, verifies the downloaded package against the matching checksum file, and only installs when there is something new. It works in a temporary directory and cleans up after itself.
Write the script to /usr/local/bin/update-balena-etcher.
sudo tee /usr/local/bin/update-balena-etcher > /dev/null <<'SCRIPT_EOF'
#!/usr/bin/env bash
set -euo pipefail

API_URL="https://api.github.com/repos/balena-io/etcher/releases/latest"
WORK_DIR=$(mktemp -d "${TMPDIR:-/tmp}/balena-etcher-update.XXXXXX")
trap 'rm -rf "$WORK_DIR"' EXIT

for cmd in curl jq grep sed sha256sum apt-get sudo mktemp dpkg-query; do
  if ! command -v "$cmd" >/dev/null 2>&1; then
    echo "Missing required command: $cmd"
    exit 1
  fi
done

CURRENT_VERSION=$(dpkg-query -W -f='${Version}\n' balena-etcher 2>/dev/null || echo none)
RELEASE_JSON=$(curl -fsSL "$API_URL")
DEB_URL=$(printf '%s\n' "$RELEASE_JSON" | jq -r '[.assets[].browser_download_url | select(test("balena-etcher_[0-9.]+_amd64\\.deb$"))][0] // empty')
SUMS_URL=$(printf '%s\n' "$RELEASE_JSON" | jq -r '[.assets[].browser_download_url | select(test("SHA256SUMS\\.Linux\\.x64\\.txt$"))][0] // empty')

if [ -z "$DEB_URL" ] || [ -z "$SUMS_URL" ]; then
  echo "Could not find the latest balenaEtcher amd64 .deb and Linux checksum file."
  exit 1
fi

DEB_FILE=${DEB_URL##*/}
SUMS_FILE=${SUMS_URL##*/}
LATEST_VERSION=$(printf '%s\n' "$DEB_FILE" | sed -E 's/^balena-etcher_([0-9.]+)_amd64\.deb$/\1/')

if [ -z "$LATEST_VERSION" ] || [ "$LATEST_VERSION" = "$DEB_FILE" ]; then
  echo "Could not parse the latest balenaEtcher version."
  exit 1
fi

echo "Installed version: $CURRENT_VERSION"
echo "Latest version: $LATEST_VERSION"

if [ "$CURRENT_VERSION" = "$LATEST_VERSION" ]; then
  echo "balenaEtcher is already up to date."
  exit 0
fi

cd "$WORK_DIR"
echo "Downloading $DEB_FILE..."
curl -fsSLO "$DEB_URL"
curl -fsSLO "$SUMS_URL"
grep "  $DEB_FILE$" "$SUMS_FILE" | sha256sum -c -

echo "Installing $DEB_FILE..."
sudo apt-get install -y "./$DEB_FILE"

NEW_VERSION=$(dpkg-query -W -f='${Version}\n' balena-etcher)
echo "balenaEtcher is now at version $NEW_VERSION."
SCRIPT_EOF
Make it executable so you can call it by name.
sudo chmod +x /usr/local/bin/update-balena-etcherRun this script manually whenever you want to check for a newer balenaEtcher release. Do not schedule it with cron or a systemd timer, because unattended package installs can interrupt desktop sessions or conflict with other APT operations.
Verify the balenaEtcher update command on Ubuntu
Because the updater lives in /usr/local/bin, you can run it from any directory once the shell can see that path.
command -v update-balena-etcher/usr/local/bin/update-balena-etcher
Run update-balena-etcher as your regular user. The script only uses sudo for the final APT install step when a newer package is available.
update-balena-etcherInstalled version: 2.1.x Latest version: 2.1.x balenaEtcher is already up to date.
Remove balenaEtcher from Ubuntu
Remove the package first. If you created the reusable update command, remove that helper at the same time.
sudo apt remove -y balena-etcher
sudo rm -f /usr/local/bin/update-balena-etcher
APT may mark a small dependency such as libxss1 as no longer required, but reused systems can also have unrelated autoremovable packages. Preview the list before you accept the cleanup.
sudo apt autoremove --dry-runIf the preview only lists packages you no longer need, run the cleanup without --dry-run and review APT’s confirmation prompt.
sudo apt autoremoveFind balenaEtcher user data on Ubuntu before deleting it
Package removal does not delete per-user preferences. Search your own account first instead of deleting guessed paths.
find "$HOME/.config" "$HOME/.cache" "$HOME/.local/share" -maxdepth 1 -iname '*balena*' 2>/dev/nullDelete only the exact paths that the
findcommand prints. If it prints nothing, balenaEtcher has not created per-user data for that account and there is nothing else to remove.
Verify balenaEtcher is removed from Ubuntu
Check that the package no longer has an installed ii state after removal.
if dpkg-query -W -f='${db:Status-Abbrev} ${binary:Package}\n' balena-etcher 2>/dev/null | grep -q '^ii'; then
  echo "balena-etcher is still installed"
else
  echo "balena-etcher is not installed"
fi
balena-etcher is not installed
Conclusion
balenaEtcher on Ubuntu 26.04, 24.04, and 22.04 gives you a safer USB-writing workflow for Linux ISOs and IMG files, with validation built in after each flash. Keep WoeUSB on Ubuntu around for Windows installer media, and install GParted on Ubuntu if you also want to inspect or resize partitions after you write the drive.

Formatting tips for your comment
You can use basic HTML to format your comment. Useful tags currently allowed in published comments:
<code>command</code>command<strong>bold</strong><em>italic</em><a href="https://example.com">link</a><blockquote>quote</blockquote>