
The LAMP stack powers millions of websites worldwide, combining Linux, Apache, MariaDB (or MySQL), and PHP into a proven foundation for web applications. Whether you need to host WordPress sites, run custom PHP applications, or set up a development environment, LAMP provides the flexibility and reliability to handle it. By the end of this guide, you will have a production-ready LAMP stack with a working web server, secure database, and PHP integration.
Understanding the LAMP Stack Components
Before diving into installation, understanding what each component does helps you troubleshoot issues and make informed configuration decisions:
- Linux: The operating system layer providing stability, security, and process management for all other components.
- Apache: The web server that listens for HTTP/HTTPS requests and serves web content to browsers. Apache handles virtual hosts, URL rewriting, and SSL termination.
- MariaDB: The database server for storing application data. MariaDB is the default MySQL-compatible database on modern Debian releases, offering improved performance and active community development.
- PHP: The server-side scripting language that processes dynamic content. PHP connects Apache to MariaDB, enabling applications like WordPress, Drupal, and custom web apps.
Update Your Debian System Before Installation
Start by updating your system’s package index and upgrading existing packages. This ensures you install the latest security patches and package versions available in the repositories:
sudo apt update && sudo apt upgradeOnce the upgrade completes, proceed with the LAMP component installation.
Install Apache Web Server
Apache is the first component to install since it serves as the foundation for delivering web content. Indeed, the Apache HTTP Server (also called httpd) has been the most popular web server for decades and integrates seamlessly with PHP.
Install Apache with APT
To begin, install Apache using the default Debian repositories:
sudo apt install apache2The installation automatically starts Apache and enables it to run at boot. Therefore, to confirm the installation succeeded, check the version:
apache2 -vYou should see output similar to this on Debian 13:
Server version: Apache/2.4.65 (Debian)
Server built:   2025-07-29T17:52:31
The exact version number varies by Debian release. Debian 12 and 11 also include Apache 2.4.x with slightly different build dates. All supported versions follow the same configuration patterns.
If you need a newer Apache version than what Debian provides, see our guide on upgrading Apache on Debian for instructions on building from source or using backports.
Verify Apache Service Status
Next, confirm that Apache is running and enabled for automatic startup:
systemctl status apache2Look for Active: active (running) in the output. If Apache is not running, start and enable it with:
sudo systemctl enable apache2 --nowThe --now flag combines enabling the service for boot with starting it immediately.
Test the Apache Default Page
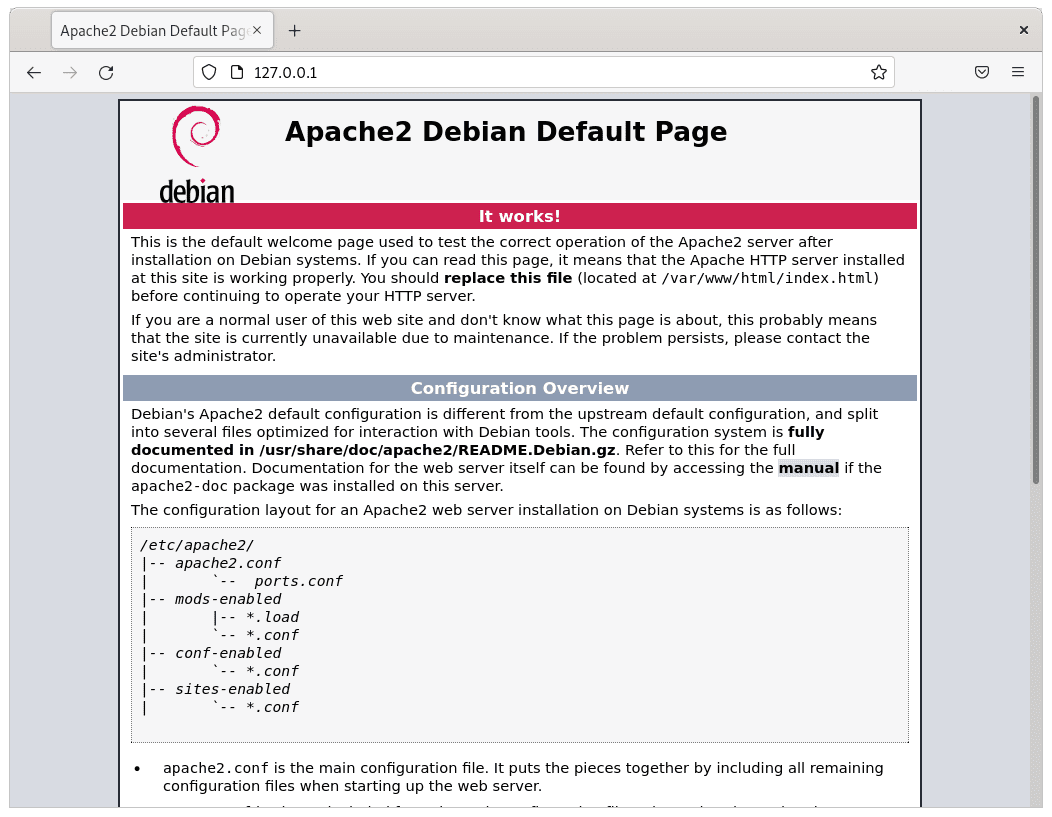
To test Apache, open a web browser and navigate to your server’s IP address or localhost:
http://127.0.0.1
http://localhost
You should see the Apache2 Debian Default Page confirming the web server is operational. Essentially, this page displays from /var/www/html/index.html and indicates Apache is correctly serving content.
If you cannot access the page, check whether a firewall is blocking port 80. For systems using UFW, the next section covers firewall configuration. For iptables users, allow HTTP traffic with:
sudo iptables -I INPUT -p tcp --dport 80 -j ACCEPTFor persistent firewall rules and easier management, consider installing UFW. See our UFW installation guide for Debian for complete setup instructions.
Install MariaDB Database Server
With the web server running, the next component to install is MariaDB. This database server is the default MySQL-compatible option on modern Debian releases, replacing MySQL in the official repositories. Additionally, MariaDB maintains full compatibility with MySQL client tools and applications while providing enhanced features and performance improvements.
MariaDB Versions by Debian Release
Each Debian release includes a different MariaDB version:
| Debian Version | MariaDB Version | Notes |
|---|---|---|
| Debian 13 (Trixie) | 11.8.x | Latest features, new JSON functions |
| Debian 12 (Bookworm) | 10.11.x LTS | Long-term support until 2028 |
| Debian 11 (Bullseye) | 10.5.x LTS | Long-term support until 2025 |
If you need a specific MariaDB version or MySQL instead, see our guides on installing MariaDB from official repositories or installing MySQL 8.0 on Debian.
Install MariaDB Server and Client
First, install both the server and client packages:
sudo apt install mariadb-server mariadb-clientAfter the installation completes, verify the installed version:
mariadb --versionYou should see output similar to this on Debian 13:
mariadb from 11.8.3-MariaDB, client 15.2 for debian-linux-gnu (x86_64) using EditLine wrapper
Verify MariaDB Service Status
Next, check that MariaDB is running:
systemctl status mariadbShould the service not be active, enable and start it with:
sudo systemctl enable mariadb --nowSecure the MariaDB Installation
Fresh MariaDB installations have permissive default settings that should be tightened for production use. Fortunately, the included security script automates common hardening steps:
sudo mariadb-secure-installationOn Debian 11 and 12,
mysql_secure_installationalso works as a symbolic link to the same script. However, usemariadb-secure-installationdirectly since this is the canonical command and the symlink may not exist on all systems.
During execution, the script prompts you through several security decisions. Here are the recommended responses for most installations:
Enter current password for root (enter for none): [Press Enter]
Switch to unix_socket authentication [Y/n]: Y
Change the root password? [Y/n]: Y
New password: [Enter a strong password]
Re-enter new password: [Confirm password]
Remove anonymous users? [Y/n]: Y
Disallow root login remotely? [Y/n]: Y
Remove test database and access to it? [Y/n]: Y
Reload privilege tables now? [Y/n]: Y
These settings remove anonymous access, disable remote root login, delete the test database, and apply changes immediately. For production servers, always set a strong root password and remove unnecessary accounts.
Test the MariaDB Connection
Finally, to confirm MariaDB is working properly, connect and create a test database:
sudo mariadbAfter connecting, run these commands at the MariaDB prompt to create a test database and user:
CREATE DATABASE testdb;
GRANT ALL ON testdb.* TO 'testuser'@'localhost' IDENTIFIED BY 'your_password';
FLUSH PRIVILEGES;
SHOW DATABASES;
exit;
The output should show your new database:
+--------------------+
| Database           |
+--------------------+
| information_schema |
| mysql              |
| performance_schema |
| sys                |
| testdb             |
+--------------------+
5 rows in set (0.001 sec)
This output confirms MariaDB accepts connections and can create databases. For production applications, however, use stronger passwords and more restrictive privileges.
Essential MariaDB Service Commands
These commands help manage the MariaDB service throughout your server’s lifecycle:
Stop the database server:
sudo systemctl stop mariadbStart the database server:
sudo systemctl start mariadbRestart after configuration changes:
sudo systemctl restart mariadbEnable automatic startup at boot:
sudo systemctl enable mariadbDisable automatic startup:
sudo systemctl disable mariadbInstall PHP
The final component is PHP, which connects Apache to MariaDB and enables dynamic web applications. Notably, although Debian includes different PHP versions depending on your release, the installation commands remain the same across all supported versions.
PHP Versions by Debian Release
| Debian Version | PHP Version | Support Status |
|---|---|---|
| Debian 13 (Trixie) | PHP 8.4 | Active support until late 2026 |
| Debian 12 (Bookworm) | PHP 8.2 | Security support until late 2026 |
| Debian 11 (Bullseye) | PHP 7.4 | Security-only via LTS |
If you need a specific PHP version, see our PHP installation guide for Debian for instructions on using the Sury repository.
Choose Your PHP Integration Method
Apache can integrate with PHP in two ways:
- mod_php (Apache module): Embeds PHP directly into Apache. Simpler setup, good for development and single-application servers. Each Apache worker process loads the PHP interpreter.
- PHP-FPM (FastCGI Process Manager): Runs PHP as a separate service. Better performance under load, allows different PHP versions per site, and enables OpCache sharing. Recommended for production environments.
For most new installations and production servers, PHP-FPM is the better choice. In contrast, mod_php remains simpler for development environments and smaller sites.
Option 1: Install PHP with Apache Module (mod_php)
This method embeds PHP directly into Apache for simpler configuration:
sudo apt install php libapache2-mod-php php-mysqlThe
phpmetapackage automatically installs the correct PHP version for your Debian release. Thephp-mysqlpackage provides MariaDB/MySQL database connectivity.
After the installation completes, verify PHP is available:
php -vYou should see output similar to this on Debian 13:
PHP 8.4.16 (cli) (built: Dec 18 2025 21:19:25) (NTS)
Copyright (c) The PHP Group
Zend Engine v4.4.16, Copyright (c) Zend Technologies
    with Zend OPcache v8.4.16, Copyright (c), by Zend Technologies
Typically, the Apache PHP module enables automatically. However, if you need to enable it manually, run:
sudo a2enmod php8.4Accordingly, replace php8.4 with php8.2 for Debian 12 or php7.4 for Debian 11.
Finally, restart Apache to load the PHP module:
sudo systemctl restart apache2Install Common PHP Extensions
In addition to the base installation, most web applications require additional PHP extensions. WordPress, Drupal, and other CMS platforms typically need these commonly used extensions:
sudo apt install php-curl php-gd php-mbstring php-xml php-zip php-intlSpecifically, these extensions provide:
php-curl: HTTP requests for APIs and remote contentphp-gd: Image processing and thumbnail generationphp-mbstring: Multibyte string handling for international textphp-xml: XML parsing for feeds, sitemaps, and SOAPphp-zip: Archive handling for plugin and theme uploadsphp-intl: Internationalization functions for multilingual sites
After you install extensions, restart Apache to load them:
sudo systemctl restart apache2Option 2: Install PHP-FPM for Better Performance
As an alternative to mod_php, PHP-FPM runs as a separate process pool, providing better resource management and performance for high-traffic sites:
sudo apt install php-fpm libapache2-mod-fcgid php-mysqlSince PHP-FPM is not enabled in Apache by default, you therefore need to enable the required Apache modules and the PHP-FPM configuration:
Debian 13:
sudo a2enmod proxy_fcgi setenvif
sudo a2enconf php8.4-fpm
For Debian 12:
sudo a2enmod proxy_fcgi setenvif
sudo a2enconf php8.2-fpm
On Debian 11:
sudo a2enmod proxy_fcgi setenvif
sudo a2enconf php7.4-fpm
Subsequently, restart Apache to apply the configuration:
sudo systemctl restart apache2Afterwards, verify PHP-FPM is running:
systemctl status php8.4-fpmAdjust the version number for your Debian release (php8.2-fpm or php7.4-fpm).
Switching Between mod_php and PHP-FPM
If you later decide to switch from mod_php to PHP-FPM (or vice versa), make sure to disable the current configuration first to avoid conflicts.
To switch from mod_php to PHP-FPM (Debian 13 example):
sudo a2dismod php8.4
sudo a2enmod proxy_fcgi setenvif
sudo a2enconf php8.4-fpm
sudo systemctl restart apache2
To switch from PHP-FPM to mod_php (Debian 13 example):
sudo a2disconf php8.4-fpm
sudo a2dismod proxy_fcgi
sudo a2enmod php8.4
sudo systemctl restart apache2
Test PHP Integration with Apache
Now that PHP is installed, you should verify it works correctly with Apache by creating a test page.
Create a PHP Test File
To start, create a simple PHP file in the web root directory:
sudo nano /var/www/html/info.phpNext, add the following content:
<?php
phpinfo();
?>
Afterwards, save the file with Ctrl+O, then exit with Ctrl+X.
View the PHP Info Page
Next, open a web browser and navigate to:
http://your-server-ip/info.php
http://localhost/info.php
As a result, you should see a detailed PHP configuration page showing:
- PHP version and build information
- Server API (should show “Apache 2.0 Handler” for mod_php or “FPM/FastCGI” for PHP-FPM)
- Loaded configuration files
- Enabled PHP extensions
In particular, the “Server API” line confirms which PHP integration method is active:
- Apache 2.0 Handler: mod_php is active
- FPM/FastCGI: PHP-FPM is active
Remove the Test File
Because the phpinfo() output exposes sensitive server configuration details, you should remove this file after verification:
sudo rm /var/www/html/info.phpSecurity note: Never leave
phpinfo()files on production servers. Attackers can use this information to identify vulnerabilities in your PHP configuration.
Secure Apache with Let’s Encrypt SSL
Modern websites require HTTPS for security and SEO benefits. Consequently, Let’s Encrypt provides free SSL certificates that Certbot can automatically install and renew.
Install Certbot
To begin, install the Certbot package with the Apache plugin:
sudo apt install python3-certbot-apacheObtain and Install SSL Certificate
After installation, run Certbot with the recommended security options:
sudo certbot --apache --agree-tos --redirect --hsts --staple-ocsp --email you@example.com -d www.example.comReplace you@example.com with your actual email address and www.example.com with your domain name. This command:
--redirect: Automatically redirects HTTP to HTTPS--hsts: Enables HTTP Strict Transport Security headers--staple-ocsp: Enables OCSP stapling for faster certificate validation
Upon successful completion, your site will be accessible at https://www.example.com with automatic HTTP-to-HTTPS redirection.
For detailed SSL configuration options, see our guide on securing Apache with Let’s Encrypt on Debian.
Configure UFW Firewall for Apache
If you use UFW (Uncomplicated Firewall), configure it to allow web traffic. Notably, Apache automatically registers application profiles with UFW during installation.
Install and Enable UFW
If UFW is not already installed:
sudo apt install ufwCritical: If you are connected via SSH, allow SSH access before enabling UFW to prevent being locked out of your server.
sudo ufw allow ssh
sudo ufw enable
View Apache Firewall Profiles
To see the available profiles, simply list them:
sudo ufw app listAs a result, you should see output that includes Apache profiles:
Available applications:
  Apache
  Apache Full
  Apache Secure
  OpenSSH
Specifically, these Apache profiles control:
- Apache: HTTP only (port 80)
- Apache Secure: HTTPS only (port 443)
- Apache Full: Both HTTP and HTTPS (ports 80 and 443)
Allow Web Traffic
For a site with SSL (recommended), allow both HTTP and HTTPS:
sudo ufw allow 'Apache Full'Consequently, you should see the following output:
Rule added
Rule added (v6)
Alternatively, for HTTPS-only sites (after enabling SSL redirect):
sudo ufw allow 'Apache Secure'Verify Firewall Status
Finally, confirm your firewall rules are correctly configured:
sudo ufw statusThe output should show:
Status: active

To                         Action      From
--                         ------      ----
OpenSSH                    ALLOW       Anywhere
Apache Full                ALLOW       Anywhere
OpenSSH (v6)               ALLOW       Anywhere (v6)
Apache Full (v6)           ALLOW       Anywhere (v6)
Troubleshooting Common LAMP Issues
The following solutions address the most common problems encountered during LAMP setup.
Apache Fails to Start
If Apache fails to start, begin by checking the error log for specific issues:
sudo journalctl -u apache2 --no-pager -n 50Additionally, test the configuration syntax:
sudo apachectl configtestFor a valid configuration, you should typically see:
AH00558: apache2: Could not reliably determine the server's fully qualified domain name, using 127.0.0.1. Set the 'ServerName' directive globally to suppress this message
Syntax OK
While the ServerName warning is harmless, you can silence it by adding your server’s hostname to the global configuration:
echo "ServerName localhost" | sudo tee /etc/apache2/conf-available/servername.conf
sudo a2enconf servername
sudo systemctl reload apache2
Common startup failure causes include:
- Port 80 already in use: Another service (like Nginx) may be using the port. Check with
sudo ss -tlnp | grep :80 - Syntax error in configuration: The configtest command above will show the specific error and file location
- Missing SSL certificate: If SSL is configured but certificates don’t exist, Apache fails to start. Remove or comment out SSL configuration until certificates are obtained
PHP Files Download Instead of Executing
If your browser downloads PHP files instead of displaying them, PHP is not properly integrated with Apache. Verify the PHP module is loaded:
apachectl -M | grep phpIf nothing appears, then enable the PHP module and restart Apache:
sudo a2enmod php8.4
sudo systemctl restart apache2
MariaDB Connection Refused
When PHP applications cannot connect to MariaDB, first verify the service is running:
systemctl status mariadbAfterwards, test the connection manually:
sudo mariadb -u root -pIf you can connect manually but PHP still cannot, then ensure the php-mysql extension is installed:
sudo apt install php-mysql
sudo systemctl restart apache2
Permission Denied Errors
If Apache cannot read files in /var/www/html, fix ownership:
sudo chown -R www-data:www-data /var/www/html
sudo chmod -R 755 /var/www/html
As a result, this sets the Apache user (www-data) as the owner with read and execute permissions for everyone.
Remove LAMP Stack Components
If you need to remove LAMP components, follow these steps for each component.
Uninstall PHP
First, to remove PHP and related packages, run:
sudo apt remove --purge php* libapache2-mod-php*
sudo apt autoremove
Uninstall MariaDB
The following commands permanently delete all databases and MariaDB configuration. Back up your data before proceeding if you need to preserve it.
sudo apt remove --purge mariadb-server mariadb-client mariadb-common
sudo apt autoremove
sudo rm -rf /var/lib/mysql /etc/mysql
Uninstall Apache
The following commands remove Apache and its configuration. Any custom virtual hosts or SSL configurations will be deleted.
sudo apt remove --purge apache2 apache2-utils
sudo apt autoremove
sudo rm -rf /etc/apache2
Once complete, verify that no services remain:
systemctl status apache2 mariadbIf the uninstallation was successful, both services should show as not found or inactive.
Next Steps After LAMP Installation
Now that you have a working LAMP stack, consider these next steps to build a complete web hosting environment:
- Install WordPress: See our guide on installing WordPress with Apache on Debian
- Add database management: Install phpMyAdmin for a web-based database interface (see our phpMyAdmin on Debian guide for reference)
- Configure virtual hosts: Host multiple websites on a single server
- Set up automatic backups: Protect your data with scheduled database and file backups
- Harden security: Install ModSecurity with Apache on Debian for web application firewall protection
- Protect against brute force: Set up Fail2ban on Debian to automatically block malicious login attempts
Conclusion
In summary, you now have a functional LAMP stack on Debian with Apache serving web content, MariaDB managing your databases, and PHP processing dynamic applications. Together, these open-source components provide a stable, well-documented foundation for hosting everything from personal projects to production web applications. Whether you chose mod_php for simplicity or PHP-FPM for performance, your server is ready to host PHP applications with secure database connectivity.

Formatting tips for your comment
You can use basic HTML to format your comment. Useful tags currently allowed:
<code>command</code>command<strong>bold</strong><em>italic</em><blockquote>quote</blockquote>