
Obsidian stores each vault as ordinary Markdown files, so your notes remain usable outside the app. To install Obsidian on Ubuntu, match the package source to your release, decide who should own full-installer updates, and account for the desktop sandbox behavior before committing to one path.
Ubuntu’s default repositories do not package Obsidian, so sudo apt install obsidian is not a working Ubuntu archive command. The official download page supplies the current Linux formats. Flatpak is the simplest cross-release choice, while the upstream Debian package provides direct amd64 integration. The current Snap works on 24.04 and 22.04 but has a confirmed launcher failure on 26.04.
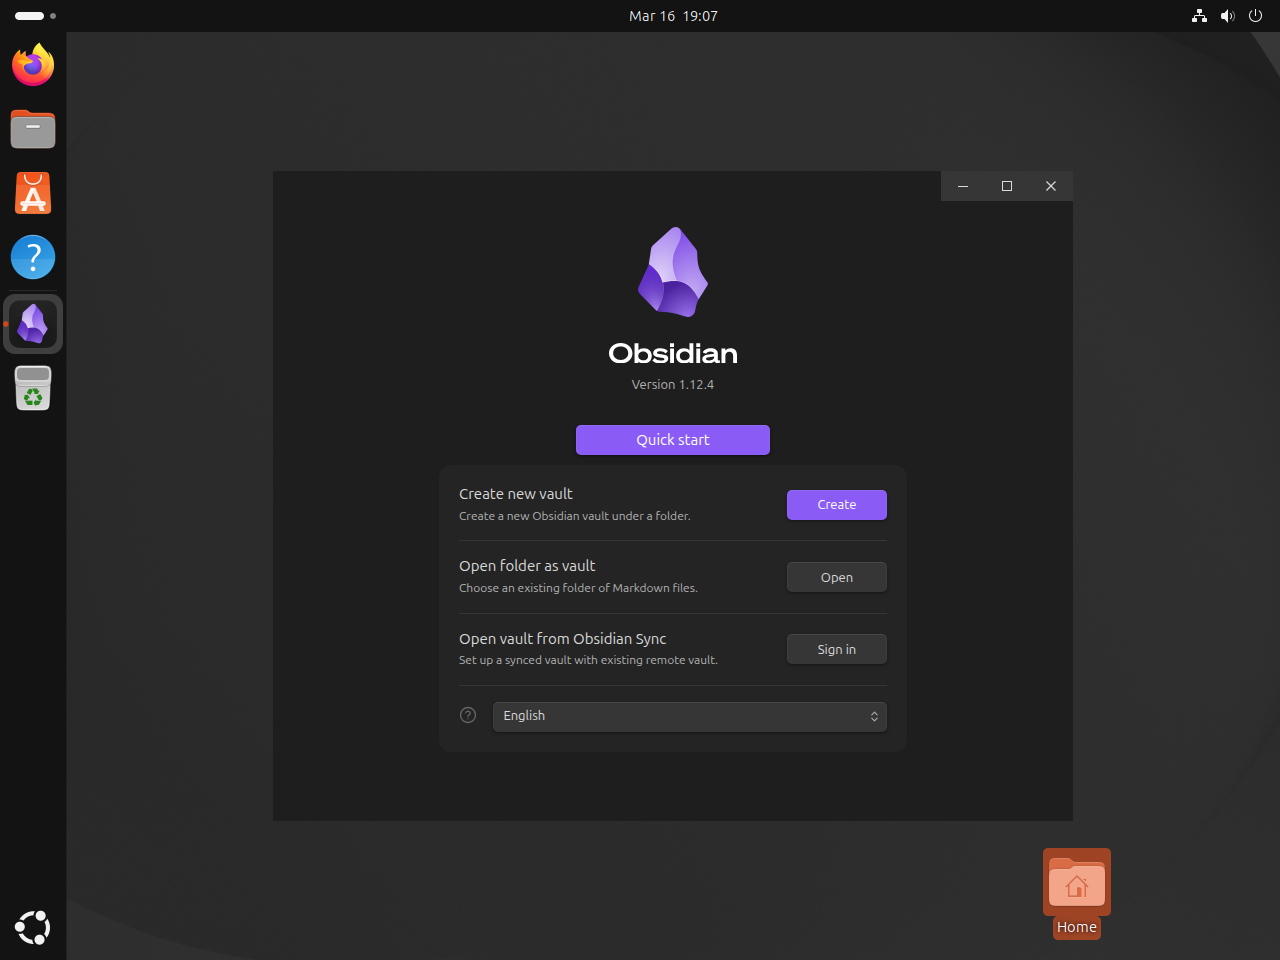
Install Obsidian on Ubuntu
Each method installs the same Obsidian desktop app, while your vault data remains in the folders you choose. The package source, update path, and desktop integration differ. If you searched for an APT package, use the official .deb method below instead of a nonexistent Ubuntu repository package.
| Method | Source and ownership | Updates | Ubuntu release fit | Best fit |
|---|---|---|---|---|
| Flatpak | Verified Flathub package; distributed by Flathub and not supported by Obsidian | Flatpak replaces the complete package | 26.04, 24.04, and 22.04 | Most readers who want one working flow across all three releases |
| Official DEB | Official Obsidian release asset for amd64 | In-app updates plus periodic installer-package refreshes | 26.04, 24.04, and 22.04 on amd64 | Readers who want a system install and normal app-menu entry without a package store |
| Snap | Snapcraft package under the obsidianmd publisher account; classic confinement | Automatic Snap refreshes | 24.04 and 22.04; skip on 26.04 while the launcher bug remains | Ubuntu releases where the current Snap launcher works and automatic store refreshes matter most |
| AppImage | Official Obsidian x86_64 release asset | In-app updates plus periodic AppImage replacement | 26.04, 24.04, and 22.04 on amd64 | Portable upstream build with a per-app user-namespace profile on 24.04 and 26.04 |
Install one packaging method at a time. Flatpak is the default choice across all three releases; use another row when its ownership or integration better matches your needs. Before switching methods, remove the previous package and its launcher so duplicate app-menu entries cannot open a stale build.
Flatpak, the official amd64
.deb, and the x86_64 AppImage use the same overall flow on Ubuntu 26.04, 24.04, and 22.04. The AppImage needslibfuse2t64on Ubuntu 26.04 and 24.04 orlibfuse2on Ubuntu 22.04. Obsidian needs an active graphical desktop session to open.
The official Debian package is published only for amd64. Obsidian also publishes an ARM64 AppImage, but the direct-download commands and updater scripts below target the x86_64 asset. On arm64, use the official ARM64 AppImage and adapt the asset name, digest check, and launcher rather than copying the x86_64 commands.
Refresh APT package metadata
Refresh APT first so any helper packages you install for Flatpak, the official Debian package workflow, or the AppImage path come from current Ubuntu metadata.
sudo apt updateThese commands use
sudofor tasks that need root privileges. If your account does not have sudo access yet, follow the guide to add a new user to sudoers on Ubuntu before you continue.
Install Obsidian on Ubuntu with Flatpak
Flatpak is the most consistent choice across Ubuntu 26.04, 24.04, and 22.04. Flathub marks the application as verified by the Obsidian team, while also stating that this distribution is not supported by Obsidian. The current permissions include home-directory access and the ssh-auth socket, which is enough to open normal vault folders but still deserves review before you enable integrations that use an SSH agent.
If Flatpak is new on this system, follow the guide to install Flatpak on Ubuntu for the broader desktop-integration steps. The same package and remote commands still handle the minimum setup needed for Obsidian itself.
Install the Flatpak package first if this Ubuntu system does not already have it.
sudo apt install flatpak -yAdd Flathub as a system remote after the package is available.
sudo flatpak remote-add --if-not-exists flathub https://dl.flathub.org/repo/flathub.flatpakrepoThe --if-not-exists flag keeps the remote-add step safe to repeat, and the next grep filter narrows the output to the Flathub line you care about. For more pattern-matching examples, see how to use the grep command in Linux.
flatpak remotes --system | grep -E '^flathub[[:space:]]'flathub system
The system label confirms Flathub was added at system scope, which is why the Flatpak install, update, and removal commands all use sudo.
Install the Obsidian application ID from Flathub after the remote is present. The ID is case-sensitive: use md.obsidian.Obsidian, with a capital O in the final segment.
sudo flatpak install flathub md.obsidian.ObsidianIf you installed Flatpak after logging into the current desktop session, sign out and back in or restart Ubuntu before judging the app-menu and dock icon. GNOME may not load Flatpak’s exported desktop entries until the next session, although
flatpak run md.obsidian.Obsidianworks immediately.
Check the stable system-scope metadata fields after the download finishes.
flatpak info --system md.obsidian.Obsidian | grep -E '^[[:space:]]*(ID|Ref|Arch|Branch|Version|Origin|Installation):' ID: md.obsidian.Obsidian
Ref: app/md.obsidian.Obsidian/x86_64/stable
Arch: x86_64
Branch: stable
Version: 1.12.7
Origin: flathub
Installation: system
Check the installed permissions too if you want to confirm the sandbox shape before you start using a vault or the Git plugin.
flatpak info --system --show-permissions md.obsidian.Obsidian | grep -Eo 'filesystems=home|ssh-auth' | sort -ufilesystems=home ssh-auth
The important lines are filesystems=home and ssh-auth. They confirm that this is not a narrowly isolated sandbox: the app can read your home files and contact an SSH agent. Review the complete output on your machine before granting any extra overrides. For the Flathub build, leave Obsidian’s in-app automatic updates disabled because Flatpak owns the stable package update path.
Install Obsidian on Ubuntu with the official DEB package
The official GitHub releases also publish an amd64 Debian package. This method fits best when you want a normal system install with a menu entry and the obsidian command, but you do not want Snap or Flatpak.
The package includes an AppArmor profile and runs without the AppImage --no-sandbox workaround. On Ubuntu 24.04 and 26.04, its maintainer script replaces Ubuntu’s own /etc/apparmor.d/obsidian profile during installation, so the removal section includes the required profile-restoration check. Ubuntu 22.04 has no distro-owned baseline file, and the upstream installer skips its bundled profile because Jammy’s AppArmor version does not support it.
This package is only published for amd64. On arm64 Ubuntu systems, skip this method. GitHub releases also publish an arm64 AppImage and arm64 tar archive, but the AppImage method here targets the standard x86_64 build.
Install curl and jq first. The commands use GitHub’s release API to select the matching official asset and its published SHA-256 digest instead of trusting a guessed filename.
sudo apt install curl jq -yConfirm the machine architecture before downloading anything.
dpkg --print-architectureamd64
Continue only when the output is amd64. The official Debian package does not have an arm64 asset.
Resolve the current release, exact Debian asset URL, and GitHub-published digest. Keep the next commands in the same terminal session because they reuse these variables.
DEB_METADATA_READY=0
RELEASE_JSON=$(mktemp)

if [ "$(dpkg --print-architecture)" = "amd64" ] &&
  curl -fsSL https://api.github.com/repos/obsidianmd/obsidian-releases/releases/latest -o "$RELEASE_JSON" &&
  TAG=$(jq -er '.tag_name' "$RELEASE_JSON"); then
  VERSION=${TAG#v}
  DEB_ASSET="obsidian_${VERSION}_amd64.deb"
  EXPECTED_DEB_URL="https://github.com/obsidianmd/obsidian-releases/releases/download/$TAG/$DEB_ASSET"

  if DEB_MATCH_COUNT=$(jq -er --arg asset "$DEB_ASSET" '[.assets[] | select(.name == $asset)] | length' "$RELEASE_JSON") &&
    DEB_URL=$(jq -er --arg asset "$DEB_ASSET" '.assets[] | select(.name == $asset) | .browser_download_url' "$RELEASE_JSON") &&
    DEB_SHA256=$(jq -er --arg asset "$DEB_ASSET" '.assets[] | select(.name == $asset) | .digest | sub("^sha256:"; "")' "$RELEASE_JSON") &&
    [[ "$VERSION" =~ ^[0-9]+([.][0-9]+)+$ ]] &&
    [ "$DEB_MATCH_COUNT" -eq 1 ] &&
    [ "$DEB_URL" = "$EXPECTED_DEB_URL" ] &&
    [[ "$DEB_SHA256" =~ ^[0-9a-f]{64}$ ]]; then
    DEB_METADATA_READY=1
  fi
fi

rm -f "$RELEASE_JSON"

if [ "$DEB_METADATA_READY" -eq 1 ]; then
  printf 'Tag: %s\nAsset: %s\nSHA-256: %s\nURL: %s\n' "$TAG" "$DEB_ASSET" "$DEB_SHA256" "$DEB_URL"
else
  echo "Release metadata validation failed; do not continue with this download."
  false
fi
Tag: v1.12.7 Asset: obsidian_1.12.7_amd64.deb SHA-256: 3644e3ef19bcd23db4d17f7c73311b5245429391a2a48b361da93375f59712b0 URL: https://github.com/obsidianmd/obsidian-releases/releases/download/v1.12.7/obsidian_1.12.7_amd64.deb
The guard requires a dotted numeric release version, exactly one matching asset, the expected official URL, and a 64-character lowercase hexadecimal digest. The version and checksum will change with future releases. Do not continue unless the four validated values print.
Create a small cache directory, download the package, and verify its digest and embedded package fields before installation.
DEB_PACKAGE_READY=0
DEB_CACHE="${XDG_CACHE_HOME:-$HOME/.cache}/obsidian-deb"
DEB_FILE=

if [ "${DEB_METADATA_READY:-0}" -eq 1 ]; then
  install -d "$DEB_CACHE"
  DEB_FILE=$(mktemp "$DEB_CACHE/obsidian.XXXXXX.deb") || DEB_FILE=
  if [ -n "$DEB_FILE" ] &&
    curl -fL --progress-bar "$DEB_URL" -o "$DEB_FILE" &&
    printf '%s  %s\n' "$DEB_SHA256" "$DEB_FILE" | sha256sum --check -; then
    PACKAGE_NAME=$(dpkg-deb -f "$DEB_FILE" Package)
    PACKAGE_VERSION=$(dpkg-deb -f "$DEB_FILE" Version)
    PACKAGE_ARCH=$(dpkg-deb -f "$DEB_FILE" Architecture)

    if [ "$PACKAGE_NAME" = "obsidian" ] && [ "$PACKAGE_VERSION" = "$VERSION" ] && [ "$PACKAGE_ARCH" = "amd64" ]; then
      DEB_PACKAGE_READY=1
      dpkg-deb -f "$DEB_FILE" Package Version Architecture
    fi
  fi
fi

if [ "$DEB_PACKAGE_READY" -ne 1 ]; then
  if [ -n "$DEB_FILE" ]; then rm -f -- "$DEB_FILE"; fi
  echo "Package verification failed; Obsidian was not installed."
  false
fi
/home/linuxcapable/.cache/obsidian-deb/obsidian.A1b2C3.deb: OK Package: obsidian Version: 1.12.7 Architecture: amd64
The random suffix in the secure temporary package filename changes on each run.
Before the first DEB installation, preserve Ubuntu’s AppArmor baseline because the upstream maintainer script replaces that path on Ubuntu 24.04 and 26.04. This also preserves a locally modified distro conffile. Ubuntu 22.04 records that no baseline file exists.
DEB_STATE_DIR="$HOME/.local/share/obsidian-deb"
PROFILE_PATH=/etc/apparmor.d/obsidian
PROFILE_BACKUP="$DEB_STATE_DIR/ubuntu-obsidian.profile"
PROFILE_DIGEST="$DEB_STATE_DIR/ubuntu-obsidian.profile.sha256"
PROFILE_STATUS="$DEB_STATE_DIR/ubuntu-obsidian.profile.status"
PROFILE_BACKUP_READY=0
PROFILE_RECORD_STARTED=0
DEB_STATE_PATH_READY=0
if [ -L "$DEB_STATE_DIR" ] || { [ -e "$DEB_STATE_DIR" ] && [ ! -d "$DEB_STATE_DIR" ]; }; then
  echo "Refusing a nonregular DEB state path: $DEB_STATE_DIR"
elif install -d "$DEB_STATE_DIR"; then
  DEB_STATE_PATH_READY=1
fi
UBUNTU_VERSION_ID=$( . /etc/os-release && printf '%s' "$VERSION_ID" ) || UBUNTU_VERSION_ID=

if [ "$DEB_STATE_PATH_READY" -ne 1 ]; then
  echo "The DEB state directory is not ready."
  false
elif [ "${DEB_PACKAGE_READY:-0}" -ne 1 ]; then
  echo "The verified DEB package is not ready, so no baseline was recorded."
  false
elif dpkg-query -W -f='${Status}\n' obsidian 2>/dev/null | grep -qx 'install ok installed'; then
  echo "Obsidian is already installed; use the updater instead of replacing the saved baseline."
  false
elif [ -e "$PROFILE_BACKUP" ] || [ -L "$PROFILE_BACKUP" ] ||
  [ -e "$PROFILE_DIGEST" ] || [ -L "$PROFILE_DIGEST" ] ||
  [ -e "$PROFILE_STATUS" ] || [ -L "$PROFILE_STATUS" ]; then
  SAVED_BASELINE_READY=0
  if [ -f "$PROFILE_STATUS" ] && [ ! -L "$PROFILE_STATUS" ]; then
    SAVED_BASELINE=$(cat "$PROFILE_STATUS")
    case "$UBUNTU_VERSION_ID:$SAVED_BASELINE" in
      22.04:absent)
        if sudo grep -Fqx 'obsidian (unconfined)' /sys/kernel/security/apparmor/profiles; then
          PROFILE_LOADED_RC=0
        else
          PROFILE_LOADED_RC=$?
        fi
        if [ ! -e "$PROFILE_BACKUP" ] && [ ! -L "$PROFILE_BACKUP" ] &&
          [ ! -e "$PROFILE_DIGEST" ] && [ ! -L "$PROFILE_DIGEST" ] &&
          [ ! -e "$PROFILE_PATH" ] && [ ! -L "$PROFILE_PATH" ] &&
          [ "$PROFILE_LOADED_RC" -eq 1 ]; then
          SAVED_BASELINE_READY=1
        fi
        ;;
      24.04:present|26.04:present)
        if [ -f "$PROFILE_BACKUP" ] && [ ! -L "$PROFILE_BACKUP" ] &&
          [ -f "$PROFILE_DIGEST" ] && [ ! -L "$PROFILE_DIGEST" ] &&
          grep -Eq '^[0-9a-f]{64}$' "$PROFILE_DIGEST" &&
          printf '%s  %s\n' "$(cat "$PROFILE_DIGEST")" "$PROFILE_BACKUP" | sha256sum --check --status - &&
          [ -f "$PROFILE_PATH" ] && [ ! -L "$PROFILE_PATH" ] &&
          dpkg-query -S "$PROFILE_PATH" | grep -Eq '^apparmor(:[^:]+)?: ' &&
          cmp -s "$PROFILE_BACKUP" "$PROFILE_PATH"; then
          SAVED_BASELINE_READY=1
        fi
        ;;
    esac
  fi
  if [ "$SAVED_BASELINE_READY" -eq 1 ]; then
    PROFILE_BACKUP_READY=1
    echo "Reusing the validated AppArmor baseline saved by the previous attempt."
  else
    echo "An existing DEB baseline record was preserved; review it before reinstalling."
    false
  fi
else
  PROFILE_RECORD_STARTED=1
  PROFILE_STATUS_TEMP=$(mktemp "$DEB_STATE_DIR/.ubuntu-obsidian.status.XXXXXX") || PROFILE_STATUS_TEMP=
  case "$UBUNTU_VERSION_ID" in
    22.04)
      if sudo grep -Fqx 'obsidian (unconfined)' /sys/kernel/security/apparmor/profiles; then
        PROFILE_LOADED_RC=0
      else
        PROFILE_LOADED_RC=$?
      fi
      if [ -e "$PROFILE_PATH" ] || [ -L "$PROFILE_PATH" ] ||
        [ "$PROFILE_LOADED_RC" -ne 1 ] || [ -z "$PROFILE_STATUS_TEMP" ]; then
        echo "The Ubuntu 22.04 AppArmor baseline is not in the expected absent state."
      elif printf '%s\n' absent > "$PROFILE_STATUS_TEMP" && mv -fT -- "$PROFILE_STATUS_TEMP" "$PROFILE_STATUS"; then
        PROFILE_BACKUP_READY=1
      fi
      ;;
    24.04|26.04)
      PROFILE_BACKUP_TEMP=$(mktemp "$DEB_STATE_DIR/.ubuntu-obsidian.profile.XXXXXX") || PROFILE_BACKUP_TEMP=
      PROFILE_DIGEST_TEMP=$(mktemp "$DEB_STATE_DIR/.ubuntu-obsidian.sha256.XXXXXX") || PROFILE_DIGEST_TEMP=
      if [ -L "$PROFILE_PATH" ] || [ ! -f "$PROFILE_PATH" ] ||
        ! dpkg-query -S "$PROFILE_PATH" | grep -Eq '^apparmor(:[^:]+)?: ' ||
        [ -z "$PROFILE_STATUS_TEMP" ] || [ -z "$PROFILE_BACKUP_TEMP" ] || [ -z "$PROFILE_DIGEST_TEMP" ]; then
        echo "The Ubuntu AppArmor baseline could not be safely identified."
      elif install -m 0600 "$PROFILE_PATH" "$PROFILE_BACKUP_TEMP" &&
        sha256sum "$PROFILE_BACKUP_TEMP" | awk '{print $1}' > "$PROFILE_DIGEST_TEMP" &&
        printf '%s\n' present > "$PROFILE_STATUS_TEMP" &&
        mv -fT -- "$PROFILE_BACKUP_TEMP" "$PROFILE_BACKUP" &&
        mv -fT -- "$PROFILE_DIGEST_TEMP" "$PROFILE_DIGEST" &&
        mv -fT -- "$PROFILE_STATUS_TEMP" "$PROFILE_STATUS"; then
        PROFILE_BACKUP_READY=1
      fi
      ;;
    *)
      echo "This release is outside the tested Ubuntu scope: $UBUNTU_VERSION_ID"
      ;;
  esac
fi

if [ "$PROFILE_BACKUP_READY" -eq 1 ]; then
  printf 'Saved AppArmor baseline: %s\n' "$(cat "$PROFILE_STATUS")"
else
  for temporary_path in "${PROFILE_STATUS_TEMP:-}" "${PROFILE_BACKUP_TEMP:-}" "${PROFILE_DIGEST_TEMP:-}"; do
    if [ -n "$temporary_path" ]; then rm -f "$temporary_path"; fi
  done
  if [ "$PROFILE_RECORD_STARTED" -eq 1 ]; then
    rm -f -- "$PROFILE_BACKUP" "$PROFILE_DIGEST" "$PROFILE_STATUS"
  fi
  echo "AppArmor baseline capture failed; Obsidian was not installed."
  false
fi
Ubuntu 22.04: Saved AppArmor baseline: absent Ubuntu 24.04 or 26.04: Saved AppArmor baseline: present
Install the verified local package with APT, which resolves dependencies such as libxss1 that a raw dpkg -i command can leave unresolved.
if [ "${DEB_PACKAGE_READY:-0}" -eq 1 ] && [ "${PROFILE_BACKUP_READY:-0}" -eq 1 ]; then
  if sudo apt install "$DEB_FILE"; then
    rm -f -- "$DEB_FILE"
  else
    echo "APT did not install the verified package; the download and baseline record were retained."
    false
  fi
else
  echo "Refusing to install without both package verification and an AppArmor baseline record."
  false
fi
Verify the installed package version after APT finishes.
dpkg -s obsidian | grep -E '^(Package|Version):'Package: obsidian Version: 1.12.7
Check the installed command path too. On Ubuntu 22.04, 24.04, and 26.04, the package also created the application-menu entry automatically.
command -v obsidian/usr/bin/obsidian
Validate the desktop file first. The upstream file currently produces a nonfatal warning because its Comment and Name values are both Obsidian; the validator still exits successfully.
desktop-file-validate /usr/share/applications/obsidian.desktop/usr/share/applications/obsidian.desktop: warning: value "Obsidian" for key "Comment" in group "Desktop Entry" looks the same as that of key "Name"
Then confirm the desktop entry’s launch and icon fields.
grep -E '^(Exec|Icon)=' /usr/share/applications/obsidian.desktopExec=/opt/Obsidian/obsidian %U Icon=obsidian
Check the release-specific AppArmor result after installation. Ubuntu 22.04 should have no Obsidian profile file, while Ubuntu 24.04 and 26.04 should expose both the attachment and its loaded state.
UBUNTU_VERSION_ID=$( . /etc/os-release && printf '%s' "$VERSION_ID" ) || UBUNTU_VERSION_ID=

case "$UBUNTU_VERSION_ID" in
  22.04)
    if [ -e /etc/apparmor.d/obsidian ]; then
      echo "Unexpected Obsidian AppArmor profile on Ubuntu 22.04."
      false
    else
      echo "Obsidian AppArmor profile skipped on Ubuntu 22.04"
    fi
    ;;
  24.04|26.04)
    grep -F 'profile obsidian "/opt/Obsidian/obsidian"' /etc/apparmor.d/obsidian
    sudo grep -F 'obsidian (unconfined)' /sys/kernel/security/apparmor/profiles
    ;;
  *)
    echo "This release is outside the tested Ubuntu scope: $UBUNTU_VERSION_ID"
    false
    ;;
esac
Ubuntu 22.04:
Obsidian AppArmor profile skipped on Ubuntu 22.04
Ubuntu 24.04 or 26.04:
profile obsidian "/opt/Obsidian/obsidian" flags=(unconfined) {
obsidian (unconfined)
Ubuntu 24.04 and 26.04 load this unconfined per-app profile automatically. It is a narrow user-namespace allowance that lets Electron keep Chromium’s sandbox enabled, not a general AppArmor confinement boundary. On Ubuntu 22.04, the installer reports that Jammy’s AppArmor does not support the bundled profile and skips creating the source file.
Install Obsidian with Snap on Ubuntu 24.04 or 22.04
The Snapcraft package is published under the obsidianmd account and uses classic confinement. Classic confinement gives the app broad host access rather than a Flatpak-style sandbox boundary, which lets it open vaults throughout your normal home directory.
Use this method only on Ubuntu 24.04 or 22.04 while revision 62 remains current. Obsidian 1.12.7 installs on Ubuntu 26.04 but exits before opening its window because the Snap launcher is incompatible with that release’s core utilities. The tracked Snap launcher thread includes confirmation from both Obsidian and Canonical contributors. Choose Flatpak or the official .deb on Ubuntu 26.04 instead.
Do not treat
/snap/obsidian/current/obsidian --no-sandboxas a Snap fix. That command bypasses the Snap launcher and its configured environment, so it no longer tests or runs the package through its intended entry point.
On Ubuntu 24.04 or 22.04, Snapcraft installs Obsidian directly from the store, so you do not need to save a separate installer file.
Most Ubuntu desktop installs already include snapd. If the snap command is missing on this system, install it first:
sudo apt install snapd -yThe -y flag auto-confirms the APT prompt. Once snap is available, install Obsidian from the Snap Store:
sudo snap install obsidian --classicVerify that Snap installed the expected channel, revision, and publisher.
snap list obsidianName Version Rev Tracking Publisher Notes obsidian 1.12.7 62 latest/stable obsidianmd classic
Install Obsidian on Ubuntu with AppImage
The AppImage is the portable upstream build from Obsidian’s release channel. It fits best when you want to stay closest to Obsidian’s Linux docs without depending on Snap or Flatpak.
Install curl, jq, desktop-file-utils, and the AppImage FUSE compatibility package that matches your Ubuntu release first. The release lookup uses jq to select the exact asset and its published digest, while desktop-file-validate checks the local launcher.
Ubuntu 26.04 and 24.04:
sudo apt install curl jq desktop-file-utils libfuse2t64 -yUbuntu 22.04:
sudo apt install curl jq desktop-file-utils libfuse2 -yUbuntu renamed the compatibility package from
libfuse2tolibfuse2t64starting in 24.04. The Obsidian AppImage still needslibfuse.so.2, so the package name changes but the requirement does not.
If APT cannot locate the release-specific FUSE package on a customized Ubuntu installation, enable the Ubuntu Universe repository, refresh APT metadata, and repeat the prerequisite command.
This workflow uses Obsidian’s x86_64 asset. Confirm amd64 before continuing; arm64 readers need the separate ARM64 AppImage linked from Obsidian’s download page rather than these commands.
dpkg --print-architectureamd64
Resolve the current x86_64 AppImage URL and GitHub-published digest. Keep the next commands in the same terminal session because they reuse these variables.
APPIMAGE_METADATA_READY=0
RELEASE_JSON=$(mktemp)

if [ "$(dpkg --print-architecture)" = "amd64" ] &&
  curl -fsSL https://api.github.com/repos/obsidianmd/obsidian-releases/releases/latest -o "$RELEASE_JSON" &&
  TAG=$(jq -er '.tag_name' "$RELEASE_JSON"); then
  VERSION=${TAG#v}
  APPIMAGE_ASSET="Obsidian-$VERSION.AppImage"
  EXPECTED_APPIMAGE_URL="https://github.com/obsidianmd/obsidian-releases/releases/download/$TAG/$APPIMAGE_ASSET"

  if APPIMAGE_MATCH_COUNT=$(jq -er --arg asset "$APPIMAGE_ASSET" '[.assets[] | select(.name == $asset)] | length' "$RELEASE_JSON") &&
    APPIMAGE_URL=$(jq -er --arg asset "$APPIMAGE_ASSET" '.assets[] | select(.name == $asset) | .browser_download_url' "$RELEASE_JSON") &&
    APPIMAGE_SHA256=$(jq -er --arg asset "$APPIMAGE_ASSET" '.assets[] | select(.name == $asset) | .digest | sub("^sha256:"; "")' "$RELEASE_JSON") &&
    [[ "$VERSION" =~ ^[0-9]+([.][0-9]+)+$ ]] &&
    [ "$APPIMAGE_MATCH_COUNT" -eq 1 ] &&
    [ "$APPIMAGE_URL" = "$EXPECTED_APPIMAGE_URL" ] &&
    [[ "$APPIMAGE_SHA256" =~ ^[0-9a-f]{64}$ ]]; then
    APPIMAGE_METADATA_READY=1
  fi
fi

rm -f "$RELEASE_JSON"

if [ "$APPIMAGE_METADATA_READY" -eq 1 ]; then
  printf 'Tag: %s\nAsset: %s\nSHA-256: %s\nURL: %s\n' "$TAG" "$APPIMAGE_ASSET" "$APPIMAGE_SHA256" "$APPIMAGE_URL"
else
  echo "Release metadata validation failed; do not continue with this download."
  false
fi
Tag: v1.12.7 Asset: Obsidian-1.12.7.AppImage SHA-256: f6d8b96fe685a8632c819cc093a248ace0f6bab410f44a6c929a2611b1ebb17c URL: https://github.com/obsidianmd/obsidian-releases/releases/download/v1.12.7/Obsidian-1.12.7.AppImage
The guard requires a dotted numeric release version, exactly one matching x86_64 asset, the expected official URL, and a 64-character lowercase hexadecimal digest. The version and checksum will change with future releases. For more detail on the download flags, see how to use the curl command in Linux.
Create the local application and state directories, download the current AppImage, and verify it before making the file executable.
APPIMAGE_FILE_READY=0
APPIMAGE_DIR="$HOME/Applications"
APPIMAGE_PATH="$APPIMAGE_DIR/Obsidian.AppImage"
STATE_DIR="$HOME/.local/share/obsidian-appimage"
VERSION_FILE="$STATE_DIR/version"
APPIMAGE_TEMP=
VERSION_TEMP=
APPIMAGE_DIRS_READY=0

if [ -L "$APPIMAGE_DIR" ] || { [ -e "$APPIMAGE_DIR" ] && [ ! -d "$APPIMAGE_DIR" ]; } ||
  [ -L "$STATE_DIR" ] || { [ -e "$STATE_DIR" ] && [ ! -d "$STATE_DIR" ]; }; then
  echo "Refusing a nonregular AppImage application or state directory."
elif install -d "$APPIMAGE_DIR" "$STATE_DIR"; then
  APPIMAGE_DIRS_READY=1
fi

if [ "$APPIMAGE_DIRS_READY" -ne 1 ]; then
  echo "The AppImage directories are not ready."
  false
elif [ "${APPIMAGE_METADATA_READY:-0}" -ne 1 ]; then
  echo "Release metadata is not ready; no AppImage was downloaded."
  false
elif [ -e "$APPIMAGE_PATH" ] || [ -L "$APPIMAGE_PATH" ]; then
  echo "Refusing to overwrite an existing AppImage: $APPIMAGE_PATH"
  echo "Use the managed updater after reviewing the existing file."
  false
elif [ -e "$VERSION_FILE" ] || [ -L "$VERSION_FILE" ]; then
  echo "Refusing to overwrite existing AppImage version state: $VERSION_FILE"
  false
elif ! APPIMAGE_TEMP=$(mktemp "$APPIMAGE_DIR/.Obsidian.AppImage.new.XXXXXX") ||
  ! VERSION_TEMP=$(mktemp "$STATE_DIR/.version.new.XXXXXX"); then
  rm -f "$APPIMAGE_TEMP" "$VERSION_TEMP"
  echo "Secure AppImage staging failed; the live path was not changed."
  false
elif
  curl -fL --progress-bar "$APPIMAGE_URL" -o "$APPIMAGE_TEMP" &&
  printf '%s  %s\n' "$APPIMAGE_SHA256" "$APPIMAGE_TEMP" | sha256sum --check - &&
  chmod u+x "$APPIMAGE_TEMP" &&
  printf '%s\n' "$VERSION" > "$VERSION_TEMP" &&
  mv -fT -- "$VERSION_TEMP" "$VERSION_FILE" &&
  mv -fT -- "$APPIMAGE_TEMP" "$APPIMAGE_PATH"; then
  APPIMAGE_FILE_READY=1
else
  rm -f "$APPIMAGE_TEMP" "$VERSION_TEMP"
  if [ ! -e "$APPIMAGE_PATH" ]; then
    rm -f "$VERSION_FILE"
  fi
  echo "AppImage verification failed; the downloaded file was not promoted."
  false
fi
/home/linuxcapable/Applications/.Obsidian.AppImage.new.A1b2C3: OK
The random suffix in the temporary filename changes on each run.
Confirm that the verified AppImage was promoted with its executable bit and matching version state.
if [ "${APPIMAGE_FILE_READY:-0}" -eq 1 ] &&
  [ -f "$HOME/Applications/Obsidian.AppImage" ] &&
  [ ! -L "$HOME/Applications/Obsidian.AppImage" ] &&
  [ -x "$HOME/Applications/Obsidian.AppImage" ] &&
  [ "$(cat "$HOME/.local/share/obsidian-appimage/version")" = "$VERSION" ]; then
  echo "Verified AppImage is executable"
else
  echo "The verified AppImage is not ready."
  false
fi
Verified AppImage is executable
Ubuntu 24.04 and 26.04: add a profile attached only to this AppImage path before creating the launcher. Ubuntu restricts unprivileged user namespaces on these releases; the narrow userns rule lets Electron create its Chromium sandbox without disabling that policy system-wide.
APPIMAGE_PATH="$HOME/Applications/Obsidian.AppImage"
PROFILE_NAME=obsidian-appimage
PROFILE_FILE=/etc/apparmor.d/obsidian-appimage
PROFILE_MARKER='# Managed by the Obsidian AppImage workflow'
PROFILE_STAGE=$(mktemp) || PROFILE_STAGE=
PROFILE_ROOT_STAGE=
PROFILE_STAGE_READY=0

if [ -n "$PROFILE_STAGE" ] &&
  { printf '%s\n' "$PROFILE_MARKER"; printf 'profile %s "%s" flags=(unconfined) {\n  userns,\n}\n' "$PROFILE_NAME" "$APPIMAGE_PATH"; } > "$PROFILE_STAGE"; then
  PROFILE_STAGE_READY=1
fi

if [ "${APPIMAGE_FILE_READY:-0}" -ne 1 ]; then
  rm -f "$PROFILE_STAGE"
  echo "The verified AppImage is not ready, so no profile was changed."
  false
elif [ "$PROFILE_STAGE_READY" -ne 1 ]; then
  rm -f "$PROFILE_STAGE"
  echo "The staged AppArmor profile could not be created."
  false
elif [ -L "$PROFILE_FILE" ]; then
  rm -f "$PROFILE_STAGE"
  echo "Refusing to replace a symbolic-link profile: $PROFILE_FILE"
  false
elif [ -e "$PROFILE_FILE" ] && { ! sudo test -f "$PROFILE_FILE" || ! sudo cmp -s "$PROFILE_STAGE" "$PROFILE_FILE"; }; then
  rm -f "$PROFILE_STAGE"
  echo "Refusing to overwrite an existing profile that differs from this account's workflow: $PROFILE_FILE"
  false
elif ! sudo apparmor_parser -Q -T -K "$PROFILE_STAGE"; then
  rm -f "$PROFILE_STAGE"
  echo "The staged Obsidian AppImage profile failed syntax validation."
  false
else
  PROFILE_CREATED=0
  PROFILE_INSTALL_READY=1
  if [ ! -e "$PROFILE_FILE" ]; then
    PROFILE_ROOT_STAGE=$(sudo mktemp /etc/apparmor.d/.obsidian-appimage.XXXXXX) || PROFILE_ROOT_STAGE=
    if [ -n "$PROFILE_ROOT_STAGE" ] &&
      sudo install -o root -g root -m 0644 "$PROFILE_STAGE" "$PROFILE_ROOT_STAGE" &&
      sudo mv -fT -- "$PROFILE_ROOT_STAGE" "$PROFILE_FILE"; then
      PROFILE_CREATED=1
      PROFILE_ROOT_STAGE=
    else
      if [ -n "$PROFILE_ROOT_STAGE" ]; then sudo rm -f -- "$PROFILE_ROOT_STAGE"; fi
      PROFILE_INSTALL_READY=0
    fi
  fi

  if [ "$PROFILE_INSTALL_READY" -eq 1 ] &&
    sudo apparmor_parser -r "$PROFILE_FILE" &&
    sudo grep -Fqx "$PROFILE_NAME (unconfined)" /sys/kernel/security/apparmor/profiles; then
    rm -f "$PROFILE_STAGE"
  else
    PROFILE_CLEANUP_PROVEN=0
    if [ "$PROFILE_CREATED" -eq 1 ] &&
      ! sudo test -L "$PROFILE_FILE" &&
      sudo test -f "$PROFILE_FILE" &&
      sudo cmp -s "$PROFILE_STAGE" "$PROFILE_FILE"; then
      if sudo test -r /sys/kernel/security/apparmor/profiles; then
        if sudo grep -Fqx "$PROFILE_NAME (unconfined)" /sys/kernel/security/apparmor/profiles; then
          PROFILE_LOADED_RC=0
        else
          PROFILE_LOADED_RC=$?
        fi

        if [ "$PROFILE_LOADED_RC" -eq 0 ]; then
          if sudo apparmor_parser -R "$PROFILE_FILE" &&
            { if sudo grep -Fqx "$PROFILE_NAME (unconfined)" /sys/kernel/security/apparmor/profiles; then
                PROFILE_AFTER_UNLOAD_RC=0
              else
                PROFILE_AFTER_UNLOAD_RC=$?
              fi
              [ "$PROFILE_AFTER_UNLOAD_RC" -eq 1 ]; }; then
              PROFILE_CLEANUP_PROVEN=1
          fi
        elif [ "$PROFILE_LOADED_RC" -eq 1 ]; then
          PROFILE_CLEANUP_PROVEN=1
        fi
      fi

      if [ "$PROFILE_CLEANUP_PROVEN" -eq 1 ]; then
        sudo rm -f -- "$PROFILE_FILE"
      else
        echo "The new profile source was retained because an unloaded state could not be proved: $PROFILE_FILE"
      fi
    fi
    rm -f "$PROFILE_STAGE"
    echo "The Obsidian AppImage profile was not loaded."
    false
  fi
fi
obsidian-appimage (unconfined)
This
unconfinedprofile is a per-app user-namespace allowance, not a general AppArmor confinement boundary. Its fixed system filename supports one AppImage account at a time, and the exact-content guard refuses a different user’s attachment instead of overwriting it. Remove the recognized managed profile before moving the AppImage or assigning this workflow to another account. Ubuntu 22.04 does not enable the same restriction and should skip this profile step.
The AppImage ships an icon that you can extract for a local desktop launcher. Obsidian’s official Linux installation help shows --no-sandbox, but the release-specific profile above provides a safer Ubuntu 24.04 and 26.04 path that keeps Electron’s sandbox enabled. The icon stays in the AppImage state directory and the launcher uses its absolute path, which avoids managing an icon-theme cache.
Extract the upstream icon first and copy it into the local AppImage state directory.
ICON_READY=0
START_DIR=$PWD
STATE_DIR="$HOME/.local/share/obsidian-appimage"
ICON_PATH="$STATE_DIR/obsidian.png"
EXTRACT_DIR=
ICON_STAGE=

if [ "${APPIMAGE_FILE_READY:-0}" -ne 1 ]; then
  echo "The verified AppImage is not ready."
elif [ -e "$ICON_PATH" ] || [ -L "$ICON_PATH" ]; then
  echo "Refusing to overwrite existing AppImage icon state: $ICON_PATH"
elif EXTRACT_DIR=$(mktemp -d "$STATE_DIR/.extract.XXXXXX") &&
  ICON_STAGE=$(mktemp "$STATE_DIR/.obsidian.XXXXXX") &&
  install -d "$HOME/.local/share/applications" &&
  cd "$EXTRACT_DIR" &&
  "$HOME/Applications/Obsidian.AppImage" --appimage-extract >/dev/null &&
  install -m 0644 squashfs-root/obsidian.png "$ICON_STAGE" &&
  mv -fT -- "$ICON_STAGE" "$ICON_PATH"; then
  ICON_READY=1
fi

cd "$START_DIR"
if [ -n "$EXTRACT_DIR" ]; then rm -rf -- "$EXTRACT_DIR"; fi
if [ -n "$ICON_STAGE" ]; then rm -f -- "$ICON_STAGE"; fi

if [ "$ICON_READY" -ne 1 ]; then
  echo "AppImage icon extraction failed."
  false
fi
Write the local launcher after the icon is in place.
DESKTOP_FILE="$HOME/.local/share/applications/obsidian.desktop"
DESKTOP_STAGE=
DESKTOP_MARKER='# Managed by the Obsidian AppImage workflow'
EXPECTED_EXEC="Exec=$HOME/Applications/Obsidian.AppImage %U"
EXPECTED_ICON="Icon=$HOME/.local/share/obsidian-appimage/obsidian.png"
EXPECTED_WM='StartupWMClass=obsidian'
DESKTOP_OWNED=0

if [ -f "$DESKTOP_FILE" ] && [ ! -L "$DESKTOP_FILE" ]; then
  if grep -Fqx "$DESKTOP_MARKER" "$DESKTOP_FILE" ||
    { grep -Fqx "$EXPECTED_EXEC" "$DESKTOP_FILE" && grep -Fqx "$EXPECTED_ICON" "$DESKTOP_FILE" && grep -Fqx "$EXPECTED_WM" "$DESKTOP_FILE"; }; then
    DESKTOP_OWNED=1
  fi
fi

if [ "${ICON_READY:-0}" -ne 1 ]; then
  echo "The icon is not ready, so no desktop launcher was changed."
  false
elif [ -L "$DESKTOP_FILE" ]; then
  echo "Refusing to replace a symbolic-link desktop entry: $DESKTOP_FILE"
  false
elif [ -e "$DESKTOP_FILE" ] && [ "$DESKTOP_OWNED" -ne 1 ]; then
  echo "Refusing to overwrite an unrecognized desktop entry: $DESKTOP_FILE"
  false
elif ! DESKTOP_STAGE=$(mktemp "$HOME/.local/share/applications/.obsidian.new.XXXXXX.desktop"); then
  echo "Could not create the staged desktop entry."
  false
elif
  printf '%s\n' "$DESKTOP_MARKER" "[Desktop Entry]" "Name=Obsidian" "$EXPECTED_EXEC" "$EXPECTED_ICON" "Type=Application" "Categories=Office;" "$EXPECTED_WM" "MimeType=x-scheme-handler/obsidian;" "Terminal=false" > "$DESKTOP_STAGE" &&
  desktop-file-validate "$DESKTOP_STAGE" &&
  [ -s "$HOME/.local/share/obsidian-appimage/obsidian.png" ] &&
  mv -fT -- "$DESKTOP_STAGE" "$DESKTOP_FILE"; then
  grep -E '^(Exec|Icon)=' "$DESKTOP_FILE"
  echo "Icon file is ready"
else
  if [ -n "$DESKTOP_STAGE" ]; then rm -f -- "$DESKTOP_STAGE"; fi
  echo "Desktop launcher validation failed."
  false
fi
Exec=/home/linuxcapable/Applications/Obsidian.AppImage %U Icon=/home/linuxcapable/.local/share/obsidian-appimage/obsidian.png Icon file is ready
That Exec= line confirms the local launcher starts the AppImage without disabling Chromium’s sandbox.
Do not disable Ubuntu’s AppArmor service or
kernel.apparmor_restrict_unprivileged_usernsglobally to make one AppImage work. The exact-path profile preserves the system policy for every other application.
The chmod u+x step adds execute permission to the AppImage, while install -Dm644 copies the icon and creates its parent directory in one step. No output from desktop-file-validate means the launcher passed validation. For more permission-change examples, see how to use the chmod command in Linux.
Start Obsidian on Ubuntu
Obsidian is still a desktop GUI application even when you install it from a terminal. Use the launcher that matches your packaging method, or open the app from Ubuntu’s application menu after installation.
Start Obsidian from the Ubuntu terminal
Use the launcher command that matches your install method.
Snap (Ubuntu 24.04 or 22.04 only):
snap run obsidianFlatpak:
flatpak run md.obsidian.ObsidianOfficial DEB:
obsidianAppImage:
$HOME/Applications/Obsidian.AppImageOn Ubuntu 24.04 and 26.04, this command depends on the exact-path AppArmor profile created above. Ubuntu 22.04 can launch the same AppImage directly without that profile because its default user-namespace policy differs.
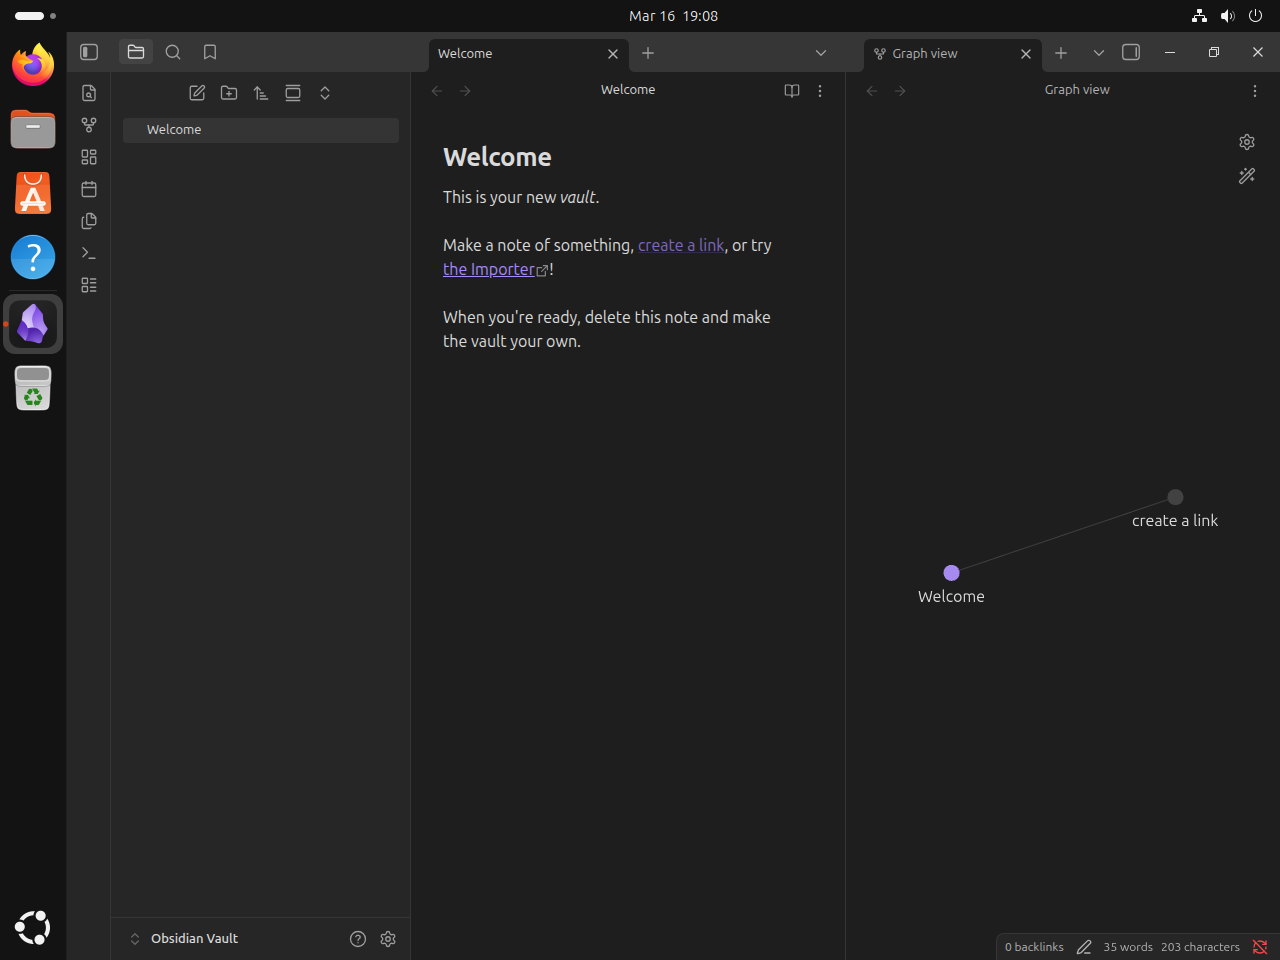
On first launch, each working method opens the same welcome window. Create a new vault there, or point Obsidian at an existing Markdown folder you already keep elsewhere on the system. On Ubuntu 26.04, this visible launch check is also what distinguishes the working Flatpak, DEB, and AppImage methods from the currently broken Snap launcher.
Start Obsidian from the Ubuntu app menu
Flatpak, the official .deb, and Snap create application-menu entries automatically. The AppImage workflow writes ~/.local/share/applications/obsidian.desktop, so after that step you can search for Obsidian in Ubuntu’s app menu. Remember that the current Snap entry does not open on Ubuntu 26.04.
With a graphical session active, AppImage users can test the exact desktop entry from a terminal. A visible Obsidian window confirms that both the launcher and its absolute icon path are usable.
gtk-launch obsidianUpdate or remove Obsidian on Ubuntu
Obsidian can apply many application updates after a restart, but periodic installer updates replace the Electron framework bundled with the package. Snap and Flatpak manage that complete package through their stores. The direct GitHub methods need a fresh verified download or the manual updater scripts below when Obsidian’s release notes require a newer installer version.
Update Obsidian Snap on Ubuntu 24.04 or 22.04
Refresh the working Snap build with Snap’s own package manager on Ubuntu 24.04 or 22.04. A refresh is not currently a repair for the Ubuntu 26.04 launcher incompatibility unless Snapcraft publishes a fixed revision.
sudo snap refresh obsidianUpdate Obsidian Flatpak on Ubuntu
Refresh the Flathub build with Flatpak’s update command.
sudo flatpak update md.obsidian.ObsidianIf you use the Flathub build, leave Obsidian’s own automatic updates disabled inside the app. Public stable releases arrive through Flatpak itself, so running both update paths only creates duplicate prompts.
Create an Obsidian DEB update script on Ubuntu
The official Debian package is a direct download rather than a repository package. This updater compares the installed version with GitHub’s latest release, downloads only the exact amd64 asset, verifies its published SHA-256 digest and package identity, and then installs a newer version.
Avoid automating this with cron. A download can fail, a release can be withdrawn, or the package can change in a way you want to review first. Run the script manually so you can watch the output before it replaces the installed build.
This workflow saves the updater as /usr/local/bin/update-obsidian-deb.sh so you can later run update-obsidian-deb.sh from a normal shell. The sudo tee pattern writes the root-owned file because plain > redirection would not inherit sudo.
DEB_UPDATER=/usr/local/bin/update-obsidian-deb.sh
DEB_UPDATER_MARKER='# Managed by the Obsidian DEB updater workflow'

if sudo test -L "$DEB_UPDATER"; then
  echo "Refusing to replace a symbolic-link updater: $DEB_UPDATER"
  false
elif sudo test -e "$DEB_UPDATER" && {
  ! sudo test -f "$DEB_UPDATER" ||
  { ! sudo grep -Fqx "$DEB_UPDATER_MARKER" "$DEB_UPDATER" &&
    { ! sudo grep -Fqx 'LOG_DIR="$HOME/.local/share/obsidian-deb"' "$DEB_UPDATER" ||
      ! sudo grep -Fqx 'sudo apt-get install -y "$DEB_FILE"' "$DEB_UPDATER" ||
      ! sudo grep -Fq 'EXPECTED_DEB_URL="https://github.com/obsidianmd/obsidian-releases/releases/download/$LATEST_TAG/$DEB_ASSET"' "$DEB_UPDATER"; }; };
}; then
  echo "Refusing to overwrite an unrecognized updater: $DEB_UPDATER"
  false
else
  if sudo test -e "$DEB_UPDATER" && ! sudo grep -Fqx "$DEB_UPDATER_MARKER" "$DEB_UPDATER"; then
    echo "Adopting the exact legacy Obsidian DEB updater."
  fi
  DEB_UPDATER_STAGE=$(sudo mktemp /usr/local/bin/.update-obsidian-deb.sh.XXXXXX) || DEB_UPDATER_STAGE=
  if [ -z "$DEB_UPDATER_STAGE" ]; then
    echo "Could not create the staged updater."
    false
  else
    cat <<'EOF' | sudo tee "$DEB_UPDATER_STAGE" >/dev/null
#!/usr/bin/env bash
# Managed by the Obsidian DEB updater workflow
set -euo pipefail

if [ "$(id -u)" -eq 0 ]; then
  echo "Run this script as your regular user, not as root."
  exit 1
fi

for cmd in apt-get curl date dpkg dpkg-deb dpkg-query grep id install jq mktemp rm sha256sum sudo; do
  if ! command -v "$cmd" >/dev/null; then
    echo "Missing required command: $cmd"
    exit 1
  fi
done

if [ "$(dpkg --print-architecture)" != "amd64" ]; then
  echo "The official Obsidian deb updater supports amd64 only."
  exit 1
fi

if ! dpkg-query -W -f='${Status}\n' obsidian 2>/dev/null | grep -qx 'install ok installed'; then
  echo "The obsidian package is not installed."
  echo "Install the official Obsidian deb first, then rerun this script."
  exit 1
fi

LOG_DIR="$HOME/.local/share/obsidian-deb"
LOG_FILE="$LOG_DIR/update.log"
CACHE_DIR="${XDG_CACHE_HOME:-$HOME/.cache}/obsidian-deb"
install -d "$LOG_DIR" "$CACHE_DIR"

CURRENT_VERSION=$(dpkg-query -W -f='${Version}\n' obsidian)
RELEASE_JSON=$(mktemp)
DEB_FILE=""

cleanup() {
  rm -f "$RELEASE_JSON"
  if [ -n "$DEB_FILE" ]; then
    rm -f "$DEB_FILE"
  fi
}
trap cleanup EXIT

if ! curl -fsSL https://api.github.com/repos/obsidianmd/obsidian-releases/releases/latest -o "$RELEASE_JSON"; then
  echo "Could not download the latest Obsidian release metadata."
  exit 1
fi

LATEST_TAG=$(jq -er '.tag_name' "$RELEASE_JSON")
LATEST_VERSION=${LATEST_TAG#v}
DEB_ASSET="obsidian_${LATEST_VERSION}_amd64.deb"
EXPECTED_DEB_URL="https://github.com/obsidianmd/obsidian-releases/releases/download/$LATEST_TAG/$DEB_ASSET"
DEB_MATCH_COUNT=$(jq -er --arg asset "$DEB_ASSET" '[.assets[] | select(.name == $asset)] | length' "$RELEASE_JSON")
DEB_URL=$(jq -er --arg asset "$DEB_ASSET" '.assets[] | select(.name == $asset) | .browser_download_url' "$RELEASE_JSON")
DEB_SHA256=$(jq -er --arg asset "$DEB_ASSET" '.assets[] | select(.name == $asset) | .digest | sub("^sha256:"; "")' "$RELEASE_JSON")
if [[ ! "$LATEST_VERSION" =~ ^[0-9]+([.][0-9]+)+$ ]] ||
  [ "$DEB_MATCH_COUNT" -ne 1 ] || [ "$DEB_URL" != "$EXPECTED_DEB_URL" ] || [[ ! "$DEB_SHA256" =~ ^[0-9a-f]{64}$ ]]; then
  echo "Latest Debian asset metadata failed validation."
  exit 1
fi

echo "Checking the latest Obsidian release..."
echo "Current version: $CURRENT_VERSION"
echo "Latest version:  $LATEST_VERSION"

if dpkg --compare-versions "$LATEST_VERSION" le "$CURRENT_VERSION"; then
  echo "Already up to date."
  exit 0
fi

echo "Downloading $LATEST_VERSION..."
DEB_FILE=$(mktemp "$CACHE_DIR/obsidian.XXXXXX.deb")
curl -fL --progress-bar "$DEB_URL" -o "$DEB_FILE"
printf '%s  %s\n' "$DEB_SHA256" "$DEB_FILE" | sha256sum --check -

PACKAGE_NAME=$(dpkg-deb -f "$DEB_FILE" Package)
PACKAGE_VERSION=$(dpkg-deb -f "$DEB_FILE" Version)
PACKAGE_ARCH=$(dpkg-deb -f "$DEB_FILE" Architecture)

if [ "$PACKAGE_NAME" != "obsidian" ] || [ "$PACKAGE_VERSION" != "$LATEST_VERSION" ] || [ "$PACKAGE_ARCH" != "amd64" ]; then
  echo "Downloaded package metadata does not match the expected Obsidian release."
  exit 1
fi

echo "Installing $LATEST_VERSION..."
sudo apt-get install -y "$DEB_FILE"

printf '%s | Updated to %s\n' "$(date '+%Y-%m-%d %H:%M:%S')" "$LATEST_VERSION" >> "$LOG_FILE"
echo "Updated to $LATEST_VERSION."
EOF
    if sudo grep -Fqx "$DEB_UPDATER_MARKER" "$DEB_UPDATER_STAGE" &&
      sudo grep -Fqx 'echo "Updated to $LATEST_VERSION."' "$DEB_UPDATER_STAGE" &&
      sudo bash -n "$DEB_UPDATER_STAGE" &&
      sudo chown root:root "$DEB_UPDATER_STAGE" &&
      sudo chmod 0755 "$DEB_UPDATER_STAGE" &&
      sudo mv -fT -- "$DEB_UPDATER_STAGE" "$DEB_UPDATER"; then
      command -v update-obsidian-deb.sh
    else
      sudo rm -f -- "$DEB_UPDATER_STAGE"
      echo "Updater validation failed; the existing command was not replaced."
      false
    fi
  fi
fi
The script reads the installed version from dpkg, so it does not keep a separate version file. An exit trap removes temporary release metadata and package downloads, while ~/.local/share/obsidian-deb/update.log receives an entry only after a newer verified package installs.
The staged installer validates the script with bash -n, sets root ownership and executable permissions, and then replaces only a recognized managed updater.
sudo grep -Fqx '# Managed by the Obsidian DEB updater workflow' /usr/local/bin/update-obsidian-deb.sh
command -v update-obsidian-deb.sh
/usr/local/bin/update-obsidian-deb.sh
After that one-time setup, the only Debian-package updater command you need to remember is update-obsidian-deb.sh.
Run the updater by name whenever you want to check for a newer package.
update-obsidian-deb.shChecking the latest Obsidian release... Current version: 1.12.7 Latest version: 1.12.7 Already up to date.
When a newer package is available, the script verifies the replacement .deb before APT installs it, then appends a timestamped line to ~/.local/share/obsidian-deb/update.log.
Create an Obsidian AppImage update script on Ubuntu
The AppImage build also needs a reusable updater because the file lives in your home directory instead of under a package manager.
This script checks GitHub’s latest release, compares it with the stored version, verifies the x86_64 asset against GitHub’s published SHA-256 digest, and refreshes the local launcher and icon only after the replacement passes validation.
Avoid automating this with cron. A download can fail, a release can be withdrawn, or a desktop integration step can need your attention. Run the script manually so you can watch the output before it changes your local AppImage.
This workflow saves the updater as /usr/local/bin/update-obsidian-appimage.sh so you can later run update-obsidian-appimage.sh from a normal shell without remembering a longer path. The sudo tee pattern writes the root-owned file because plain > redirection would not inherit sudo.
APPIMAGE_UPDATER=/usr/local/bin/update-obsidian-appimage.sh
APPIMAGE_UPDATER_MARKER='# Managed by the Obsidian AppImage updater workflow'

if sudo test -L "$APPIMAGE_UPDATER"; then
  echo "Refusing to replace a symbolic-link updater: $APPIMAGE_UPDATER"
  false
elif sudo test -e "$APPIMAGE_UPDATER" && {
  ! sudo test -f "$APPIMAGE_UPDATER" ||
  { ! sudo grep -Fqx "$APPIMAGE_UPDATER_MARKER" "$APPIMAGE_UPDATER" &&
    { ! sudo grep -Fqx 'STATE_DIR="$HOME/.local/share/obsidian-appimage"' "$APPIMAGE_UPDATER" ||
      ! sudo grep -Fqx 'TEMP_APPIMAGE="$STATE_DIR/Obsidian.AppImage.new"' "$APPIMAGE_UPDATER" ||
      ! sudo grep -Fq 'EXPECTED_APPIMAGE_URL="https://github.com/obsidianmd/obsidian-releases/releases/download/$LATEST_TAG/$APPIMAGE_ASSET"' "$APPIMAGE_UPDATER"; }; };
}; then
  echo "Refusing to overwrite an unrecognized updater: $APPIMAGE_UPDATER"
  false
else
  if sudo test -e "$APPIMAGE_UPDATER" && ! sudo grep -Fqx "$APPIMAGE_UPDATER_MARKER" "$APPIMAGE_UPDATER"; then
    echo "Adopting the exact legacy Obsidian AppImage updater."
  fi
  APPIMAGE_UPDATER_STAGE=$(sudo mktemp /usr/local/bin/.update-obsidian-appimage.sh.XXXXXX) || APPIMAGE_UPDATER_STAGE=
  if [ -z "$APPIMAGE_UPDATER_STAGE" ]; then
    echo "Could not create the staged updater."
    false
  else
    cat <<'EOF' | sudo tee "$APPIMAGE_UPDATER_STAGE" >/dev/null
#!/usr/bin/env bash
# Managed by the Obsidian AppImage updater workflow
set -euo pipefail

APPIMAGE_DIR="$HOME/Applications"
APPIMAGE_PATH="$APPIMAGE_DIR/Obsidian.AppImage"
PROFILE_NAME=obsidian-appimage
PROFILE_FILE=/etc/apparmor.d/obsidian-appimage
STATE_DIR="$HOME/.local/share/obsidian-appimage"
VERSION_FILE="$STATE_DIR/version"
ICON_PATH="$STATE_DIR/obsidian.png"
DESKTOP_DIR="$HOME/.local/share/applications"
DESKTOP_FILE="$DESKTOP_DIR/obsidian.desktop"
DESKTOP_MARKER='# Managed by the Obsidian AppImage workflow'
EXPECTED_EXEC="Exec=$APPIMAGE_PATH %U"
EXPECTED_ICON="Icon=$ICON_PATH"
EXPECTED_WM='StartupWMClass=obsidian'
WORK_DIR=
LOG_FILE="$STATE_DIR/update.log"
TEMP_APPIMAGE=
ICON_STAGE=
DESKTOP_STAGE=
VERSION_STAGE=
ICON_BACKUP="$STATE_DIR/.obsidian.png.backup"
DESKTOP_BACKUP="$DESKTOP_DIR/.obsidian.desktop.backup"
VERSION_BACKUP="$STATE_DIR/.version.backup"

if [ "$(id -u)" -eq 0 ]; then
  echo "Run this script as your regular user, not as root."
  exit 1
fi

for cmd in apparmor_parser cat chmod cp curl date desktop-file-validate dpkg grep id install jq mktemp mv rm sha256sum sudo tee; do
  if ! command -v "$cmd" >/dev/null; then
    echo "Missing required command: $cmd"
    exit 1
  fi
done

if [ "$(dpkg --print-architecture)" != "amd64" ]; then
  echo "This Obsidian AppImage updater supports amd64 only."
  exit 1
fi

for managed_dir in "$APPIMAGE_DIR" "$STATE_DIR" "$DESKTOP_DIR"; do
  if [ -L "$managed_dir" ] || { [ -e "$managed_dir" ] && [ ! -d "$managed_dir" ]; }; then
    echo "Refusing a nonregular managed directory: $managed_dir"
    exit 1
  fi
done

if [ -r /proc/sys/kernel/apparmor_restrict_unprivileged_userns ] && [ "$(cat /proc/sys/kernel/apparmor_restrict_unprivileged_userns)" = "1" ]; then
  if [ -L "$PROFILE_FILE" ] || [ ! -f "$PROFILE_FILE" ] ||
    ! grep -Fqx '# Managed by the Obsidian AppImage workflow' "$PROFILE_FILE" ||
    ! grep -Fq "profile $PROFILE_NAME \"$APPIMAGE_PATH\"" "$PROFILE_FILE" ||
    ! sudo apparmor_parser -Q -T -K "$PROFILE_FILE"; then
    echo "The recognized exact-path Obsidian AppImage profile source is missing."
    echo "Create it with the Ubuntu 24.04 or 26.04 profile step, then rerun this updater."
    exit 1
  fi

  if ! sudo grep -Fqx "$PROFILE_NAME (unconfined)" /sys/kernel/security/apparmor/profiles; then
    echo "The recognized Obsidian AppImage profile is not loaded."
    echo "Reload it with the troubleshooting step, then rerun this updater."
    exit 1
  fi
fi

if [ -L "$APPIMAGE_PATH" ] || [ ! -f "$APPIMAGE_PATH" ] || [ ! -x "$APPIMAGE_PATH" ]; then
  echo "A regular executable Obsidian.AppImage was not found at $APPIMAGE_PATH"
  echo "Download and make the AppImage executable first, then rerun this script."
  exit 1
fi

if [ -L "$DESKTOP_FILE" ]; then
  echo "Refusing to replace a symbolic-link desktop entry: $DESKTOP_FILE"
  exit 1
fi

desktop_is_owned_or_legacy() {
  [ -f "$DESKTOP_FILE" ] && [ ! -L "$DESKTOP_FILE" ] &&
    { grep -Fqx "$DESKTOP_MARKER" "$DESKTOP_FILE" ||
      { grep -Fqx "$EXPECTED_EXEC" "$DESKTOP_FILE" && grep -Fqx "$EXPECTED_ICON" "$DESKTOP_FILE" && grep -Fqx "$EXPECTED_WM" "$DESKTOP_FILE"; }; }
}

if [ -e "$DESKTOP_FILE" ] && ! desktop_is_owned_or_legacy; then
  echo "Refusing to overwrite an unrecognized desktop entry: $DESKTOP_FILE"
  exit 1
fi

if [ -e "$DESKTOP_FILE" ] && ! grep -Fqx "$DESKTOP_MARKER" "$DESKTOP_FILE"; then
  echo "Adopting the exact legacy Obsidian AppImage desktop entry."
fi

for managed_path in "$ICON_PATH" "$VERSION_FILE"; do
  if [ -L "$managed_path" ] || { [ -e "$managed_path" ] && [ ! -f "$managed_path" ]; }; then
    echo "Refusing to replace a nonregular managed file: $managed_path"
    exit 1
  fi
done

for recovery_path in "$ICON_BACKUP" "$DESKTOP_BACKUP" "$VERSION_BACKUP"; do
  if [ -e "$recovery_path" ] || [ -L "$recovery_path" ]; then
    echo "A previous update recovery file still exists: $recovery_path"
    echo "Inspect and restore it before rerunning this updater."
    exit 1
  fi
done

install -d "$APPIMAGE_DIR" "$STATE_DIR" "$DESKTOP_DIR"

CURRENT_VERSION="none"
if [ -f "$VERSION_FILE" ]; then
  CURRENT_VERSION=$(cat "$VERSION_FILE")
  if [[ ! "$CURRENT_VERSION" =~ ^[0-9]+([.][0-9]+)+$ ]]; then
    echo "The stored AppImage version is invalid: $VERSION_FILE"
    exit 1
  fi
fi

echo "Checking the latest Obsidian release..."
RELEASE_JSON=$(mktemp)

cleanup() {
  cd "$HOME" 2>/dev/null || true
  rm -f "$RELEASE_JSON"
  for temporary_path in "${TEMP_APPIMAGE:-}" "${ICON_STAGE:-}" "${DESKTOP_STAGE:-}" "${VERSION_STAGE:-}"; do
    if [ -n "$temporary_path" ]; then rm -f -- "$temporary_path"; fi
  done
  if [ -n "${WORK_DIR:-}" ]; then rm -rf -- "$WORK_DIR"; fi
}
trap cleanup EXIT

if ! curl -fsSL https://api.github.com/repos/obsidianmd/obsidian-releases/releases/latest -o "$RELEASE_JSON"; then
  echo "Could not download the latest Obsidian release metadata."
  exit 1
fi

LATEST_TAG=$(jq -er '.tag_name' "$RELEASE_JSON")
LATEST_VERSION=${LATEST_TAG#v}
APPIMAGE_ASSET="Obsidian-$LATEST_VERSION.AppImage"
EXPECTED_APPIMAGE_URL="https://github.com/obsidianmd/obsidian-releases/releases/download/$LATEST_TAG/$APPIMAGE_ASSET"
APPIMAGE_MATCH_COUNT=$(jq -er --arg asset "$APPIMAGE_ASSET" '[.assets[] | select(.name == $asset)] | length' "$RELEASE_JSON")
APPIMAGE_URL=$(jq -er --arg asset "$APPIMAGE_ASSET" '.assets[] | select(.name == $asset) | .browser_download_url' "$RELEASE_JSON")
APPIMAGE_SHA256=$(jq -er --arg asset "$APPIMAGE_ASSET" '.assets[] | select(.name == $asset) | .digest | sub("^sha256:"; "")' "$RELEASE_JSON")

if [[ ! "$LATEST_VERSION" =~ ^[0-9]+([.][0-9]+)+$ ]] ||
  [ "$APPIMAGE_MATCH_COUNT" -ne 1 ] || [ "$APPIMAGE_URL" != "$EXPECTED_APPIMAGE_URL" ] || [[ ! "$APPIMAGE_SHA256" =~ ^[0-9a-f]{64}$ ]]; then
  echo "Latest AppImage asset metadata failed validation."
  exit 1
fi

echo "Current version: $CURRENT_VERSION"
echo "Latest version:  $LATEST_VERSION"

if [ "$CURRENT_VERSION" != "none" ] && dpkg --compare-versions "$CURRENT_VERSION" gt "$LATEST_VERSION"; then
  echo "The installed AppImage is newer than the latest public release."
  echo "The updater cannot verify that build against the latest release metadata; inspect it manually."
  exit 1
fi

if [ "$CURRENT_VERSION" = "$LATEST_VERSION" ] &&
  [ -x "$APPIMAGE_PATH" ] &&
  [ -s "$ICON_PATH" ] &&
  grep -Fqx "$DESKTOP_MARKER" "$DESKTOP_FILE" &&
  grep -Fqx "$EXPECTED_EXEC" "$DESKTOP_FILE" &&
  grep -Fqx "$EXPECTED_ICON" "$DESKTOP_FILE" &&
  grep -Fqx "$EXPECTED_WM" "$DESKTOP_FILE" &&
  desktop-file-validate "$DESKTOP_FILE" >/dev/null 2>&1 &&
  printf '%s  %s\n' "$APPIMAGE_SHA256" "$APPIMAGE_PATH" | sha256sum --check --status -; then
  echo "Already up to date."
  exit 0
fi

echo "Downloading $LATEST_VERSION..."
TEMP_APPIMAGE=$(mktemp "$APPIMAGE_DIR/.Obsidian.AppImage.new.XXXXXX")
ICON_STAGE=$(mktemp "$STATE_DIR/.obsidian.new.XXXXXX")
DESKTOP_STAGE=$(mktemp "$DESKTOP_DIR/.obsidian.new.XXXXXX.desktop")
VERSION_STAGE=$(mktemp "$STATE_DIR/.version.new.XXXXXX")
WORK_DIR=$(mktemp -d "$STATE_DIR/.extract.XXXXXX")
curl -fL --progress-bar "$APPIMAGE_URL" -o "$TEMP_APPIMAGE"
printf '%s  %s\n' "$APPIMAGE_SHA256" "$TEMP_APPIMAGE" | sha256sum --check -
chmod u+x "$TEMP_APPIMAGE"

echo "Staging the desktop integration..."
cd "$WORK_DIR"
"$TEMP_APPIMAGE" --appimage-extract >/dev/null
install -Dm644 squashfs-root/obsidian.png "$ICON_STAGE"
printf '%s\n' "$DESKTOP_MARKER" "[Desktop Entry]" "Name=Obsidian" "$EXPECTED_EXEC" "$EXPECTED_ICON" "Type=Application" "Categories=Office;" "$EXPECTED_WM" "MimeType=x-scheme-handler/obsidian;" "Terminal=false" > "$DESKTOP_STAGE"
printf '%s\n' "$LATEST_VERSION" > "$VERSION_STAGE"
desktop-file-validate "$DESKTOP_STAGE"
cd "$HOME"
ICON_HAD_OLD=0
DESKTOP_HAD_OLD=0
VERSION_HAD_OLD=0
if [ -e "$ICON_PATH" ]; then ICON_HAD_OLD=1; fi
if [ -e "$DESKTOP_FILE" ]; then DESKTOP_HAD_OLD=1; fi
if [ -e "$VERSION_FILE" ]; then VERSION_HAD_OLD=1; fi

if { [ "$ICON_HAD_OLD" -eq 0 ] || cp -pT -- "$ICON_PATH" "$ICON_BACKUP"; } &&
  { [ "$DESKTOP_HAD_OLD" -eq 0 ] || cp -pT -- "$DESKTOP_FILE" "$DESKTOP_BACKUP"; } &&
  { [ "$VERSION_HAD_OLD" -eq 0 ] || cp -pT -- "$VERSION_FILE" "$VERSION_BACKUP"; }; then
  :
else
  rm -f "$ICON_BACKUP" "$DESKTOP_BACKUP" "$VERSION_BACKUP"
  echo "Could not preserve the current desktop integration; the AppImage was not changed."
  exit 1
fi

restore_managed_file() {
  local had_old=$1
  local backup=$2
  local target=$3
  if [ "$had_old" -eq 1 ]; then
    mv -fT -- "$backup" "$target"
  else
    rm -f -- "$target"
  fi
}

COMMITTED=0
if mv -fT -- "$ICON_STAGE" "$ICON_PATH" &&
  mv -fT -- "$DESKTOP_STAGE" "$DESKTOP_FILE" &&
  mv -fT -- "$VERSION_STAGE" "$VERSION_FILE" &&
  mv -fT -- "$TEMP_APPIMAGE" "$APPIMAGE_PATH"; then
  COMMITTED=1
  if ! rm -f "$ICON_BACKUP" "$DESKTOP_BACKUP" "$VERSION_BACKUP"; then
    echo "Warning: the update committed, but one or more recovery files could not be removed."
  fi
else
  ROLLBACK_OK=1
  restore_managed_file "$ICON_HAD_OLD" "$ICON_BACKUP" "$ICON_PATH" || ROLLBACK_OK=0
  restore_managed_file "$DESKTOP_HAD_OLD" "$DESKTOP_BACKUP" "$DESKTOP_FILE" || ROLLBACK_OK=0
  restore_managed_file "$VERSION_HAD_OLD" "$VERSION_BACKUP" "$VERSION_FILE" || ROLLBACK_OK=0
  if [ "$ROLLBACK_OK" -eq 1 ]; then
    echo "Update promotion failed; the previous AppImage integration was restored."
  else
    echo "Update promotion and rollback both failed; preserve the .backup files for manual recovery."
  fi
  exit 1
fi

if ! printf '%s | Updated to %s\n' "$(date '+%Y-%m-%d %H:%M:%S')" "$LATEST_VERSION" >> "$LOG_FILE"; then
  echo "Warning: the AppImage updated, but the update log could not be written."
fi
echo "Updated to $LATEST_VERSION."
echo "Launcher refreshed at $DESKTOP_FILE."
EOF
    if sudo grep -Fqx "$APPIMAGE_UPDATER_MARKER" "$APPIMAGE_UPDATER_STAGE" &&
      sudo grep -Fqx 'echo "Launcher refreshed at $DESKTOP_FILE."' "$APPIMAGE_UPDATER_STAGE" &&
      sudo bash -n "$APPIMAGE_UPDATER_STAGE" &&
      sudo chown root:root "$APPIMAGE_UPDATER_STAGE" &&
      sudo chmod 0755 "$APPIMAGE_UPDATER_STAGE" &&
      sudo mv -fT -- "$APPIMAGE_UPDATER_STAGE" "$APPIMAGE_UPDATER"; then
      command -v update-obsidian-appimage.sh
    else
      sudo rm -f -- "$APPIMAGE_UPDATER_STAGE"
      echo "Updater validation failed; the existing command was not replaced."
      false
    fi
  fi
fi
The script keeps its version, icon, and log under ~/.local/share/obsidian-appimage. An exit trap removes temporary release metadata and incomplete downloads, while the existing AppImage remains in place until its replacement passes the checksum, extraction, and desktop-file checks.
The staged installer validates the script with bash -n, sets root ownership and executable permissions, and then replaces only a recognized managed updater.
sudo grep -Fqx '# Managed by the Obsidian AppImage updater workflow' /usr/local/bin/update-obsidian-appimage.sh
command -v update-obsidian-appimage.sh
/usr/local/bin/update-obsidian-appimage.sh
After that one-time setup, the only updater command you need to remember is update-obsidian-appimage.sh.
Run the updater by name whenever you want to check for a new release.
update-obsidian-appimage.shChecking the latest Obsidian release... Current version: 1.12.7 Latest version: 1.12.7 Already up to date.
When a new release is available, the script verifies the replacement AppImage before it rewrites the launcher, refreshes the icon, and appends a timestamped line to ~/.local/share/obsidian-appimage/update.log.
Check vault locations before removing Obsidian
Obsidian normally stores notes in vault folders you choose outside package-owned data paths. Before removing Snap data or deleting Flatpak settings, open Obsidian’s vault switcher and confirm where every vault lives. The following checks show the size of each package-data tree and print any .obsidian vault markers found inside it.
du -sh "$HOME/snap/obsidian" "$HOME/.var/app/md.obsidian.Obsidian" 2>/dev/null
find "$HOME/snap/obsidian" "$HOME/.var/app/md.obsidian.Obsidian" -type d -name .obsidian -print 2>/dev/null
Back up every vault you need before deleting package-specific data. Any path printed by the
findcommand belongs to a vault that must be moved or backed up first. The DEB and AppImage commands below leave ordinary vault folders alone; Snap removes its live package data into a recovery snapshot, while manual Flatpak data deletion is permanent.
Remove Obsidian Snap on Ubuntu
Remove the Snap normally so snapd creates its automatic removal snapshot before deleting the system-wide package and live Snap data. Use snap saved to list the recovery snapshot; to recover it later, run snap restore followed by the numeric snapshot ID in the first column.
sudo snap remove obsidian
snap saved
Remove Obsidian Flatpak on Ubuntu
Remove the system-scope Flatpak application first. Do not combine sudo with --delete-data: that tries to remove root’s application data and can fail because a root shell has no desktop D-Bus session.
sudo flatpak uninstall md.obsidian.ObsidianThe uninstall leaves your normal user’s Flatpak settings at ~/.var/app/md.obsidian.Obsidian. Keep that directory if you may reinstall. If you want to erase those settings too, use the verification step below and remove the directory only after confirming that it does not contain anything you intend to keep.
Remove Obsidian DEB on Ubuntu
Purge the installed Debian package with APT first. This removes the package’s dpkg state but leaves your home-directory vaults and ~/.config/obsidian user profile untouched.
sudo apt purge obsidian -yRestore the AppArmor state recorded before installation. On Ubuntu 24.04 and 26.04, this puts back the exact distro profile or local modification that existed before Obsidian replaced it. Ubuntu 22.04 instead confirms that the path remains absent. The fallback branch repairs the distro conffile for older installations that predate the saved-baseline workflow, but it cannot recover an earlier local modification.
DEB_STATE_DIR="$HOME/.local/share/obsidian-deb"
PROFILE_PATH=/etc/apparmor.d/obsidian
PROFILE_BACKUP="$DEB_STATE_DIR/ubuntu-obsidian.profile"
PROFILE_DIGEST="$DEB_STATE_DIR/ubuntu-obsidian.profile.sha256"
PROFILE_STATUS="$DEB_STATE_DIR/ubuntu-obsidian.profile.status"
PROFILE_RESTORE_READY=0
PROFILE_ROOT_STAGE=

if [ -L "$PROFILE_STATUS" ]; then
  echo "Refusing a symbolic-link AppArmor baseline record: $PROFILE_STATUS"
elif [ -f "$PROFILE_STATUS" ]; then
  PROFILE_BASELINE=$(cat "$PROFILE_STATUS")
  case "$PROFILE_BASELINE" in
    present)
      if [ -L "$PROFILE_BACKUP" ] || [ ! -f "$PROFILE_BACKUP" ] ||
        [ -L "$PROFILE_DIGEST" ] || [ ! -f "$PROFILE_DIGEST" ] ||
        ! grep -Eq '^[0-9a-f]{64}$' "$PROFILE_DIGEST" ||
        ! printf '%s  %s\n' "$(cat "$PROFILE_DIGEST")" "$PROFILE_BACKUP" | sha256sum --check --status - ||
        ! sudo apparmor_parser -Q -T -K "$PROFILE_BACKUP"; then
        echo "The saved Ubuntu AppArmor baseline failed validation and was retained."
      elif [ -L "$PROFILE_PATH" ] || { [ -e "$PROFILE_PATH" ] &&
        { ! sudo test -f "$PROFILE_PATH" || ! sudo cmp -s "$PROFILE_BACKUP" "$PROFILE_PATH"; }; }; then
        echo "Refusing to overwrite a different AppArmor profile: $PROFILE_PATH"
      else
        PROFILE_PROMOTION_READY=1
        if [ ! -e "$PROFILE_PATH" ]; then
          PROFILE_ROOT_STAGE=$(sudo mktemp /etc/apparmor.d/.obsidian.restore.XXXXXX) || PROFILE_ROOT_STAGE=
          if [ -z "$PROFILE_ROOT_STAGE" ] ||
            ! sudo install -o root -g root -m 0644 "$PROFILE_BACKUP" "$PROFILE_ROOT_STAGE" ||
            ! sudo mv -fT -- "$PROFILE_ROOT_STAGE" "$PROFILE_PATH"; then
            PROFILE_PROMOTION_READY=0
            if [ -n "$PROFILE_ROOT_STAGE" ]; then sudo rm -f -- "$PROFILE_ROOT_STAGE"; fi
          fi
        fi

        if [ "$PROFILE_PROMOTION_READY" -eq 1 ] &&
          sudo apparmor_parser -r "$PROFILE_PATH" &&
          sudo grep -Fqx 'obsidian (unconfined)' /sys/kernel/security/apparmor/profiles; then
          if rm -f -- "$PROFILE_BACKUP" "$PROFILE_DIGEST" "$PROFILE_STATUS"; then
            PROFILE_RESTORE_READY=1
            echo "Saved Ubuntu AppArmor baseline restored"
          else
            echo "The profile was restored, but its saved record could not be cleared."
          fi
        else
          echo "AppArmor restoration was not proved; the saved baseline was retained."
        fi
      fi
      ;;
    absent)
      if [ -e "$PROFILE_BACKUP" ] || [ -L "$PROFILE_BACKUP" ] ||
        [ -e "$PROFILE_DIGEST" ] || [ -L "$PROFILE_DIGEST" ] ||
        [ -e "$PROFILE_PATH" ] || [ -L "$PROFILE_PATH" ]; then
        echo "The saved absent baseline conflicts with files now present; nothing was deleted."
      else
        if sudo grep -Fqx 'obsidian (unconfined)' /sys/kernel/security/apparmor/profiles; then
          PROFILE_LOADED_RC=0
        else
          PROFILE_LOADED_RC=$?
        fi
        if [ "$PROFILE_LOADED_RC" -eq 1 ]; then
          if rm -f -- "$PROFILE_STATUS"; then
            PROFILE_RESTORE_READY=1
            echo "Saved Ubuntu AppArmor baseline restored: absent"
          else
            echo "The absent baseline was proved, but its saved record could not be cleared."
          fi
        else
          echo "The absent baseline could not be proved; the record was retained."
        fi
      fi
      ;;
    *)
      echo "Unrecognized AppArmor baseline record; nothing was changed."
      ;;
  esac
elif [ -e "$PROFILE_BACKUP" ] || [ -L "$PROFILE_BACKUP" ] ||
  [ -e "$PROFILE_DIGEST" ] || [ -L "$PROFILE_DIGEST" ]; then
  echo "An incomplete AppArmor baseline record was retained for manual review."
elif [ -L "$PROFILE_PATH" ] || { [ -e "$PROFILE_PATH" ] && ! sudo test -f "$PROFILE_PATH"; }; then
  echo "Refusing to repair a nonregular AppArmor profile: $PROFILE_PATH"
elif dpkg-query -L apparmor | grep -qx "$PROFILE_PATH"; then
  if [ -e "$PROFILE_PATH" ]; then
    echo "No saved baseline identifies the existing AppArmor profile; review it manually."
  elif sudo apt-get -o Dpkg::Options::=--force-confmiss install --reinstall -y apparmor &&
    sudo test -f "$PROFILE_PATH" &&
    sudo apparmor_parser -r "$PROFILE_PATH" &&
    sudo grep -Fqx 'obsidian (unconfined)' /sys/kernel/security/apparmor/profiles; then
    PROFILE_RESTORE_READY=1
    echo "Ubuntu package AppArmor baseline repaired"
  fi
else
  if sudo grep -Fqx 'obsidian (unconfined)' /sys/kernel/security/apparmor/profiles; then
    PROFILE_LOADED_RC=0
  else
    PROFILE_LOADED_RC=$?
  fi
  if [ ! -e "$PROFILE_PATH" ] && [ ! -L "$PROFILE_PATH" ] && [ "$PROFILE_LOADED_RC" -eq 1 ]; then
    PROFILE_RESTORE_READY=1
    echo "Ubuntu AppArmor baseline remains absent"
  fi
fi

if [ "$PROFILE_RESTORE_READY" -ne 1 ]; then
  echo "Stop before deleting DEB state; AppArmor restoration needs review."
  false
fi
Ubuntu 22.04: Saved Ubuntu AppArmor baseline restored: absent Ubuntu 24.04 or 26.04: Saved Ubuntu AppArmor baseline restored
If APT reports unused dependencies afterward, preview the cleanup before removing anything else.
sudo apt autoremove --dry-runRun the real autoremove only after the preview shows packages you are comfortable removing.
sudo apt autoremoveRemove the optional updater only when it matches the managed script or the exact earlier version of this workflow. The guards preserve symbolic links, unrelated files, and any AppArmor baseline record that still needs recovery.
The following cleanup permanently deletes the Obsidian DEB updater log and downloaded package cache. Copy the log elsewhere first if you want to keep its update history; vaults and
~/.config/obsidianare not touched.
DEB_UPDATER=/usr/local/bin/update-obsidian-deb.sh
DEB_UPDATER_MARKER='# Managed by the Obsidian DEB updater workflow'
DEB_STATE_DIR="$HOME/.local/share/obsidian-deb"
DEB_CACHE_DIR="${XDG_CACHE_HOME:-$HOME/.cache}/obsidian-deb"
DEB_HELPER_REMOVAL_READY=0
DEB_STATE_SCAN_RC=0
DEB_CACHE_SCAN_RC=0
UNEXPECTED_DEB_STATE=
UNEXPECTED_DEB_CACHE=

if [ -d "$DEB_STATE_DIR" ] && [ ! -L "$DEB_STATE_DIR" ]; then
  UNEXPECTED_DEB_STATE=$(find "$DEB_STATE_DIR" -mindepth 1 -maxdepth 1 \( ! -type f -o ! -name update.log \) -print -quit)
  DEB_STATE_SCAN_RC=$?
fi
if [ -d "$DEB_CACHE_DIR" ] && [ ! -L "$DEB_CACHE_DIR" ]; then
  UNEXPECTED_DEB_CACHE=$(find "$DEB_CACHE_DIR" -mindepth 1 -maxdepth 1 \( ! -type f -o ! -name 'obsidian*' \) -print -quit)
  DEB_CACHE_SCAN_RC=$?
fi

if ! sudo test -e "$DEB_UPDATER" && ! sudo test -L "$DEB_UPDATER"; then
  DEB_HELPER_REMOVAL_READY=1
elif sudo test -L "$DEB_UPDATER" || ! sudo test -f "$DEB_UPDATER"; then
  echo "Refusing to delete a nonregular updater: $DEB_UPDATER"
elif sudo grep -Fqx "$DEB_UPDATER_MARKER" "$DEB_UPDATER" || {
  sudo grep -Fqx 'LOG_DIR="$HOME/.local/share/obsidian-deb"' "$DEB_UPDATER" &&
  sudo grep -Fqx 'sudo apt-get install -y "$DEB_FILE"' "$DEB_UPDATER" &&
  sudo grep -Fq 'EXPECTED_DEB_URL="https://github.com/obsidianmd/obsidian-releases/releases/download/$LATEST_TAG/$DEB_ASSET"' "$DEB_UPDATER";
}; then
  if sudo rm -f -- "$DEB_UPDATER" && ! sudo test -e "$DEB_UPDATER" && ! sudo test -L "$DEB_UPDATER"; then
    DEB_HELPER_REMOVAL_READY=1
  fi
else
  echo "Refusing to delete an unrecognized updater: $DEB_UPDATER"
fi

if [ "$DEB_HELPER_REMOVAL_READY" -eq 1 ] &&
  [ ! -e "$DEB_STATE_DIR/ubuntu-obsidian.profile" ] && [ ! -L "$DEB_STATE_DIR/ubuntu-obsidian.profile" ] &&
  [ ! -e "$DEB_STATE_DIR/ubuntu-obsidian.profile.sha256" ] && [ ! -L "$DEB_STATE_DIR/ubuntu-obsidian.profile.sha256" ] &&
  [ ! -e "$DEB_STATE_DIR/ubuntu-obsidian.profile.status" ] && [ ! -L "$DEB_STATE_DIR/ubuntu-obsidian.profile.status" ] &&
  { [ ! -e "$DEB_STATE_DIR" ] || { [ -d "$DEB_STATE_DIR" ] && [ ! -L "$DEB_STATE_DIR" ]; }; } &&
  { [ ! -e "$DEB_CACHE_DIR" ] || { [ -d "$DEB_CACHE_DIR" ] && [ ! -L "$DEB_CACHE_DIR" ]; }; } &&
  [ "$DEB_STATE_SCAN_RC" -eq 0 ] && [ -z "$UNEXPECTED_DEB_STATE" ] &&
  [ "$DEB_CACHE_SCAN_RC" -eq 0 ] && [ -z "$UNEXPECTED_DEB_CACHE" ] &&
  rm -rf -- "$DEB_STATE_DIR" "$DEB_CACHE_DIR" &&
  [ ! -e "$DEB_STATE_DIR" ] && [ ! -L "$DEB_STATE_DIR" ] &&
  [ ! -e "$DEB_CACHE_DIR" ] && [ ! -L "$DEB_CACHE_DIR" ]; then
  echo "Recognized DEB updater state removed"
else
  echo "DEB cleanup stopped because a helper, baseline record, or nonregular path needs review."
  false
fi
Remove Obsidian AppImage on Ubuntu
Close every Obsidian window before removal so the AppImage FUSE mount can detach. On Ubuntu 24.04 or 26.04, unload and remove the exact-path profile created for this AppImage first. The existence guard makes this a no-op on Ubuntu 22.04.
APPIMAGE_PATH="$HOME/Applications/Obsidian.AppImage"
PROFILE_NAME=obsidian-appimage
PROFILE_FILE=/etc/apparmor.d/obsidian-appimage
PROFILE_MARKER='# Managed by the Obsidian AppImage workflow'
PROFILE_STAGE=$(mktemp) || PROFILE_STAGE=
PROFILE_REMOVAL_READY=0

if [ -n "$PROFILE_STAGE" ]; then
  { printf '%s\n' "$PROFILE_MARKER"; printf 'profile %s "%s" flags=(unconfined) {\n  userns,\n}\n' "$PROFILE_NAME" "$APPIMAGE_PATH"; } > "$PROFILE_STAGE"
fi

if [ -z "$PROFILE_STAGE" ] || [ ! -s "$PROFILE_STAGE" ]; then
  echo "The expected profile could not be staged; nothing was removed."
elif sudo test -L "$PROFILE_FILE"; then
  echo "Refusing to delete a symbolic-link profile: $PROFILE_FILE"
elif sudo test -e "$PROFILE_FILE" && { ! sudo test -f "$PROFILE_FILE" || ! sudo cmp -s "$PROFILE_STAGE" "$PROFILE_FILE"; }; then
  echo "Refusing to delete an unrecognized or differently attached profile: $PROFILE_FILE"
else
  if sudo grep -Fqx "$PROFILE_NAME (unconfined)" /sys/kernel/security/apparmor/profiles; then
    PROFILE_LOADED_RC=0
  else
    PROFILE_LOADED_RC=$?
  fi

  if ! sudo test -e "$PROFILE_FILE"; then
    if [ "$PROFILE_LOADED_RC" -eq 1 ]; then
      PROFILE_REMOVAL_READY=1
    elif [ "$PROFILE_LOADED_RC" -eq 0 ]; then
      echo "The AppImage profile is still loaded but its source is missing; stop for manual recovery."
    else
      echo "The loaded AppArmor state could not be read."
    fi
  elif [ "$PROFILE_LOADED_RC" -eq 0 ]; then
    if sudo apparmor_parser -Q -T -K "$PROFILE_FILE" &&
      sudo apparmor_parser -R "$PROFILE_FILE"; then
      if sudo grep -Fqx "$PROFILE_NAME (unconfined)" /sys/kernel/security/apparmor/profiles; then
        PROFILE_AFTER_UNLOAD_RC=0
      else
        PROFILE_AFTER_UNLOAD_RC=$?
      fi
      if [ "$PROFILE_AFTER_UNLOAD_RC" -eq 1 ] &&
        sudo rm -f -- "$PROFILE_FILE" &&
        ! sudo test -e "$PROFILE_FILE" && ! sudo test -L "$PROFILE_FILE"; then
        PROFILE_REMOVAL_READY=1
      fi
    fi
  elif [ "$PROFILE_LOADED_RC" -eq 1 ] &&
    sudo rm -f -- "$PROFILE_FILE" &&
    ! sudo test -e "$PROFILE_FILE" && ! sudo test -L "$PROFILE_FILE"; then
    PROFILE_REMOVAL_READY=1
  fi
fi

if [ -n "$PROFILE_STAGE" ]; then rm -f -- "$PROFILE_STAGE"; fi
if [ "$PROFILE_REMOVAL_READY" -ne 1 ]; then
  echo "Profile removal was not proved; the AppImage files were preserved."
  false
fi
Do not continue if the command refuses the profile or reports an unload failure. Review the existing file manually so a loaded or administrator-managed profile is not orphaned.
Delete the AppImage, recognized desktop entry, and workflow-owned state after the profile is gone. The state guard stops when it finds a path other than the version, icon, or update log.
The following cleanup permanently deletes the AppImage file, its launcher, extracted icon, stored version, and updater log. Copy the log or icon elsewhere first if you want to keep them; ordinary vaults and
~/.config/obsidianremain untouched.
APPIMAGE_PATH="$HOME/Applications/Obsidian.AppImage"
DESKTOP_FILE="$HOME/.local/share/applications/obsidian.desktop"
STATE_DIR="$HOME/.local/share/obsidian-appimage"
PROFILE_FILE=/etc/apparmor.d/obsidian-appimage
DESKTOP_MARKER='# Managed by the Obsidian AppImage workflow'
EXPECTED_EXEC="Exec=$APPIMAGE_PATH %U"
EXPECTED_ICON="Icon=$STATE_DIR/obsidian.png"
EXPECTED_WM='StartupWMClass=obsidian'
APPIMAGE_REMOVAL_READY=1
DESKTOP_OWNED=0
VERSION_STATE_OWNED=0
STATE_FILES_READY=1

if [ -f "$DESKTOP_FILE" ] && [ ! -L "$DESKTOP_FILE" ] &&
  { grep -Fqx "$DESKTOP_MARKER" "$DESKTOP_FILE" ||
    { grep -Fqx "$EXPECTED_EXEC" "$DESKTOP_FILE" &&
      grep -Fqx "$EXPECTED_ICON" "$DESKTOP_FILE" &&
      grep -Fqx "$EXPECTED_WM" "$DESKTOP_FILE"; }; }; then
  DESKTOP_OWNED=1
fi
if [ -d "$STATE_DIR" ] && [ ! -L "$STATE_DIR" ]; then
  if [ -f "$STATE_DIR/version" ] && [ ! -L "$STATE_DIR/version" ] &&
    grep -Eq '^[0-9]+([.][0-9]+)+$' "$STATE_DIR/version"; then
    VERSION_STATE_OWNED=1
  fi
  for state_file in "$STATE_DIR/version" "$STATE_DIR/obsidian.png" "$STATE_DIR/update.log"; do
    if [ -L "$state_file" ] || { [ -e "$state_file" ] && [ ! -f "$state_file" ]; }; then
      echo "Refusing nonregular AppImage state: $state_file"
      STATE_FILES_READY=0
    fi
  done
fi

if sudo grep -Fqx 'obsidian-appimage (unconfined)' /sys/kernel/security/apparmor/profiles; then
  PROFILE_LOADED_RC=0
else
  PROFILE_LOADED_RC=$?
fi

if sudo test -e "$PROFILE_FILE" || sudo test -L "$PROFILE_FILE"; then
  echo "The AppImage profile source is still present: $PROFILE_FILE"
  APPIMAGE_REMOVAL_READY=0
elif [ "$PROFILE_LOADED_RC" -eq 0 ]; then
  echo "The AppImage profile is still loaded."
  APPIMAGE_REMOVAL_READY=0
elif [ "$PROFILE_LOADED_RC" -ne 1 ]; then
  echo "The loaded AppArmor state could not be read."
  APPIMAGE_REMOVAL_READY=0
elif [ -L "$APPIMAGE_PATH" ] || { [ -e "$APPIMAGE_PATH" ] && [ ! -f "$APPIMAGE_PATH" ]; }; then
  echo "Refusing to delete a nonregular AppImage path: $APPIMAGE_PATH"
  APPIMAGE_REMOVAL_READY=0
elif [ -L "$DESKTOP_FILE" ] || { [ -e "$DESKTOP_FILE" ] && [ ! -f "$DESKTOP_FILE" ]; }; then
  echo "Refusing to delete a nonregular desktop entry: $DESKTOP_FILE"
  APPIMAGE_REMOVAL_READY=0
elif [ -f "$DESKTOP_FILE" ] && [ "$DESKTOP_OWNED" -ne 1 ]; then
  echo "Refusing to delete an unrecognized desktop entry: $DESKTOP_FILE"
  APPIMAGE_REMOVAL_READY=0
elif [ -L "$STATE_DIR" ] || { [ -e "$STATE_DIR" ] && [ ! -d "$STATE_DIR" ]; }; then
  echo "Refusing to delete a nonregular AppImage state path: $STATE_DIR"
  APPIMAGE_REMOVAL_READY=0
elif [ "$STATE_FILES_READY" -ne 1 ]; then
  APPIMAGE_REMOVAL_READY=0
elif [ -e "$STATE_DIR/version" ] && [ "$VERSION_STATE_OWNED" -ne 1 ]; then
  echo "Refusing unrecognized AppImage version state: $STATE_DIR/version"
  APPIMAGE_REMOVAL_READY=0
elif [ -f "$APPIMAGE_PATH" ] && [ "$DESKTOP_OWNED" -ne 1 ] && [ "$VERSION_STATE_OWNED" -ne 1 ]; then
  echo "The AppImage has no recognized launcher or version record and was preserved."
  APPIMAGE_REMOVAL_READY=0
elif [ -d "$STATE_DIR" ]; then
  UNEXPECTED_STATE=$(find "$STATE_DIR" -mindepth 1 -maxdepth 1 ! -name version ! -name obsidian.png ! -name update.log -print -quit)
  STATE_SCAN_RC=$?
  if [ "$STATE_SCAN_RC" -ne 0 ]; then
    echo "The AppImage state directory could not be inspected."
    APPIMAGE_REMOVAL_READY=0
  elif [ -n "$UNEXPECTED_STATE" ]; then
    echo "Unexpected AppImage state was preserved: $UNEXPECTED_STATE"
    APPIMAGE_REMOVAL_READY=0
  fi
fi

if [ "$APPIMAGE_REMOVAL_READY" -eq 1 ] &&
  rm -f -- "$APPIMAGE_PATH" "$DESKTOP_FILE" &&
  rm -rf -- "$STATE_DIR" &&
  [ ! -e "$APPIMAGE_PATH" ] && [ ! -L "$APPIMAGE_PATH" ] &&
  [ ! -e "$DESKTOP_FILE" ] && [ ! -L "$DESKTOP_FILE" ] &&
  [ ! -e "$STATE_DIR" ] && [ ! -L "$STATE_DIR" ]; then
  echo "Recognized AppImage files removed"
else
  echo "AppImage cleanup stopped for manual review."
  false
fi
Remove the updater command too if it matches the managed script or the exact earlier version of this workflow. Any symbolic link, nonregular path, or unrelated file is preserved.
APPIMAGE_UPDATER=/usr/local/bin/update-obsidian-appimage.sh
APPIMAGE_UPDATER_MARKER='# Managed by the Obsidian AppImage updater workflow'

if ! sudo test -e "$APPIMAGE_UPDATER" && ! sudo test -L "$APPIMAGE_UPDATER"; then
  echo "AppImage updater already absent"
elif sudo test -L "$APPIMAGE_UPDATER" || ! sudo test -f "$APPIMAGE_UPDATER"; then
  echo "Refusing to delete a nonregular updater: $APPIMAGE_UPDATER"
  false
elif sudo grep -Fqx "$APPIMAGE_UPDATER_MARKER" "$APPIMAGE_UPDATER" || {
  sudo grep -Fqx 'STATE_DIR="$HOME/.local/share/obsidian-appimage"' "$APPIMAGE_UPDATER" &&
  sudo grep -Fqx 'TEMP_APPIMAGE="$STATE_DIR/Obsidian.AppImage.new"' "$APPIMAGE_UPDATER" &&
  sudo grep -Fq 'EXPECTED_APPIMAGE_URL="https://github.com/obsidianmd/obsidian-releases/releases/download/$LATEST_TAG/$APPIMAGE_ASSET"' "$APPIMAGE_UPDATER";
}; then
  if ! sudo rm -f -- "$APPIMAGE_UPDATER" || sudo test -e "$APPIMAGE_UPDATER" || sudo test -L "$APPIMAGE_UPDATER"; then
    echo "The recognized updater could not be removed."
    false
  fi
else
  echo "Refusing to delete an unrecognized updater: $APPIMAGE_UPDATER"
  false
fi
Optionally remove the shared Obsidian profile
The official DEB and AppImage methods use ~/.config/obsidian for application settings, themes, and plugins. Snap and Flatpak keep their settings in the package-data trees checked earlier. If you are removing every direct-package install and want a clean first launch later, inspect this directory before deleting it.
du -sh "$HOME/.config/obsidian" 2>/dev/null
find "$HOME/.config/obsidian" -mindepth 1 -maxdepth 1 -printf '%f\n' 2>/dev/null
Back up any settings, plugins, themes, or other profile content you want to reuse. Delete the directory only after you have confirmed that nothing inside is needed.
The next command permanently deletes the shared DEB and AppImage settings, plugins, themes, and session state under
~/.config/obsidian. It does not delete vaults stored elsewhere, but copy anything you want to reuse before continuing.
rm -rf "$HOME/.config/obsidian"Verify Obsidian removal on Ubuntu
Use the matching check after removal so you know the application itself is gone before you decide what to do with any vault folders.
Snap:
snap list obsidianerror: no matching snaps installed
[ -d "$HOME/snap/obsidian" ] && echo "snap data still present" || echo "snap data removed"snap data removed
Flatpak:
flatpak list --system --app --columns=application | grep -Fx md.obsidian.Obsidian || echo "not installed"not installed
Check the sandbox data directory separately if you also removed the Flatpak settings.
[ -d "$HOME/.var/app/md.obsidian.Obsidian" ] && echo "sandbox data still present" || echo "sandbox data removed"sandbox data removed
If that check reports leftover sandbox data, inspect it again immediately before deletion. A printed .obsidian path marks a vault that must be moved or backed up first.
du -sh "$HOME/.var/app/md.obsidian.Obsidian" 2>/dev/null
find "$HOME/.var/app/md.obsidian.Obsidian" -type d -name .obsidian -print 2>/dev/null
Remove the sandbox data only after confirming that the directory contains no settings or vault content you want to keep.
The next command permanently deletes all remaining Flatpak settings and any vault stored under
~/.var/app/md.obsidian.Obsidian. Move or back up every needed file before continuing.
rm -rf "$HOME/.var/app/md.obsidian.Obsidian"Official DEB:
if dpkg-query -W -f='${Status}\n' obsidian 2>/dev/null | grep -qx 'install ok installed'; then
  echo "obsidian package still installed"
else
  echo "obsidian package not installed"
fi
obsidian package not installed
AppImage:
if [ -e "$HOME/Applications/Obsidian.AppImage" ] || [ -e "$HOME/.local/share/applications/obsidian.desktop" ] || [ -e "$HOME/.local/share/obsidian-appimage" ] || [ -e /etc/apparmor.d/obsidian-appimage ]; then
  echo "AppImage files still present"
else
  echo "AppImage files removed"
fi

if sudo grep -Fq 'obsidian-appimage (unconfined)' /sys/kernel/security/apparmor/profiles; then
  echo "AppImage profile still loaded"
else
  echo "AppImage profile removed"
fi
AppImage files removed AppImage profile removed
Shared profile:
[ -d "$HOME/.config/obsidian" ] && echo "shared profile still present" || echo "shared profile removed"shared profile removed
Troubleshoot Obsidian on Ubuntu
Start with the packaging method you installed instead of applying unrelated Electron flags. Ubuntu 26.04 has a method-specific Snap launcher failure, while AppImage problems usually involve FUSE or Electron’s sandbox.
Fix Obsidian Snap not opening on Ubuntu 26.04
If snap run obsidian installs successfully but exits without a window on Ubuntu 26.04, first confirm the installed revision and capture the launcher result.
snap list obsidian
snap run obsidian
Obsidian 1.12.7 revision 62 is affected by a launcher incompatibility with Ubuntu 26.04’s core utilities. Reinstalling the same revision or adding --no-sandbox to snap run does not repair the wrapper. Remove the Snap and switch to Flatpak or the official amd64 .deb until Snapcraft publishes a fixed revision.
sudo snap remove obsidianFix Obsidian AppImage FUSE errors on Ubuntu
If the AppImage refuses to start and immediately complains about libfuse.so.2, the FUSE compatibility package for your Ubuntu release is missing.
dlopen(): error loading libfuse.so.2

AppImages require FUSE to run.
You might still be able to extract the contents of this AppImage
if you run it with the --appimage-extract option.
Install the matching compatibility package, then perform a real launch. On Ubuntu 24.04 or 26.04, ensure the exact-path profile from the install section is loaded first.
Ubuntu 26.04 and 24.04:
sudo apt install libfuse2t64 -yUbuntu 22.04:
sudo apt install libfuse2 -yLaunch the AppImage after installing the package.
"$HOME/Applications/Obsidian.AppImage"A visible Obsidian window confirms that the AppImage mounted and passed the FUSE stage. The --appimage-version flag only prints the embedded AppImage runtime version and does not prove that FUSE loaded. If the library error disappears but Electron reports a sandbox error, continue with the next section.
Fix Obsidian AppImage sandbox errors on Ubuntu 24.04 and 26.04
Ubuntu 24.04 and 26.04 both report kernel.apparmor_restrict_unprivileged_userns=1. If the exact-path profile is missing or points to an old location, Electron cannot create its sandbox and the AppImage aborts before the window opens. Ubuntu 22.04 does not hit this policy-specific failure.
[18931:0316/154818.549521:FATAL:sandbox/linux/suid/client/setuid_sandbox_host.cc:166] The SUID sandbox helper binary was found, but is not configured correctly. Rather than run without sandboxing I'm aborting now.
Confirm that the profile attachment matches the current AppImage path, reload it, and verify the loaded profile before launching again.
APPIMAGE_PATH="$HOME/Applications/Obsidian.AppImage"
PROFILE_FILE=/etc/apparmor.d/obsidian-appimage

if sudo grep -Fqx '# Managed by the Obsidian AppImage workflow' "$PROFILE_FILE" &&
  sudo grep -Fq "profile obsidian-appimage \"$APPIMAGE_PATH\"" "$PROFILE_FILE" &&
  sudo apparmor_parser -Q -T -K "$PROFILE_FILE" &&
  sudo apparmor_parser -r "$PROFILE_FILE" &&
  sudo grep -F 'obsidian-appimage (unconfined)' /sys/kernel/security/apparmor/profiles; then
  "$APPIMAGE_PATH"
else
  echo "The exact-path AppImage profile is missing or failed to load."
  false
fi
If the first command reports a missing file or no matching line, recreate the profile from the AppImage install section. Obsidian’s documented --no-sandbox argument can confirm the cause temporarily, but it disables Chromium’s sandbox and should not be saved in the launcher. For more background on this Ubuntu policy, read how to enable or disable AppArmor on Ubuntu.
grep '^Exec=' "$HOME/.local/share/applications/obsidian.desktop"Exec=/home/linuxcapable/Applications/Obsidian.AppImage %U
Fix the Obsidian installer out-of-date warning
If Obsidian reports that the installer is out of date, the in-app update has refreshed Obsidian’s application code but not the packaged Electron framework. Update through the method you installed rather than mixing package formats. Snap and Flatpak refresh through their package tools, while the direct .deb and AppImage paths use the verified updater scripts created above.
You do not need to uninstall Obsidian first. Close the desktop app, run the matching package update, and reopen it after the package manager or direct-download script finishes.
If the warning remains, compare the installed package version with the latest Obsidian release. The official .deb exposes /usr/bin/obsidian, while Snap, Flatpak, and AppImage installs use their method-specific launch commands shown earlier.
Conclusion
Obsidian is now installed through one source, with package-level updates and cleanup handled by that same method. Keep vault backups outside application data; on Ubuntu 26.04, recheck the store launcher issue before reconsidering Snap. To compare another Markdown-first note app and sync model, install Joplin on Ubuntu.

Formatting tips for your comment
You can use basic HTML to format your comment. Useful tags currently allowed in published comments:
<code>command</code>command<strong>bold</strong><em>italic</em><a href="https://example.com">link</a><blockquote>quote</blockquote>