Arduino enables hobbyists and professionals to build interactive electronics projects using its open-source hardware and software platform. Specifically, the Arduino IDE is the essential tool for writing and uploading code to microcontroller boards. Furthermore, this guide demonstrates how to install the Arduino IDE on Debian Linux, ensuring you have the right environment for your development needs.
To install the Arduino IDE on Debian Linux, you have three primary methods: using the default Debian repository for the legacy version, installing via Flatpak for the latest stable build, or using the AppImage for a manual installation. Throughout this guide, we will walk you through all three installation methods to ensure you have the version of the Arduino IDE that best suits your needs.
Choose Your Arduino Installation Method
Because Debian prioritizes stability, the default repository version is often older than the latest upstream release. Therefore, choose the method that best fits your requirements:
| Method | Channel | Version | Updates | Best For |
|---|---|---|---|---|
| Flatpak | Flathub | Latest Stable (v2.x) | Automatic | Most users requiring modern features |
| AppImage | Arduino.cc | Latest Stable (v2.x) | Manual | Users who prefer portable, self-contained apps |
| Debian APT | Debian Package | Legacy (v1.8.x) | Automatic | Users needing maximum system stability |
For most users, the Flatpak method is recommended because it provides the modern Arduino IDE v2 with automatic updates while keeping your system clean. Alternatively, the AppImage method works well for portability needs.
Method 1: Install Arduino IDE v1.8 (Legacy) via APT
Update Debian Before Arduino Installation
Before installing new software, it is essential to refresh the package lists for upgrades or new package installations. Consequently, this ensures that all existing packages are up-to-date, bolstering your system’s security and stability.
First, update your Debian system with the following command:
sudo apt updateNext, if any of your system’s packages require upgrades, run the following command:
sudo apt upgradeInstall Arduino via APT Command
The Arduino IDE can be installed from Debian’s default repositories. However, the version found in these repositories is typically the legacy 1.8.x series, not the modern v2.x. Nevertheless, although it is stable and integrates seamlessly with your Debian distribution, it lacks newer features.
Therefore, this installation method is preferable for users who prioritize stability and integration over the latest features. Accordingly, to install Arduino IDE from Debian’s default repositories, use the following command:
sudo apt install arduinoNevertheless, the version in Debian’s repositories remains a reliable choice for many users, particularly those focusing on long-term projects where stability trumps the availability of the newest features.
Verify APT Installation
Once the installation is complete, you can verify the version installed:
apt-cache policy arduinoAs a result, the expected output will show the installed version (typically 1.8.x):
arduino:
  Installed: 2:1.8.19+dfsg1-1
  Candidate: 2:1.8.19+dfsg1-1
  Version table:
 *** 2:1.8.19+dfsg1-1 500
        500 http://deb.debian.org/debian bookworm/main amd64 Packages
Method 2: Install Arduino IDE v2 via Flatpak
Flatpak offers a unique approach to package management in Linux. Specifically, it isolates an application from your system, minimizing potential conflicts and enhancing security. Consequently, this section will explore leveraging Flatpak and Flathub for the Arduino IDE installation.
Note: If your system does not already have Flatpak installed, this must be done before proceeding. In that case, you can refer to our dedicated guide on installing Flatpak for a comprehensive, step-by-step walkthrough.
Enable Flathub For Arduino
Before installing the Arduino IDE via Flatpak, we must first activate the Flathub repository. Essentially, Flathub is a substantial marketplace for hosting Flatpak applications, allowing you to install many applications from a central location.
Therefore, you can enable the Flathub repository by inputting the following command in your terminal:
sudo flatpak remote-add --if-not-exists flathub https://flathub.org/repo/flathub.flatpakrepoIn turn, this command effectively integrates the Flathub repository into your Flatpak configuration.
Install Arduino via Flatpak Command
Once you have activated the Flathub repository, you can now install the Arduino IDE. Specifically, the flatpak install command facilitates this process.
To get started, run the following command to install the standard version of Arduino IDE v2.x:
flatpak install flathub cc.arduino.IDE2 -yConversely, if you prefer the legacy v1.8.x version via Flatpak instead, use this command:
flatpak install flathub cc.arduino.arduinoide -yVerify Flatpak Installation
Following this, confirm the installation by listing the installed Flatpak packages:
flatpak list | grep arduinoExample output:
cc.arduino.IDE2 Arduino IDE 2.3.2 stable system
Method 3: Install Arduino IDE v2 via AppImage
The AppImage format allows you to run software without installing it system-wide. Consequently, this method is ideal for users who prefer a portable version of the Arduino IDE or need to run multiple versions side-by-side.
Install Required Dependencies
Modern Debian systems require libfuse2 to run AppImages. However, keep in mind that the package name differs slightly depending on
your version.
For Debian 12 (Bookworm) and Debian 11 (Bullseye):
sudo apt install libfuse2Alternatively, for Debian 13 (Trixie) and newer, install the updated t64 package:
sudo apt install libfuse2t64Download and Run AppImage
First, download the latest Arduino IDE v2 AppImage from the official website. Once downloaded, navigate to the directory and make the file executable:
chmod +x arduino-ide_*_Linux_64bit.AppImageSubsequently, you can now run it directly:
./arduino-ide_*_Linux_64bit.AppImageGrant User Permissions for USB Access
To upload sketches to your Arduino board, your user must be part of the dialout group. Otherwise, without this permission, you
may encounter “Serial Port not selected” errors.
sudo usermod -a -G dialout $USEREffecting Changes: You must log out and log back in (or restart your desktop session) for this change to take effect. However, rebooting is not necessary.
Launch Arduino IDE
Specifically, this section will discuss initiating the Arduino IDE from both the command-line interface (CLI) and the graphical user interface (GUI).
CLI Commands to Launch Arduino
In general, the command to start the Arduino IDE varies depending on your chosen installation method:
For APT installations, run the command:
arduinoIn contrast, Flatpak installations run the command:
flatpak run cc.arduino.arduinoideflatpak run cc.arduino.IDE2GUI Method to Launch Arduino
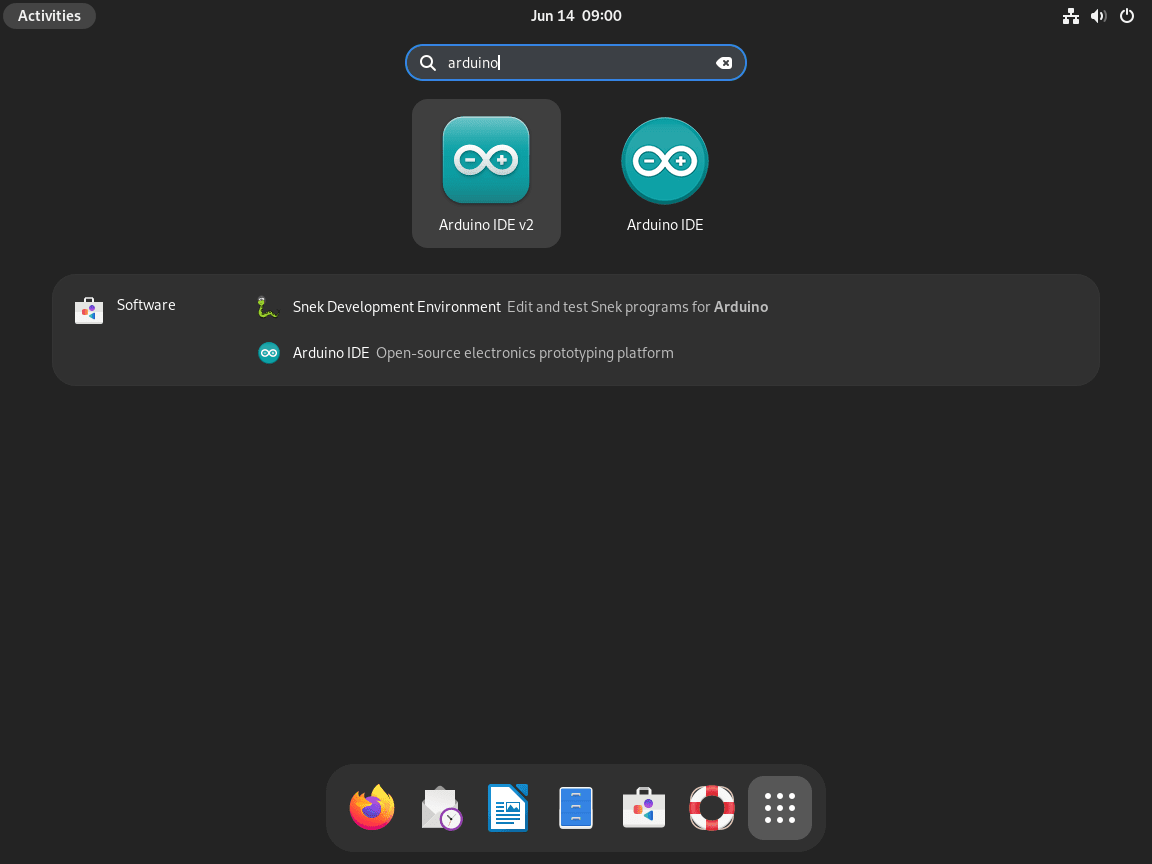
Alternatively, for those who prefer operating within a graphical interface, the Arduino IDE can be easily located and launched through the Debian GUI. To do this, follow these steps:
- Head to the ‘Activities’ menu in the top-left corner of the desktop.
- Click on ‘Show Applications’ at the bottom of the sidebar.
- Scroll or search for ‘Arduino IDE’ in the applications list.

Configure Arduino IDE
Now that the installation is complete, you can further optimize your environment to improve your workflow.
Optimize the Editor
First, navigate to File > Preferences; from there, customize the following settings:
- Display Line Numbers: Essential for debugging.
- Enable Code Folding: This helps manage large sketches.
Additionally, for advanced project management and version control, consider installing Git on Debian to track changes in your sketches.
Manage Arduino Installation
Update Arduino
To ensure optimal security and performance, regularly check for updates to ensure you have the latest features and security patches.
Keep in mind that each package manager presents its unique command to refresh installed packages. Consequently, below are the commands for the two common package managers:
Updating the Arduino IDE Installed via the APT Method
sudo apt updateAlternatively, Updating the Arduino IDE Installed via the Flatpak Method
flatpak updateRemove Arduino
In some circumstances, you may need to remove the Arduino IDE from your system. Importantly, the commands to accomplish this differ based on the installation method used for the Arduino IDE.
APT Installations of Arduino Removal Command:
sudo apt remove arduinoFlatpak Installations of Arduino Removal Command:
flatpak uninstall --delete-data cc.arduino.arduinoide -yflatpak uninstall --delete-data cc.arduino.IDE2 -yTroubleshoot Common Issues
Although Arduino IDE installation is generally straightforward, you may encounter some common issues. Fortunately, below are solutions to frequently reported problems.
Serial Port Not Visible or “Access Denied”
If the IDE cannot see your board or upload sketches (error: “Serial Port not selected”), this is typically a
permissions issue. To resolve this, ensure you added your user to the dialout group:
sudo usermod -a -G dialout $USERRestart Required: After running this command, you must log out or reboot for this group change to take effect.
AppImage Not Launching
On Debian 12+, AppImages require the FUSE 2 library. As a result, if clicking the file does nothing, install the required package for your version:
For Debian 12 (Bookworm):
sudo apt install libfuse2Alternatively, for Debian 13 (Trixie):
sudo apt install libfuse2t64Conclusion
With the Arduino IDE successfully installed on your Debian system, you can now start developing and managing your electronics projects effectively. Whether you choose the ease of installation from the default Debian repository or opt for the latest build via Flatpak and Flathub, each method provides access to the powerful tools and features of the Arduino platform. Additionally, remember to regularly update your installation to take advantage of new features and improvements. Ultimately, enjoy the creativity and innovation that the Arduino platform brings to your projects.


Formatting tips for your comment
You can use basic HTML to format your comment. Useful tags:
<code>command</code>command<pre>block of code</pre><strong>bold</strong><em>italic</em><a href="URL">link</a><blockquote>quote</blockquote>