

Kodi transforms any Linux machine into a full-featured media center, organizing movies, TV shows, music, and photos with metadata and artwork while supporting live TV, streaming add-ons, and remote control apps. If you prefer a server-based solution, consider Jellyfin or Plex for centralized streaming. For a lightweight alternative, VLC media player provides basic playback without the full media center experience. This guide walks through compiling the latest Kodi release from source on Ubuntu, giving you access to features and updates that may not yet be available in pre-built packages.
Kodi Overview
Before installing, here’s what makes Kodi useful for media management:
- Media library organization: Kodi scans your local folders and automatically downloads poster art, plot summaries, and metadata from online databases like TheMovieDB and TheTVDB.
- Multi-device streaming: Run Kodi on your desktop while using smartphone apps like Kore or Yatse as remote controls, or sync watched status across multiple Kodi installations.
- Add-on ecosystem: Extend functionality with official and community add-ons for streaming services, subtitle downloads, weather displays, and audio visualizations.
- Live TV integration: Connect to TV tuners or IPTV services through PVR (Personal Video Recorder) add-ons, with full EPG (Electronic Program Guide) support and recording capabilities.
The Team Kodi PPA has been discontinued, so this guide covers compiling from source, which is the recommended method for Ubuntu users who want the latest Kodi release. If you previously used the PPA, see the migration section to switch to source compilation. These steps work on Ubuntu 26.04 LTS, 24.04 LTS, and 22.04 LTS.
Compile Kodi from Source on Ubuntu
Compiling from source gives you the latest Kodi release with full feature support. This approach requires installing development libraries, downloading the source code, and running the build. Depending on your hardware, allow 15-60 minutes for the compilation process.
Install Build Dependencies
First, update your package lists to ensure you get the latest versions of all dependencies:
sudo apt updateInstall the required build tools and development libraries. This command installs over 70 packages covering compiler toolchains, media codecs, graphics rendering, and hardware integration:
sudo apt install -y autoconf automake autopoint autotools-dev cmake curl \
    default-jre gawk gcc g++ gdc gettext git gperf \
    libasound2-dev libass-dev libavahi-client-dev libavahi-common-dev \
    libbluetooth-dev libbluray-dev libbz2-dev libcdio-dev libcdio++-dev \
    libcec-dev libcrossguid-dev libcurl4-openssl-dev libdbus-1-dev \
    libdrm-dev libegl1-mesa-dev libenca-dev libexiv2-dev libflac-dev \
    libflatbuffers-dev libfmt-dev libfontconfig-dev libfreetype-dev \
    libfribidi-dev libfstrcmp-dev libgcrypt-dev libgif-dev \
    libgl1-mesa-dev libgles2-mesa-dev libglew-dev libglu1-mesa-dev \
    libgnutls28-dev libgpg-error-dev libgtest-dev libiso9660-dev \
    libjpeg-dev liblcms2-dev liblirc-dev libltdl-dev liblzo2-dev \
    libmicrohttpd-dev libmysqlclient-dev libnfs-dev libogg-dev \
    libp8-platform-dev libpcre2-dev libpcre3-dev libplist-dev libpng-dev \
    libpulse-dev libshairplay-dev libsmbclient-dev libspdlog-dev \
    libsqlite3-dev libssl-dev libtag1-dev libtiff-dev libtinyxml-dev \
    libtinyxml2-dev libtool libudev-dev libunistring-dev libva-dev \
    libvdpau-dev libvorbis-dev libxkbcommon-dev libxmu-dev libxrandr-dev \
    libxslt1-dev libxt-dev lsb-release meson nasm ninja-build \
    nlohmann-json3-dev python3-dev python3-pil rapidjson-dev swig unzip \
    uuid-dev zip zlib1g-dev
Key package categories in this list:
- Build tools (
cmake,gcc,g++,meson,ninja-build): Compile and link the source code - Graphics libraries (
libgl1-mesa-dev,libgles2-mesa-dev,libva-dev,libvdpau-dev): Enable hardware-accelerated video rendering via OpenGL, VAAPI, and VDPAU - Media support (
libass-dev,libbluray-dev,libflac-dev,libtag1-dev): Handle subtitles, Blu-ray discs, audio formats, and metadata tags - Network features (
libsmbclient-dev,libnfs-dev,libmicrohttpd-dev): Access network shares via SMB/NFS and run Kodi’s built-in web server - Hardware integration (
libcec-dev,libbluetooth-dev,liblirc-dev): Support CEC (TV remote passthrough), Bluetooth controllers, and infrared remotes
If you want to build Kodi for Wayland instead of X11, also install these additional packages:
sudo apt install -y waylandpp-dev wayland-protocolsDownload Kodi Source Code
With dependencies installed, create a build directory and download the latest stable Kodi source. The following command automatically fetches the newest release from GitHub:
mkdir -p $HOME/kodi-build
cd $HOME/kodi-build
curl -s https://api.github.com/repos/xbmc/xbmc/releases/latest | grep -oP '"tag_name": "\K[^"]+' | xargs -I{} wget -q "https://github.com/xbmc/xbmc/archive/refs/tags/{}.tar.gz" -O kodi.tar.gz
This automated approach saves you from manually checking version numbers. Here is how it works:
curl -s: Silently fetches release data from the GitHub APIgrep -oP: Extracts the tag name (e.g., 21.3-Omega) using regexxargs -I{}: Passes the version to wget, constructing the download URL
If the piped command syntax seems confusing or the GitHub API is rate-limited, download manually instead: visit the Kodi releases page, find the latest stable version tag, and download the source tarball directly.
Extract the source archive and remove the tarball:
tar -xzf kodi.tar.gz
rm kodi.tar.gz
Configure and Build Kodi
Create a separate build directory and run CMake to configure the compilation. The following configuration targets X11 with OpenGL rendering, which works with most desktop environments:
mkdir $HOME/kodi-build/kodi-build
cd $HOME/kodi-build/kodi-build
cmake ../xbmc-*/ \
    -DCMAKE_INSTALL_PREFIX=/usr/local \
    -DCORE_PLATFORM_NAME="x11" \
    -DAPP_RENDER_SYSTEM=gl \
    -DENABLE_INTERNAL_CROSSGUID=ON \
    -DENABLE_INTERNAL_FLATBUFFERS=ON
Here is what each CMake flag controls:
-DCMAKE_INSTALL_PREFIX=/usr/local: Installs Kodi to/usr/localinstead of/usr, keeping source-compiled software separate from distribution packages-DCORE_PLATFORM_NAME="x11": Builds for X11 display server (use"wayland"for Wayland, or"x11 wayland"for both)-DAPP_RENDER_SYSTEM=gl: Uses OpenGL for rendering (the standard for desktop Linux)-DENABLE_INTERNAL_CROSSGUID=ON: Uses Kodi’s bundled crossguid library for UUID generation instead of system libraries-DENABLE_INTERNAL_FLATBUFFERS=ON: Uses Kodi’s bundled FlatBuffers for serialization, avoiding version mismatches with system libraries
To build for Wayland instead of X11, replace
-DCORE_PLATFORM_NAME="x11"with-DCORE_PLATFORM_NAME="wayland"in the command above. This requires thewaylandpp-devandwayland-protocolspackages installed earlier. After installation, launch withkodi-waylandinstead ofkodi. Building for both platforms with-DCORE_PLATFORM_NAME="x11 wayland"gives you the flexibility to choose at runtime.
CMake will check for all required dependencies and configure the build. When configuration completes successfully, you should see output similar to:
-- AVAHI enabled: Yes
-- BLUETOOTH enabled: Yes
-- BLURAY enabled: Yes
-- CEC enabled: Yes
-- PULSEAUDIO enabled: Yes
-- VAAPI enabled: Yes
-- GLX enabled: Yes
-- VDPAU enabled: Yes
-- Configuring done (21.3s)
-- Generating done (0.7s)
-- Build files have been written to: $HOME/kodi-build/kodi-build
Once configuration completes, start the compilation using all available CPU cores:
cmake --build . -- -j$(nproc)Compilation typically takes 30-60 minutes depending on your CPU. The
-j$(nproc)flag uses all available processor cores to speed up the build.
Install Kodi
After compilation completes successfully, install Kodi to your system:
sudo make install
sudo ldconfig
The ldconfig command updates the system’s library cache so Kodi can find its shared libraries.
Verify Kodi Installation
Confirm the installation succeeded by checking the version:
kodi --versionKodi Media Center 21.3 (21.3.0) Git:20251118-abcdef1234
The version number and Git hash reflect the release you compiled. Check the Kodi releases page to verify you have the latest stable version.
Configure Firewall for Kodi Remote Control
If you plan to use smartphone remote apps or access Kodi from other devices on your network, you need to allow incoming connections through your firewall. Kodi’s web server and remote interfaces use specific ports.
Enable UFW Firewall
Ubuntu includes UFW (Uncomplicated Firewall) by default. For a complete walkthrough of firewall management, see our UFW firewall guide. First, verify it’s installed and enable it if not already active:
sudo apt install ufw
sudo ufw enable
Allow Kodi Web Interface Port
Kodi’s web interface typically uses port 8080 by default. Allow this port if you want to control Kodi from a browser or remote app:
sudo ufw allow 8080/tcpFor additional security, restrict access to your local network only:
sudo ufw allow from 192.168.1.0/24 to any port 8080 proto tcpReplace 192.168.1.0/24 with your actual network range.
Verify Firewall Rules
Check that your rules are active:
sudo ufw status numberedStatus: active
To Action From
-- ------ ----
[ 1] 8080/tcp ALLOW IN Anywhere
Launch Kodi
You can start Kodi from the terminal:
kodiAlternatively, find Kodi in your application menu under Sound & Video or Multimedia.
First-Time Setup Tips
When you launch Kodi for the first time, consider these configuration steps to get the most out of your media center:
Add Media Sources
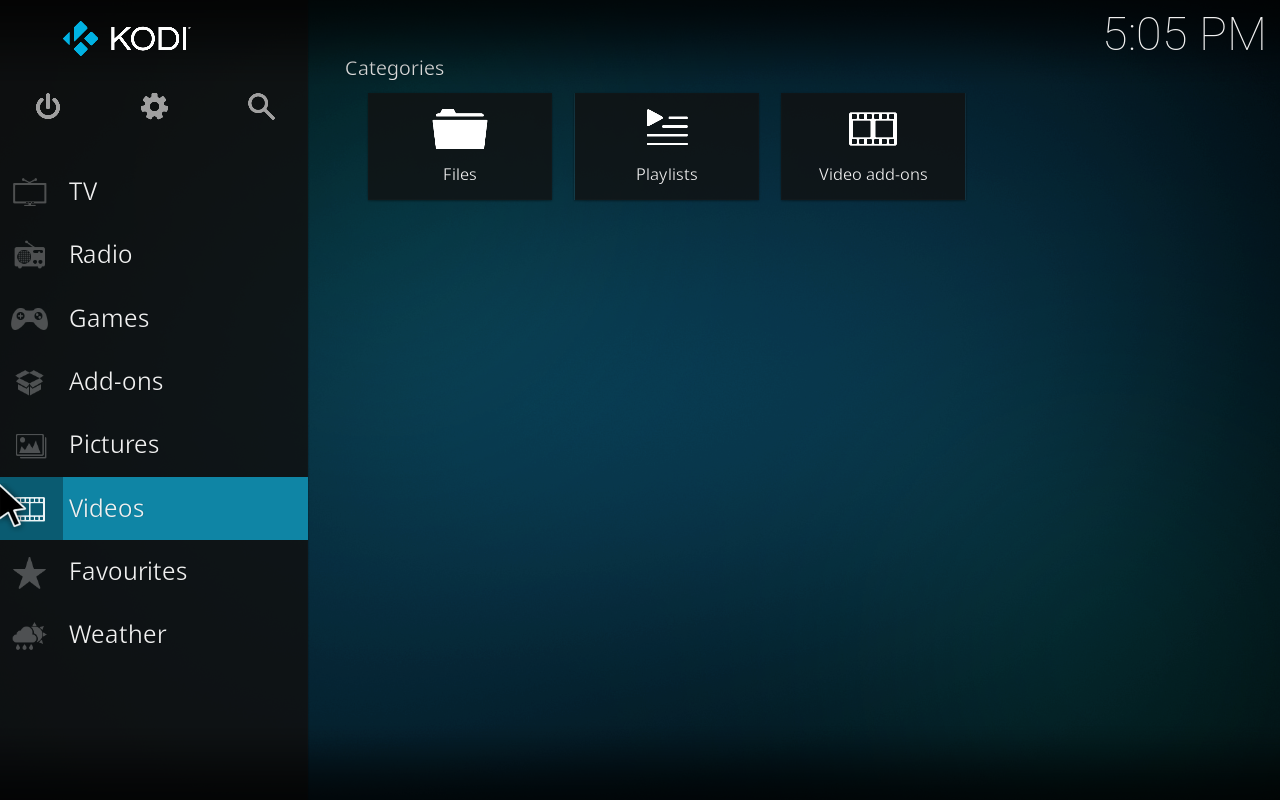
Navigate to Videos, then Files, then Add videos to point Kodi at your media folders. When adding a source, select the content type (Movies or TV Shows) so Kodi downloads the correct metadata. For reliable scraping, name your files consistently:
- Movies:
Movie Name (Year).mkvorMovie Name (Year)/Movie Name (Year).mkv - TV Shows:
Show Name/Season 01/Show Name S01E01.mkv
Enable Remote Control
To control Kodi from your phone or another device, navigate to Settings, then Services, then Control. Enable “Allow remote control via HTTP” and set a username and password. The default port is 8080, which you opened in the firewall section earlier. Smartphone apps like Kore (official, free) and Yatse (Android, free with paid features) connect using these credentials.
Install Add-ons
Browse the official Kodi add-on repository through Add-ons, then Download. Popular categories include:
- Subtitles: OpenSubtitles, Subscene
- PVR clients: TVHeadend, NextPVR for live TV integration
- Weather: Weather Underground, OpenWeatherMap
- Skins: Estuary (default), Arctic Horizon, Aeon Nox
Configure Audio Output
Under Settings, then System, then Audio, select your preferred output device. If you have a receiver that supports Dolby Digital or DTS, enable passthrough to send encoded audio directly without decoding on the PC. Select your receiver’s capabilities under “Passthrough output device” to avoid compatibility issues.

Update Kodi
Since Kodi was compiled from source, updates require rebuilding. The following script automates this process by checking for new releases and rebuilding only when an update is available.
First, check your current version:
kodi --versionSave the following script as $HOME/kodi-build/update-kodi.sh:
#!/bin/bash
set -e

INSTALL_PREFIX="/usr/local"
BUILD_DIR="$HOME/kodi-build"

for cmd in curl wget cmake make gcc; do
  if ! command -v $cmd &> /dev/null; then
    echo "Error: $cmd is required but not installed."
    exit 1
  fi
done

CURRENT_VERSION=$($INSTALL_PREFIX/bin/kodi --version 2>/dev/null | grep -oP '[0-9]+\.[0-9]+' | head -1 || echo "none")
LATEST_VERSION=$(curl -s https://api.github.com/repos/xbmc/xbmc/releases/latest | grep -oP '"tag_name": "\K[^"]+')

if [ -z "$LATEST_VERSION" ]; then
  echo "Error: Could not fetch the latest Kodi version."
  exit 1
fi

LATEST_SHORT=$(echo "$LATEST_VERSION" | grep -oP '^[0-9]+\.[0-9]+')

if [ "$CURRENT_VERSION" = "$LATEST_SHORT" ]; then
  echo "Kodi is already up to date: $CURRENT_VERSION"
  exit 0
fi

echo "Updating Kodi from $CURRENT_VERSION to $LATEST_VERSION"

cd "$BUILD_DIR"
rm -rf xbmc-* kodi-build kodi.tar.gz
curl -s https://api.github.com/repos/xbmc/xbmc/releases/latest | grep -oP '"tag_name": "\K[^"]+' | xargs -I{} wget -q "https://github.com/xbmc/xbmc/archive/refs/tags/{}.tar.gz" -O kodi.tar.gz
tar -xzf kodi.tar.gz
rm kodi.tar.gz
mkdir kodi-build
cd kodi-build
cmake ../xbmc-*/ \
    -DCMAKE_INSTALL_PREFIX=$INSTALL_PREFIX \
    -DCORE_PLATFORM_NAME="x11" \
    -DAPP_RENDER_SYSTEM=gl \
    -DENABLE_INTERNAL_CROSSGUID=ON \
    -DENABLE_INTERNAL_FLATBUFFERS=ON
cmake --build . -- -j$(nproc)
sudo make install
sudo ldconfig

echo "Kodi updated to $LATEST_VERSION"
Make the script executable and run it:
chmod +x $HOME/kodi-build/update-kodi.sh
$HOME/kodi-build/update-kodi.sh
Run this script manually rather than automating it with cron. Kodi compilation can fail when new dependencies or build system changes are introduced between versions, so reviewing the output lets you catch and fix problems before they affect your installation.
Verify the updated version:
kodi --versionRemove Kodi
If you need to remove Kodi, first uninstall the application:
cd $HOME/kodi-build/kodi-build
sudo make uninstall
Then clean up the build directory:
rm -rf $HOME/kodi-buildThe following command removes your Kodi configuration, including library databases, add-on settings, and cached metadata. Back up this folder first if you want to preserve your setup.
rm -rf ~/.kodiTroubleshooting
CMake Configuration Fails
If CMake reports “Could NOT find” errors, you’re missing a required library. For example, a missing RapidJSON dependency produces this error:
CMake Error at /usr/share/cmake-3.28/Modules/FindPackageHandleStandardArgs.cmake:233 (message):
  Could NOT find RapidJSON (missing: RAPIDJSON_INCLUDE_DIRS RapidJSON_VERSION)
To resolve this, search for the development package and install it:
apt search rapidjson-dev
sudo apt install rapidjson-dev
After installing the missing package, remove the build directory and rerun CMake:
cd $HOME/kodi-build
rm -rf kodi-build
mkdir kodi-build && cd kodi-build
cmake ../xbmc-*/ -DCMAKE_INSTALL_PREFIX=/usr/local -DCORE_PLATFORM_NAME="x11" -DAPP_RENDER_SYSTEM=gl -DENABLE_INTERNAL_CROSSGUID=ON -DENABLE_INTERNAL_FLATBUFFERS=ON
Build Runs Out of Memory
If compilation fails with memory errors or your system becomes unresponsive during the build, reduce the parallel job count. Systems with less than 8GB of RAM may struggle with the default settings. Instead of using all cores, specify a lower number:
cmake --build . -- -j2This limits compilation to 2 concurrent jobs, reducing memory usage at the cost of longer build time.
Kodi Won’t Launch
If Kodi doesn’t start after installation, run it from a terminal to see error messages:
kodi 2>&1 | head -50A common issue is missing shared libraries. If you see errors like “kodi: error while loading shared libraries”, first update the library cache:
sudo ldconfigFor graphics-related errors, verify your display drivers are properly installed. Check if OpenGL is working with:
glxinfo | grep "OpenGL version"You should see output similar to:
OpenGL version string: 4.6 (Compatibility Profile) Mesa 24.2.8
If glxinfo is not found, install the mesa-utils package: sudo apt install mesa-utils. If OpenGL reports a software renderer or “llvmpipe” instead of your GPU, your graphics drivers need attention. For NVIDIA users, check if the driver is loaded with nvidia-smi. For AMD and Intel, the Mesa drivers included with Ubuntu work automatically.
Migrate from the Team Kodi PPA
If you previously installed Kodi from the Team Kodi PPA (now discontinued), those packages have not been updated since 2023 and will not receive new releases. To migrate to the source-compiled installation without losing your library data, first remove the PPA package (your ~/.kodi configuration folder is preserved):
sudo apt remove kodi
sudo apt autoremove
Remove the PPA to prevent package conflicts:
sudo add-apt-repository --remove ppa:team-xbmc/ppa
sudo apt update
Your Kodi library database, add-on settings, and watched status remain in ~/.kodi. After compiling from source following this guide, launch Kodi and your existing library will load automatically.
Frequently Asked Questions
No, the Team Kodi PPA was retired in early 2024. To get the latest Kodi version on Ubuntu without waiting for the slow official repositories, you must compile from source or use a container format via Flatpak.
For the best media experience, building for X11 is currently recommended. The X11 build runs seamlessly on Ubuntu’s default Wayland desktop via XWayland and supports critical features like automatic refresh rate switching that the native Wayland build currently lacks. Use the native Wayland build only if you encounter specific screen tearing issues.
Source installations do not update automatically. You must manually force an update by downloading the new source code and rebuilding it. The update script provided in this guide automates this process effectively.
Compiling from source offers native system integration, which often results in better hardware acceleration support and easier access to local storage drives compared to the sandboxed environment of Flatpak apps.
Conclusion
You now have Kodi installed from source, ready to organize and stream your media library. Whether you built for X11 or Wayland, the source-compiled installation gives you access to the latest features while the build directory at $HOME/kodi-build and the update script enable straightforward updates when new releases become available. Kodi automatically installs its desktop entry during make install, so you can launch it from your application menu in the Multimedia or Sound & Video category.

This works very well on new Ubuntu 25.10 but the build is for x11. What would be the instructions for wayland ?
Good question, cmichel. The current guide builds for X11 because it is more widely tested, but Kodi fully supports Wayland. To build for Wayland instead, you need two additional packages and a different CMake configuration.
First, install the Wayland development libraries alongside the other dependencies:
Then, when you reach the CMake configuration step, use
waylandinstead ofx11for the platform name:After installation, launch with
kodi-waylandinstead ofkodi. You can also build with support for multiple platforms by passing-DCORE_PLATFORM_NAME="x11 wayland", which creates both binaries. The article has been updated with these Wayland instructions.