Visual Studio Code is easiest to maintain on Debian when it comes from Microsoft’s APT repository: the package installs the standard code launcher, exposes the stable and Insiders builds, and updates with the rest of APT. You can install Visual Studio Code on Debian 13 (Trixie), 12 (Bookworm), or 11 (Bullseye) with that repository, or use the Flathub build when Flatpak packaging matters more than host integration.
Microsoft’s Linux setup page also offers direct .deb downloads for one-off installs and documents the same repository fields. A dedicated DEB822 source file uses those fields while staying easier to audit, update, and remove later. If you want the same editor core without Microsoft’s branding and telemetry, install VSCodium on Debian instead.
Install Visual Studio Code on Debian
The Microsoft APT repository is the better default for most Debian desktops because it installs the official Microsoft build, keeps updates in APT, and provides both the stable and Insiders packages. Flatpak is useful when you prefer Flathub packaging or want to avoid adding a third-party APT source.
| Method | Source | Update Behavior | Best For | Trade-offs |
|---|---|---|---|---|
| Microsoft APT repository | Microsoft Linux repository | APT-managed updates | Most users who want the standard code launcher and official Microsoft packages | Adds a third-party APT source and Microsoft signing key |
| Flatpak | Flathub | Flatpak-managed updates | Users who prefer Flatpak packaging or do not want a Microsoft APT source | Community repackaging, unverified on Flathub, and some host-tool workflows need extra setup |
Use only one APT repository path for VS Code. Older extrepo-based setups and the manual Microsoft source point at the same repository through different files, which can trigger duplicate-source or
Signed-Byconflicts duringapt update.
Microsoft’s repository currently publishes Debian packages for amd64, arm64, and armhf. Flathub currently publishes the VS Code Flatpak for x86_64 and aarch64. Microsoft also distributes an official Snap, but Debian does not use Snap by default; use the Snapd on Debian setup path only if you deliberately want the Snap package instead of APT or Flatpak.
Update Debian and Install Prerequisites
Refresh APT before adding the repository, then install the tools needed to download and convert Microsoft’s signing key:
sudo apt update
sudo apt install ca-certificates wget gpg -y
These commands use
sudofor system changes. If your account is not in the sudoers file yet, follow the guide to add a user to sudoers on Debian before continuing.
Import the Microsoft VS Code GPG Key
Download Microsoft’s signing key and store it as a binary keyring for APT:
wget -qO- https://packages.microsoft.com/keys/microsoft.asc | sudo gpg --dearmor --yes -o /usr/share/keyrings/microsoft.gpgThe key is published as ASCII armor. gpg --dearmor converts it to the binary keyring format used by Signed-By, and --yes prevents an overwrite prompt if you rerun the command.
Create the VS Code Repository File
Create a DEB822 source file that uses the current Debian architecture only when Microsoft publishes that architecture for VS Code:
ARCH=$(dpkg --print-architecture)

case "$ARCH" in
  amd64 | arm64 | armhf)
    printf '%s\n' \
      'Types: deb' \
      'URIs: https://packages.microsoft.com/repos/code' \
      'Suites: stable' \
      'Components: main' \
      "Architectures: $ARCH" \
      'Signed-By: /usr/share/keyrings/microsoft.gpg' | sudo tee /etc/apt/sources.list.d/vscode.sources >/dev/null
    ;;
  *)
    printf 'Microsoft VS Code APT packages are not published for %s.\n' "$ARCH"
    ;;
esac
The tee command writes the root-owned source file because a normal shell redirection would still run as your user account. If the command prints an unsupported-architecture message, stop here and use a different package path.
Confirm the source file before refreshing APT:
cat /etc/apt/sources.list.d/vscode.sourcesExample output on an amd64 system:
Types: deb
URIs: https://packages.microsoft.com/repos/code
Suites: stable
Components: main
Architectures: amd64
Signed-By: /usr/share/keyrings/microsoft.gpg
Refresh APT and check that the code package resolves from Microsoft’s repository:
sudo apt update
apt-cache policy code
Relevant output includes the Microsoft source and a candidate version:
code:
  Installed: (none)
  Candidate: 1.120.0-1778619059
  Version table:
     1.120.0-1778619059 500
        500 https://packages.microsoft.com/repos/code stable/main amd64 Packages
The version number changes frequently. The important part is that Candidate: is not (none) and the source line points to packages.microsoft.com/repos/code.
Install the Stable VS Code Package
Install the stable Microsoft build with the package name code:
sudo apt install code -yThe package includes a Microsoft debconf question about adding the VS Code repository. If it appears, choose No to keep source management with the DEB822 file you already created; the package still installs normally because APT already has the repository metadata.
Microsoft also publishes the Insiders build for early testing. Install it only when you specifically need preview features or extension-development testing:
sudo apt install code-insiders -yThe stable and Insiders builds can be installed side by side. Stable runs with
code, Insiders runs withcode-insiders, and each build keeps separate settings and extensions.
Verify the VS Code APT Installation
Check the installed package state and the launcher path:
dpkg-query -W -f='${db:Status-Abbrev} ${binary:Package} ${Version}\n' code
command -v code
A successful stable install prints a line that begins with ii code, followed by the installed version, and command -v resolves to /usr/bin/code. For Insiders, run the same check with code-insiders.
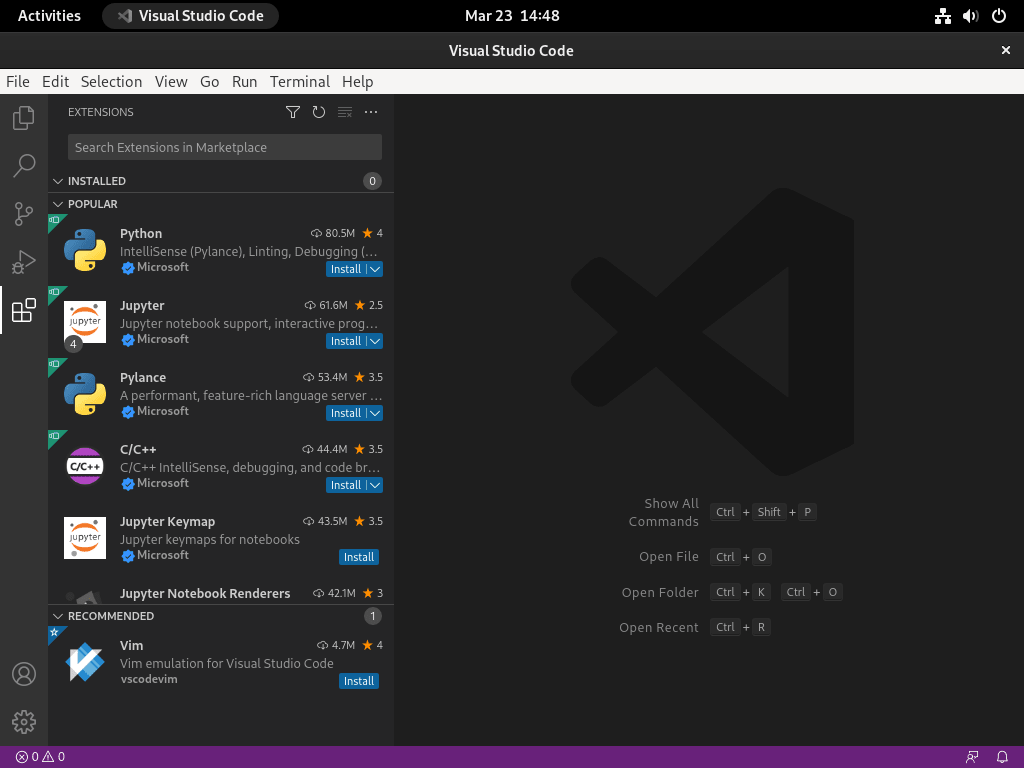
Install Visual Studio Code with Flatpak on Debian
The Flathub package is a community repackaging of Microsoft’s proprietary build. Flathub currently lists it as unverified, and its own notes warn that integrated-terminal and language-tooling workflows can need extra host access. Use Flatpak when you want that packaging model; use the APT method when you want the normal code launcher and smoother access to host compilers, SDKs, and shell tools.
Install Flatpak and Add Flathub
Install Flatpak and add the Flathub remote if your Debian desktop does not already have it. For a dedicated walkthrough, use the Flatpak on Debian guide.
sudo apt update
sudo apt install flatpak -y
sudo flatpak remote-add --if-not-exists flathub https://dl.flathub.org/repo/flathub.flatpakrepo
Confirm the Flathub remote is available:
flatpak remotes --columns=name,options | grep -E '^flathub[[:space:]]'flathub system
Install VS Code from Flathub
Install the VS Code Flatpak from Flathub:
sudo flatpak install flathub com.visualstudio.code -yThe -y flag accepts Flatpak’s install prompt automatically. Flatpak installs the app plus the required runtime in the same transaction.
Verify the VS Code Flatpak Installation
Check the installed app ID, branch, origin, and scope:
flatpak info com.visualstudio.code | grep -E '^[[:space:]]*(ID|Ref|Arch|Branch|Version|Origin|Installation):'The output should show ID: com.visualstudio.code, Branch: stable, and Origin: flathub. A system-scope install also shows Installation: system.
Launch Visual Studio Code on Debian
APT and Flatpak use different terminal launchers, while the desktop application menu works for both package paths.
Launch VS Code from the Terminal
Start the stable APT build with:
codeStart the Insiders APT build with:
code-insidersStart the Flatpak build with the app ID:
flatpak run com.visualstudio.codeFor the APT build, pass a directory path to open a project folder directly:
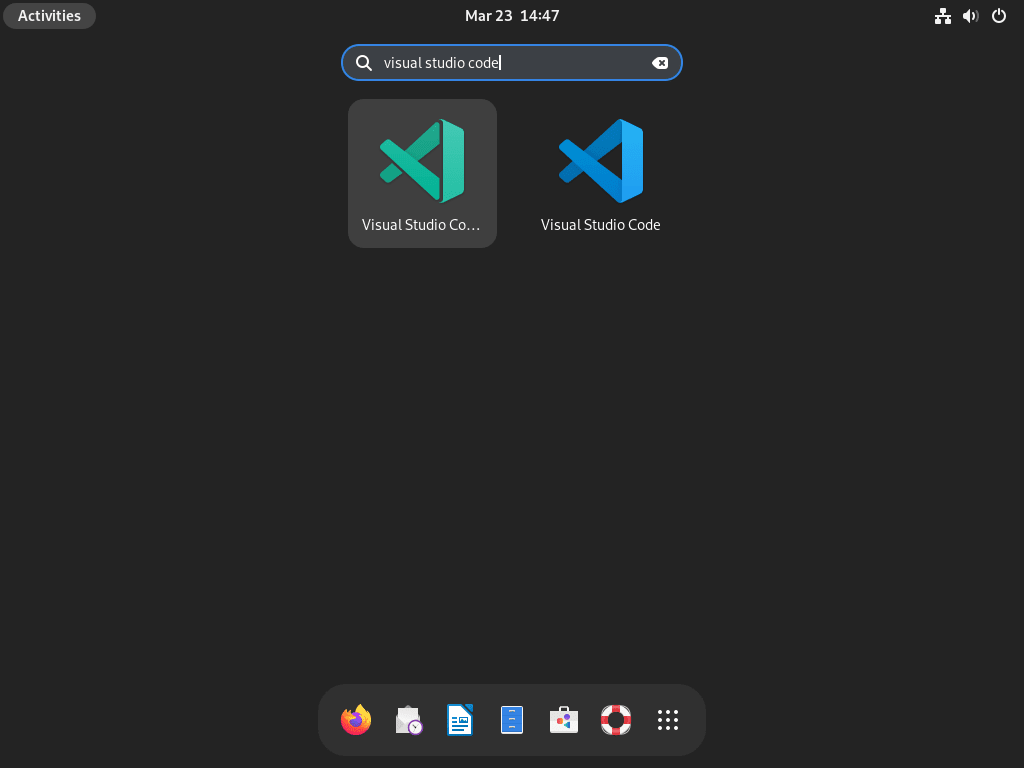
code ~/Projects/my-projectLaunch VS Code from the Applications Menu
Open your desktop application launcher, search for Visual Studio Code or Code, and select the VS Code icon. GNOME users can open Activities first; other Debian desktops expose the same launcher through their application menu. If the Flatpak entry does not appear after a first-time Flatpak setup, log out and back in so the desktop session reloads Flatpak’s exported application paths.
Update Visual Studio Code on Debian
Use the update command that matches the install method.
Update VS Code via APT
APT-managed installs update with the rest of your enabled APT package sources:
sudo apt update
sudo apt upgrade
To target only the stable VS Code package, use --only-upgrade:
sudo apt update
sudo apt install --only-upgrade code -y
For the Insiders build, target its package name instead:
sudo apt install --only-upgrade code-insiders -yUpdate VS Code via Flatpak
Update the Flathub package at the same system scope used during installation:
sudo flatpak update com.visualstudio.code -yRemove Visual Studio Code from Debian
Remove the package through the manager that installed it, then decide whether to remove repository files and per-user settings. Package removal does not delete your extensions, settings, workspace history, or Flatpak user data.
Remove the VS Code APT Packages
Remove the stable and Insiders packages if they are installed:
sudo apt remove code code-insidersReview and remove dependencies that APT no longer needs:
sudo apt autoremoveRemove the VS Code source file. Microsoft keyrings can be shared by other Microsoft repositories, so remove each keyring only when no remaining source file references it:
sudo rm -f /etc/apt/sources.list.d/vscode.sources
sudo rm -f /etc/apt/sources.list.d/vscode.list

for keyring in /usr/share/keyrings/microsoft.gpg /usr/share/keyrings/vscode.gpg; do
  [ -f "$keyring" ] || continue
  uses_key=no
  for source_file in /etc/apt/sources.list /etc/apt/sources.list.d/*.list /etc/apt/sources.list.d/*.sources; do
    [ -f "$source_file" ] || continue
    if grep -F "$keyring" "$source_file" >/dev/null; then
      uses_key=yes
      break
    fi
  done

  if [ "$uses_key" = no ]; then
    sudo rm -f "$keyring"
  else
    printf 'Keeping %s because another APT source still uses it.\n' "$keyring"
  fi
done

sudo apt update
Verify that no APT-installed VS Code package remains:
dpkg-query -W -f='${db:Status-Abbrev} ${binary:Package}\n' code code-insiders 2>/dev/null | grep '^ii' || echo "VS Code APT packages are not installed"
hash -r
command -v code || echo "code command is not in PATH"
Remove the VS Code Flatpak
Remove the Flathub app, then remove unused runtimes if no other Flatpak app needs them:
sudo flatpak uninstall com.visualstudio.code -y
sudo flatpak uninstall --unused -y
Confirm the Flatpak app ID is gone:
flatpak list --app --columns=application | grep -Fx com.visualstudio.code || echo "VS Code Flatpak is not installed"Clean Up an Older extrepo VS Code Source
Older Debian setups may still have an extrepo-generated source for the same Microsoft repository. Remove that duplicate before using the manual /etc/apt/sources.list.d/vscode.sources file. For more extrepo background, see how to manage third-party APT repositories on Debian with extrepo.
if command -v extrepo >/dev/null 2>&1; then
  sudo extrepo disable vscode
fi

sudo rm -f /etc/apt/sources.list.d/extrepo_vscode.sources
sudo rm -f /var/lib/extrepo/keys/vscode.asc
sudo apt update
Remove VS Code User Configuration Data
Check which per-user VS Code data directories exist before deleting anything:
find ~/.config/Code ~/.vscode ~/.cache/Code ~/.local/share/Code \
  ~/.config/Code\ -\ Insiders ~/.vscode-insiders ~/.cache/Code\ -\ Insiders ~/.local/share/Code\ -\ Insiders \
  ~/.var/app/com.visualstudio.code -maxdepth 0 -print 2>/dev/null
The following commands permanently delete local VS Code settings, extensions, snippets, workspace state, and Flatpak sandbox data for the current user. Back up anything you want to keep before running them.
Remove stable APT build data:
rm -rf ~/.config/Code ~/.vscode ~/.cache/Code ~/.local/share/CodeRemove Insiders build data:
rm -rf ~/.config/Code\ -\ Insiders ~/.vscode-insiders ~/.cache/Code\ -\ Insiders ~/.local/share/Code\ -\ InsidersRemove Flatpak build data:
rm -rf ~/.var/app/com.visualstudio.codeTroubleshoot VS Code on Debian
Most VS Code install failures on Debian come from repository trust, duplicate source files, unsupported architectures, or Flatpak’s sandbox boundary.
Fix Microsoft GPG Key Errors
If sudo apt update cannot verify Microsoft’s repository, APT may show a missing-key error:
W: GPG error: https://packages.microsoft.com/repos/code stable InRelease:
The following signatures couldn't be verified because the public key is not available: NO_PUBKEY EB3E94ADBE1229CF
Check whether the keyring exists:
ls -l /usr/share/keyrings/microsoft.gpgIf the file is missing or corrupted, re-import the key and refresh APT:
wget -qO- https://packages.microsoft.com/keys/microsoft.asc | sudo gpg --dearmor --yes -o /usr/share/keyrings/microsoft.gpg
sudo apt update
Fix Unable to Locate Package code
If APT cannot find the package after adding the repository, the source file is missing, malformed, or APT has not refreshed its metadata:
E: Unable to locate package code
Inspect the source file, refresh APT, and check the package candidate:
cat /etc/apt/sources.list.d/vscode.sources
sudo apt update
apt-cache policy code
The source file should contain URIs: https://packages.microsoft.com/repos/code, Suites: stable, Components: main, and the Signed-By path used when importing the key. If Candidate: remains (none), confirm your architecture with dpkg --print-architecture.
Fix Duplicate Source or Signed-By Conflicts
APT can reject the repository when two source files point at the same Microsoft URI but use different keyring paths:
E: Conflicting values set for option Signed-By regarding source https://packages.microsoft.com/repos/code/ stable
Find every source file that references the VS Code repository:
grep -R -n "packages.microsoft.com/repos/code" /etc/apt/sources.list /etc/apt/sources.list.d 2>/dev/nullKeep one source path. If you are using the manual DEB822 method, remove common legacy duplicates and refresh APT:
sudo rm -f /etc/apt/sources.list.d/extrepo_vscode.sources
sudo rm -f /etc/apt/sources.list.d/vscode.list
sudo apt update
Handle Flatpak Host Tool Limitations
The Flatpak build runs inside a sandbox. If the integrated terminal or an extension cannot see host compilers, SDKs, shells, or project tools, the APT build is usually the cleaner fix because it runs in the normal host environment.
For a Flatpak-only setup, open Flathub’s VS Code help link from the app page and follow the flatpak-spawn or SDK-extension guidance for the toolchain you need. Avoid broad permission overrides unless you understand what host paths or commands the editor will gain access to.
Conclusion
VS Code is installed on Debian through a package path that matches your workflow, with Microsoft APT as the normal host-integrated option and Flatpak as the sandboxed alternative. Install Git on Debian next for version control, or configure SSH on Debian before using the Remote SSH extension.

Hi, this does not appear to work on Debian 12 aarch64 (Raspberry Pi), because only the amd64 version is available from the Microsoft repos.
As a work-around, can get the aarch64 .deb file from https://code.visualstudio.com/Download# and install using `sudo dpkg -i code_1.97.0-1738712383_arm64.deb` or similar.
Thanks for flagging this, mj1911. You were absolutely right. The previous version of this guide only specified
arch=amd64in the repository configuration, which excluded arm64 devices like the Raspberry Pi.The article has since been rewritten using the modern DEB822 repository format, and now includes both architectures:
Microsoft does provide arm64 packages in their VS Code repository, so Raspberry Pi users running Debian aarch64 can now install directly from the APT repository without needing the manual .deb workaround. Your feedback helped identify the gap. Thanks for documenting the workaround for others who encountered this before the update.